


![]()
This is a step by step beginner’s guide shows how to install and set up a lightweight Socks5 proxy server in Ubuntu or Debian.
Due to poor network connection, I decided to set up a proxy server on my remote VPS for playing an online game. However, the tutorials on the web are mostly using Dante, which consumes too much RAM, and makes my cheap VPS server frequently run out of memory.
After digging around, I found a lightweight socks5 proxy server called Microsocks. And, here’s how to install & use it in Debian & Ubuntu.
Step 1: Install Microsocks
Microsocks is a multi-threaded, small, efficient SOCKS5 server, that supports IPv4, IPv6, DNS, and use TCP protocol for network proxy. It’s easy to set up, and very lightweight that consume less than 4 MB memory in my server. Sadly, it does NOT support UDP as which requires almost double the existing code make it no longer “micro”.
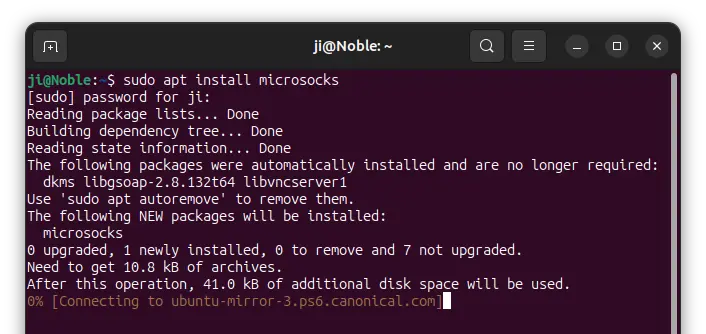
Debian bullseye, bookworm, as well as Ubuntu 24.04 and Ubuntu 22.04 include the software package in system repository. You can simply connect to your server and run command to install it:
sudo apt install microsocks
For old Ubuntu and Debian that don’t have the package in repository, or if you want to get the latest version, do the following steps one by one to build from source.
- First, run command to install dependency libraries for building the source:
sudo apt install build-essential debhelper
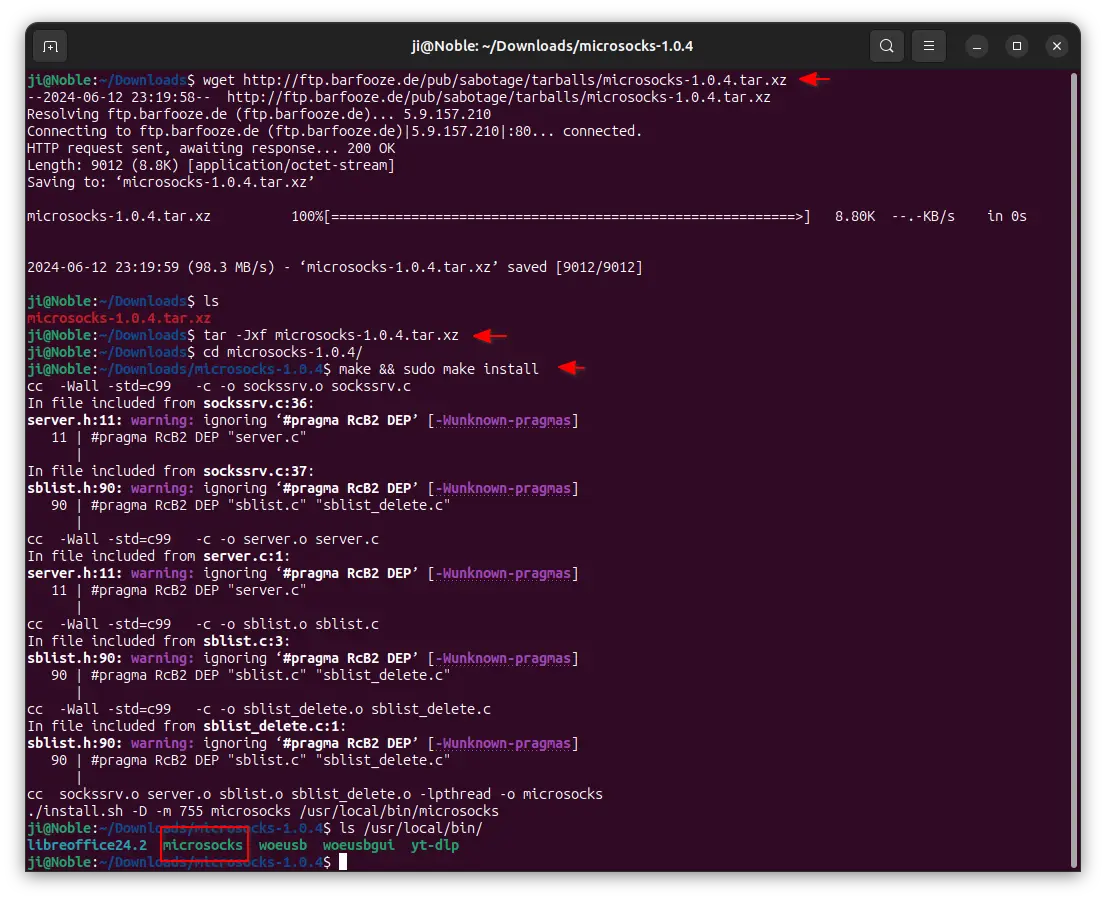
- Download the source tarball by command:
wget http://ftp.barfooze.de/pub/sabotage/tarballs/microsocks-1.0.4.tar.xz
As the time goes by, the link will be outdated! Go this github page for the most recent download link, and use it to replace the one in the command above.
- Once you downloaded the tarball, use command to extract (replace package name accordingly):
tar -Jxf microsocks-1.0.4.tar.xz
Replace
-Jxfin command if the file extension changed.-zxffor .tar.gz or-jxffor tar.bz2. - Finally, navigate to the extracted folder and run command to build & install:
cd microsocks*
make && sudo make install
Once successfully installed, you’ll see the executable file installed to /usr/local/bin directory:
Step 2: Start Microsocks SOCKS5 Server
Once installed the software package, just run the command below to start the proxy server:
microsocks -1 -q -i 100.111.122.123 -p 1234 -u JI -P abcde454
In the command, all the arguments can be skipped.
- -1 activates auth_once mode. once a specific ip address authenticated successfully, it is added to a whitelist and may use the proxy without authentication anymore.
- -q disable log. Need version 1.0.4+.
- -i 100.111.122.123 tells which IP address to listen on. Skip it so to listen on all network interface in server.
- -p 1234 tells to listen on port 1234. Skip it, will listen on default 1080.
- -u JI and -P abcde454 specify the username and password for authentication. Username can be any desired text, rather than existing user on server.
In my case, I use the command below instead. Which listen on all the server IP, port 1080, authenticated with user JI and password abcde454.
microsocks -1 -u JI -P abcde454
After that, try connecting using a Socks5 client or run command instead to verify:
curl --socks5 user:password@server-ip:port https://www.google.com/
Create systemd service for the SOCKS5 server
Thanks to this request, you can run the proxy server silently in background as a system service and automatically on startup.
1. To do so, first press Ctrl+C to exit the command above if running. Then, run command to create a service file and edit with nano editor:
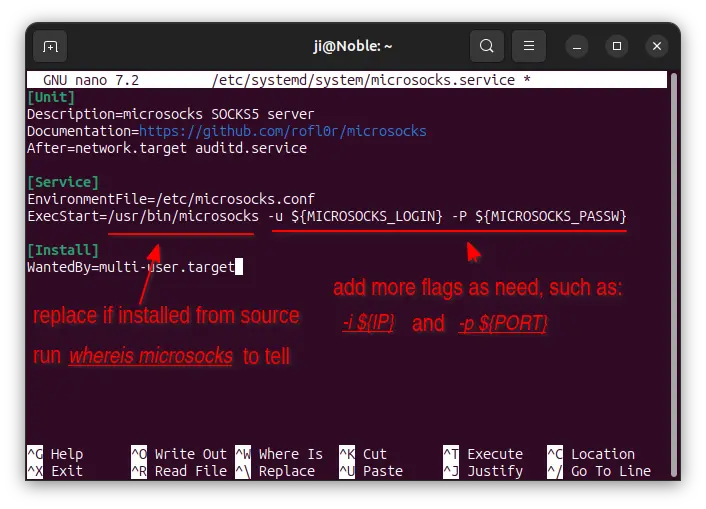
sudo nano /etc/systemd/system/microsocks.service
When the file opens in command line, paste the line below:
[Unit]
Description=microsocks SOCKS5 server
Documentation=https://github.com/rofl0r/microsocks
After=network.target auditd.service

[Service]
EnvironmentFile=/etc/microsocks.conf
ExecStart=/usr/bin/microsocks -u ${MICROSOCKS_LOGIN} -P ${MICROSOCKS_PASSW}

[Install]
WantedBy=multi-user.target
NOTE: If you installed the proxy server from source, then replace /usr/bin/microsocks with /usr/local/bin/microsocks in lines above, and add more flags, such as -1, -p ${PORT} as need.
When done editing the file, press Ctrl+S to save, and Ctrl+X to exit.
2. Next, create the /etc/microsocks.conf config file and edit with nano:
sudo nano /etc/microsocks.conf
When file opens, write following lines and save it:
# used by the systemd service file
MICROSOCKS_LOGIN="any_name_here"
MICROSOCKS_PASSW="any_password_here"
Also add IP="xx.xx.xx.xx" and/or PORT="xxxx" if you enable the flags in last step via the systemd service file.
3. Finally, enable and start the service via command:
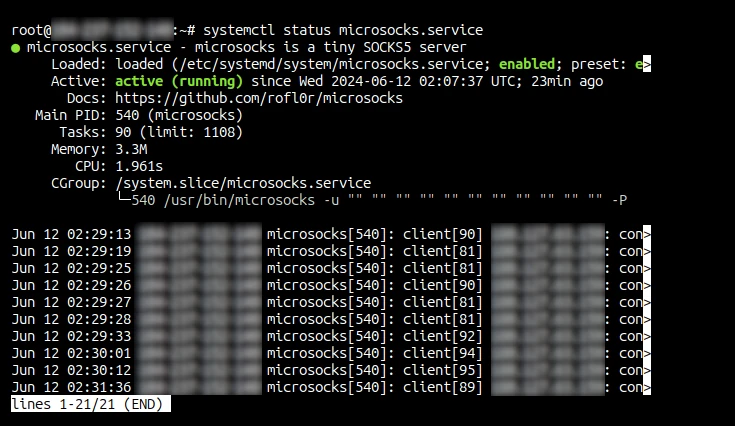
sudo systemctl enable --now microsocks.service
And, verify if it’s active running by systemctl status microsocks.
Step 3: Open the listening port in firewall
If your server has firewall enabled, then you need to open the port for the proxy server function.
To do so, first run command to verify the firewall status:
sudo ufw status
If it’s in active running, you may open the port 1080 (replace port number if another in use for microsocks) via command:
sudo ufw allow 1080/tcp
Connect to the SOCKS5 Server from local machine
In my case in Windows, I use proxifier to connect to my proxy server. It’s an app need to paid for use. Just search in Google for download & how to use guide.
For Ubuntu and other Linux (or Windows for web browser), you may enable -1 flag in the server side, then run the command below in local machine to connect and authenticate (replace user, password, server-ip and port) for the first time:
curl --socks5 user:password@server-ip:port https://www.google.com/
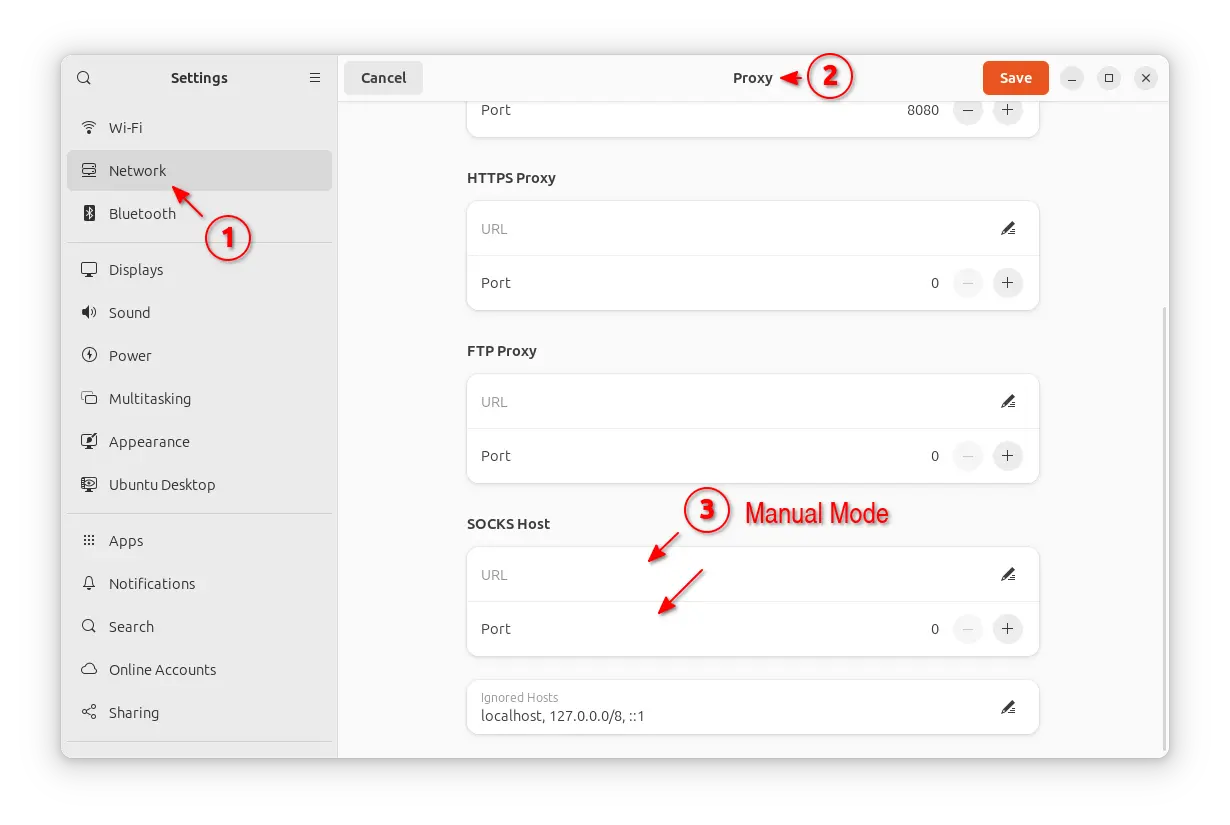
Next, you can use go to Network -> Proxy to enable the Socks5 proxy without authentication:
Uninstall:
To uninstall the SOCKS5 proxy server in your Debian or Ubuntu, either use command:
sudo apt remove microsocks
Or, just delete the executable file if you installed it from the source:
sudo rm /usr/local/bin/microsocks
Also, disable the systemd service if installed:
sudo systemctl disable --now microsocks.service
And, run sudo rm /etc/microsocks.conf to delete the config file.


