


![]()
This tutorial shows how to disable your mouse forward/backward buttons in Ubuntu. Though the title said for Ubuntu 24.04, this tutorial should also work in most modern Linux, such as Debian, Fedora, and Arch.
Many mouses today have extra buttons on the side, allowing to navigate forward and back when working with web browsers, file explorers, etc applications.
If you don’t like the side-buttons, like me, then you can disable them in Linux.
Without using third-party apps (e.g., input-remapper), here I’m going to show you how to do the job by creating an udev rule that works in most Linux on both Xorg and Wayland sessions.
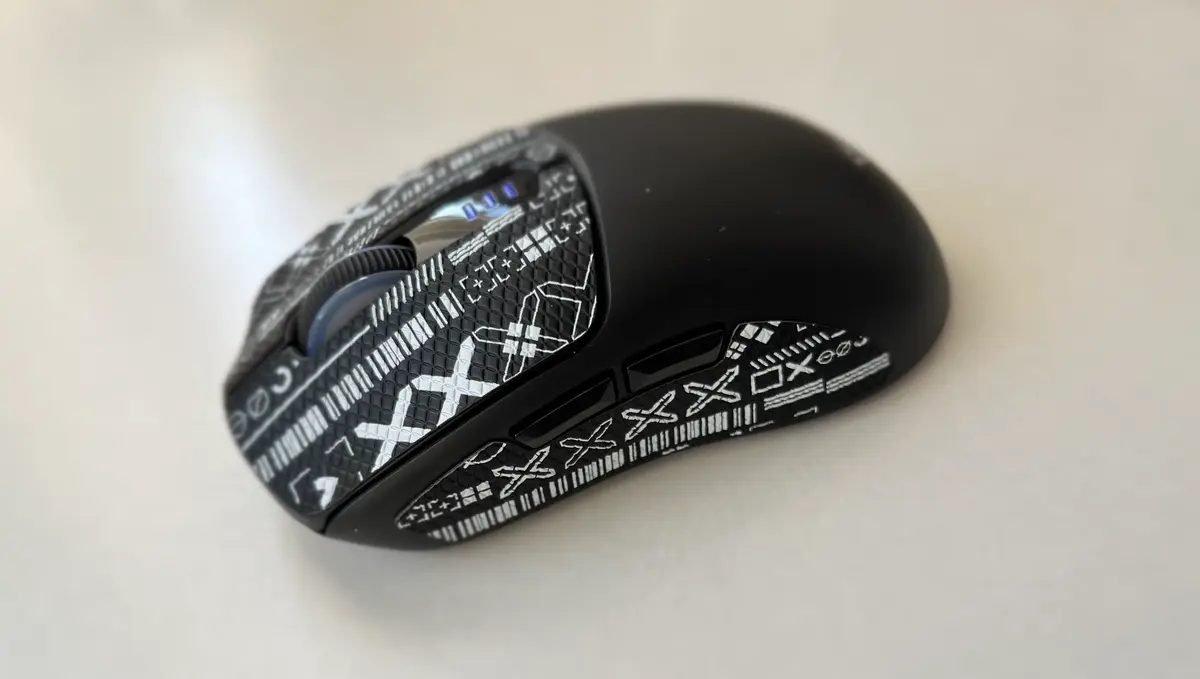
A Mouse with side buttons
Step 1: Find out scancodes of the Mouse buttons
When you press a button on mouse, it sends a scancode to the computer. Then, your system maps the scancode to a virtual keycode. By re-mapping the scancode to reserved, it will be ignored when you press on it.
1. First, press Ctrl+Alt+T to open up a terminal window. When it opens, run command:
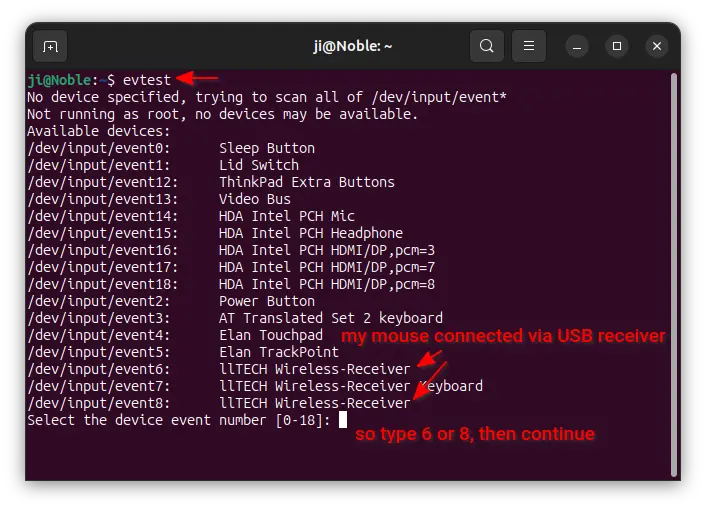
evtest
Or sudo evtest if it cannot discover any of input devices.
If command not found, run sudo apt install evtest to install. And in the terminal output, it will print all the available input devices.
In my case, it’s a wireless keyboard connected through an USB receiver. As the screenshot below shows, it should be either /dev/input/event6 or /dev/input/event8. Type either number 6 or 8 (you need to replace it accordingly), then continue.
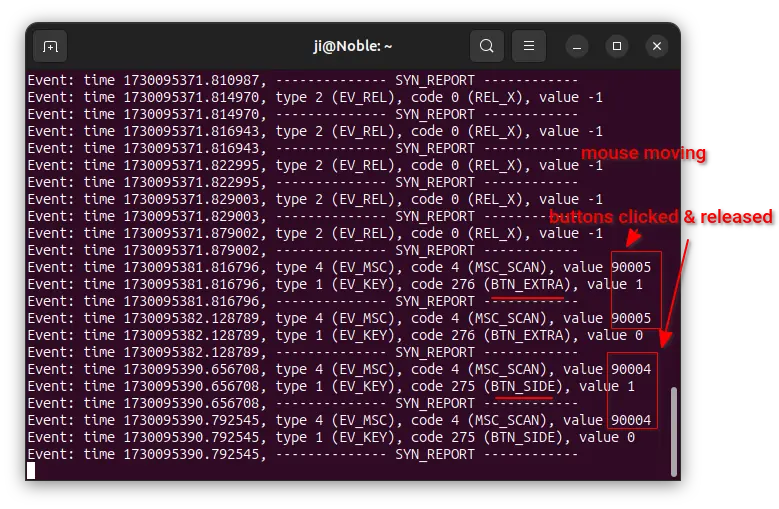
2. After typing the correct device event number and hitting Enter, it should print corresponding outputs in terminal window, when you moving and/or pressing buttons on the mouse.
Now, you need to press the side-buttons, and remember the value number (scancode) in terminal output.
In my case, when I clicked on forward button, it output scancode 90005 and keycode BTN_EXTRA. And, it output 90004 and BTN_SIDE when backward button clicked.
Step 2: Get the ID of your mouse
After finding out the scancodes of side-buttons, you also need to find out the ID of the mouse, so you can tell Linux kernel which device to configure when writing the udev rule.
This can be done by running a single command below in terminal:
cat /sys/class/input/event6/device/modalias
Here you need to replace “event6” in command with yours device event number, according to evtest command in Step 1.
In the output, you need to copy the input:b****v****p****e**** (input:b0003v089Dp062Fe0111 in my case). And,
inputis the Kernel subsystem name.b0003means bus ID 0003.v089Dp062Fe0111are the 4-digit hex vender, product, and version ID.

Step 3: Create & Edit udev rule
Now, in a terminal window, run command to create and open a custom udev rule:
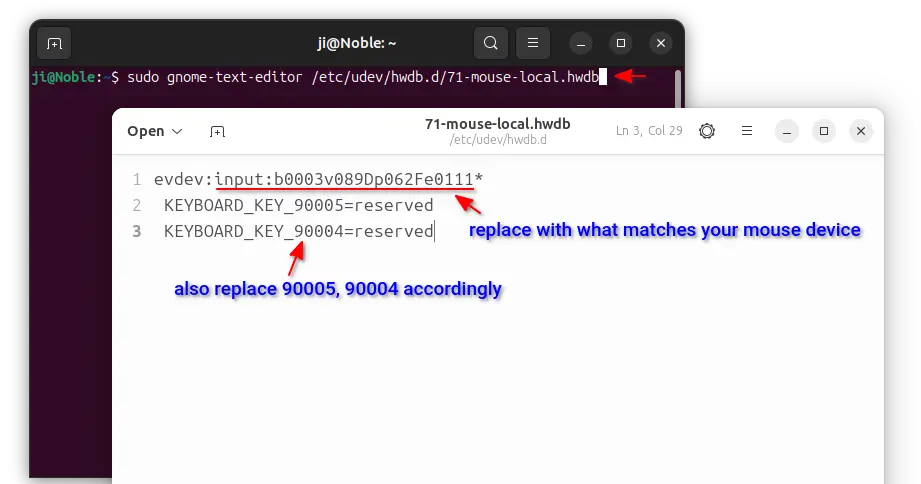
sudo gnome-text-editor /etc/udev/hwdb.d/71-mouse-local.hwdb
Depends on your desktop environment, replace gnome-text-editor with gedit for 22.04 and earlier, mousepad for XFCE, pluma for MATE, or nano command line text editor that works in most desktops.
When file opens, add the lines below and edit accordingly:
evdev:input:b0003v089Dp062Fe0111*
 KEYBOARD_KEY_90005=reserved
 KEYBOARD_KEY_90004=reserved
Here, you need to:
- replace
90005and90004according to Step 1. - replace
input:b0003v089Dp062Fe0111according to Step 2.
NOTE: there’s an asterisk * at the end of first line. For nano text editor, press Ctrl+S to save and Ctrl+X to exit.
Tips: for mouse works in both wireless and wired modes, each mode may have its own product ID. Meaning, you may have to do the steps above twice! And, the udev rule will look like:
evdev:input:b0003v25A7pFA7Ce0110*
 KEYBOARD_KEY_90005=reserved
 KEYBOARD_KEY_90004=reserved

evdev:input:b0003v25A7pFA7Be0110*
 KEYBOARD_KEY_90005=reserved
 KEYBOARD_KEY_90004=reserved
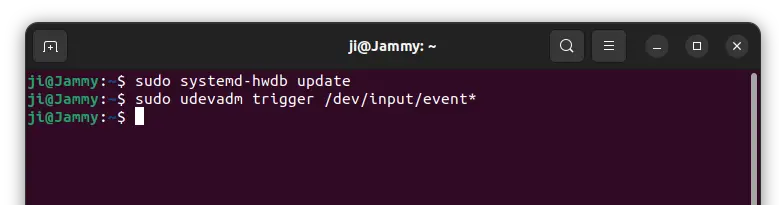
Step 4: Apply Change
After saved the udev config file, you can either restart computer, or run the 2 commands below one by one to apply change:
- First, update the binary hardware database
sudo systemd-hwdb update
- Then apply the change.
sudo udevadm trigger /dev/input/event*
You may skip
/dev/input/event*in last command,sudo udevadm triggeralso works.
Undo – Re-enable side-buttons
To undo the changes above, just delete the udev config file via the command below, and restart computer:
sudo rm /etc/udev/hwdb.d/71-mouse-local.hwdb
If you don’t want to restart, then, re-edit the config file and replace reserved according to Step 1, one with BTN_EXTRA, and another with BTN_SIDE. Finally, re-run the 2 commands in Step 4 to apply.


Dear god, thank you, yes! I have never used side buttons, they only annoy me. They just got me destroyed in a game I was playing and that was the final straw. Your’s was the first guide to disable them that worked. THANK YOU!
Thanks for the excellent post with nice detail. the only thing that threw me was that unless I ran it with sudo privileges `evtest` would not discover any of my devices on Ubuntu 25.04. One I discovered this I was able to follow all of your other instructions.
I haven’t had a lot of luck finding a multi-mode (laptop one and laptop two run on separate frequencies), bluetooth, ambidextrous mouse (though I mostly use left-handed) so I was happy to find the Shunjinrun SJR343. Except I kept accidently clicking the right-thumb side buttons with the left side of my hand which was mapped to “Go back in the browser” and a loss of whatever work I was doing.
Just tested on Ubuntu 25.10, and it did require
sudopermission. Thanks for your comment.Many thanks for this. It worked when Piper wouldn’t.