This tutorial shows how to install and setup howdy to get Windows Hello™ style authentication in Ubuntu 24.04 and Ubuntu 24.10.
Howdy is a free open-source Python program, that can use your built-in IR emitters and camera in combination with facial recognition to prove who you are.
With it, you will no longer need to type password anymore for login, un-lock screen, sudo commands, or launching apps that need root permission (e.g., Grub Customizer and Synaptic).
NOTE: Howdy is NOT as secure as a password and will never be! It’s just a quick and convenient way of logging in, not a more secure one.
Step 1: Install Howdy
The software has official PPA that contains the .deb packages for all current Ubuntu releases.
The official PPA package however does NOT work for Ubuntu 24.04, due to outdated post-install script. It will try the old pip install method to get numpy and dlib modules, which no long works due to upstream Python policy change.
Thankfully, Slimbook, a Spanish laptop manufacturer, rebuilt the package along with dlib module into this PPA for Ubuntu 24.04. As the PPA contains lots of other slimbook specific packages, I rebuilt them into this unofficial PPA with Ubuntu 24.04 and Ubuntu 24.10 support.
1. Add PPA
For Ubuntu 22.04 and earlier, open terminal (Ctrl+Alt+T) and run command to add the official PPA:
sudo add-apt-repository ppa:boltgolt/howdy
For Ubuntu 24.04, 24.10, 25.04, add the unofficial PPA instead:
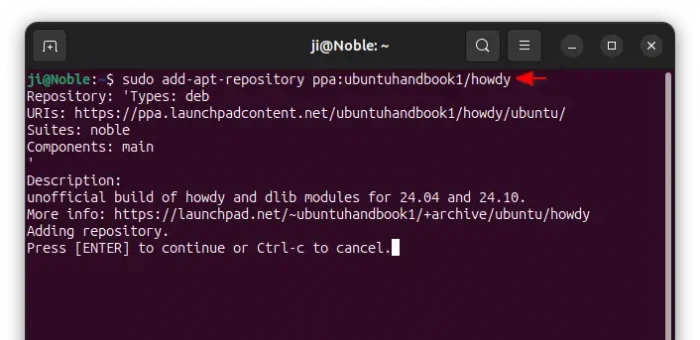
sudo add-apt-repository ppa:ubuntuhandbook1/howdy
2. Install Howdy package
Ubuntu now automatically refresh package cache while adding PPA, but if you’re following this tutorial in Linux Mint 22, then you need to run command to do the update manually:
sudo apt update
Next, run command to install the howdy package:
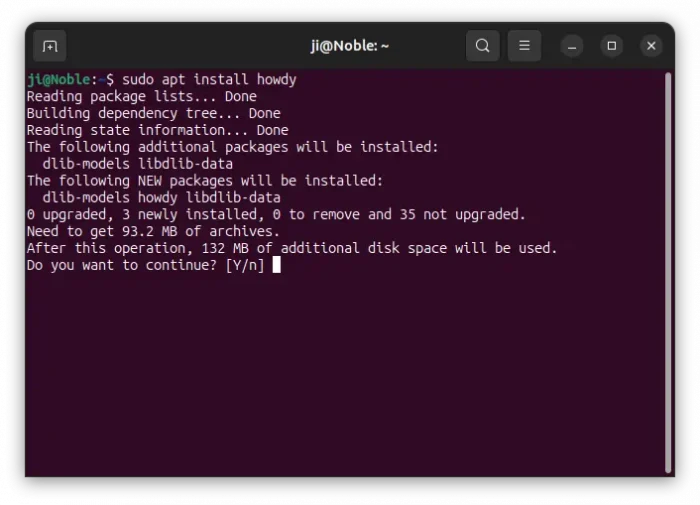
sudo apt install howdy
The official PPA package will automatically run post-install script, that will ask you to select between “Fast”, “Balanced”, and “Secure” modes, then update pip, numpy, dlib modules automatically.
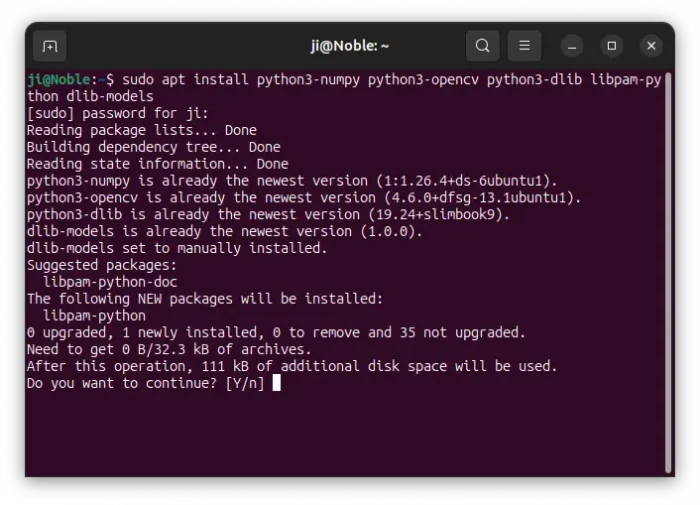
For Ubuntu 24.04, 24.10, 25.04, you need to manually install the modules by running the commands below:
sudo apt install python3-numpy python3-opencv python3-dlib libpam-python dlib-models libinireader0
Step 2: Configure Howdy
After installed howdy, you need to edit the config file and tell path to your webcam device.
1. To find out the device path, open terminal (Ctrl+Alt+T) and run command:
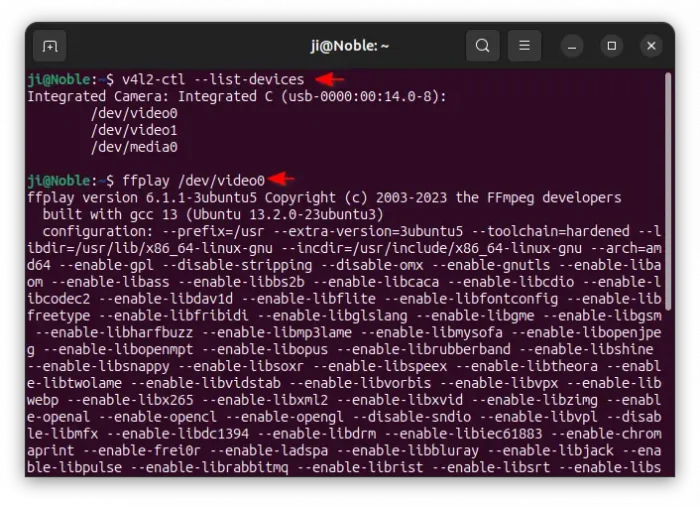
v4l2-ctl --list-devices
Run sudo apt install v4l-utils if the command above not found. And, run sudo apt install ffmpeg if ffplay command below not found.
Then, try ffplay command (e.g., ffplay /dev/video0, ffplay /dev/video1) to open each device one by one. If it successfully opens an app window with your camera screen, then that’s the device path for next step.
2. Next, edit the config file by running the command below in terminal:
sudo howdy config
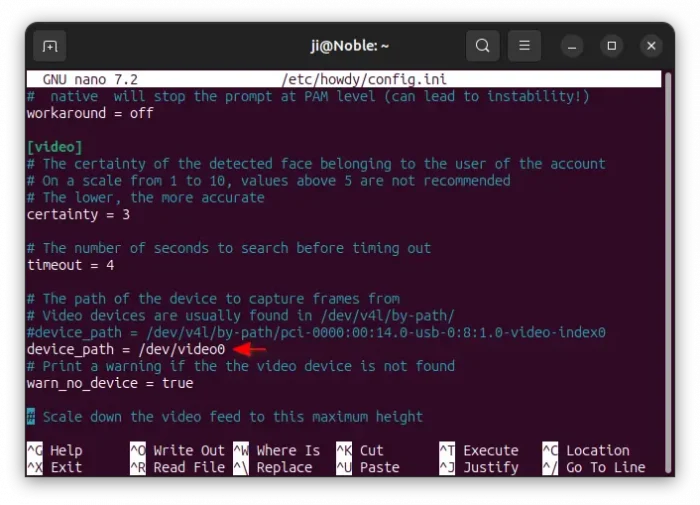
When file opens, scroll down and set “device_path” value according to last step. For laptops’ builtin webcam, it’s usually /dev/video0.
Optionally, you may configure more options via the file. They include:
detection_notice = true– print text to notify when it attempts face detection.disable-login = true– does not use facial authentication for login.use_cnn = true– use the more accurate CNN model, but takes more time (a few seconds) and more power to run.- and more.
After editing the config file, press Ctrl+S to save, then Ctrl+X to exit.
Step 3: Add your Face ID
To add face ID for current user, use command:
sudo howdy add
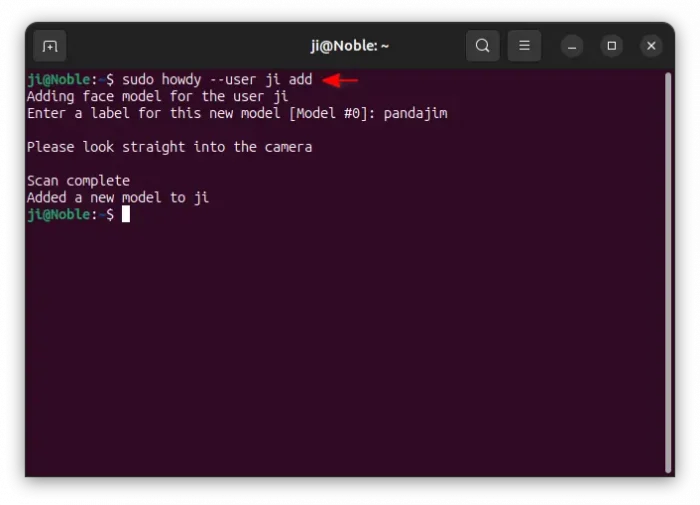
Then type a name for the ID you’re going to add. Next, your webcam light should turn on and scan your face. Just look straight into the camera, and wait the scan process done.
As the screenshot above shows, you can add face ID for another user, by adding --user USER_NAME command option. So, the command will be sudo howdy --user USER_NAME add.
After added a face ID, you can now try running any sudo command in another terminal window to see if it works.
Step 4: Manage face IDs
You can run sudo howdy add command again and again to add more IDs/models.
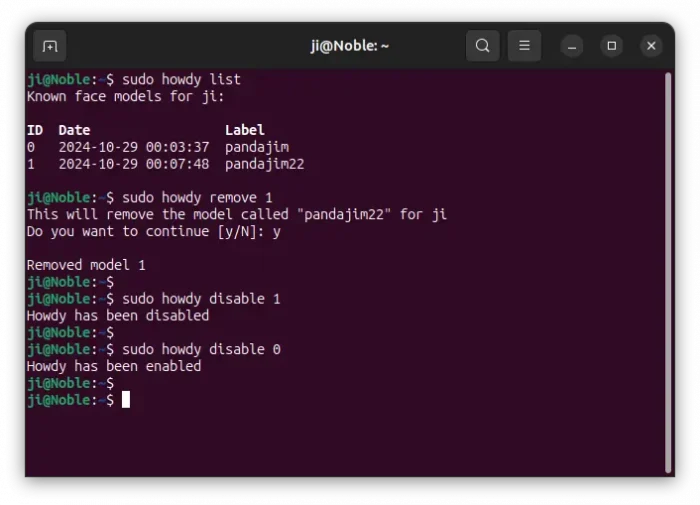
To list all the face IDs/Models, use command:
sudo howdy list
Then, you may either remove certain ID through its ID number (e.g., 0, 1, 2, …):
sudo howdy remove 1
Or, remove all IDs at once via command:
sudo howdy clear
And, to disable facial authentication, use command:
sudo howdy disable 1
While replace number 1 in the command with 0 will re-enable it.
Uninstall Howdy:
If you want to remove the Howdy facial authentication tool, open terminal and run command:
sudo apt remove --autoremove howdy python3-dlib
Also remove the PPA with either command below depends on which one you added:
sudo add-apt-repository --remove ppa:boltgolt/howdy
sudo add-apt-repository --remove ppa:ubuntuhandbook1/howdy
Linux Mint users don’t forget to run sudo apt update to manually refresh cache afterward.




Unfortunately it doesnt work @ U 24.10 from your repo.
PAM unable to dlopen(/usr/lib/security/howdy/pam_howdy.so): libINIReader.so.0
Try to install the libinih:
Nice to see this back! For me though:
– it installed fine
– I configured the video device as /dev/video0
– ran sudo howdy test and it worked
– added a capture and it shows in list
– ran sudo pam-auth-update and saw Howdy was selected, followed by fingerprint reader and password
– rebooted but was NOT greeted by Howdy but by the fingerprint reader prompt
– at command prompt sudo date again asked me to scan fingerprint.
Any ideas what could be wrong?
It could be that it’s missing the libinih library. Try installing the
libinireader0andlibinih1package.That worked! Thanks.
Hi Ji,
Good writeup, thanks!
Can I suggest the great addition by Torsten Uhlmann from here: https://github.com/tuhlmann/select-howdy-source
If like me you move from home to office and you cameras change devices this works a treat.
Cheers
Col
Thanks it worked. I had to do some more changes due to numpy version issues, but could get it resolved after some head breaking
This works great on Mint 22, only thing is that it doesn’t work on the lock screen, in my case when I close and open my laptop lid, and it breaks entirely after that as well. Do you know of any fix for this?
I spoke too soon. It appears to work/authenticate only the first time. After subsequent lock screens it says attempting facial recognition and then immediately errors.
It also does not work at the login screen after a reboot/startup. In this case I don’t even see the “attempting facial recognition” text.
any help?
Amazing guide, works like a charm for ubuntu 24 running on a recent Thinkpad (apply /dev/video2 to use the fancy red dot video camera instead of the normal one)
Thank you for the guide! This worked great after several failed attempts with other methods.
Howdy recognition of my face is erratic. Once it does not recognize my face, I enter a “sudo loop” so I cant even disable Howdo
Howdy sadly is not frequently updated. If you like the app, you may report the issue to:
https://github.com/boltgolt/howdy/issues
Can it work in Ubuntu 25.04?
Already built the PPA package for Ubuntu 25.04, and it seems to be working good in my ThinkPad T480s.
For me howdy installed fine, but it is not using the IR emitter and the recognition does not work at all.
(Using Asus ZenBook Flip 13) Any suggestions?
Thank you soooo much… It worked in ubuntu 25.04. I was looking all over the web, it’s the only guide that works.. Thank you again.
Hi Jim!
Howdy worked perfectly for me on Ubuntu 22.04. But since I upgraded to 24.04, It show this error.
sudo howdy add
Traceback (most recent call last):
File “/usr/lib/howdy/cli.py”, line 101, in
import cli.add
I tried different guides n
File “/usr/lib/howdy/cli/add.py”, line 39, in
config.read(paths_factory.config_file_path())
File “/usr/lib/python3.12/configparser.py”, line 684, in read
self._read(fp, filename)
File “/usr/lib/python3.12/configparser.py”, line 1064, in _read
raise MissingSectionHeaderError(fpname, lineno, line)
configparser.MissingSectionHeaderError: File contains no section headers.
file: ‘/etc/howdy/config.ini’, line: 5
‘device_path =/dev/video0\n’
I have tried different guide to fix it but failed. do you have any suggestions?
manu Thank
Did you remove and do a clean re-install of howdy after upgraded to 24.04? The run-time libraries differ in the 2 Ubuntu releases.
And the error tells that something is wrong in the configuration file. If you can’t correct it, try deleting the config file and re-install howdy with config override enabled:
Very helpful, thanks!
Do you know if there is a way to add more attempts to make the face model more accurate? Or would I have to clear the model each time to take a new one.