


![]()
Want to downgrade the Linux Kernel to the original GA (General Availability) Kernel 6.8 in Ubuntu 24.04? Here’s how to do the job step by step.
Since Ubuntu 24.04.2, the LTS by default ships with HWE kernel 6.11, which will be updated to the newer kernel series for the next point releases. However, the original Kernel 6.8 is always easy to install back.
Install the GA Kernel 6.8 in Ubuntu 24.04
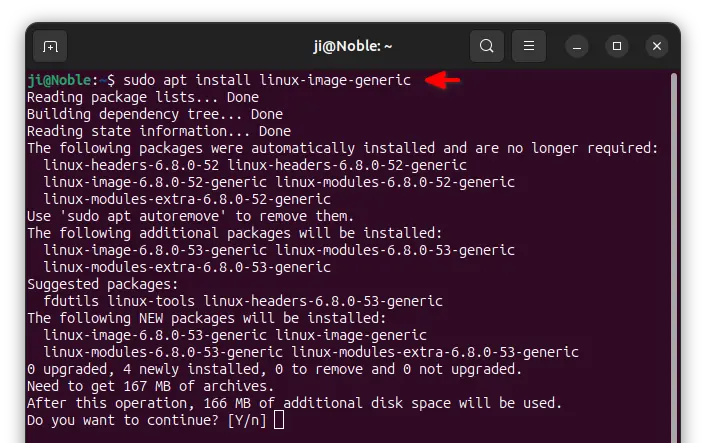
The original kernel is provided by the linux-image-generic package in system main repository.
Simply, press Ctrl+Alt+T on keyboard to open up a terminal window. Then, run command to install the package:
sudo apt install linux-image-generic
NOTE: running sudo command will ask to input user password for authentication. There’s no visual feedback while inputting password, just type in mind and hit Enter.
Configure to boot Kernel 6.8 by default
After running the command above in last step, you should now have Linux Kernel 6.8. However, it won’t boot with that kernel as you also have higher kernels installed.
To boot the original kernel 6.8 by default, you have 2 choices:
- remove the newer kernels.
- or configure Grub boot-loader to select boot 6.8 kernel by defau.t
Option 1: Remove the HWE Kernel
If you don’t have any non-default (means third-party) kernels, then just remove the Hardware Enablement (HWE) kernel, by doing the steps below one by one.
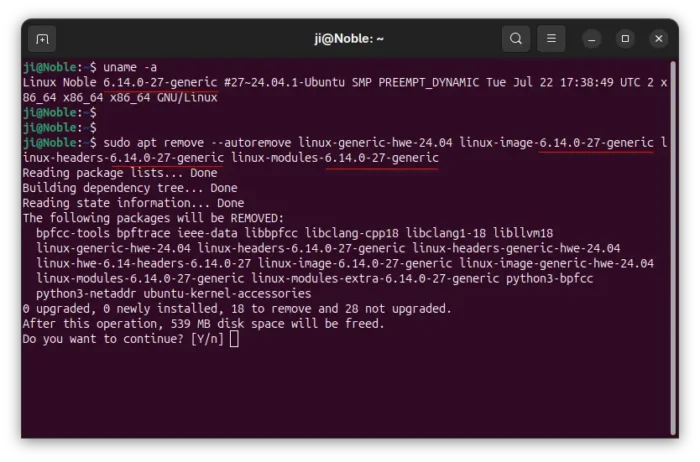
First, open terminal (Ctrl+Alt+T) and run command to get the current Kernel version:
uname -a
In my case, it’s 6.14.0-27-generic.
Next, run command to remove the kernel:
sudo apt remove --autoremove linux-generic-hwe-24.04 linux-image-6.14.0-27-generic linux-headers-6.14.0-27-generic linux-modules-6.14.0-27-generic
NOTE: Ubuntu will update the Kernel version as time goes on. You need to replace “6.14.0-27-generic” in command accordingly.
After that, your Ubuntu will automatically boot with kernel 6.8 on next boot, as there’s no higher kernel series available.
Option 2: Configure Grub to boot Kernel 6.8 by default
If you want to keep your Ubuntu with multiple kernels, then you may tell Grub boot-loader to boot which kernel by default on every boot.
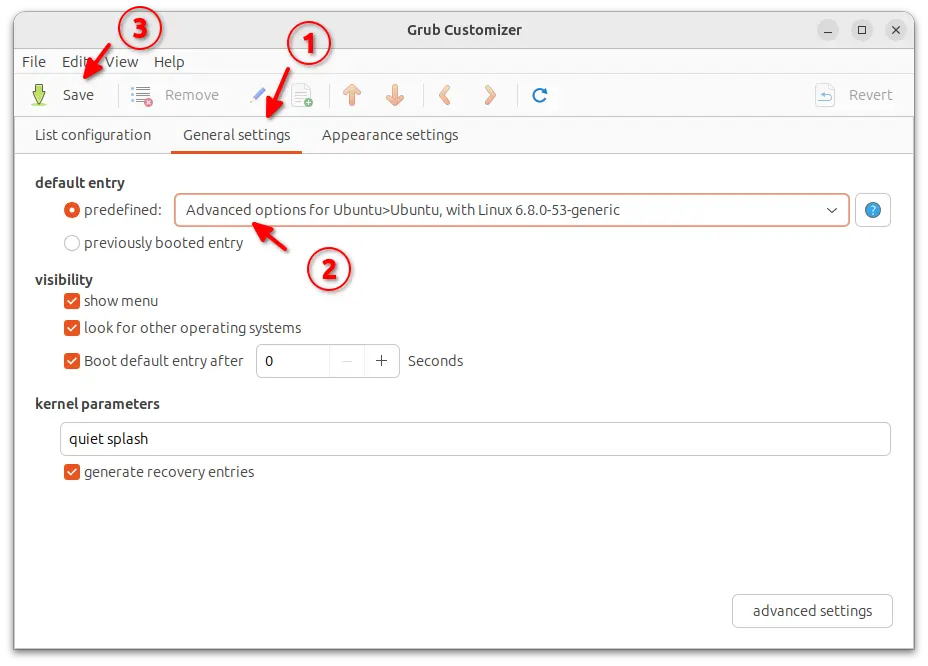
If you have Grub-Customizer installed, then launch it and navigate to General Settings tab. Finally, choose a predefined entry, and save!
Without using 3rd party tool, you may instead open terminal (Ctrl+Alt+T) and run command to edit the grub configuration file:
sudo nano /etc/default/grub
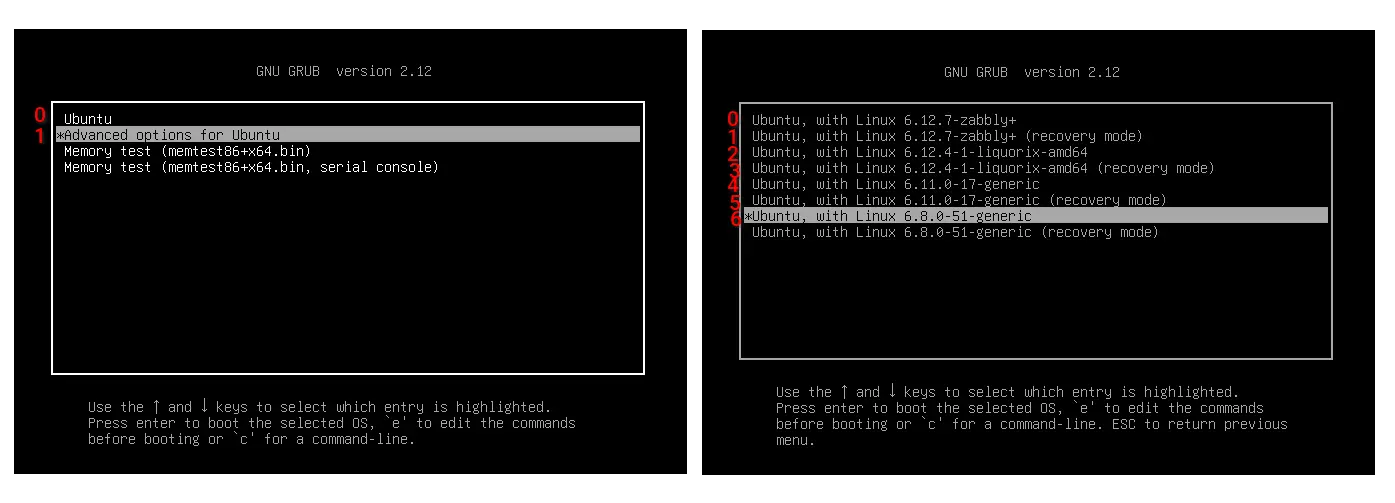
Then, change GRUB_DEFAULT line to GRUB_DEFAULT=”1>2″.
Here 1 means the second entry in main menu (usually “Advanced options for Ubuntu”), 2 means the third entry in sub-menu. So, “1>2” (double quotation marks required) means the 3rd entry in sub-menu of the 2nd main menu entry.
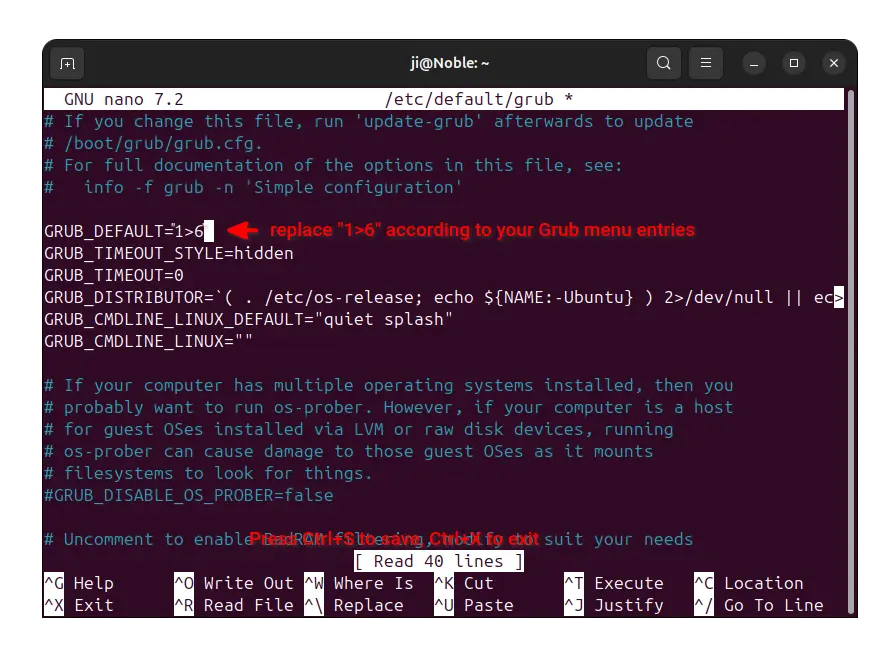
Here you need to change the NUMBER according to your Grub boot menu! The menu entry counts from 0. “Advanced options for Ubuntu” entry is usually 1, and kernel 6.8 in sub-menu in my case (see screenshot below) is 6. You need to replace it with yours.
When done editing the file, press Ctrl+S to save, and Ctrl+X to exit. Finally, run command below to apply change:
sudo update-grub
Verify:
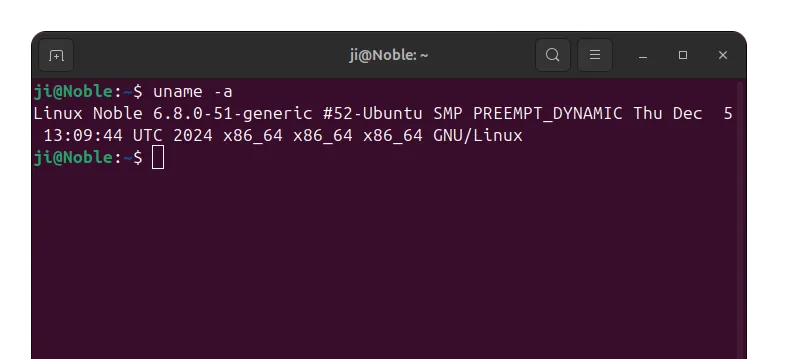
Finally, reboot your computer, and run command in terminal to verify which kernel is running:
uname -a


Thank you for this Tutorial, because i have Problems with the 6.11 Kernel!
Does not remove the actual kernel, just the meta package, Bad advice.
Updated!
Thanks for pointing out the issue. It seems that Ubuntu changed the package dependencies, so the previous command won’t work.
Thank you so much, because with the newer kernels I only had screen resolution of 800 600, which was anything after 6.11. I started with 6.1, could revert back to that for proper resolution but then found out it’s not supported anymore, although 6.8.0-87 generic is. And at first all I found was how to install the mainline kernels, which has 6.8.0-87 (plus added numbers) but that’s not supported. VERY confusing, and nowhere but with you is there information how to simply install the kernel that IS supported in LTS, without it being an unsupported mainline kernel.