


![]()
This is a step by step beginner’s guide shows how to install and setup the latest Wireshark network protocol analyzer software (v4.4.8 updated) in Ubuntu 24.04, Ubuntu 22.04, Ubuntu 20.04, and Linux Mint 22/21.
Wireshark is a popular free open-source software to capture and display real-time details of network traffic. It’s available in Ubuntu system repository, but old.
Step 1: Install Wireshark
There’s a community maintained PPA repository that contains most recent Wireshark for Ubuntu 20.04, 22.04, 24.04, 24.10, and 25.04 on Intel/AMD and arm64 CPUs.
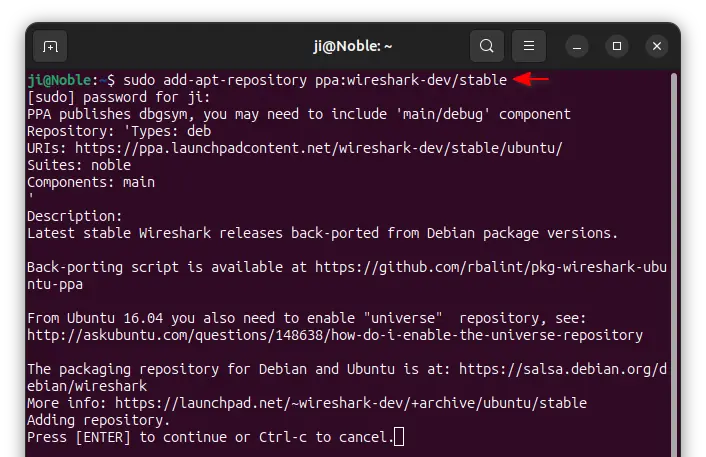
1. To add the PPA, press Ctrl+Alt+T to open up a terminal window and run command:
sudo add-apt-repository ppa:wireshark-dev/stable
Type user password when it asks (no visual feedback) and hit Enter to continue. Linux Mint user can open “Software Sources” instead, navigate to “PPAs” tab, click ‘Add’ and input ppa:wireshark-dev/stable to add the PPA.
2. After adding PPA, run the command below to install the wireshark package:
sudo apt install wireshark
For Linux Mint, you need to run sudo apt update to refresh package cache first.

With the PPA repository, you can keep wireshark up-to-date by either running the last command again and again (need refresh cache of course), or installing updates using Software Updater (Update Manager).

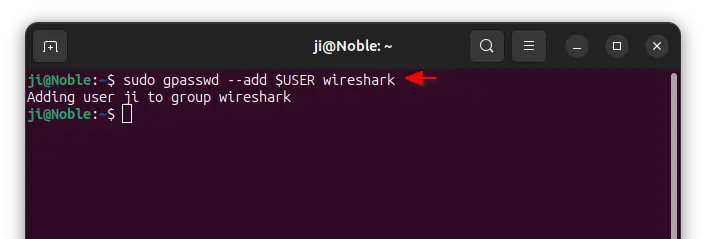
Step 2: Add user to wireshark group to fix permission issue
Due to permission issue, you may get “Couldn’t run dumpcap in child process: Permission denied” error when running wireshark with normal user privilege.
To workaround it, you may either run sudo wireshark form terminal to start the app with super user privilege, or run command below to add your current user into wireshark group:
sudo gpasswd --add $USER wireshark
Here $USER will return the current user name. You may replace it to add other users into that group.
when done, restart computer to apply change.
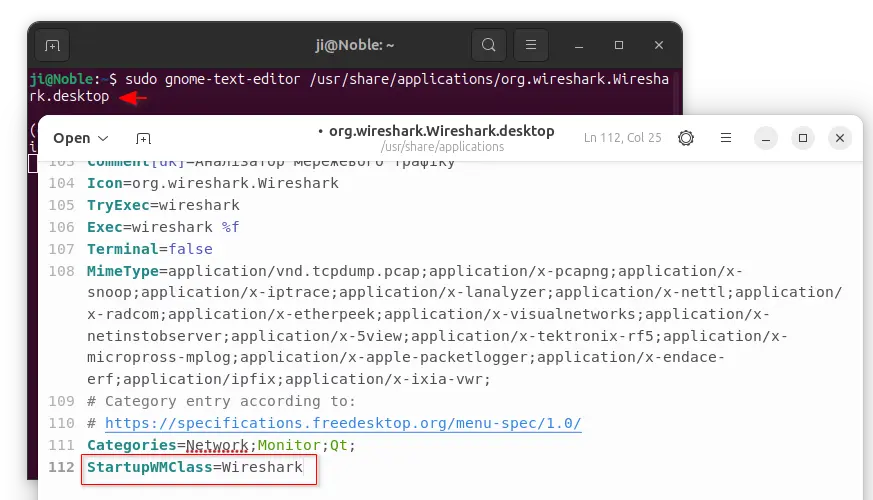
Step 3: Fix missing app icon in the dock
In Ubuntu 24.04, some apps including wireshark miss their logo icons on the dock. Instead, it displays an universal gear icon with gray square background.
To fix the issue, simply add StartupWMClass string in the associated .desktop config file. And, here’s how to do the trick for wireshark.

First, press Ctrl+Alt+T to open up a terminal window. When it opens, run command to edit the .desktop file for wireshark:
sudo gnome-text-editor /usr/share/applications/org.wireshark.Wireshark.desktop
Here you may replace gnome-text-editor with your favorite text editor, or use nano that works in most desktops.
When file opens, add StartupWMClass=Wireshark in the end and save. For nano, press Ctrl+S to save and Ctrl+X to exit.
Finally, re-launch the app to apply change.
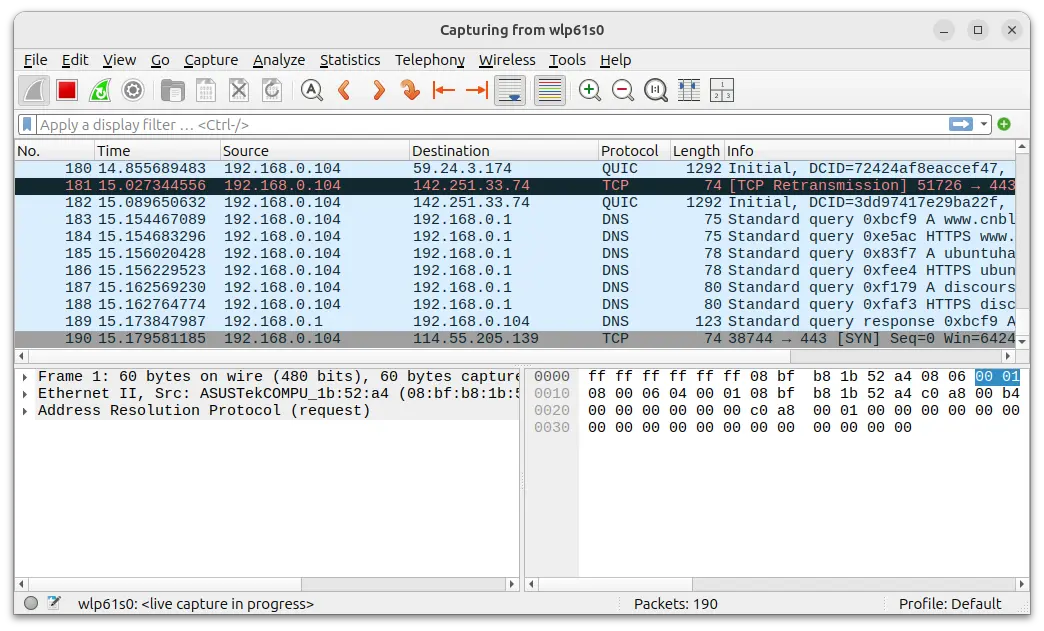
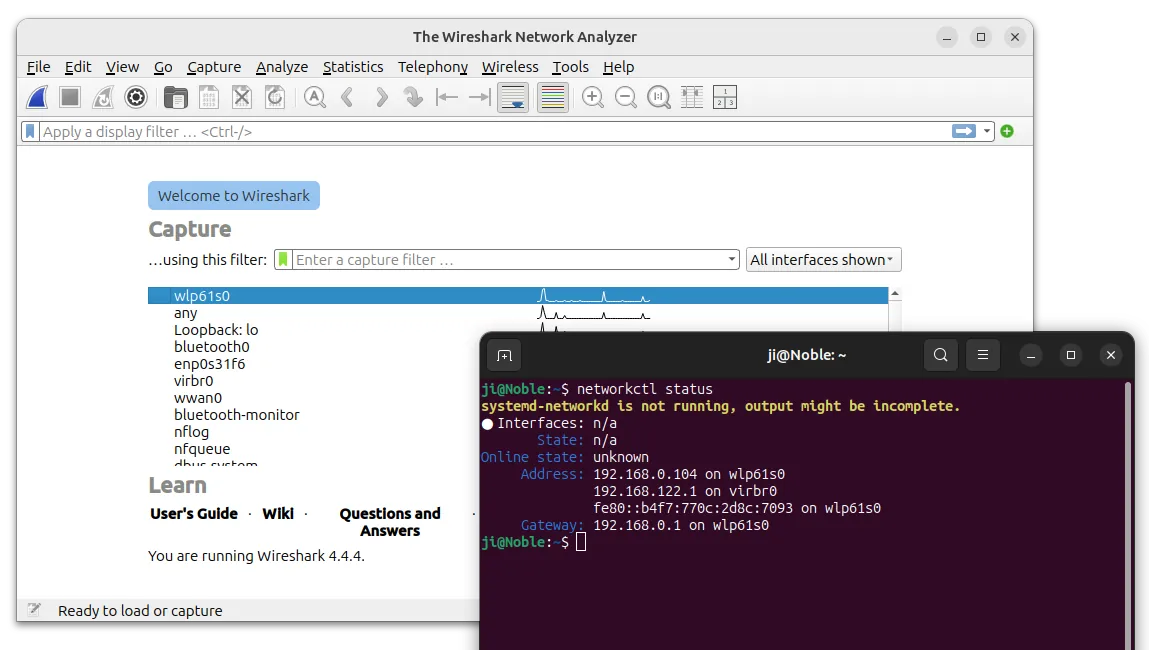
Step 4: Start wireshark and capture your network interface
Now launch wireshark either from system start menu or by running wireshark command from terminal.
When it opens, choose your network interface (usually the default highlighted one), then either go to “Capture -> Start” or press Ctrl+E to start capturing network traffic.
In case, you don’t know which network interface is in currently being used, run command ip address or networkctl status to tell.
For more, see the official user guide.
Uninstall Wireshark:
If the latest version is not working good in your case, you may run command in terminal to downgrade it:
sudo apt install ppa-purge && sudo ppa-purge ppa:wireshark-dev/stable
This command will install ppa-purge tool and use it to purge the PPA and downgrade installed packages. It however may fail if you have broken software sources.
If you just want to remove the network protocol analyzer, then run the command below instead:
sudo apt remove --autoremove wireshark
Also, remove the PPA repository by either running command below in terminal:
sudo add-apt-repository ppa:wireshark-dev/stable
or using “Software & Updates” to remove the source line under “Other Software” tab, and reload after closing the dialog.


