


![]()
This is a step by step beginner’s guide shows how to install the current Ubuntu 26.04 LTS in your PC or laptop.
Ubuntu 26.04, code-name Resolute Raccoon, is a Long Term Support (LTS) release that features GNOME 50 desktop and Kernel 7.0 so far.
Requirements
According to the Ubuntu 26.04 release note, you need a computer with:
- 2 GHz dual-core processor.
- 6 GB or higher memory.
- 25 GB disk space.
And, to follow this tutorial you need a 8 GB USB stick for booting the live desktop.
Step 1: Download Ubuntu 26.04 .iso image
First, select download Ubuntu 26.04 desktop iso image from the Ubuntu website via the link below:
Or, go to this page for ARM devices. If you don’t want the default GNOME Desktop, then choose XUbuntu 26.04, KUbuntu 26.04, etc flavors from their own websites.
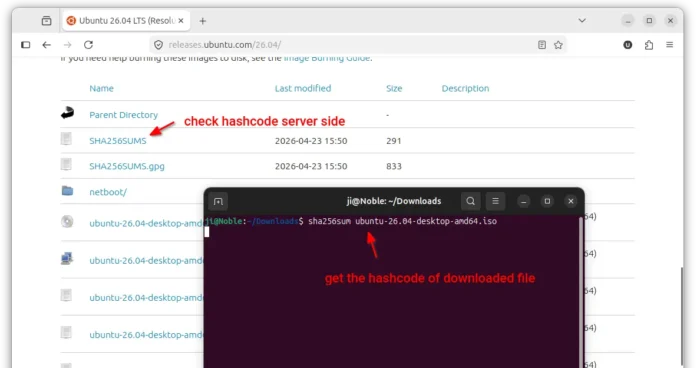
After downloaded the disc image, it’s highly recommended to verify the file integrity, to make sure the downloaded file is totally same to the one in download server.
- If you’re on Windows, then search & open cmd, and run command to print the sha256sum for downloaded file:
cd Downloads && certutil -hashfile ubuntu-26.04-desktop-amd64.iso SHA256
- For Linux, use this command in terminal instead:
sha256sum ~/Downloads/ubuntu-26.04-desktop-amd64.iso
- And macOS can open terminal and run command:
shasum -a 256 ~/Downloads/ubuntu-26.04-desktop-amd64.iso
Depends on what package you downloaded, replace “ubuntu-26.04-desktop-amd64.iso” in command accordingly.
Once the command prints the hash code, compare it to the one in the download page. They must same before doing next step.
Step 2: Burn ISO into USB
After downloaded the iso image, burn it into the USB stick. So that you can boot your computer into a live Ubuntu system from that USB.
Depends on your current operating system, you may choose Rufus for Windows, Etcher for Linux, Windows, and macOS, or Ventoy for Linux and Windows.
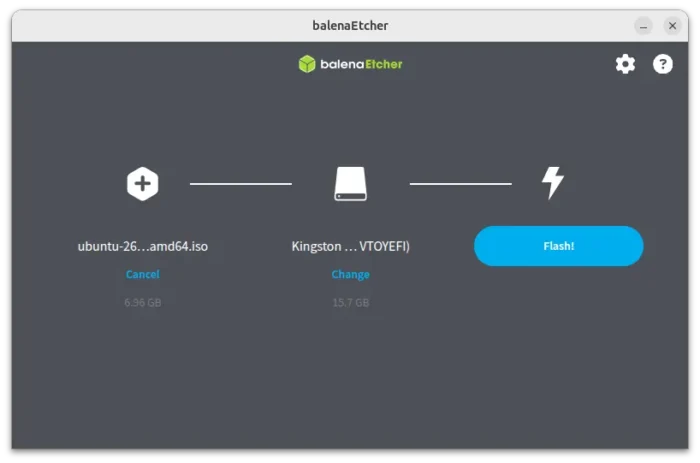
create bootable USB via Etcher
Step 3: Boot from the USB
Now, connect the USB stick into target computer then boot it.
Depends on the motherboard, press del, Esc, or F12 etc keyboard key at very beginning of boot process to launch UEFI menu and select boot from your USB. Or, go to BIOS settings, and set the USB as the first boot option.
NOTE: You may need to disable secure boot before being able to boot from USB, then re-enable it after installed Ubuntu.
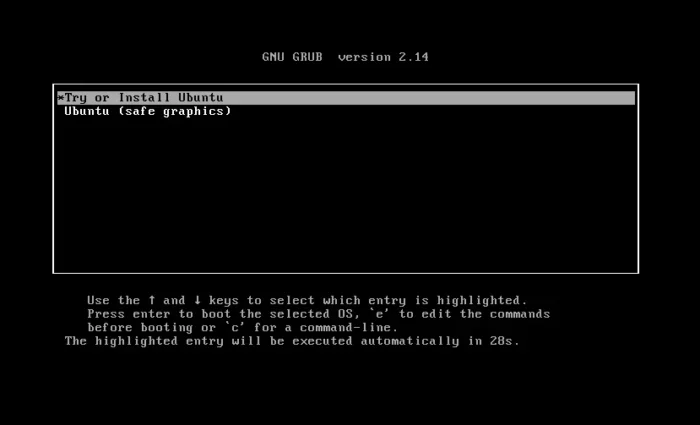
For Ventoy, it’s better to choose boot Grub mode. Then, select boot with default “Try or Install Ubuntu” or “safe graphics” to avoid graphics issue for NVIDIA user.
Step 4: Start the Installer
If everything goes well, it should now boot into the Ubuntu Desktop and auto-launch the installer wizard for you.
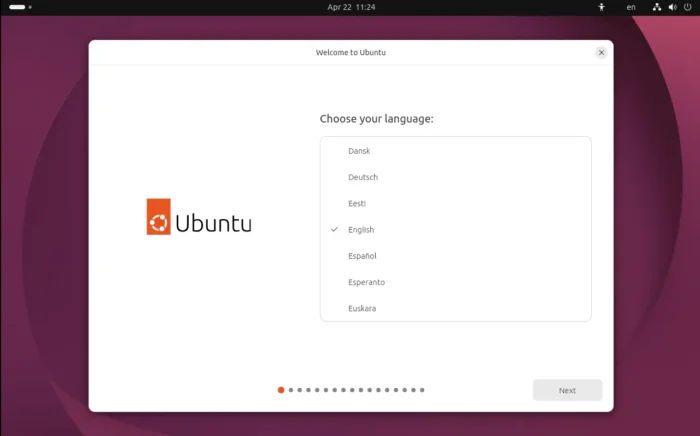
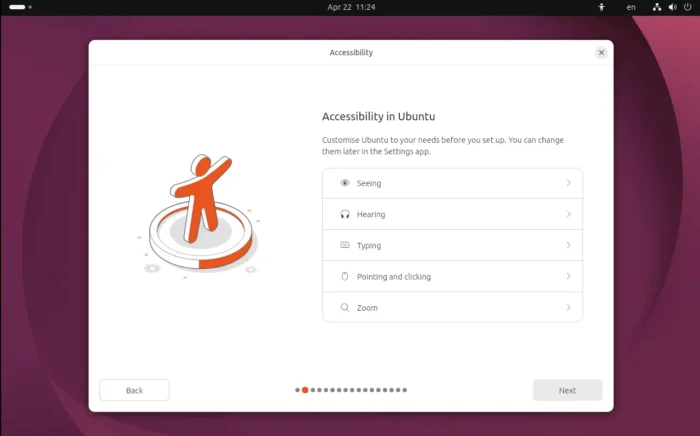
Ubuntu 26.04 installer wizard
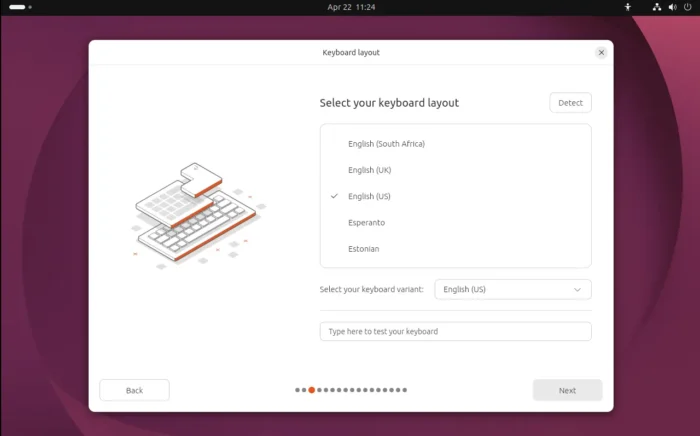
Follow the wizard to select language, configure accessibility settings, keyboard layout.
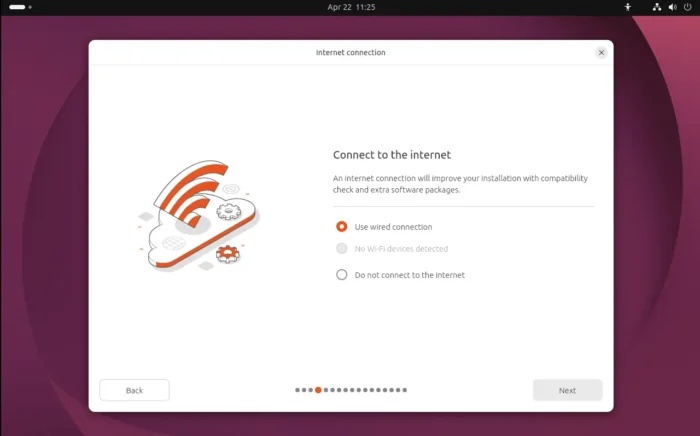
Next, connect to internet or wifi network if you need to install updates or drivers during the installing process. While, leaving network dis-connected also works in most cases!
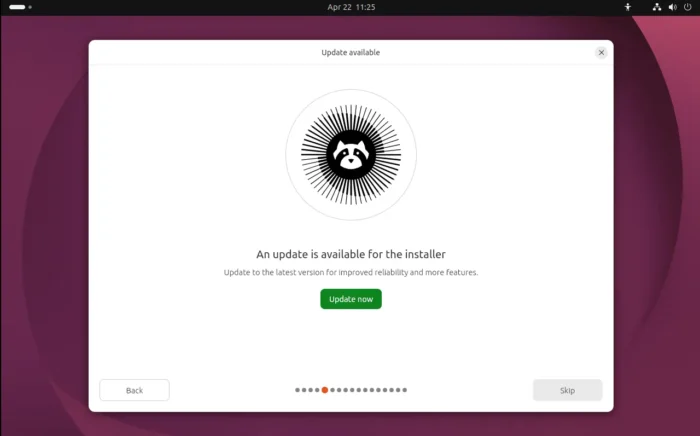
The Ubuntu installer now supports for updating itself during the Ubuntu installing process. Click update if the current does not work for you, or just skip it.
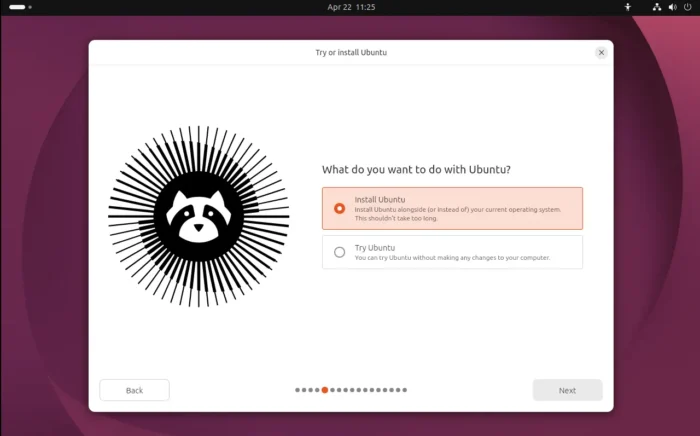
In next page, you can choose the default to continue installing Ubuntu. Or, select “Try Ubuntu” to try out the live system without making any change to your computer.
And, you may re-launch this wizard at any time from the left dock or desktop shortcut icon.
For advanced user or organization with auto-install file, choose auto-install in next page. While, average users may use the default interactive installation method.

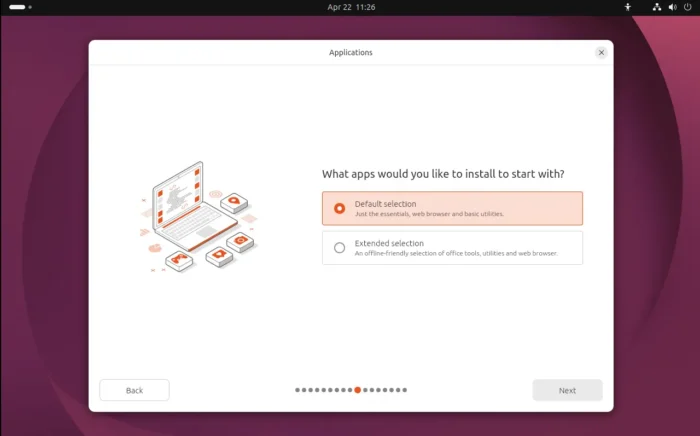
Depends on your need, you may select “Default selection” in next page and install required apps afterwards, or select “Extended selection” mode to have more default apps pre-installed, like Ubuntu 22.04 and earlier do.
- Default selection – only browser, text editor, app center and other basic apps.
- Extended selection – has more default apps preinstalled, e.g., video player, audio player, office suite.
Due to legal reason, Ubuntu by default does not install the media codec and proprietary drivers, but it provides the options in the installer for those who want to install them during the Ubuntu installing process, though you need an active internet connection.

Step 5: set up your disk for Ubuntu
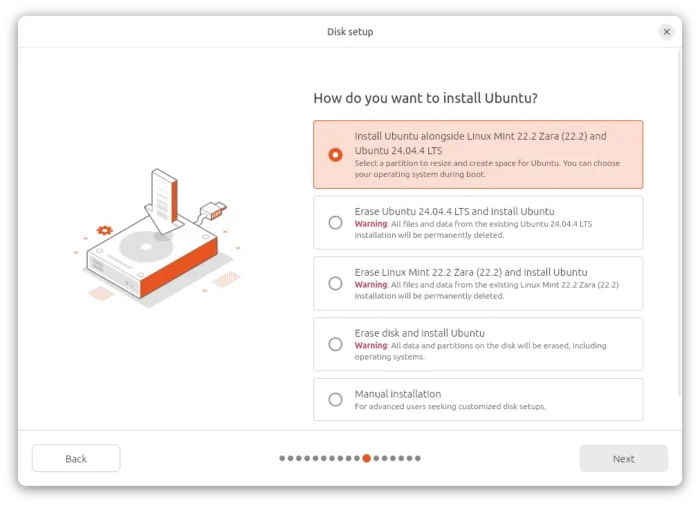
The most important part is select which disk or which disk partition to install Ubuntu to.
Depends on your disk status, it may show you following options:
- Erase disk and install Ubuntu – use the entire disk for Ubuntu 26.04, all existing data will be lost.
- Erase an existing system and install Ubuntu – overwrite the selected system (data will be lost) and install Ubuntu 26.04 on it.
- Install Ubuntu alongside existing systems – shrink a selected disk partition, to make room for Ubuntu 26.04. No data will be lost.
- Manual installation – make free space on your disk manually and install Ubuntu 26.04 on it.
Except Manual installation, all others have graphical options to easily encrypt the Ubuntu system.
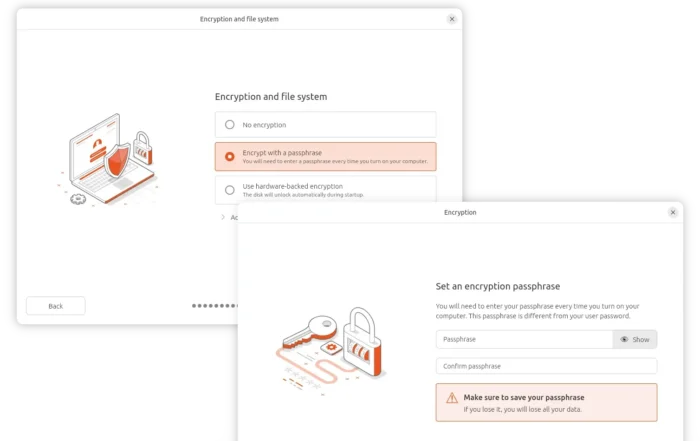
Except “Manual installation”, all others have graphical option to encrypt the system
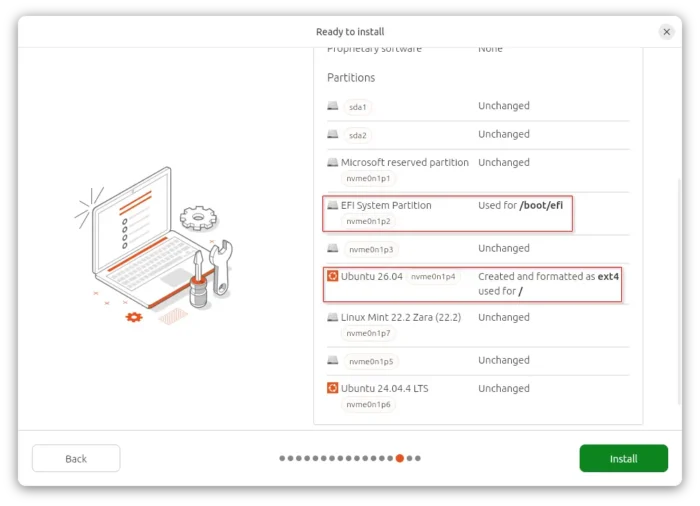
If you selected Manual installation, then it will show you the partition table for your disks. You need to either manually delete useless partitions to make free space, or, select a target partition and click “Change” button to use it for Ubuntu 26.04.
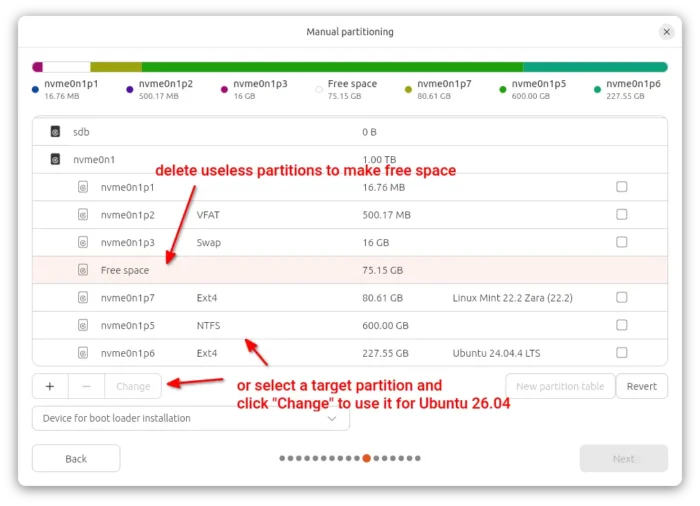
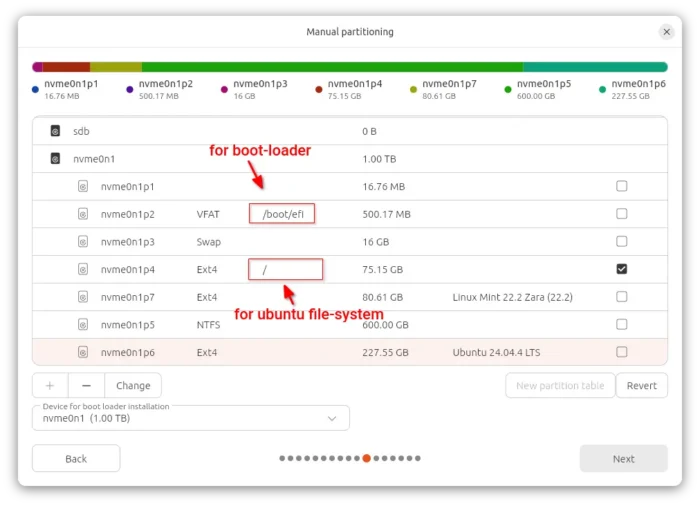
Once you have enough free space, then select it and create a partition for Ubuntu file-system:
- at least 25 GB (or as large as possible for long time use!) size,
- Ext4 file system, or others as you prefer.
- mount on /.

If you previously has an operating system on the disk, then there should already be a VFAT partition for boot-loader. And, in my case it’s automatically marked as /boot/efi after created the “/” file-system partition. If NOT, manually create a 500 MB partition, FAT32 file-system and mounted on /boot/efi.
(Optional) You may optionally create (or use existing) separated partition mounted on /home for user files, a swap area (Ubuntu now auto-generate swap as file), a separated partition for /boot, though they are NOT required!
after manually created disk partitions for Ubuntu 26.04
Step 6: Start the installing process
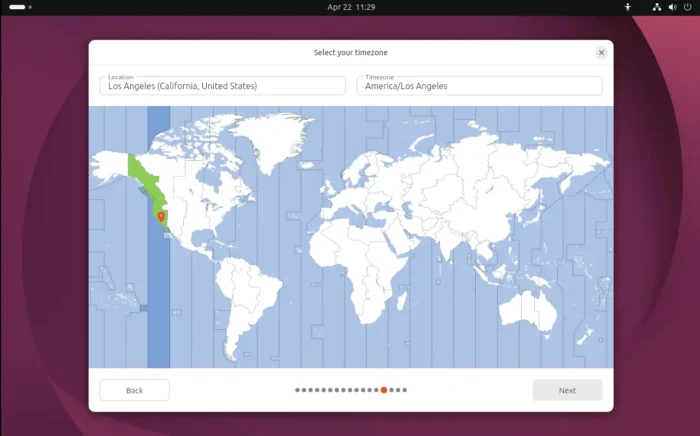
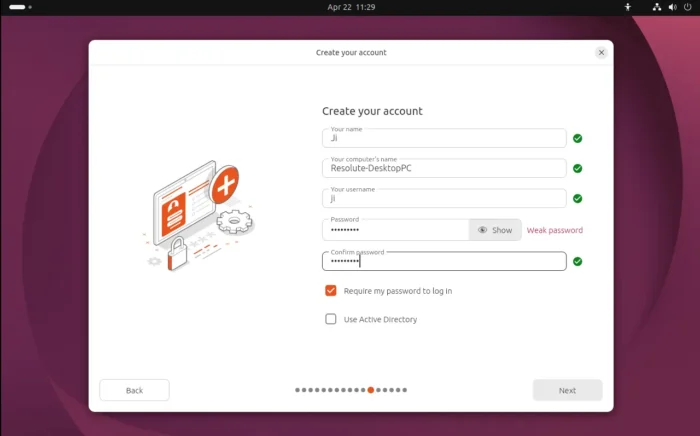
After that, create user account and select your timezone.
Finally, confirm by clicking on “Install” button to start the process. NOTE: Before you click the green “Install” button as the screenshot below shows, you can still undo all the changes you made above.
Once you click “Install”, it starts making changes to your disk (if need) and installing Ubuntu by writing system data.
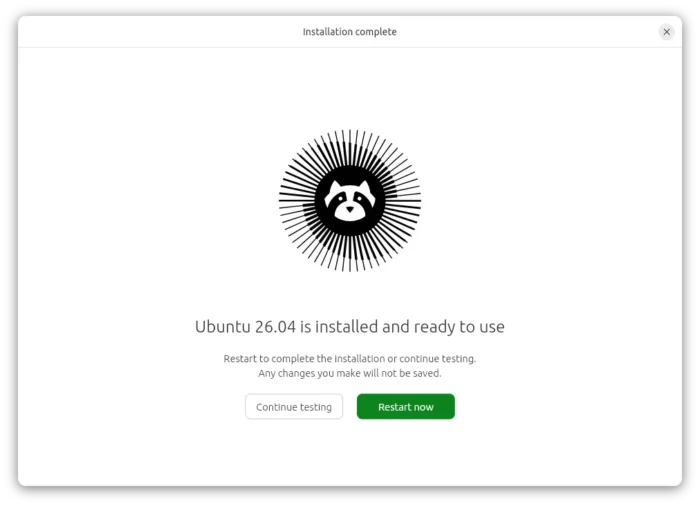
If everything goes well, it will show you installation complete with options to either continue testing the live system or restart computer.


