This is a step by step beginner’s guide shows how to install the GCC 16 compiler in Ubuntu 24.04 / Linux Mint 22.x, Ubuntu 22.04, Ubuntu 20.04, and even the old Ubuntu 18.04.
GCC 16 is so far the latest major version of the GNU Compiler Collection. It’s available in Ubuntu 26.04 repository but non-default.
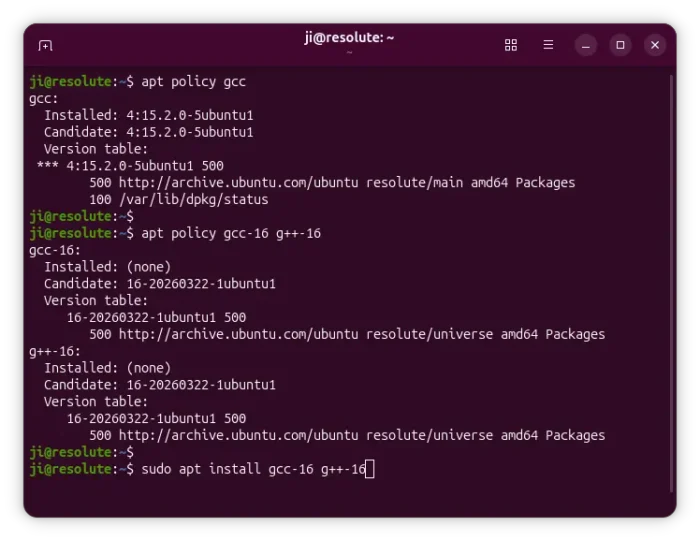
Ubuntu 26.04 default to GCC 15, while GCC 16 is available for choice
What’s New in GCC 16
GCC 16 defaults to C++20 (-std=gnu++20), and features early C++26 support including std::simd, std::inplace_vector, std::copyable_function, std::function_ref, std::optional<T&>, and more.
It added support Intel Wildcat Lake and the upcoming AMD Zen 6, and Intel Nova Lake CPUs support, as well as new experimental Algol 68 compiler.
It as well improved C++ error messages, including making hierarchical/nested diagnostics the default, added initial support for exceptions and Named Return Value Optimization, and, expanded _BitInt support to more architectures. See this page for more changes in GCC 16.
Install GCC 16 in Ubuntu via PPA
As mentioned Ubuntu 26.04 includes GCC 16 in system repository. User of the LTS may directly run the apt install command below to install it.
For current Ubuntu 24.04, Ubuntu 22.04 LTS, and even the old Ubuntu 20.04/18.04 LTS, there’s an “official” PPA that contains the compiler for all supported CPU architecture types (e.g., amd64, arm64/armhf, ppc64el, riscv64, s390x).
Not only GCC 16, the PPA also include GCC 13, GCC 14, and GCC 15 that the previous Ubuntu LTS releases don’t have.
NOTE: The PPA is maintained by Ubuntu Developer who’s behind the official Ubuntu-provided GCC compiler. It’s however marked as test build, meaning not officially support by Ubuntu.
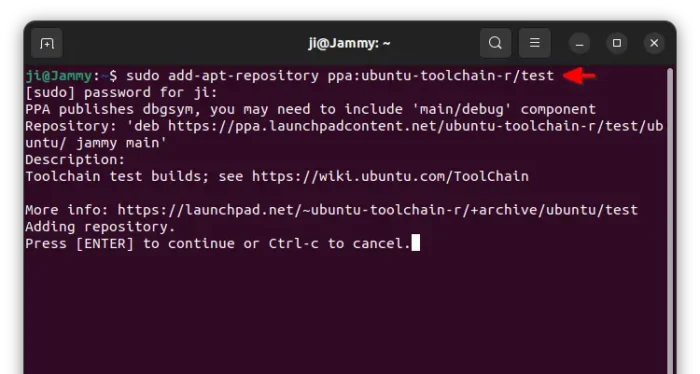
1. To add the PPA, press Ctrl+Alt+T on keyboard to launch a terminal window, then run command:
sudo add-apt-repository ppa:ubuntu-toolchain-r/test
Type user password when it asks (no visual feedback, just type in mind) and hit Enter to continue.
2. If you follow this tutorial in Linux Mint, then either use Software Sources to add PPA, or run the command below to refresh cache after added the PPA.
sudo apt update
While Ubuntu now automatically refresh cache when adding PPA via the add-apt-repository command.
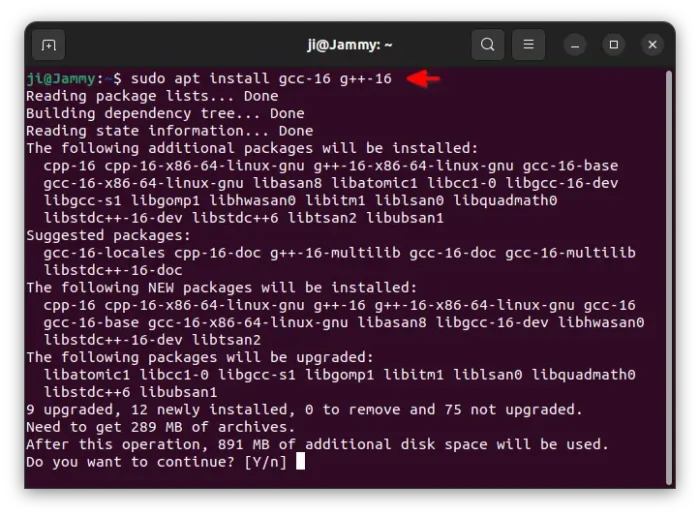
3. Finally GCC 16 by running command:
sudo apt install gcc-16 g++-16
For choice, you may also install the ga68-16 Algol 68 compiler, gccgo-16 Go compiler, as well as other GNU compilers.
And, you may replace number 16 accordingly (to 15, 14, 13, etc) to install other GCC compiler versions.
How to Use GCC 16
After installed the new version of GNU Compiler, you may run the similar command below to make use of it:
CC=gcc-16 CXX=g++-16 cmake ..
or use make CC=gcc-16 CXX=g++-16.
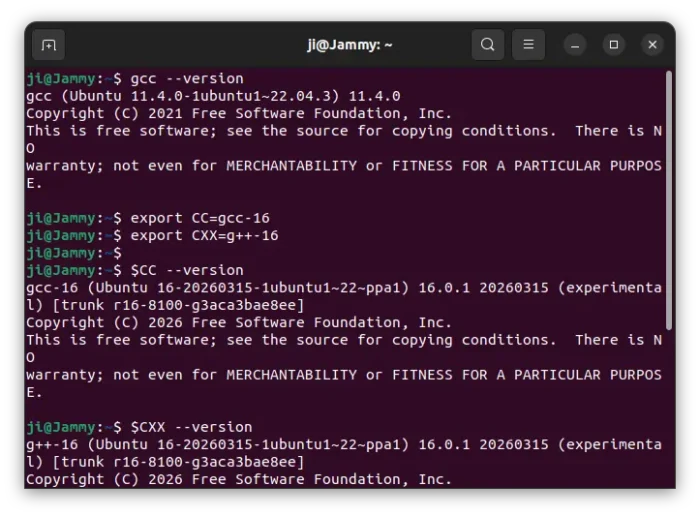
Or, run the command below to set environment variables, to temporarily use GCC 16 in the current shell (until you close the terminal).
export CC=gcc-16
export CXX=g++-16
Set GCC 16 as default (Optional)
The last step shows you how to temporarily use GCC 16 in terminal. If you want, you can set GCC 16 as default compiler.
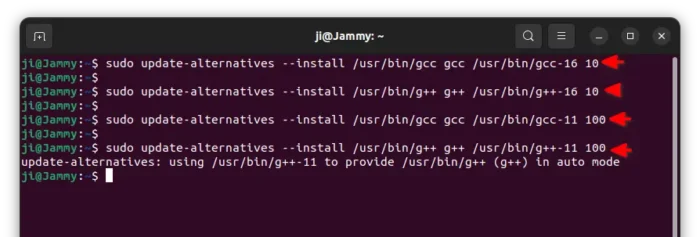
1. First, run the commands below to install GCC 16 as an alternative to default GCC/G++:
sudo update-alternatives --install /usr/bin/gcc gcc /usr/bin/gcc-16 10
sudo update-alternatives --install /usr/bin/g++ g++ /usr/bin/g++-16 10
2. Next, add the previous default GCC as alternatives:
sudo update-alternatives --install /usr/bin/gcc gcc /usr/bin/gcc-11 100
sudo update-alternatives --install /usr/bin/g++ g++ /usr/bin/g++-11 100
Here you need to replace number 11 depends on your previous default GCC version. It’s gcc-11 for 22.04, gcc-13 for 24.04, gcc-7 for 18.04.
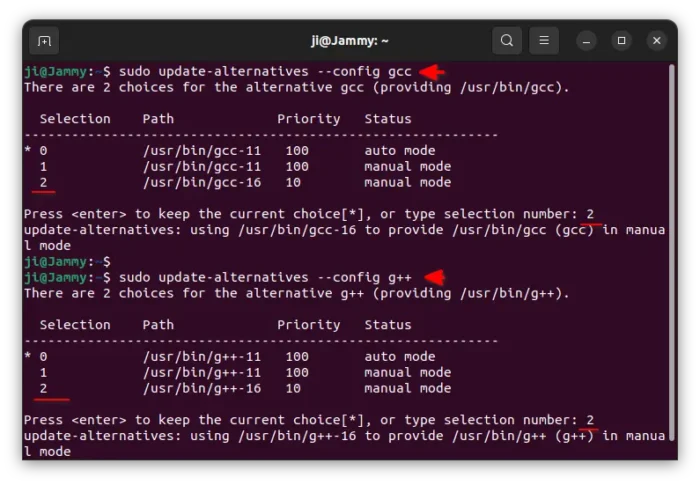
3. Finally, run the commands below one by one to configure the default GCC:
sudo update-alternatives --config gcc
sudo update-alternatives --config g++
And you can re-run the last 2 commands at any time to restore the default GCC to the previous version.
Uninstall:
Before uninstalling GCC 16, re-run the last 2 commands and set the default GCC/G++ to the previous default version.
Then, run the command below to uninstall GCC 16:
sudo apt remove --autoremove gcc-16 g++-16
And, remove the PPA by running command:
sudo add-apt-repository --remove ppa:ubuntu-toolchain-r/test
Finally, refresh cache via sudo apt update.
Tips: If you removed GCC 16, but the default version is not set back, then try running the commands below to restore:
sudo update-alternatives --set gcc /usr/bin/gcc-11
sudo update-alternatives --set g++ /usr/bin/g++-11
Also, replace number 11 with 7 for 18.04, 13 for 24.04, 15 for 26.04.