Archives For November 30, 1999

Sigil

Sigil epub ebook editor 0.9.10 was released earlier today with new features and various bug-fixes.

According to the changelog.txt, Sigil 0.9.10 adds following new features:

  • allow plugins to supply their own icon (plugin.png 48×48) for use on the Quick Launch Toolbar icons
  • extend plugin interface to include the status of the epub inside Sigil (modified or saved)
  • extend plugin interface to include the path to the saved epub file or the null string if never saved
  • extend Insert->Special Characters to include both a Greek letter panel and a mathematical symbol panel
  • add support for calibre:series and calibre:series_index to Metadata Editor for epub2
  • add support for calibre:title_sort to Metadata Editor for epub2
  • add support for clicking internal links in Preview to load the proper destination tab
  • add support for loading Qt’s base translation files if present. Allows buttons on native qt dialogs to be translated (Windows users may need to manually copy newer qtbase_xx.qm files to Sigil’s translation directory if they didn’t exist in Qt5.6.2)
  • allow user to add custom css rules to Preview/Book View by creating a file called “custom_preview_style.css” in the Sigil preferences folder (not responsible for custom css and ebook css fighting with each other)

There are also various bugs fixed in the release, see changelog file for details in Sigil github page.

How to Install Sigil 0.9.10 in Ubuntu:

UPDATE: The PPA is no longer updated! For the most recent packages, see here instead.

The new release can be easily installed in Ubuntu 16.04, Ubuntu 18.04, Linux Mint 19/18 via PPA (unofficial) repository.

1. Open terminal by either pressing Ctrl+Alt+T on keyboard or searching for “Terminal” from software launcher. When it opens, run command to add the PPA:

sudo add-apt-repository ppa:ubuntuhandbook1/sigil

Type your user password (no asterisks feedback due to security reason) when it prompts and hit Enter.

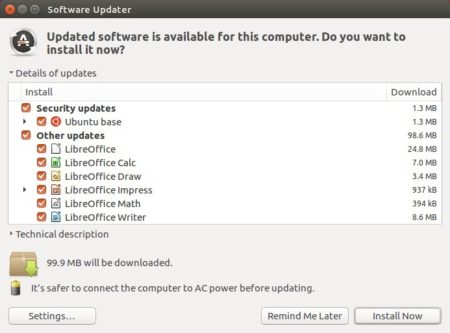
2. Then you can upgrade Sigil editor from an existing release via Software Updater:

Or install /upgrade Sigil via commands:

sudo apt update

sudo apt install sigil

Uninstall:

To remove the PPA repository, launch ‘Software & Updates’ utility and navigate to ‘Other Software’ tab.

To remove Sigil epub editor, either use system package manager or run command in terminal:

sudo apt-get remove --autoremove sigil sigil-data

Liferea Feed Reader

Liferea (Linux Feed Reader) 1.12.4 was released a day ago. The new release brings smaller bug and security fixes.

Changes in Liferea 1.12.4 include:

  • Add installable plugin to change accels
  • Fix segfault on date out of range
  • Fix Free Music Archive link in default OPMLs
  • Switch from persistent to session-only cookies
  • Fix unread count of vfolder
  • Add etra keywords in .desktop file (syndication; rss; atom)
  • Fix updating counters for remote sources
  • Updated cookie usage hint in FAQ

How to Install Liferea 1.12.4 in Ubuntu:

For Ubuntu 16.04, Ubuntu 18.04, Linux Mint 19, 18.x, the new release is available in a third-party PPA repository.

1. Open terminal either via Ctrl+Alt+T or by searching for ‘terminal’ from app launcher. When it opens, run command to add the PPA:

sudo add-apt-repository ppa:ubuntuhandbook1/apps

Type your password (no asterisks feedback while typing) when it prompts and hit Enter.

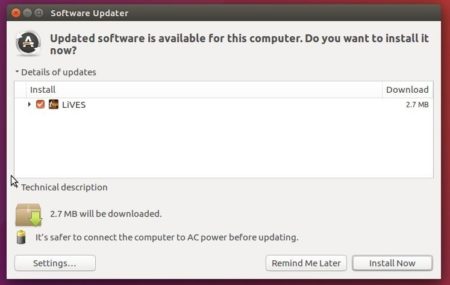
2. Then upgrade Liferea via Software Updater utility:

upgrade Liferea via Software Updater

or run commands one by one to install the Linux feed reader:

sudo apt-get update

sudo apt-get install liferea

Finally launch the news reader from your application launcher and enjoy! (Log out and log back if you don’t see the icon).

Uninstall Liferea:

As the PPA also contains many other software packages, you may remove it by launching Software & Updates and navigating to Other Software tab.

If you want to remove the news reader software, either use your system package manager or run command in terminal:

sudo apt-get remove --autoremove liferea

MPV Media Player 0.29.0 Released

Last updated: July 27, 2018

MPV media player logo

MPV media player, an open-source fork of mplayer2 and mplayer, reached 0.29.0 release with numerous changes.

MPV 0.29 now requires FFmpeg 4.0 or newer, and it features:

  • ao/openal: Add better sample format and channel layout selection
  • ao/openal: Add support for direct channels output
  • cocoa-cb: initial implementation via opengl-cb API
  • context_drm_egl: Introduce 30bpp support (requires Mesa 18.0.0_rc4 or later)
  • osx: add some more menu bar items as suggested by Apples’s HIG
  • vo_gpu: make screenshots use the GL renderer
  • x11: support Shift+TAB as an input key bind
  • ytdl_hook: support native dash demuxer, if present
  • ao_alsa, ao_pulse: reduce requested buffer size
  • audio: change format negotiation, remove channel remix fudging
  • client API: deprecate opengl-cb API and introduce a replacement API
  • demux: lower demuxer cache default sizes from 400MB/400MB to 50MB/150MB
  • osx: always deactivate the early opengl flush on macOS
  • scripting: change when/how player waits for scripts being loaded
  • vo_gpu: various improvements to HDR peak detection
  • vo_gpu: various improvements to HDR tone mapping
  • wayland_common: update to stable xdg-shell
  • ytdl_hook: parse youtube playlist urls to set start index if --ytdl-raw-option=yes-playlist= is specified
  • build: drop support for SDL1 (only applied to ao_sdl)

There are also many new command options, bug fixes and minor enhancements.

While no Ubuntu packages available at the moment, you may download the source and see more details at the link below:

MPV Release Page

UPDATE: This PPA now includes MPV 0.29 for Ubuntu 18.04.

Simply open terminal (Ctrl+Alt+T) and run following commands one by one to add the PPA and install mpv 0.29 in Ubuntu 18.04:

sudo add-apt-repository ppa:mc3man/mpv-tests

sudo apt-get install mpv

Battle For Wesnoth in Ubuntu

This quick tutorial shows you how to install the latest Battle for Wesnoth 1.14.3 in Ubuntu 18.04, and/or Ubuntu 16.04.

Battle for Wesnoth is an open source, turn-based strategy game with a high fantasy theme. It features both singleplayer and online/hotseat multiplayer combat.

While all current Ubuntu releases offer Wesnoth 1.12 in the main repositories, the latest version has reached 1.14.3.

Install Battle for Wesnoth 1.14 via PPA:

There’s an unofficial PPA that contains the game packages for Ubuntu 16.04, Ubuntu 18.04 so far.

1. Open terminal either via Ctrl+Alt+T or by searching for ‘terminal’ from software launcher. When it opens, run command to add the PPA:

sudo add-apt-repository ppa:vincent-c/wesnoth

Type your password (no asterisks feedback) when it prompts and hit Enter.

2. Then run 2 commands one by one to check updates and install the game:

sudo apt-get update

sudo apt-get install wesnoth-1.14

Once installed, launch it from your system software launcher and enjoy!

Uninstall:

To remove the PPA, open Software & Updates utility and navigate to Other Software tab.

To remove the game, open terminal and run command:

sudo apt-get remove --autoremove wesnoth

Microsoft PowerShell Core now can be easily installed in Ubuntu 18.04, Ubuntu 16.04 via Snap package.

PowerShell is a task automation and configuration management framework from Microsoft, consisting of a command-line shell and associated scripting language.

It was announced on MSDN blogs:

    The goal of PowerShell Core is to be the ubiquitous language for managing your assets in the hybrid cloud. That’s why we’ve worked to make it available on many operating systems, architectures, and flavors of Linux, macOS, and Windows as possible.

    Today, we’re happy to announce an addition to our support matrix: PowerShell Core is now available as a Snap package.

How to Install PowerShell in Ubuntu via Snap:

Snap packages are containerized applications that can be installed on many Linux distributions. Snap bundles its dependencies in a single package and updates itself automatically once new version is published.

To install PowerShell snap, open Ubuntu Software, search for and install PowerShell Core:

or open terminal (Ctrl+Alt+T) and install it by running command:

snap install powershell --classic

NOTE for Ubuntu 16.04 users first time installing a snap package, install snapd before getting started:

sudo apt install snapd snapd-xdg-open

Ubuntu 17.10 Reached End of Its Life

Last updated: July 20, 2018

Ubuntu 18.04

Ubuntu 17.10 Artful Aardvark reached end of life on July 19 2018. It was announced last night:

This is a follow-up to the End of Life warning sent earlier this month to confirm that as of today (July 19, 2018), Ubuntu 17.10 is no longer supported. No more package updates will be accepted to 17.10, and it will be archived to old-releases.ubuntu.com in the coming weeks.

The original End of Life warning follows, with upgrade instructions:

Ubuntu announced its 17.10 (Artful Aardvark) release almost 9 months ago, on October 19, 2017. As a non-LTS release, 17.10 has a 9-month support cycle and, as such, the support period is now nearing its
end and Ubuntu 17.10 will reach end of life on Thursday, July 19th.

At that time, Ubuntu Security Notices will no longer include information or updated packages for Ubuntu 17.10.

Users of Ubuntu 17.10 are recommended to upgrade to Ubuntu 18.04 LTS. Before following the official documentation, you need to first make backups, uninstall proprietary drivers, purge third-party PPAs.

And it’s always a good choice to do a fresh install of Ubuntu 18.04 LTS.

Download Ubuntu 18.04

MusicBrainz Picard 2.0 stable was released today many fixes and new features and much needed upgrades!

MusicBrainz Picard 2.0 release highlights:

  • Add Retina and Hi-DPI display support.
  • Add DSF file support
  • Add keyboard shortcut for deleting scripts from options > scripting page
  • Support only 64 bit Picard builds from 2.0
  • Update dependencies minimal requirements: Python 3.5, PyQt 5.7, and Mutagen 1.37.
  • And numerous bug-fixes, UI and performance improvements.

How to Install MusicBrainz Picard 2.0 in Ubuntu:

The official PPA has built the music tagger for Ubuntu 17.10, Ubuntu 18.04, and Ubuntu 18.10.

1. Launch terminal either via Ctrl+Alt+T keyboard shortcut or searching for ‘terminal’ from software launcher. When it opens, run command to add the PPA:

sudo add-apt-repository ppa:musicbrainz-developers/stable

Type your user password (no asterisks feedback) when it prompts and hit Enter to continue.

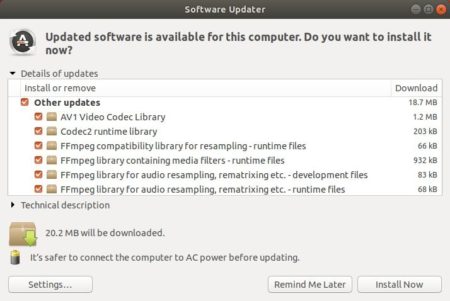
2. If a previous version was installed, upgrade the software via Software Updater:

or run following commands one by one in terminal to install or upgrade to MusicBrainz Picard 2.0:

sudo apt-get update

sudo apt-get install picard

Uninstall:

To remove the PPA, launch Software & Updates and navigate to Other Software tab.
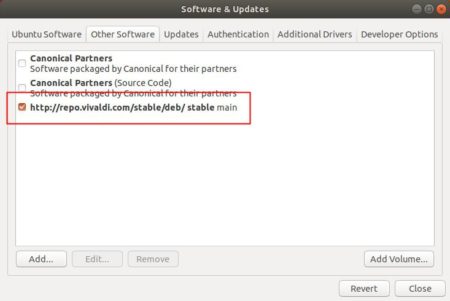
To remove MusicBrainz Picard music tagger, run command in terminal:

sudo apt-get remove --autoremove picard

wireshark

Wireshark network packet analyzer 2.6 stable series now is available to install in all current Ubuntu releases via the stable PPA.

Wireshark 2.6 was released 3 months ago in Apirl. It mainly features:

  • Support for HTTP Request sequences
  • Support for MaxMind DB files. Support for GeoIP and GeoLite Legacy databases has been removed.
  • The Windows packages are now built using Microsoft Visual Studio 2017.
  • The IP map feature (the “Map” button in the “Endpoints” dialog) has been removed.

Install Wireshark 2.6 via PPA in Ubuntu:

So far the PPA contains Wireshark 2.6.1 for Ubuntu 18.04, Ubuntu 17.10, Ubuntu 16.04, Ubuntu 14.04.

1. Open terminal by either pressing Ctrl+Alt+T or searching for ‘terminal’ from app launcher. When it opens, run command:

sudo add-apt-repository ppa:wireshark-dev/stable

Type your user password (no asterisks feedback due to security reason) when it prompts and hit Enter.

2. If you’ve the previous Wireshark 2.4.x installed on your system, remove it first via command:

sudo apt-get remove --autoremove wireshark

3. Finally run following commands one by one in terminal to install Wireshark 2.6:

sudo apt-get update

sudo apt-get install wireshark

Uninstall:

To remove the software, open terminal and run command:

sudo apt-get remove --autoremove wireshark wireshark-*

And remove the PPA by launching Software & Updates -> Other Software tab.
Nvidia Linux driver

For Ubuntu 18.04 users plagued by screen tearing issue while using NVIDIA proprietary drivers, this quick tutorial may help you via enable PRIME Synchronization on Optimus.

Screen tearing usually happens on Ubuntu Linux laptop that uses Prime to switch between NVIDIA and Intel drivers.

1. Open terminal (either via Ctrl+Alt+T or by searching for ‘terminal’ from software launcher) and run command to create a new config file:

sudo gedit /etc/modprobe.d/nvidia-drm-nomodeset.conf

Type your password (no asterisks feedback) when it prompts and hit Enter.

2. When the file opens after running the previous command, add following line and save the file.

options nvidia-drm modeset=1

3. Finally update intramfs and reboot your machine.

sudo update-initramfs -u

To check if previous changes work after reboot, run command:

sudo cat /sys/module/nvidia_drm/parameters/modeset

It should output ‘Y’.

In addition, to get much SMOOTHER Nvidia window dragging experience, you can also do:

1. Set maximum performance in Nvidia X Server Settings -> PowerMizer.

2. If you have MORE than enough RAM, set swap tendency to a MUCH lower value by running command to edit sysctl.conf:

sudo gedit /etc/sysctl.conf

and add following 2 lines when the file opens:

via: ubuntuforums

gnome shell

After doing a fresh install of Ubuntu 18.04 on my old ASUS laptop, I found that the touchpad right-click does not work. This is because Ubuntu 18.04 by default acts right-click when you perform two-finger click on touchpad.

While my laptop touchpad does not have physical buttons, I have to do two-finger click to perform right-click.

So following steps will show you how to make right-click (clicking on the bottom right area of the touchpad) working again in touchpad without a physical button in Ubuntu 18.04.

1. Open Ubuntu Software, search for and install Gnome Tweaks.

2. Launch Gnome Tweaks and navigate to Keyboard & Mouse settings page.

Under Mouse Click Emulation, simply click enable the second option: “Area – Click the bottom right of the touchpad for right-click and the bottom middle for middle click.”

That’s it. Enjoy!