Archives For November 30, 1999

Vivaldi Browser 1.13 Released with Improvements

Last updated: November 23, 2017

Vivaldi browser has reached the new stable 1.13 release with improvements to download and tabs functionality.

Vivaldi Browser 1.13 features:

  • Warning dialog if a download is incomplete
  • Ability to pause and resume downloads
  • Download speed displayed in the progress bar
  • Window Panel and tree-style tabs functionality

Download / Install Vivaldi Browser:

For Ubuntu, it offers the DEB package available for download at the link below:

Download Vivaldi Browser

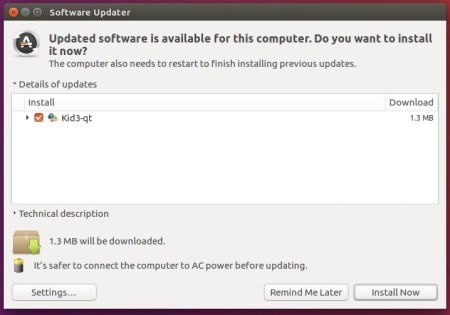
For those who have installed a previous release, and enabled the Vivaldi Linux repository, upgrade the browser via Software Updater:

To manually add the repository, run command to edit the source file:

gksudo gedit /etc/apt/sources.list.d/vivaldi.list

When the file opens, un-comment or add (if empty) the following line and save it:

deb http://repo.vivaldi.com/stable/deb/ stable main

Although they are not officially announced, VLC media player 2.2.7 (and 2.2.8 with single fix) now are available for download. Here’s how to install it in Ubuntu 16.04, Ubuntu 14.04, and derivatives.

Changes in VLC 2.2.7 include:

  • Fix flac heap write overflow on format change
  • Fix crash in libavcodec module (heap write out-of band) (CVE-2017-10699)
  • Fix infinite loop in sami subtitle
  • Fix AAC 7.1 channels detection
  • Fix potential crash in ASX parser
  • Fix AVI read/write overflow
  • Fix compatibility with Mac OS High Sierra
  • Fix regression in ASS subtitle decoding for Mac OS
  • Fix crash during automatic update in Mac OS X. Some users might need to manually update to the newest version.
  • Fix Direct3D9 output with odd offsets
  • Fix crash in MTP
  • Support libupnp 1.8

And VLC 2.2.8 fixed AVI invalid pointer dereferences for demuxers.

VLC 2.2.7

Install VLC 2.2.7 in Ubuntu 16.04/14.04:

There are quite a few PPAs with VLC packages for Ubuntu. At the moment, you can install VLC 2.2.7 in Ubuntu easily via Jonathon F’s PPA.

1. Open terminal via Ctrl+Alt+T or by searching “Terminal” from start menu. When it opens, run command to add PPA:

sudo add-apt-repository ppa:jonathonf/vlc

Type in your password (no visual feedback due to security reason) when prompts and hit Enter.

VLC 2.2.5 PPA

2.Remove old VLC version, if you installed it from Ubuntu Software, to avoid a package conflict:

sudo apt remove --autoremove vlc vlc-nox

3. Finally run commands in terminal to check updates and install VLC 2.2.7:

sudo apt update && sudo apt install vlc

How to Restore:

To restore VLC media player to the stock version in your main Ubuntu repository, run command to purge the PPA:

sudo apt install ppa-purge && sudo ppa-purge ppa:jonathonf/vlc

Supertuxkart 0.9.3 Final Released (How to Install)

Last updated: November 20, 2017

The open source kart racing game, Supertuxkart 0.9.3, was released earlier today. The new release features in-game screen recording and Android support.

Supertuxkart 0.9.3 release highlight:

  • Reduced RAM and VRAM usage, reducing load times.
  • New mesh format optimized for space and hardware skinning
  • Code refactoring of both render pipelines
  • New karts Wilber, Hexley, Kiki and updated Konqi.
  • New tracks Cornfield Crossing and Candela City
  • Physics improvements and various physics bugfixes
  • Kart GFX improvements (exhaust and headlight)
  • In-game screen recording powered by libopenglrecorder
  • High quality mipmap generation by Stragus
  • New smoother camera
  • New Grand Prix win scene
  • Gamepad configuration bugfixes
  • 3 Strikes Battle: added spare tire karts
  • Various improvements (see the release note)

How to Install Supertuxkart 0.9.3 in Ubuntu:

There’s a stable PPA contains the new 0.9.3 release for Ubuntu 14.04, Ubuntu 16.04, Ubuntu 17.04, Ubuntu 17.10, and next Ubuntu 18.04.

1. Open terminal via Ctrl+Alt+T or by searching it from app launcher. When it opens, run command to add the PPA:

sudo add-apt-repository ppa:stk/dev

Input your password (no visual feedback while typing) when it prompts and hit Enter.

2. If you have a previous release installed, just upgrade it via Software Updater.

Or run commands in terminal to install or upgrade to Supertuxkart 0.9.3:

sudo apt-get update

sudo apt-get install supertuxkart

Uninstall:

You can launch Software & Updates utility and navigate to ‘Other Software’ tab to disable or remove the PPA.

To remove the game, either use your system package manager or run command:

sudo apt-get remove --autoremove supertuxkart

YakYak, an open-source desktop chat client for Google Hangouts, now can be easily installed in Ubuntu via Snap package.

YakYak features:

  • Send/receive chat messages
  • Create/change conversations (rename, add people)
  • Leave/delete conversation
  • Notifications (using native OS notifications)
  • Drag-drop, copy-paste or attach-button for image upload.
  • Hangupsbot sync room aware (no bot name, proper user pics)
  • Show inline images
  • Send presence/focus/typing/activeclient to behave like a proper client
  • History scrollback
  • Video/audio integration (open in chrome)
  • Focus/typing indications (mainly a design issue. keep it clean)
  • Offer alternative color schemes

YakYak now is available as Snap, simply search for and install ‘yakyak’ in Ubuntu Software (need login with Ubuntu One account).

Or open terminal via Ctrl+Alt+T and run command instead to install the snap:

sudo snap install yakyak

Input your password (no visual feedback while typing) when it prompts and hit Enter.

To remove the software, either use Ubuntu Software or run command:

sudo snap remove yakyak

VidCutter, the simplest & fastest video cutting and joining application, has reached the 5.0 release with great new features and other changes.

VidCutter 5.0 release highlights:

  • New ‘SmartCut’ feature introduced for frame accurate cuts.
  • New progress bars on clips in timeline
  • New “View keyframes” button option available under Video Info
  • New app icon
  • Improvements to stream mapping, and standard quick cutting.
  • countless more improvements and fixes, see here.

How to Install VidCutter 5.0 in Ubuntu:

The developer’s PPA contains the latest packages for Ubuntu 16.04, Ubuntu 17.04, Ubuntu 17.10, and their derivatives.

1. Open terminal (Ctrl+Alt+T) and run command to add the PPA:

sudo add-apt-repository ppa:ozmartian/apps

Type in your password (no visual feedback while typing due to security reason) when it asks and hit Enter.

2. Then update and install the app via commands:

sudo apt-get update

sudo apt-get install vidcutter

Remove VidCutter:

To remove the software, run command in terminal:

sudo apt-get remove --autoremove vidcutter

And remove the PPA via Software & Updates utility under ‘Other Software’ tab.

SMPlayer 17.11.2 Released with Fixes for KDE

Last updated: November 16, 2017

SMplayer

The SMPlayer media player reached the 17.11.2 release earlier today with a few bug-fixes for KDE users.

SMPlayer 17.11.2 fixed:

  • A crash that may happen on KDE when the global menus are activated.
  • SMPlayer won’t cancel logout in KDE.
  • The seek function in the MPRIS2 code has been fixed.

SMPlayer with Mac skin

How to Install SMPlayer 17.11.2 in Ubuntu:

For Ubuntu 14.04, Ubuntu 16.04, Ubuntu 17.04, Ubuntu 17.10, and derivatives, the latest SMPlayer packages are available in the PPA repository.

1. Search for and launch “terminal” from application launcher. When it opens, run command:

sudo add-apt-repository ppa:rvm/smplayer

Input your password (no visual feedback while typing) when it asks and hit Enter.

Smplayer PPA

2. Then upgrade SMPlayer using Software Updater (or Update Manager):

upgrade smplayer

or run commands in terminal to install (or upgrade) the media player:

sudo apt-get update

sudo apt-get install smplayer smtube smplayer-themes

Uninstall:

To remove SMPlayer, run command in terminal:

sudo apt-get remove --autoremove smplayer smtube smplayer-*

And remove the PPA via “Software & Updates” utility under Other Software tab.

IntelliJ IDEA 2017.2.6 Released with Various Fixes

Last updated: November 15, 2017

JetBrains’ IntelliJ IDEA Java ide has reached the 2017.2.6 release with 2 new features and various bug-fixes.

IntelliJ IDEA 2017.2.6 added or fixed:

  • Allow “generate classes from database schema” for plain-JDBC developers
  • Allow “Return of ‘null'” to be ignored when return type is java.lang.Void
  • Code inspection hangs in the latest 2017.2.5 release
  • IntelliJ crashes system when generating a database diagram
  • Error on Refresh Gradle Project using Java 9
  • application properties not set when starting Spring Boot service in IDEA
  • New > Tapestry > Component / Page operation does nothing
  • “Open Task” makes the whole IDE freeze when selecting a task too quickly
  • And see the release note for more.

IntelliJ IDEA 2017.2 splash

How to Install IntelliJ IDEA 2017.2.6 in Ubuntu:

The official Linux packages are available for download at the link below:

IntelliJ IDEA Linux Download

Grab the package, extract, and run the executable to launch the IDE. You may manually create an application shortcut to be able to start it from app launcher.

For Ubuntu 14.04, Ubuntu 16.04, Ubuntu 17.04, Ubuntu 17.10, you can also use the installer script that automatically downloads the IDE from JetBrains’ web server, installs it to /opt/, and finally creates an app shortcut for it.

installer script (.deb) for IntelliJ IDEA Community | IntelliJ IDEA Ultimate

Install the script via dpkg command:

sudo dpkg -i ~/Downloads/intellij-idea-*_2017.2.6-1_all.deb

Alternatively, simply open terminal (Ctrl+Alt+T) and run following commands one by one to add the PPA and install the script:

sudo add-apt-repository ppa:ubuntuhandbook1/apps

sudo apt-get update

sudo apt-get install intellij-idea-community

replace intellij-idea-community with intellij-idea-ultimate in the last command to install the ultimate edition.

Uninstall:

To remove the Java IDE, simply run command in terminal:

sudo apt-get remove --autoremove intellij-idea-community intellij-idea-ultimate

And remove the PPA via Software & Updates utility under Other Software tab.

Firefox 57 Released! Over 2x Faster Than Before

Last updated: November 14, 2017

Firefox 55

Mozilla Firefox reached the 57.0 release earlier today. The new release, Firefox Quantum, features a completely new browsing engine makes it over twice as fast as before.

Mozilla Firefox 57.0 release highlights:

  • A completely new browsing engine.
  • A redesigned interface, and optimizations for touch screens
  • A unified address and search bar.
  • A revamped new tab page that includes top visited sites, recently visited pages, and recommendations from Pocket
  • An updated product tour to orient new and returning Firefox users
  • AMD VP9 hardware video decoder support for improved video playback with lower power consumption
  • An expanded section in preferences to manage all website permissions
  • Also various security fixes and other changes. See release note.

How to install Firefox 57 in Ubuntu:

For Ubuntu 14.04, Ubuntu 16.04, Ubuntu 17.04, Ubuntu 17.10, the latest Firefox 57 will be published through Ubuntu security & updates repository.

Once it’s published (check Firefox in launchpad), you can upgrade Firefox via Software Updater:

upgrade firefox

Can’t wait? Mozilla offers non-install Linux packages (select i686 for 32-bit, x86_64 for 64-bit os):

Download Firefox (non-install)

Linux Kernel

Linux Kernel 4.14 stable was released yesterday. Linus Torvalds announced that:

No surprises this week, although it is probably worth pointing out how the 0day robot has been getting even better (it was very useful before, but Fengguang has been working on making it even better, and reporting the problems it has found).

Sure, some of the new reports turned out to be just 0day doing things that just don’t work (ie KASAN with old gcc versions, but also doing things like loading old ISA drivers in situations that just don’t make sense – remember when you couldn’t even ask if the hardware existed or not, and just had to know), but even then it’s been all good.

The appended shortlog is obviously only for the (small) haul since rc8, and it really is tiny. Not very many commits, and they are small. The biggest thing that stands out in the diffstat is the “leaking_addresses” perl script, which is actually under active development, but I put the first version in for 4.14 just so that people could see that initial state and start looking at the end result and perhaps ask themselves “should my code make these kernel addresses visible to user space”.

How to Install Kernel 4.14 in Ubuntu / Linux Mint:

The mainline kernels do not include any Ubuntu-provided drivers or patches. They are not supported and are not appropriate for production use.

The mainline kernel PPA has made the new kernel binaries for Ubuntu, available for download at the link below:

Download Kernel 4.14 (.deb)

Depends on your OS type, download and install the packages in turns:

  1. linux-headers-4.14.0-xxxxxx_all.deb
  2. linux-headers-4.14.0-xxx-generic(/lowlatency)_xxx_amd64(/i386).deb
  3. linux-image-4.14.0-xxx-generic(/lowlatency)_xxx_amd64(/i386).deb

Select generic for common system, and lowlatency for a low latency system (e.g. for recording audio), amd64 for 64bit system, i386 for 32bit system, or armhf, arm64, etc for other OS types.

To get the Kernel 4.14 from the command console, run the commands below one by one:

For 64-bit OS:

cd /tmp/

wget http://kernel.ubuntu.com/~kernel-ppa/mainline/v4.14/linux-headers-4.14.0-041400_4.14.0-041400.201711122031_all.deb

wget http://kernel.ubuntu.com/~kernel-ppa/mainline/v4.14/linux-headers-4.14.0-041400-generic_4.14.0-041400.201711122031_amd64.deb

wget http://kernel.ubuntu.com/~kernel-ppa/mainline/v4.14/linux-image-4.14.0-041400-generic_4.14.0-041400.201711122031_amd64.deb

sudo dpkg -i *.deb

for 32-bit OS:

cd /tmp/

wget http://kernel.ubuntu.com/~kernel-ppa/mainline/v4.14/linux-headers-4.14.0-041400_4.14.0-041400.201711122031_all.deb

wget http://kernel.ubuntu.com/~kernel-ppa/mainline/v4.14/linux-headers-4.14.0-041400-generic_4.14.0-041400.201711122031_i386.deb

wget http://kernel.ubuntu.com/~kernel-ppa/mainline/v4.14/linux-image-4.14.0-041400-generic_4.14.0-041400.201711122031_i386.deb

sudo dpkg -i *.deb

After installed these .debs, restart and enjoy!

For those who prefer a graphical tool, try Ukuu.

Uninstall Linux Kernel 4.13:

Start/restart your machine and select boot with the previous kernel in Grub2 -> Advanced menu. Then use Ubuntu Tweak, or other system tool to remove the Kernel 4.14, or you may see this how to remove old kernels tutorial.

The latest release of Mesa 3D graphics library 17.2.4 now is available to install easily via Ubuntu-X Team PPA in Ubuntu 16.04 and Ubuntu 17.10.

Mesa 17.2.4 was released more than a week ago with several Intel OpenGL/Vulkan fixes, memory leak fixes for the Mesa state tracker, a Vulkan windowing system integration memory leak fix for X11, and some other small fixes.

How to Install Mesa 17.2.4 in Ubuntu 16.04, 17.10 via PPA:

1. Open terminal either via Ctrl+Alt+T keyboard shortcuts or by searching for “terminal” from application launcher. When it opens, run command to add the PPA:

sudo add-apt-repository ppa:ubuntu-x-swat/updates

Input your password (no visual feedback while typing) when it prompts and hit Enter.

Mesa ppa

2. Then refresh your system and install upgrades via commands:

sudo apt-get update

sudo apt-get install dist-upgrade

3. To check result, run command:

glxinfo | grep "OpenGL version"

How to Restore:

To revert back to the original Mesa 3D graphics library in Ubuntu, get into command console and run command:

sudo apt install ppa-purge && sudo ppa-purge ppa:ubuntu-x-swat/updates