Archives For November 30, 1999

The Arduino team announced the 2.3 release of the Arduino IDE this Wednesday.

Since v2.3, the debug feature is now stable and fully incorporated into the IDE! It’s now based on a standard framework, and enabled for all the Arduino boards based on the Mbed™ core, include GIGA R1 WiFi, Portenta H7, Opta, Nano BLE and Nano RP2040 Connect.

Maintainers of Arduino cores can now add debugging for any board. And, the upcoming release of the Arduino-ESP32 core will support the new debug framework!

Continue Reading…

Install latest Arduino in Ubuntu

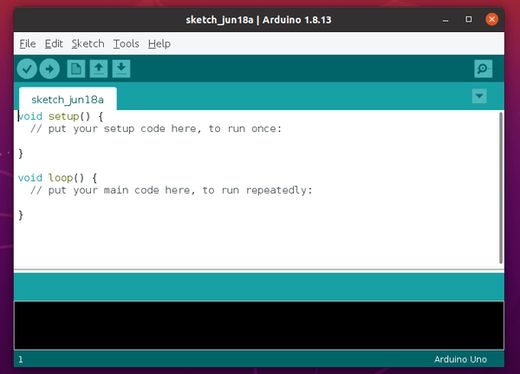
Arduino IDE 1.8.13 was released a day ago. Here’s how to install it in Ubuntu 20.04, Ubuntu 19.10, Ubuntu 18.04.

Arduino 1.8.13 release highlights:

  • Fixed crash on MacOSX >=10.15 with multiple monitor setups.
  • The boards listed in the “Tools” menu are now grouped by platform.
  • Fixed save of proxy username/password settings in “manual proxy” section.
  • Allow baudrate/config change when the Serial Monitor/Plotter is disabled
  • Improve network board detection.
  • Any many other changes, see release note.

How to Install Arduino 1.8.13 in Ubuntu:

You can install either the snap package from Ubuntu Software or flatpak package from flathub repository.

1.) For the official Linux package, go to the link below:

Download Arduino

Scroll download and click download “Linux 64-bits” (or 32-bits if you’re sill running 32 bit system) package.

2.) Open terminal (Ctrl+Alt+T) and run command to extract Arduino to /opt for global use:

cd ~/Downloads && sudo tar -Jxvf arduino-*.tar.xz -C /opt/

Type user password (no visual feedback) for sudo prompts when it asks and hit Enter.

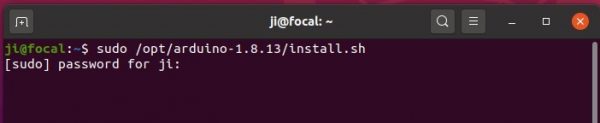
3.) Run the installer.sh script to create app launcher:

sudo /opt/arduino-*/install.sh

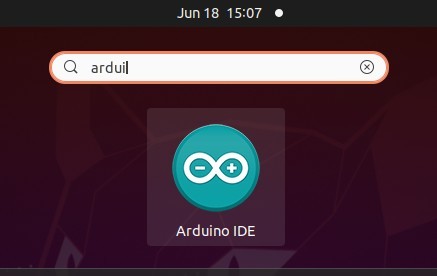
Finally open the IDE from ‘Show Applications’ menu and enjoy!

Uninstall Arduino:

To uninstall the application shortcut, simply run command:

sudo /opt/arduino-*/uninstall.sh

And also remove the software directory via command:

sudo rm -r /opt/arduino-*

Install latest Arduino in Ubuntu

Quick tutorial shows you how to the latest Arduino IDE, so far its version 1.6.6, in all current Ubuntu releases.

The open-source Arduino IDE has reached the 1.6.6 release recently with lots of changes. The new release has switched to Java 8, which is now both bundled and needed for compiling the IDE. See the RELEASE NOTE for details.

Arduino 1.6.6 in Ubuntu 15.10

For those who don’t want to use the old 1.0.5 version available in Software Center, you can always follow below steps to install Arduino in all Ubuntu releases:

Replace the words in red for future releases

1. Download the latest packages, Linux 32-bit or Linux 64-bit, from the official link below:

www.arduino.cc/en/Main/Software

Don’t know your OS type? Go and check out System Settings -> Details -> Overview.

2. Open terminal from Unity Dash, App Launcher, or via Ctrl+Alt+T keys. When it opens, run below commands one by one:

Navigate to your downloads folder:

cd ~/Downloads

navigate-downloads

Decompress the downloaded archive with tar command:

tar -xvf arduino-1.6.6-*.tar.xz

extract-archive

Move the result folder to /opt/ directory for global use:

sudo mv arduino-1.6.6 /opt

move-opt

3. Now the IDE is ready for use with bundled Java. But it would be good to create desktop icon/launcher for the application:

Navigate to install folder:

cd /opt/arduino-1.6.6/

Give executable permission to install.sh script in that folder:

chmod +x install.sh

Finally run the script to install both desktop shortcut and launcher icon:

./install.sh

In below picture I’ve combined 3 commands into one via “&&”:

install-desktop-icon

Finally, launch Arduino IDE from Unity Dash, Application Launcher, or via Desktop shorcut.

Install Gnoduino IDE Ubuntu

This simple tutorial shows how to install Gnoduino IDE, implementation of well-known Arduino IDE for GNOME, in Ubuntu 14.04 & Ubuntu 12.04.

Why Gnoduino?

The original Arduino IDE is written in Java however, and that makes for poor integration on the Linux platform, particularly with Ubuntu Unity. Luckily enough someone has been busy to do a simple rewrite of the original IDE in Python and GTK, making a fully Linux native IDE, and it’s called Gnoduino. This implementation is targeted at GNOME and its purpose is to be light.

Gnoduino IDE

How to Install Gnoduino IDE in Ubuntu:

Besides building from source, the IDE is available in PPA for Ubuntu 14.04 and Ubuntu 12.04.

Press Ctrl+Alt+T on keyboard to open the terminal. When it opens, paste the command below and hit enter to run. Type in your password when prompt.

sudo add-apt-repository ppa:pmjdebruijn/gnoduino-release

This will add the Gnoduino PPA into your system.

Add Gnoduino IDE PPA

After that, run commands below to update package lists and install the IDE:

sudo apt-get update; sudo apt-get install gnoduino

Once installed, open it from menu or Unity dash and enjoy!