


For those who don’t use the default Gnome screenshot tool, here’s how to make the ‘PrintScreen’ keyboard key take a screenshot via another (Shutter in this case) screen capturing tool.
1. Launch System Settings and navigate to Devices -> keyboard.
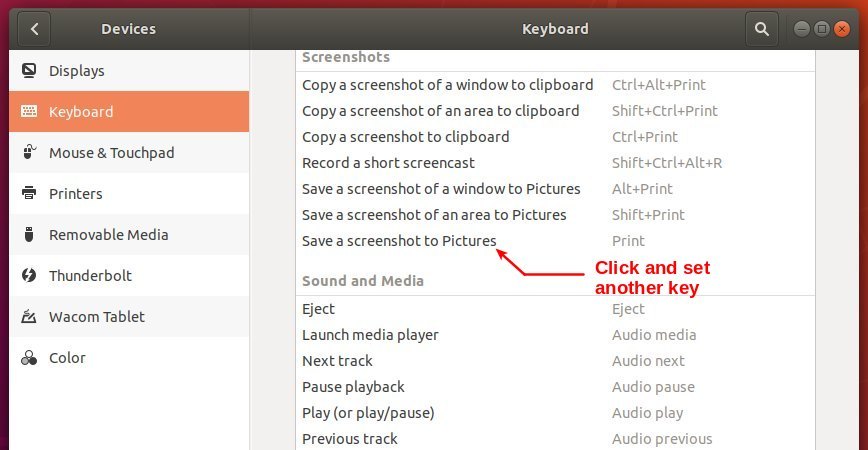
2. In right, scroll down and find out the line says “Save a screenshot to Pictures“. Click on it, and in pop-up dialog change the shortcut from Print to any other key.
3. Scroll down and click plus sign to add a new shortcut, then:
- type a name for the new shortcut.
- type
shutter -sas the shortcut function. - set the shortcut key to PrintScreen.
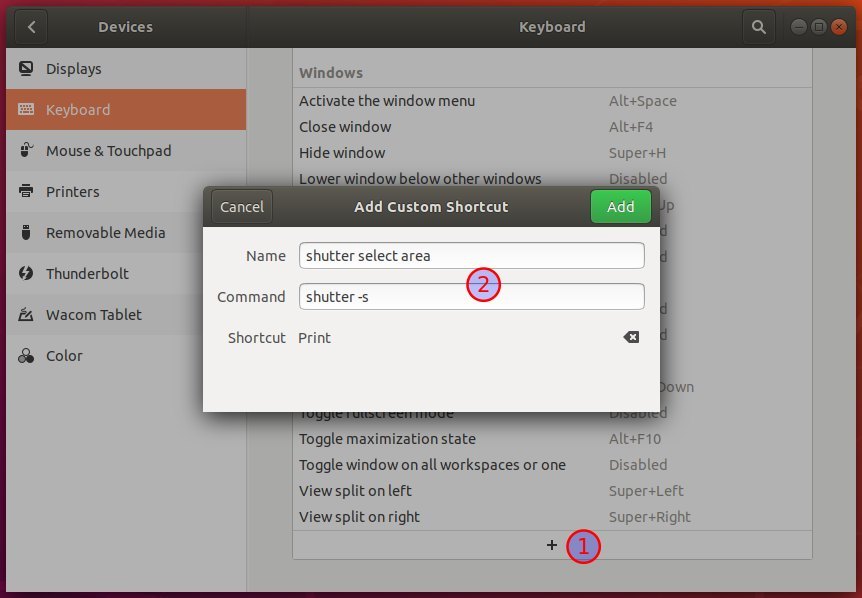
Finally click the Add button and done.
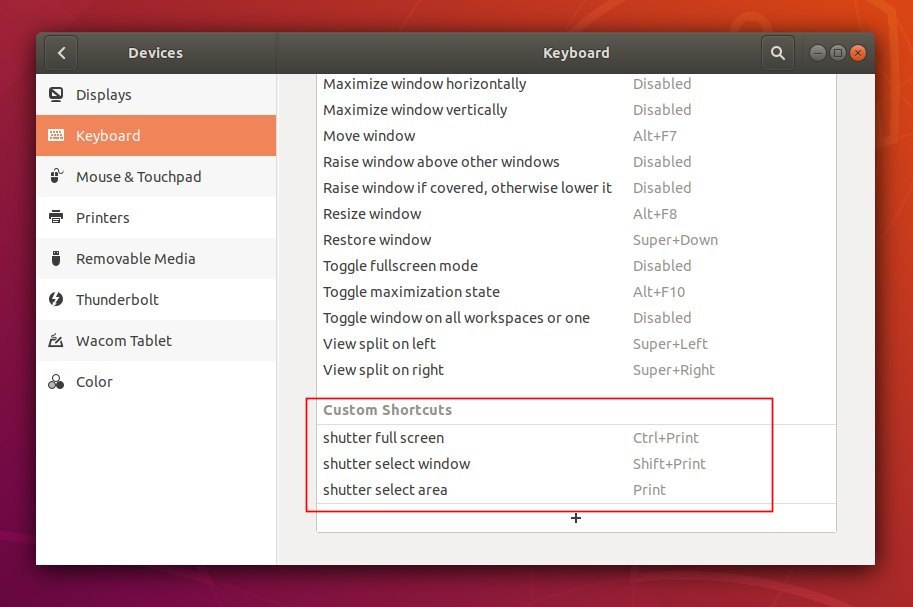
In addition, you can add more shortcuts for shutter, e.g., shutter -f to take a screenshot of full-screen and shutter -w for window capturing.


Worked pretty nice here.
Ubuntu 18.04.2 LTS, 64-bit
Thanks!