![]()
This is a step by step beginner’s guide shows how to disable IPv6 in Ubuntu 24.04 LTS with or without system restart.
IPv6 is the future of internet protocols. But for some reasons, such as compatibility with certain networks, testing purpose, or security concerns, or just because don’t use that thing, users may want to disable IPv6 in their machines.
Disabling IPv6 is generally safe. There may be small performance loss on some websites and services that are optimized for IPv6, though you can re-enable it at any time as you want.
Option 1: Disable IPv6 using Kernel Parameters
The ipv6 kernel module has options to either disable the whole functionality, or disable ipv6 on all network interfaces.
You can either configure Grub boot-loader to load kernel with ipv6 disabled on every startup, or change the kernel parameters at runtime without restarting your machine.
1. Use sysctl to disable IPv6 without reboot
sysctl is a command line tool configure kernel parameters at runtime.
To disable ipv6 on all network interfaces, simply use command:
sudo sysctl --write net.ipv6.conf.all.disable_ipv6=1
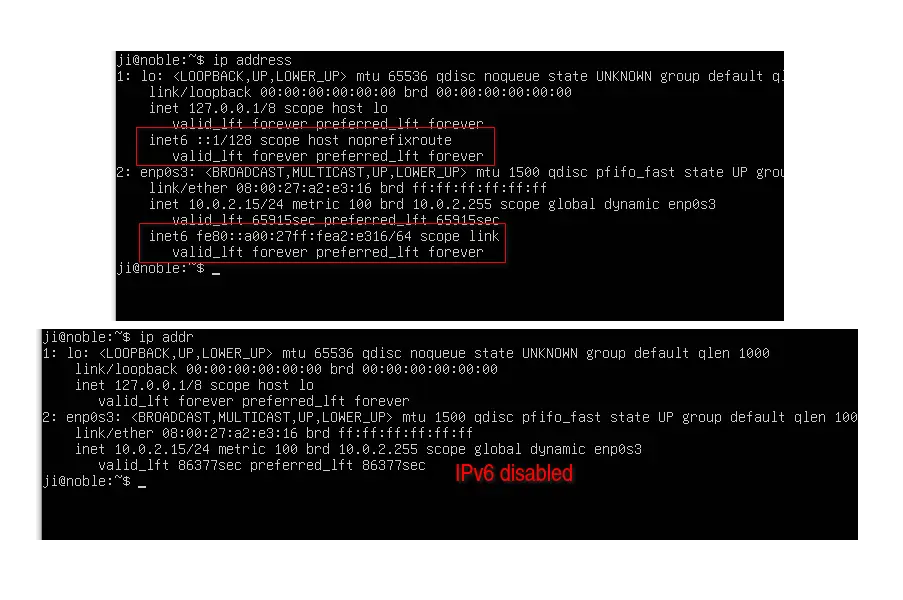
IPv6 will be disabled immediately and persist until you reboot the machine. To verify, either use ip addr command to see if there’s “inet6” sections or run ip -6 addr to check if there’s any ouput.
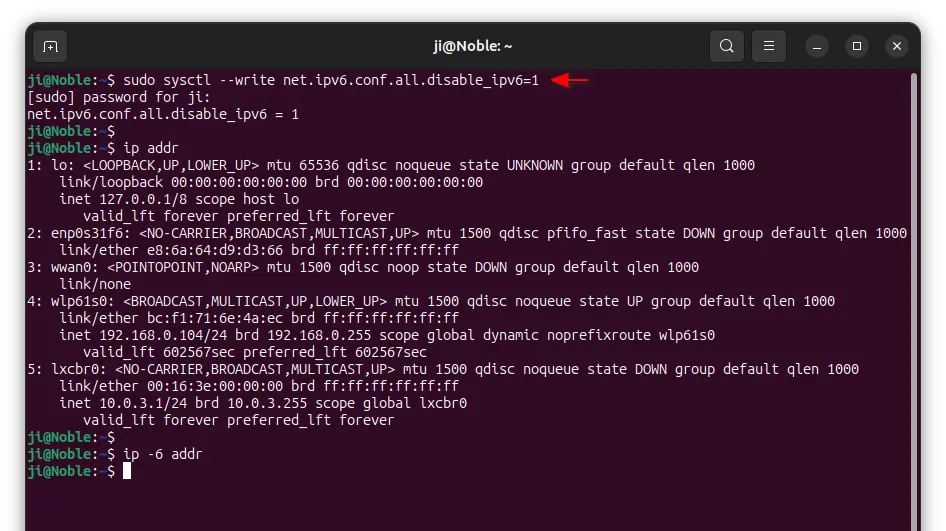
For choice, you may disable ipv6 for certain network interface. First, use the command ip addr to get network interfaces names. In my case (see the screenshot above), I have lo, enp0s31f6, wlp61s0, etc, network interfaces.
For example, disable ipv6 only for wlp61s0, use command:
sudo sysctl --write net.ipv6.conf.wlp61s0.disable_ipv6=1
And, by replacing 1 in commands above with 0 will re-enable ipv6 for all or certain network devices.
Without running the sysctl command again and again, you may write the rules into either /etc/sysctl.conf file or custom file under /etc/sysctl.d/ directory.
To edit the /etc/sysctl.conf file, use command:
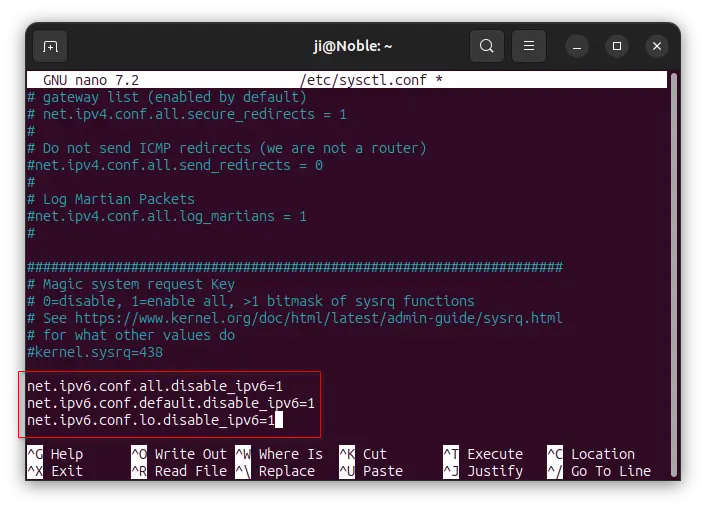
sudo nano /etc/sysctl.conf
When the file opens in the command line text editor, scroll down and add following lines to tell disable ipv6 for all, default, and lo network interfaces.
net.ipv6.conf.all.disable_ipv6=1
net.ipv6.conf.default.disable_ipv6=1
net.ipv6.conf.lo.disable_ipv6=1
After saving the file by pressing Ctrl+S then Ctrl+X, then, run the command below will apply the changes immediately:
sudo sysctl -p
In case you use custom config file (e.g., /etc/sysctl.d/99-ipv6.conf) for the configuration, then apply it by running the command below instead to point out path to config file:
sudo sysctl -p /etc/sysctl.d/99-ipv6.conf
Sadly, due to this bug since 2006, the changes you made in the /etc/sysctl.conf or custom file under /etc/sysctl.d/ do NOT persist after reboot.
You need to either re-run the last sysctl -p command on every boot, or create a schedule job to make the command run automatically on startup. To do so, run command:
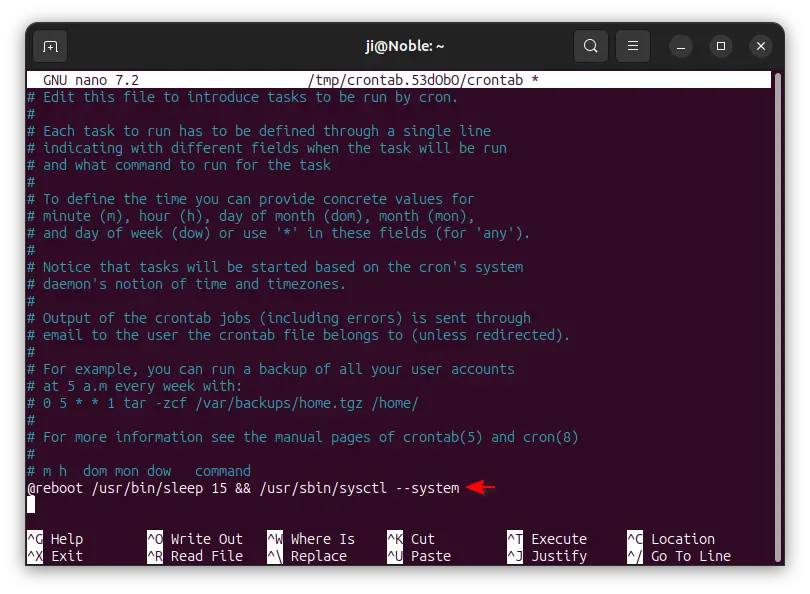
sudo crontab -e
Choose the default nano text editor if prompts, then scroll down and add line below:
@reboot /usr/bin/sleep 15 && /usr/sbin/sysctl --system
This line tells to run /usr/sbin/sysctl --system command, to load all the config files, with 15 seconds delay on every boot. Finally, press Ctrl+S to save, and Ctrl+X to exit.
2. Use Grub to load kernel with ipv6 disabled
If you don’t like to use crontab as a workaround to load sysctl configuration on every boot, then you can configure Grub bootloader instead.
First, connect to your Ubuntu server or press Ctrl+Alt+T to open terminal in Ubuntu desktop, then run command to open the configuration file for Grub:
sudo nano /etc/default/grub
When file opens, add either ipv6.disable=1 or ipv6.disable_ipv6=1 as value of GRUB_CMDLINE_LINUX_DEFAULT. Finally, press Ctrl+S to save and Ctrl+X to exit.
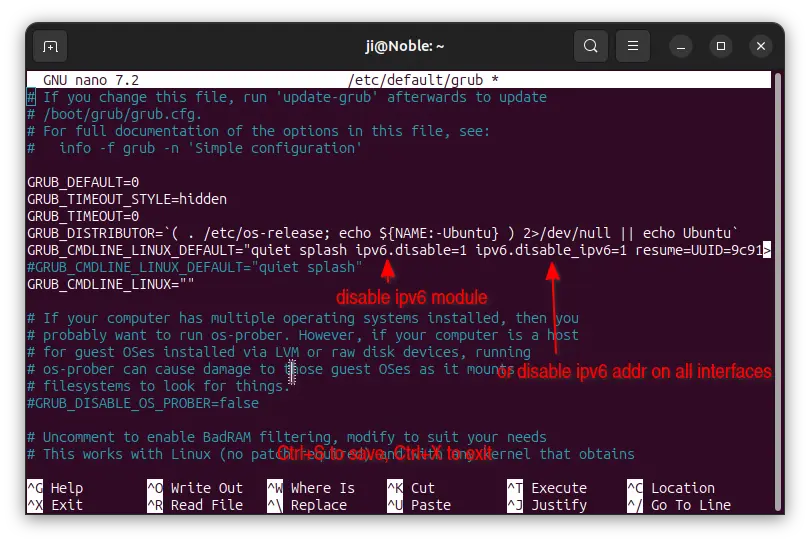
According to the kernel docs:
- The
ipv6.disable=1option will disable the whole ipv6 functionality. - While
ipv6.disable_ipv6=1tells to NOT assign IPv6 addresses on any interfaces.
To apply change, you need to run the command to re-generate the boot-loader entries.
sudo update-grub
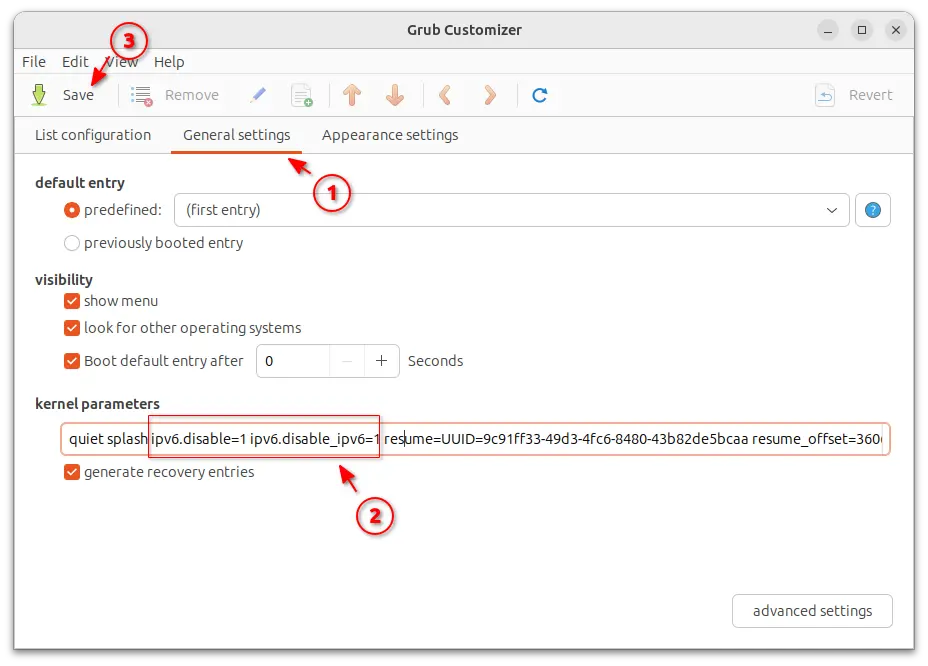
If you’re running on Ubuntu Desktop with Grub-Customizer installed, then you may launch the app and navigate to “General settings” tab to add the kernel parameters.
Option 2: Disable IPv6 using Network Manager
The network manager also provides options to disable ipv6 on either per-device basis or per-connection basis.
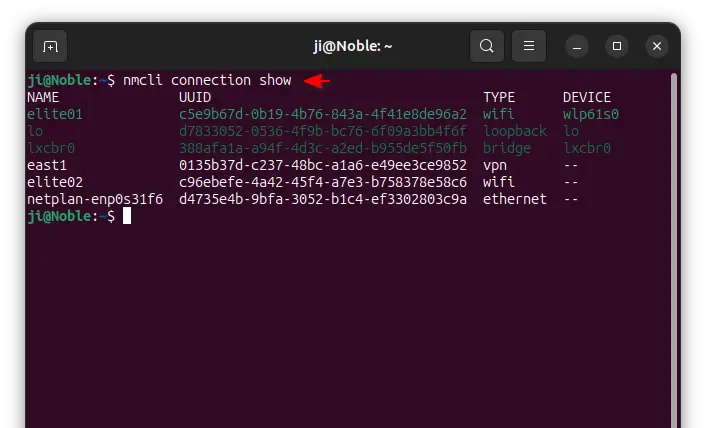
First, run command to list connections:
nmcli connection show
As the screenshot below shows, in my case I have wlp61s0 wifi device connected to elite01 wifi network, lo the loopback interface to communicate with servers on local machine, and lxcbr0 for containers.
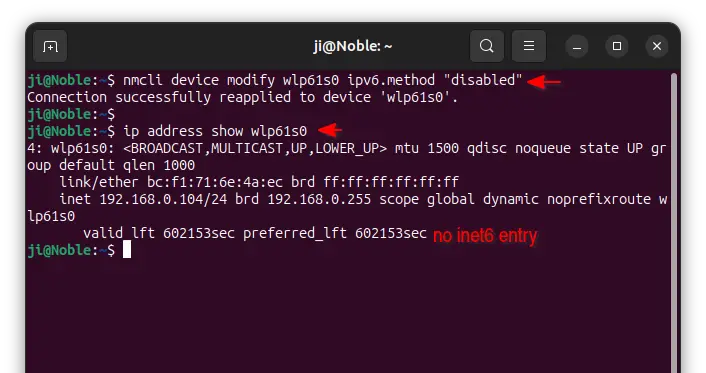
To disable ipv6 on per device basis, wlp61s0 for example, use command:
nmcli device modify wlp61s0 ipv6.method "disabled"
Then verify by running either ip addr to check all network interfaces or ip addr show wlp61s0 for certain interface (wlp61s0 in the case).
To disable ipv6 on per connection basis, elite01 wifi network for example, use command:
nmcli connection modify elite01 ipv6.method "disabled"
This method only disable ipv6 for selected connection, while the network device is still having ipv6 address assigned. And for Ubuntu Desktop, there is usually graphical network options to do the same job.
To undo the changes above, just re-run the last commands by replacing "disabled" with "auto".