


![]()
This is a step by step tutorial shows how to enable zram Kernel module and use as Swap device for better system performance in Ubuntu 24.04 PC/laptop with limited RAM.
As you may know, Ubuntu usually includes a swap space. It works like MS Windows’ “virtual memory”, that uses the hard disk for additional memory when there is not enough physical RAM for all tasks request.
Swap on disk however is slow, which will slow down the overall system performance. So, Linux introduced “zram” and “zswap” kernel modules to improve performance for computers with small amount of RAM.
Instead of using Swap on disk, zram creates block device (use no memory initially, and grow or shrink dynamically) in RAM that can use as Swap space. It compresses the data that are going to swap out, then moves into the block device. In the case, it uses less physical memory for more data, while keeps system running faster.
I’ve written about how to enable zswap in Ubuntu to do the similar job, by providing a compressed RAM cache for swap pages. Here I’m going to show you how to use zram instead, which is enabled by default in Fedora and Pop!_OS.
NOTE 1: If you have a plenty of RAM that rarely uses swap space, or you’re CPU-bound, then stay away from zram or zswap, because they consume more CPU for compressing/decompressing.
NOTE 2: zram will prevent hibernation for working properly! Use zswap instead, if you need sleep to disk.
Disable zswap (if enabled)
Zswap will prevent zram from being used effectively. If you have it enabled in your Ubuntu machine, you need to disable it first for trying out zram.
To check if zswap enabled, just open terminal (Ctrl+Alt+T) and run command:
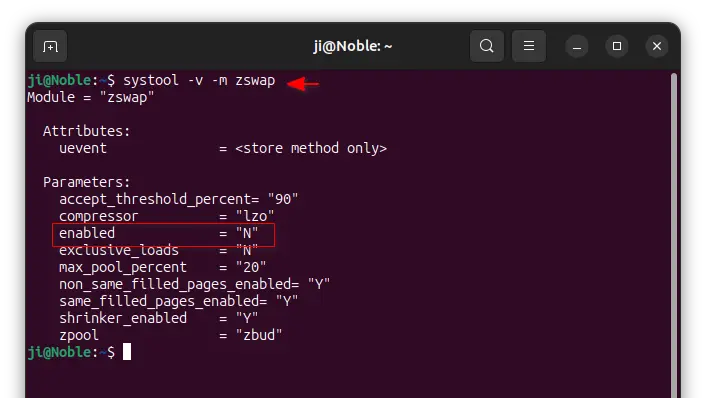
systool -v -m zswap
Run sudo apt install sysfsutils if command not found. In the output, “enabled = “N”” means the feature is not enabled.
If it said “enabled = “Y””, then you may run the command below to disable zswap at run-time (works until reboot):
echo 0 | sudo tee /sys/module/zswap/parameters/enabled
NOTE: According to the Kernel doc, the data in zswap will NOT be freed immediately. You need to wait until they are either invalidated or faulted back into memory, or manually swapoff the swap and swapon (if need) again.
If you want to disable zswap permanently, then try editing Grub boot-loader, and delete the kernel parameters for zswap (if any).
sudo nano /etc/default/grub
Delete zswap.enabled=1 from “GRUB_CMDLINE_LINUX_DEFAULT”, and, finally run sudo update-grub to apply changes.
Option 1: Enable Zram at Run-Time
To try out the kernel module at run-time, until system reboot or you manually disable it, just do steps below to manually load the module and set up for swap space.
1. First, press Ctrl+Alt+T on keyboard to open up a terminal window. Then, run command:
sudo modprobe zram
The command loads the zram module and creates a single block device in RAM. While, all the config files are stored in /sys/block/zram0 directory.
Tips: If want, you may create multiple zram block devices in RAM. For example, run sudo modprobe zram num_devices=4 will create 4, while the config files are located in /sys/block/zram{0, 1, 2, 3}.
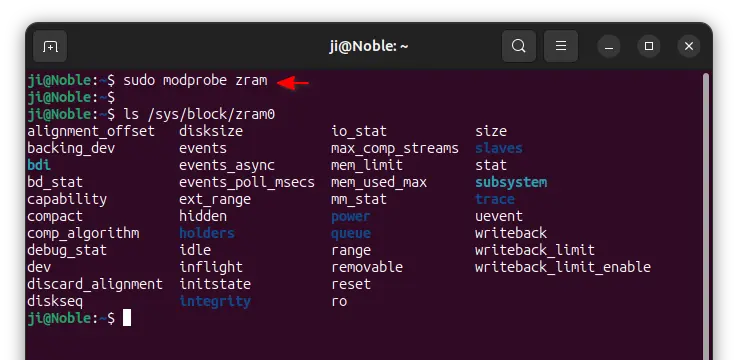
2. As you can see in the last screenshot, the zram block device include many config files under /sys/block/zram0. They include:
disksize– The maximum un-compressed data it can store.mem_limit– The maximum physical memory it can use to store compressed data.comp_algorithm– Set the compression algorithm. Supported values includelzo,z4,lz4hc,842,zstd. See the comparision.max_comp_streams– The number of possible compress operations run at the same time. Default is number of your CPU core.- There are as well many other configure options. See the Kernel Doc for more.
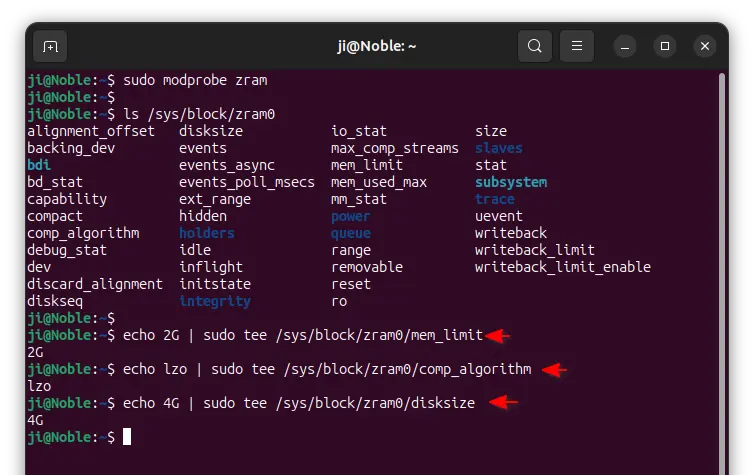
To set the maximum un-compressed data size it can store, 4GiB for example (replace the number accordingly), use command:
echo 4G | sudo tee /sys/block/zram0/disksize
To set the maximum memory size it can use to store compressed data, 2GiB for example (replace the number accordingly), use command:
echo 2G | sudo tee /sys/block/zram0/mem_limit
And, to set the compression algorithm, use command:
echo lzo | sudo tee /sys/block/zram0/comp_algorithm
Similarly, you may use the echo command to configure other options for the zram block device.
3. After enabled and configured the zram block device, you may then run command to set the device as swap area:
sudo mkswap /dev/zram0
Finally, enable the swap area with higher priority, via command:
sudo swapon --priority 100 /dev/zram0

4. Finally, you may run swapon to identify current swap devices (zram must have the highest priority). And, run the command below to check zram statistics.
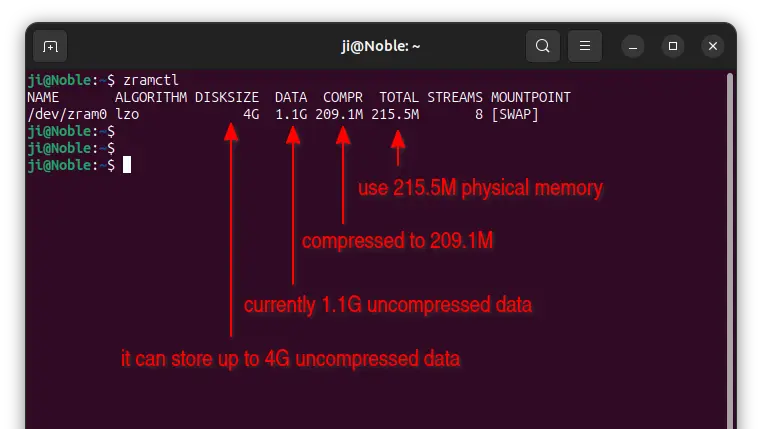
zramctl
In the output:
- DISKSIZE – means the maximum un-compressed data size it can store.
- DATA – means current size of un-compressed data (1.1G in my case).
- COMPR – the 1.1 G data has been compressed to 209.1M.
- TOTAL – is the current size of physical memory that zram use (metadata + compressed data).
5. (Optional) To take full potential of the zram advantages, you can configure the system’s swap via 4 commands below:
echo 180 | sudo tee /proc/sys/vm/swappiness
echo 0 | sudo tee /proc/sys/vm/watermark_boost_factor
echo 125 | sudo tee /proc/sys/vm/watermark_scale_factor
echo 0 | sudo tee /proc/sys/vm/page-cluster
They are default swap settings in Pop!_OS, but NOT tested in my case.
(Optional) To disable zram at run-time, either reboot your computer, or run 2 commands below to disable the swap space and un-load the zram module:
sudo swapoff /dev/zram0
sudo modprobe --remove zram
Option 2: Enable Zram on Startup (make it permanent)
The steps in “Option 1” do NOT persistent after reboot. If zram works great in your machine, you may do the following steps instead to make it permanent.
NOTE: In the steps below, I’ll use nano command line text editor for editing config files, which works in most desktops. For choice, you may replace it with gnome-text-editor for 24.04 with default GNOME, gedit for 22.04 and earlier with default GNOME, mousepad for XFCE, xed for Linux Mint Cinnamon, or other text editor according to your desktop environment.
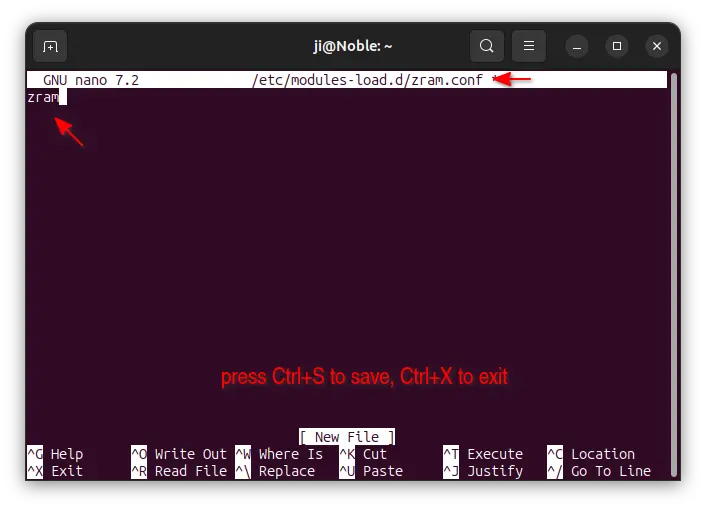
1. First, run command to create (and edit) a config file to load zram module at boot:
sudo nano /etc/modules-load.d/zram.conf
When file opens, just write zram into it. Then, press Ctrl+S to save and Ctrl+X to exit.
Tips: If you want to create multiple zram block devices in RAM, create another file via command below:
sudo nano /etc/modprobe.d/zram.conf
Then write options zram num_devices=1 (change number as you want).
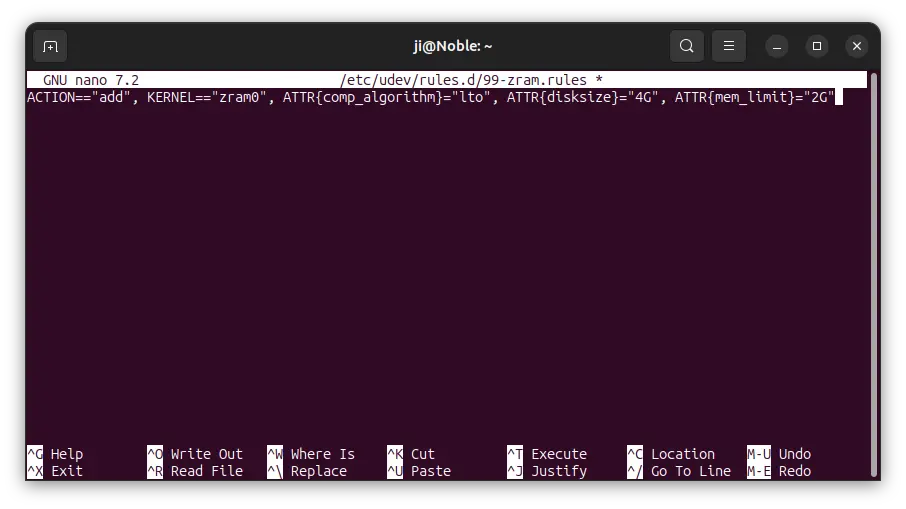
2. Next, run command to create a udev rule file to configure zram device options.
sudo nano /etc/udev/rules.d/99-zram.rules
When file opens, add line below (NOTE: the line include both “==” and “=”):
ACTION=="add", KERNEL=="zram0", ATTR{comp_algorithm}="lto", ATTR{disksize}="4G", ATTR{mem_limit}="2G"
Here change the value of “disksize”, “mem_limit”, and “comp_algorithm” according to your need. For multiple zram devices, add more lines with different device names for KERNEL (zram1, zram2, …).
3. The Arch Linux wiki tells to use udev rule + /etc/fstab to automatically make and use the zram device as swap at startup. It however causes “Failed to activate swap dev-zram0.swap” issue in my case in Ubuntu 24.04.
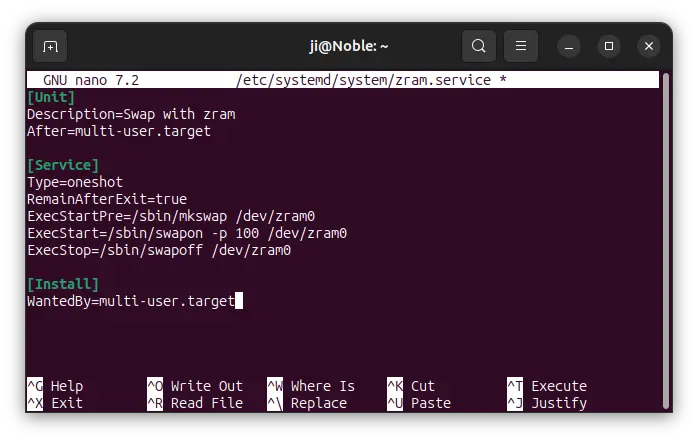
Instead, create a systemd service works in my case to automatically setup and enable zram block device as swap. First, run command to create a service file:
sudo nano /etc/systemd/system/zram.service
When file opens, add the content below and save (Ctrl+S, then Ctrl+X).
[Unit]
Description=Swap with zram
After=multi-user.target

[Service]
Type=oneshot
RemainAfterExit=true
ExecStartPre=/sbin/mkswap /dev/zram0
ExecStart=/sbin/swapon -p 100 /dev/zram0
ExecStop=/sbin/swapoff /dev/zram0

[Install]
WantedBy=multi-user.target
After saving the file, run systemctl enable zram command to enable the service.
(Optional) If you want to make use the Pop!_OS swap configuration to take full potential of the zram advantages, then, run command to create a config file:
sudo nano /etc/sysctl.d/99-vm-zram-parameters.conf
add the lines below and save.
vm.swappiness = 180
vm.watermark_boost_factor = 0
vm.watermark_scale_factor = 125
vm.page-cluster = 0
When everything’s done, restart computer and run swapon and zramctl command to verify.
To undo “Option 2”, first run systemctl disable zram first to disable the service, then delete all the files you created, by replace nano with rm in the commands above.


Huh, now i am confused , wich ist better for a Laptop with 4 GB Ram, Zram or Zswap?
😀 I don’t know! Just try both, and choose the one that feels better.