![]()
This simple tutorial shows how to install Mac OS Catalina style Gnome Shell theme and icons in Ubuntu 20.04 LTS.
Following steps include how to install the GTK theme, icon theme, tweak panel appearance, and install useful extensions. When everything’s done, your Gnome desktop will look like:

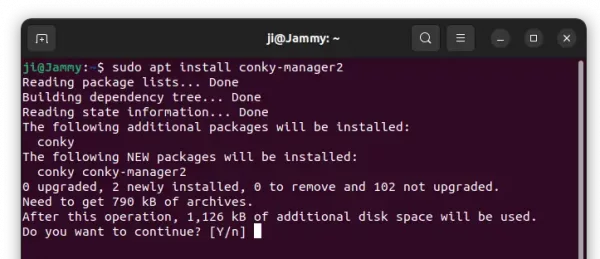
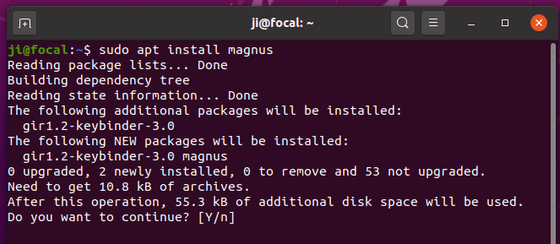
1. First install Gnome Tweaks and required theme engines.
Open terminal (press Ctrl+Alt+T on keyboard), paste following command (Ctrl+Shift+V) and run to install some required libraries:
sudo apt-get install gtk2-engines-murrine gtk2-engines-pixbuf gnome-tweaks libcanberra-gtk3-module libcanberra-gtk-module libglib2.0-dev gir1.2-gtkclutter-1.0
Type user password (no asterisk feedback) and hit Enter.

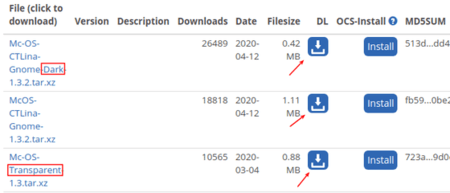
2. Download / Install Mac OS Catalina Theme:
The light, dark, transparent theme packages are available at gnome-look.org page (under files tab).
Select download one or all of the packages as you want. You may also download “Extra” tarball for wallpaper and fonts.
Then install them via:
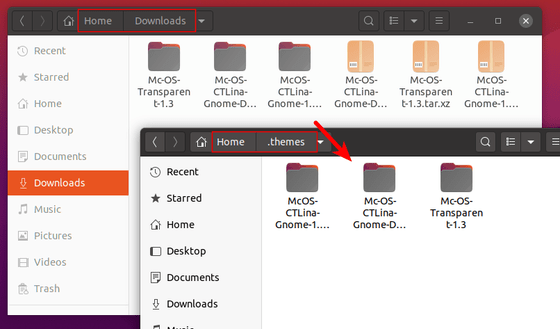
- Go to Downloads folder and extract all the three tarball.
- Open new Files (Nautilus file browser) window.
- Press Ctrl+H to display hidden file folders.
- Then navigate to .themes folder (create the folder if not exist!).
- Finally move the theme package folders from Downloads to .themes.
2. Download / Install Mac OS Icon Theme:
There are a few OS X icon themes available, click here (files tab) to get one of them.
![]()
Then install the icons via:
- Go to Downloads folder and extract the tarball.
- Open new Files (Nautilus file browser) window.
- Press Ctrl+H to display hidden file folders.
- Then navigate to .icons folder (create the folder if not exist!).
- Finally move the icon package folders from Downloads to .icons.
![]()
3. Install user theme Gnome Shell extension.
You can skip this step if you have already installed the User Theme extension, and don’t want the Blur effect.
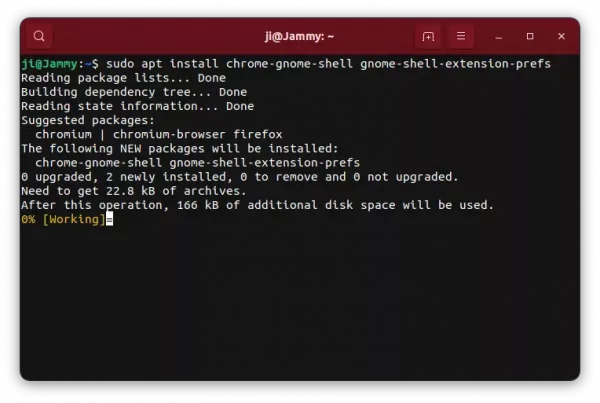
1.) First time installing a gnome shell extension? Do open terminal by pressing Ctrl+Alt+T on keyboard, then run command:
sudo apt install chrome-gnome-shell

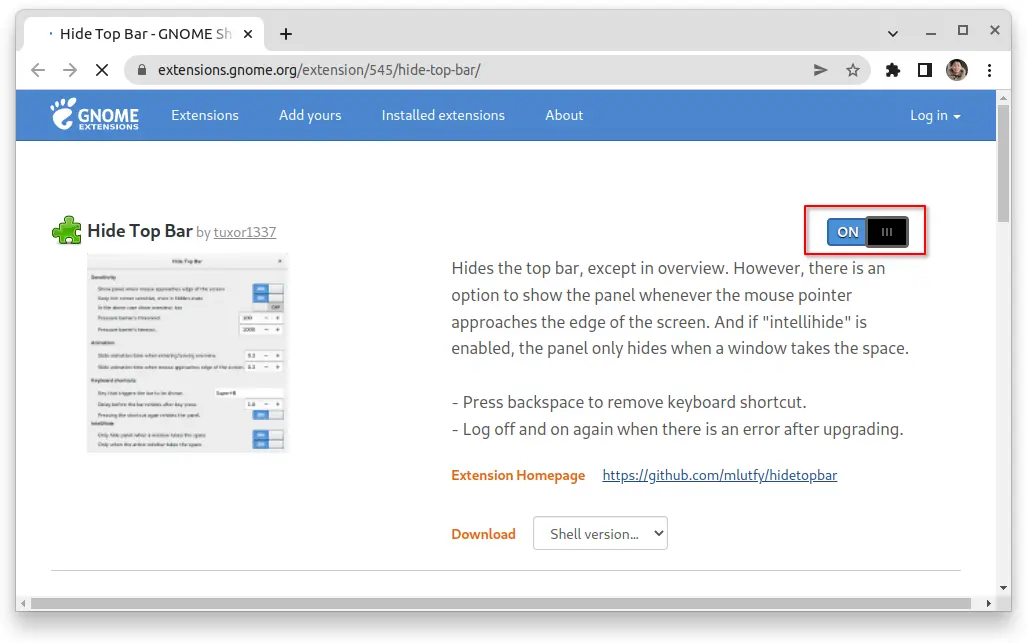
Go to extensions.gnome.org, and click the link to install the browser integration.

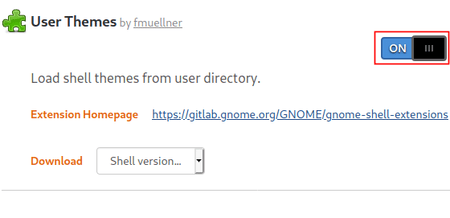
2.) Click here to install user theme extension to load shell themes from user directory.
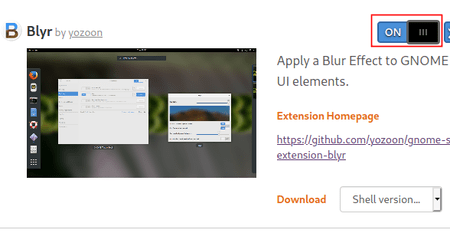
3.) (Optional) Click here to install extension to apply a Blur effect.
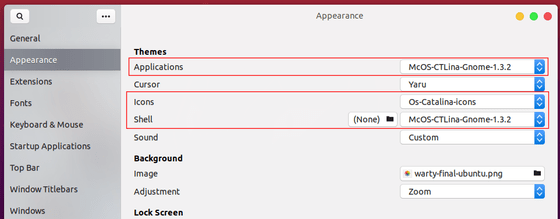
4. Apply the Mac OS Catalina Theme and Icon:
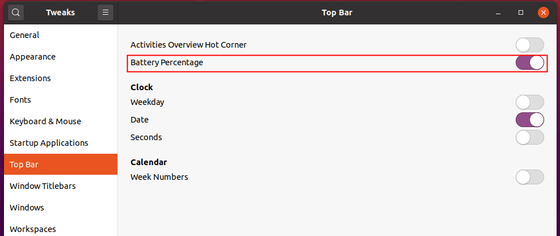
Launch Gnome Tweaks and navigate to Appearance, there you can choose themes for Applications, Icons, Gnome Shell.
5. Adjust the left dock panel.
Open terminal (Ctrl+Alt+T) and run following commands one by one:
- To move left dock panel to bottom, run command:
gsettings set org.gnome.shell.extensions.dash-to-dock dock-position BOTTOM
- To shorten the dock panel, run:
gsettings set org.gnome.shell.extensions.dash-to-dock extend-height false
- Move app launcher icon to left:
gsettings set org.gnome.shell.extensions.dash-to-dock show-apps-at-top true
- Set dock panel background transparency (range from 0 to 1):
gsettings set org.gnome.shell.extensions.dash-to-dock background-opacity 0.3