Archives For November 30, 1999

Looking to control music from your Sonos devices in Ubuntu? Noson is a fast and smart controller for your SONOS devices that is written with QML/C++.

With Noson app, you can browse your music library and play track or radio on any zones. You can manage grouping zones, queue, and playlists, and fully control the playback.

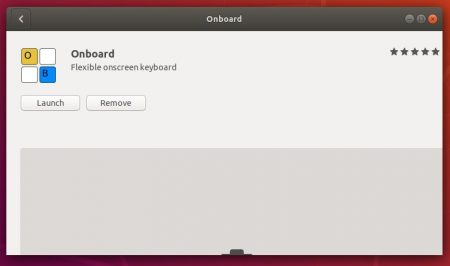
Install Noson from Ubuntu Software:

The snap package of Noson, universal Linux package format runs in sandbox, is available in Ubuntu Software:

For those who hate Ubuntu Software, run command in terminal (Ctrl+Alt+T) to install Noson snap:

snap install noson

Install Noson in Ubuntu via PPA:

For those who prefer traditional .deb package, Noson is also available in the PPA repository for Ubuntu 18.04, Ubuntu 16.04.

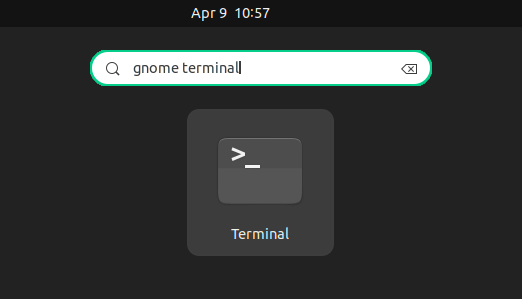
1. Open terminal either via Ctrl+Alt+T or by searching for ‘terminal’ from app launcher. When it opens, run command to add the PPA:

sudo add-apt-repository ppa:jlbarriere68/noson-app

type your password (no asterisk feedback while typing) when it prompts and hit Enter to continue.

2. Then check updates and install the software either via Synaptic package manager or by running commands in terminal:

sudo apt-get update

sudo apt-get install noson-app

Once installed, launch the software and it automatically searches for your Sonos devices.

Uninstall:

To remove Noson Sonos controller, run command in terminal:

sudo apt-get remove --autoremove noson-app

To remove the PPA, launch Software & Updates and navigate to Other Software tab.

Handbrake 1.1.1, the first bug-fix release for Handbrake 1.1 series, was released yesterday.

Handbrake 1.1.1 release highlights:

  • Fixed a potential crash in the comb detection filter
  • Fixed a potential crash in the padding filter
  • Fixed decoding certain very high bit rate ultra-high definition sources with extra large packets
  • Fixed last frame in source video missing in output
  • Fixed crash when decoding an empty audio track
  • Updated libraries: libvpx 1.7.0 (VP8/VP9 video encoding), x264 155 r2901 (H.264/AVC video encoding)
  • Fixed issues occurring when running multiple HandBrake instances simultaneously
  • Miscellaneous bug fixes and improvements

How to Install HandBrake 1.1.1 in Ubuntu:

The official HandBrake PPA has built the 1.1.1 release for Ubuntu 18.04, Ubuntu 17.10.

The Ubuntu 16.04 and Ubuntu 14.04 builds are broken at the moment, check the PPA link before getting started.

1. Open terminal either via Ctrl+Alt+T or by searching “terminal” from app launcher. When it opens, run command to add the PPA:

sudo add-apt-repository ppa:stebbins/handbrake-releases

Input your password (no visual feedback while typing due to security reason) when it prompts and hit Enter to continue.

2. Then use Synaptic package manager or run following commands to install the video transcoder:

sudo apt-get update

sudo apt-get install handbrake-gtk handbrake-cli

Note: If you installed the distribution build of HandBrake from Ubuntu Software, you need to remove it before installing the new release from PPA.

Uninstall:

To remove the software, simply run command in terminal:

sudo apt-get remove --autoremove handbrake-gtk handbrake-cli

And launch “Software & Updates -> Other Software” to remove PPAs.

brackets code editor

Adobe Brackets code editor 1.13 was released a few hours ago with some great new features.

Brackets 1.13 release highlights:

  • Manipulate folder structures from within Brackets
  • Open a remotely hosted web-page from within Brackets.
  • Brackets can now be updated with just a few clicks from within the app.

How to Install Brackets 1.13 in Ubuntu:

The official .deb packages are available for download at the link below:

Download Brackets (.deb)

Just grab the .deb that matches your OS tyle, then click install via Gdebi package manager.

Or run command in terminal (Ctrl+Alt+T) to install the downloaded package:

sudo dpkg -i ~/Downloads/Brackets.Release.1.13*.deb; sudo apt-get -f install

CopyQ, an advanced clipboard manager with editing and scripting features, reached the 3.5.0 release a few hours ago.

CopyQ 3.5.0 release highlights:

  • Icon for global shortcuts in Shortcut configuration tab
  • Simpler icons (smaller installation footprint)
  • Faster copying and pasting from the application
  • Faster and simpler invocation for commands run automatically
  • More compact Process Manager dialog
  • Scriptable function select() waits for clipboard to be set
  • Image masks for colorizing icons (“icon-mask” and “icon-busy-mask”)
  • Improved logging and updated icons (Font Awesome 5.0.13)
  • X11: Faster clipboard/selection synchronization
  • And various bug-fixes.

Install Copyq 3.5.0 in Ubuntu:

The software has an official PPA repository that contains the latest packages for Ubuntu 14.04, Ubuntu 16.04, Ubuntu 17.10, Ubuntu 18.04 so far.

1. To add the PPA, open terminal from application launcher and run command:

sudo add-apt-repository ppa:hluk/copyq

Input your password (no visual feedback while typing) when it prompts and hit Enter to continue.

2. After added the PPA repository, install CopyQ either via Synaptic package manager or by running commands in terminal:

sudo apt-get update

sudo apt-get install copyq

Once installed, start the clipboard manager from application launcher and you’ll see the icon in system tray area.

Uninstall:

To remove the software, either use Synaptic package manager or run command:

sudo apt-get remove --autoremove copyq

To remove PPA repositories, launch Software & Updates and navigate to Other Software tab.

Cinnamon

For those who want to try out the latest Cinnamon Desktop 3.8, without downloading Linux Mint 19, here’s how to install Cinnamon 3.8.x via PPA in Ubuntu 18.04.

Cinnamon 3.8 will be included in the upcoming Linux Mint 19. This Gnome based desktop environment has received better support for GTK+ 3.22 and client-side decorated windows, fully ported to Python 3, backported various changes from upstream GNOME, and more.

For Ubuntu 18.04 LTS, a stable PPA has built the Cinnamon 3.8 packages, so the desktop can be easily installed via following steps.

1. Open terminal either via Ctrl+Alt+T keyboard shortcuts, or by searching for ‘Terminal’ from app launcher. When it opens, run command:

sudo add-apt-repository ppa:embrosyn/cinnamon

Input your password (no visual feedback) when it prompts and hit Enter. Read the PPA description and finally hit Enter to add the PPA.

2. Then run command to install Cinnamon Desktop 3.8:

sudo apt-get install cinnamon

3. Finally restart your computer. When you’re at Gnome login screen, click on your username and then click the gear button to select ‘Cinnamon‘ desktop session.

Uninstall:

To remove Cinnamon desktop, open terminal and run command:

sudo apt-get remove --autoremove cinnamon cinnamon-*

And launch Software & Updates then navigate to Other Software tab to remove PPAs.

The latest Mesa 3D graphics library 18.1.1 now can be easily installed in Ubuntu 18.04 LTS via PPA.

For those sticking to the open-source drivers and need graphics performance improvements (e.g. for playing games), Canonical’s Timo Aaltonen has pushed Mesa 18.1.1 in the x-updates PPA.

1. Open terminal either via Ctrl+Alt+T or by searching for ‘Terminal’ from software launcher. When it opens, run command:

sudo add-apt-repository ppa:ubuntu-x-swat/updates

Type your password (no asterisks while typing due to security reason) when it prompts and hit Enter to continue.

2. After adding the PPA, do system update via command:

sudo apt-get dist-upgrade

apt-get update is not required any more in Ubuntu 18.04 since adding PPA automatically refreshes system repositories.

3. Finally check your driver version via command:

glxinfo | grep "OpenGL version"

Uninstall:

To restore changes and downgrade to the default drives shipped in Ubuntu 18.04, run command:

sudo apt-get install ppa-purge && sudo ppa-purge ppa:ubuntu-x-swat/updates

gnome shell

Ubuntu used to show media playback controls in the Sound menu of system tray. The functionality has been removed since Ubuntu switched to Gnome Desktop.

In Ubuntu 18.04, you can easily re-enable the feature via a Gnome Shell extension called Media Player Indicator.

1. To install the extension, open Ubuntu Software, search for and install Media Player Indicator:

Once installed, all MPRIS Version 2 capable media players, including VLC, SMPlayer, Audacious, Clementine, Rhythmbox, and more, will be listed in the system tray menu after you launched the media players.

2. To configure the Gnome extension, launch the settings via either Ubuntu Software or Gnome Tweak Tool:

MKVToolNix 24.0.0, free and open-source Matroska software, was released 2 days ago. Here’s how to install it in Ubuntu 18.04, Ubuntu 16.04, Ubuntu 17.10.

MKVToolNix 24.0.0 “Beyond The Pale” release highlights:

  • mkvmerge: MP4 reader: improved the detection of edit lists consisting of two identical entries, each spanning the file’s duration as given in the movie header atom.
  • mkvmerge: JSON identification: the “display unit” video track property is now reported as ‘display_unit’.
  • mkvmerge, mkvextract: AVC/h.264: empty NALUs will now be removed.
  • mkvextract: VobSub extraction: empty SPU packets will now be dropped during extraction
  • mkvmerge: E-AC-3 parser: fixed determining the number of channels for streams that contain an AC-3 core with dependent E-AC-3 frames.
  • Updated Niels Lohmann’s JSON library to v3.1.1.
  • Updated pugixml library to v1.9.
  • Various bug-fixes.

How to Install MKVToolNix 24.0.0 in Ubuntu:

The official apt repository offers the latest packages for Ubuntu 16.04, Ubuntu 17.10, and Ubuntu 18.04 so far.

Open terminal via Ctrl+Alt+T or by searching it from app launcher. When it opens, do following steps:

1. Run command to add the repository:

sudo sh -c 'echo "deb https://mkvtoolnix.download/ubuntu/ $(lsb_release -sc) main" >> /etc/apt/sources.list.d/bunkus.org.list'

Replace $(lsb_release -sc) with xenial for Linux Mint 18.x. And input your password (no visual feedback while typing) when it prompts and hit Enter.

2. Then install the key:

wget -q -O - https://mkvtoolnix.download/gpg-pub-moritzbunkus.txt | sudo apt-key add -

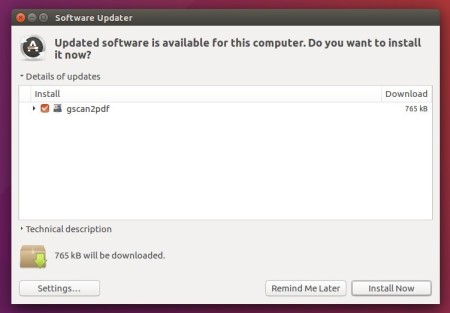
3. Finally either upgrade the software via Software Updater (Update Manager):

or run command to install the software packages:

sudo apt-get update

sudo apt-get install mkvtoolnix mkvtoolnix-gui

Uninstall:

To remove the repository, launch Software & Updates utility and navigate to Other Software tab.

To remove MKVToolNix, use Synaptic Package Manager or run following command:

sudo apt-get remove --autoremove mkvtoolnix mkvtoolnix-gui

HP Linux Imaging and Printing

A new monthly release of HPLIP, HP developed Linux drivers for HP inkjet and laser based printers, was announced earlier today.

HPLIP 3.18.6 is a small release that only adds 3 new printers support:

  • HP DesignJet Z6810 42in PostScript
  • HP DesignJet Z6810 60in PostScript
  • HP DesignJet Z6610 60in PostScript

Download / Install HPLIP 3.18.6 in Ubuntu:

To install the software, download the package “hplip-3.18.6.run” from the link below:

HPLIP Download Page

Then open terminal via Ctrl+Alt+T or search for “terminal” from app launcher. When it opens, run command:

cd ~/Downloads/ && chmod +x hplip-3.18.6.run && ./hplip-3.18.6.run

Input your password (no visual feedback while typing) when it prompts and hit Enter.

Then follow the terminal outputs, answer some questions to build and install HPLIP on your system. When everything is done, plug/re-plug your printers and enjoy!
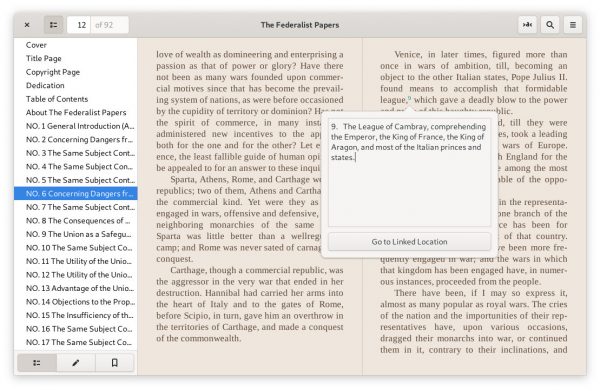
For those who are still sticking to the Scribus 1.4 stable series, here’s how to install the latest stable Scribus 1.4.7 in Ubuntu 18.04, Ubuntu 17.10, Ubuntu 16.04, and/or Ubuntu 14.04.

Scribus 1.4.7 was announced a few weeks ago along with the 1.5.4 preview release:

“Scribus 1.4.7 is almost exclusively a bugfixing and update release and will be the last iteration of the Scribus 1.4.x line. All future development efforts will go into the upcoming new stable version 1.6.x.”

How to install Scribus 1.4.7 in Ubuntu

The official PPA repository has built the packages for all current Ubuntu releases.

1. Open terminal either via Ctrl+Alt+T or by searching for “terminal” from app launcher. When it opens, run command to add the PPA:

sudo add-apt-repository ppa:scribus/ppa

Input your password (no visual feedback) when it prompts and hit Enter

2. Then upgrade Scribus using Software Updater:

or run commands in terminal to install or upgrade the desktop publishing software:

sudo apt-get update

sudo apt-get install scribus

Uninstall:

You can remove the PPA repository via Software & Updates utility -> Other Software tab.

To remove Scribus, run command in terminal:

sudo apt-get remove --autoremove scribus