This simple tutorial shows how to install the latest Pale Moon web browser via .deb package and keep up-to-date via Software Updater in Ubuntu 20.04 and Ubuntu 22.04.
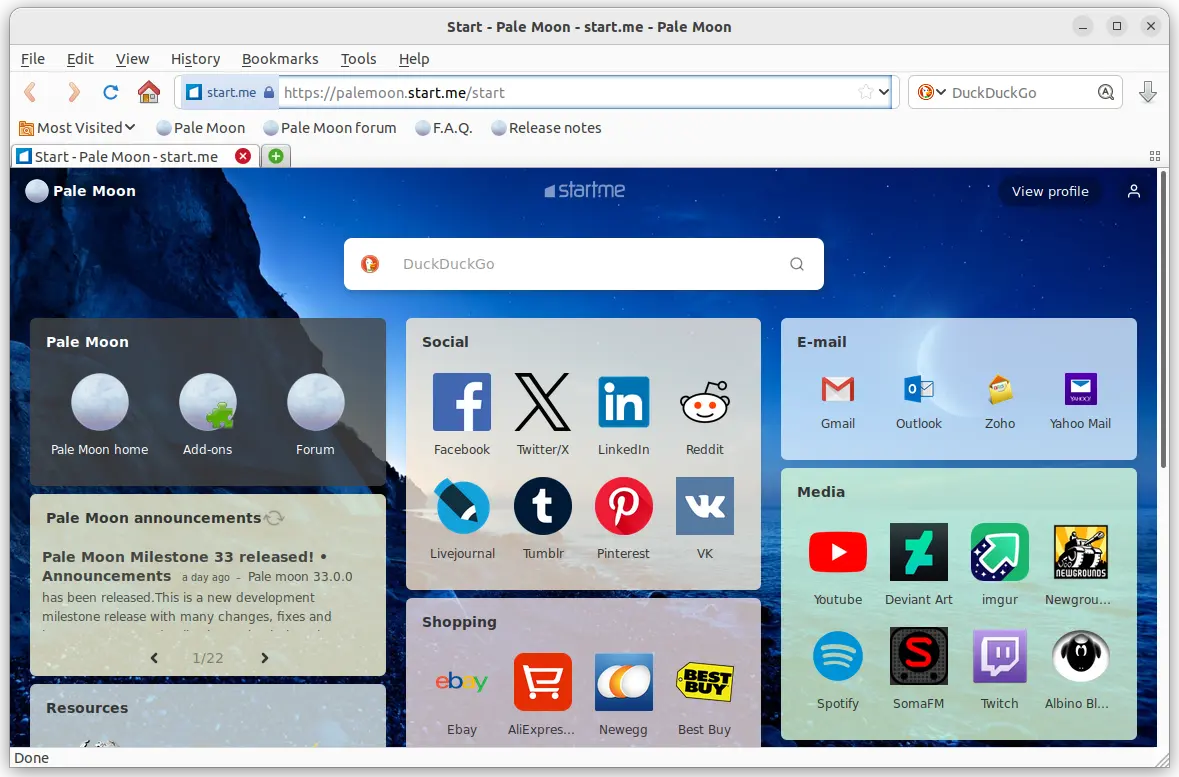
Pale Moon is an open-source web browser with an emphasis on customizability. The latest release so far is version 33.0.0 which was released a few days ago and features:
- Implement a restricted version of the asynchronous clipboard API (navigator.clipboard).
- Add support for SHA-2 (SHA-256/SHA-512/etc.) signatures for OCSP stapled responses.
- Add an option to restrict DOM full-screen mode to the existing browser window.
- New options (Preference -> Privacy -> Tracking) to allow users to more easily control several privacy-impacting features
- Implement
PromiseRejectionEvent.

The browser provides official Linux tarball, available to download in its website. The web browser is open-source, but the binary package is NOT. And, I’ve written a step by step tutorial shows how to install the tarball.
How to Install Pale Moon from apt repository:
The opensuse repository offers the most recent .deb packages for Debian and all current Ubuntu releases. It’s open-source but unofficial, and so far supports Ubuntu 18.04, Ubuntu 20.04, Ubuntu 22.04, and Ubuntu 23.10.
Option 1: Download & Install .deb package
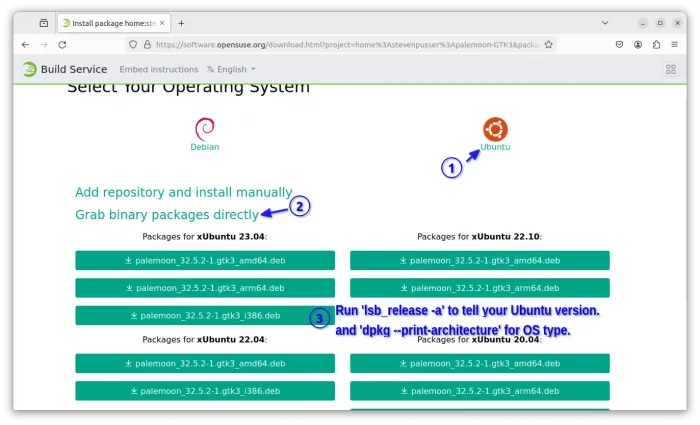
First, go to the OBS repository web page via the link button below:
For the GTK2 version, go to this page instead. After opening the web page, click Ubuntu logo, select “Grab binary packages directly“, finally you can click download the .deb package for your Ubuntu version and os type.
Don’t know which Ubuntu is running? Press ctrl+alt+t to open terminal, then run lsb_release -a command to tell. Also, run dpkg --print-architecture if you don’t know which one of ‘amd64’ or ‘arm64’ to choose.
After downloaded the package, either click open with “Software & Install” then install, or open terminal (Ctrl+Alt+T) and run command to install it:
sudo apt install ~/Downloads/palemoon*.deb
In case you didn’t save the file in Downloads folder, just type sudo apt install plus a blank space then drag’n’drop the file into terminal instead.
Option 2: Add the repository for receiving updates
To keep the package up-to-date, you may click “Add repository and install manually“, then follow the commands to add the repository into your system.
However, the instruction in that page still works at the moment, but insecure according to new Debian/Ubuntu policy. So, here’s updated commands to do the same job:
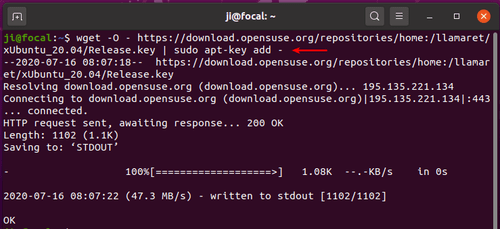
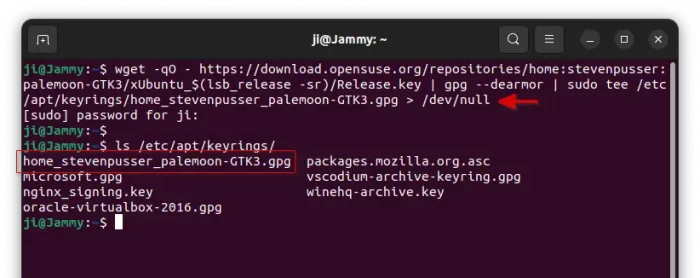
1.) First, press Ctrl+Alt+T on keyboard to open terminal. When it opens, copy and paste following single command and hit run to get the key file:
wget -qO - https://download.opensuse.org/repositories/home:stevenpusser:palemoon-GTK3/xUbuntu_$(lsb_release -sr)/Release.key | gpg --dearmor | sudo tee /etc/apt/keyrings/home_stevenpusser_palemoon-GTK3.gpg > /dev/null
NOTE: This command is for Ubuntu (and official flavors, such as KUbuntu, XUbuntu) only. For its based systems, such as Linux Mint, you have to replace $(lsb_release -sr) with 22.04, 20.04, etc, depends on which Ubuntu version your system is based on!
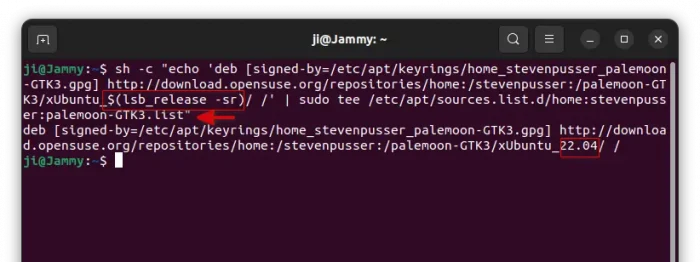
2.) Then run the single command below to create config file & add source repository into it.
sh -c "echo 'deb [signed-by=/etc/apt/keyrings/home_stevenpusser_palemoon-GTK3.gpg] http://download.opensuse.org/repositories/home:/stevenpusser:/palemoon-GTK3/xUbuntu_$(lsb_release -sr)/ /' | sudo tee /etc/apt/sources.list.d/home:stevenpusser:palemoon-GTK3.list"
Also, this command is for Ubuntu (and official flavors) only. For other based system, you need to replace $(lsb_release -sr) with 22.04, 20.04, etc, accordingly.
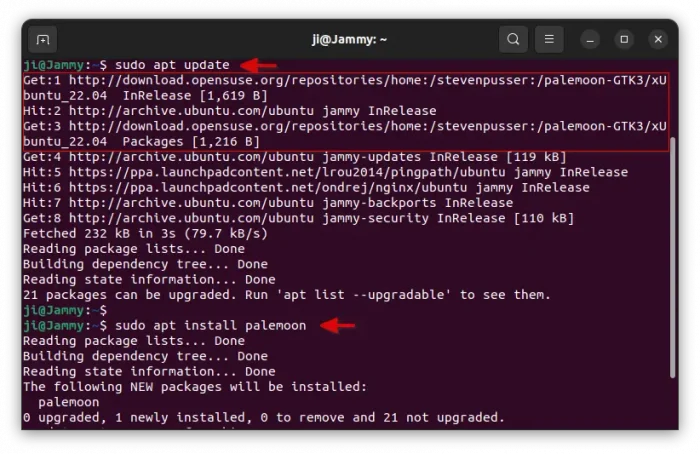
3.) Finally refresh system package cache by running command:
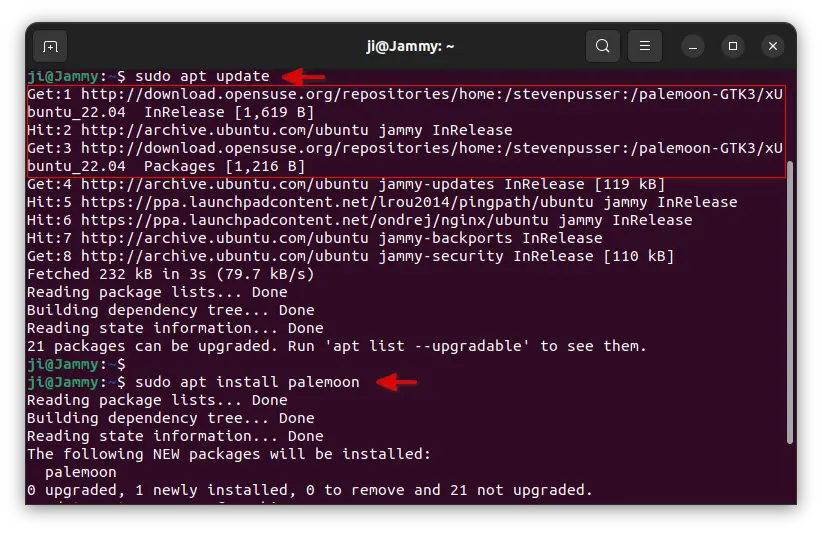
sudo apt update
The output should include something says “Get : x http://download.opensuse.org/repositories…”, meaning your system is successfully reading packages list from that repository.
Finally, install the web browser via command:
sudo apt install palemoon
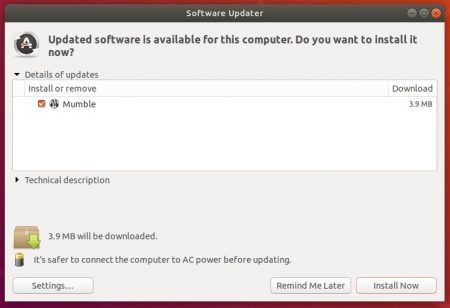
You can then use “Software Updater” to receive future updates for this package.
Uninstall:
To remove the web browser, open terminal (Ctrl+Alt+T) and run command:
sudo apt remove --autoremove palemoon
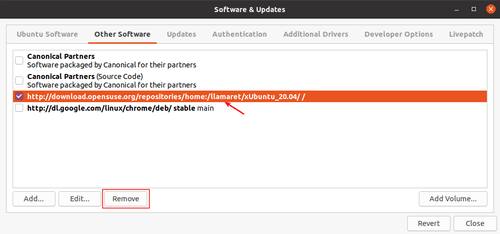
Also, remove the repository by deleting both the source and key files.
sudo rm /etc/apt/sources.list.d/home:stevenpusser:palemoon-GTK3.list
sudo rm /etc/apt/keyrings/home_stevenpusser_palemoon-GTK3.gpg
Finally run sudo apt update to refresh your system package cache.