Archives For November 30, 1999

How to Install Cinelerra CV, GG in Ubuntu 18.04

Last updated: November 3, 2018

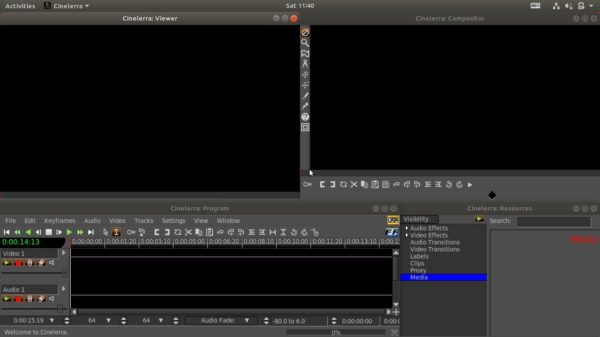
Cinelerra is one of the best video editing software for Linux desktop. This tutorial shows you how to install Cinelerra-CV and Cinelerra-GG in Ubuntu 18.04.

Cinelerra has three branches, Official HV, CV from community, and GG which is CV + ‘Good Guy’ patches etc. See what’s difference between Cinelerra branches.

Install Cinelerra GG in Ubuntu 18.04:

Cinelerra GG has an official apt repository, though it does not work properly in my case.

You can grab the .deb package directly from the repository page:

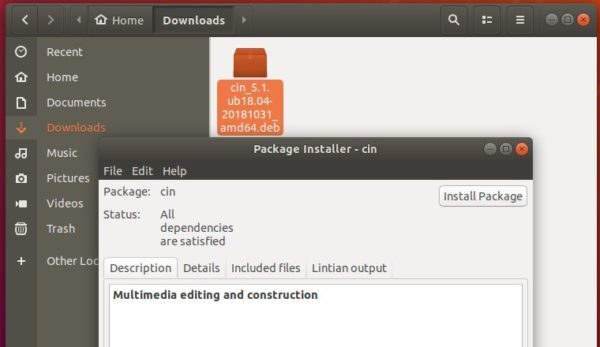
Download Cinelerra GG (cin_xxx.deb)

Then install the package via Gdebi package installer (install Gdebi from Ubuntu Software)

(Optional) To remove the package, run command:

sudo apt-get remove --autoremove cin

Install Cinelerra CV in Ubuntu 18.04

For all current Ubuntu releases, there’s an official PPA for the latest CV package.

1. Open terminal (Ctrl+Alt+T) and run command to add the PPA:

sudo add-apt-repository ppa:cinelerra-ppa/ppa

Type your password (no asterisks feedback) when it prompts and hit enter to continue.

2. Then install the video editor via command:

sudo apt-get install cinelerra-cv

(Optional) To remove the package, run command:

sudo apt-get remove --autoremove cinelerra-cv

And go to Software & Updates -> Other Software tab to remove the PPA.

cinelerra 4.6

Cinelerra video editing and compositing software now is at version 4.6. The 64-bit binary for Ubuntu 14.04 is available from Heroine Warrior.

The Cinelerra HV version is produced by Heroine Virtual, and is free software distributed under the GNU General Public License. Cinelerra also includes a video compositing engine, allowing the user to perform advanced compositing operations such as keying and mattes.

What’s New in Cinelerra HV 4.6:

  • Split pane editing.
  • OpenGL supported on Intel HD.
  • Titler improvements.
  • Bugfixes.

Install Cinelerra 4.6 in Ubuntu 14.04 64-bit:

1. Download the 64-bit binary from the link below:

Download Cinelerra HV 4.6

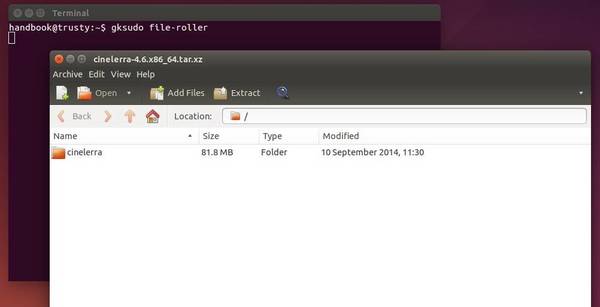
2. Press Ctrl+Alt+T on keyboard to open the terminal. When it opens, run the command below to open Archive Manager with root permission:

gksudo file-roller

When the Archive Manager opens:

  • Click the Open icon, navigate and select open Cinelerra package.
  • When the package opens, click the Extract button, select extract to /opt/ folder.

extract-cinelerra

When done, you can start the Cinelerra video editor by running command /opt/cinelerra/cinelerra in terminal.

3. Create launcher shortcut for Cinelerra

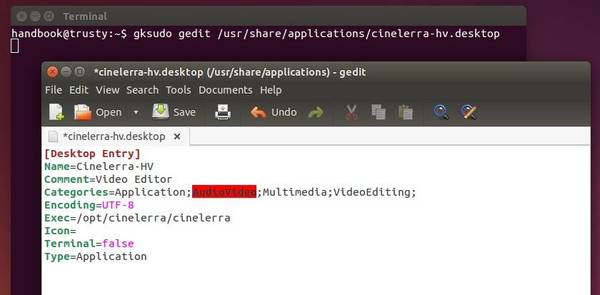
Press Ctrl+Alt+T to open terminal. When it opens, run command to create a launcher file and open it with Gedit text editor:

gksudo gedit /usr/share/applications/cinelerra-hv.desktop

When the editor opens, paste below into the file and save it.

[Desktop Entry]
Name=Cinelerra-HV
Comment=Video Editor
Categories=Application;AudioVideo;Multimedia;VideoEditing;
Encoding=UTF-8
Exec=/opt/cinelerra/cinelerra
Icon=
Terminal=false
Type=Application

You can grab a shortcut icon from web and input the file path after Icon= in above content.
cinelerra-launcher

When done, you can search for and open Cinelerra video editor from Unity Dash. Enjoy!

cinelerra 4.5

Cinelerra, a professional video editing and compositing software designed for the GNU/Linux now reached v4.5. Here’s how to install it in Ubuntu 13.10 Saucy, Ubuntu 13.04 Raring, Ubuntu 12.04 Precise, Ubuntu 12.10 and Linux Mint.

What’s New in Cinelerra 4.5:

  • Speed curves mainly for video & in degraded quality for audio.
  • Some control over whether automation follows edits.
  • Ability to transfer keyframes between audio and video tracks.
  • Motion temporaries are stored in /tmp/m and /tmp/r files.
  • Time Avg clears the accumulator on keyframes.

Install Cinelerra 4.5:

The DEB installer for Ubuntu is available at this page. Download & installed the cinelerra-data_4.5-dmo1_all.deb & cinelerra_4.5-dmo1_amd64 (or i386).deb

You can also download and build the source code.

If you’d like to install Cinelerra CV (community version of Cinelerra which adds new enhancements to the official source code.), run commands below in terminal one by one (Ctrl+Alt+T):

sudo add-apt-repository ppa:cinelerra-ppa/ppa

sudo apt-get update

sudo apt-get install cinelerra-cv

cinelerra ubuntu 13.10

This tutorial is going to show beginners how to install Cinelerra-CV Video Editor in Ubuntu 13.10 Saucy or Linux Mint 16 Petra.

Cinelerra-CV is the community version of Cinelerra which adds new enhancements to the official source code. So far, the latest is version 2.2 and it’s available in PPA for Ubuntu 13.10 Saucy, Ubuntu 13.04 Raring, Ubuntu 12.10 Quantal, Ubuntu 12.04 Precise, Ubuntu 10.04 Lucid and their derivatives.

Install Cinelerra via PPA:

To get started, hit Ctrl+Alt+T on your keyboard to open terinal. When it opens, run command to add the PPA:

sudo add-apt-repository ppa:cinelerra-ppa/ppa

Then update package lists on your system:

sudo apt-get update

Finally install the package:

sudo apt-get install cinelerra-cv

If you’d like to install the official version of cinelerra, download the Debs from this page.

This tutorial shows how to install Cinelerra video editor in current Ubuntu 22.04 and Ubuntu 24.04.

Cinelerra is a free open-source video editor for Linux. It supports advanced composition operations such as keying and mattes, and many other professional functions depending on the variant.

Cinelerra has a few variants, including GG, CV, HV. The GG variant, which supports up to 8K video, and can also create DVDs and Blu-rays, is presently under active development and the only one that works in my case in current Ubuntu releases.
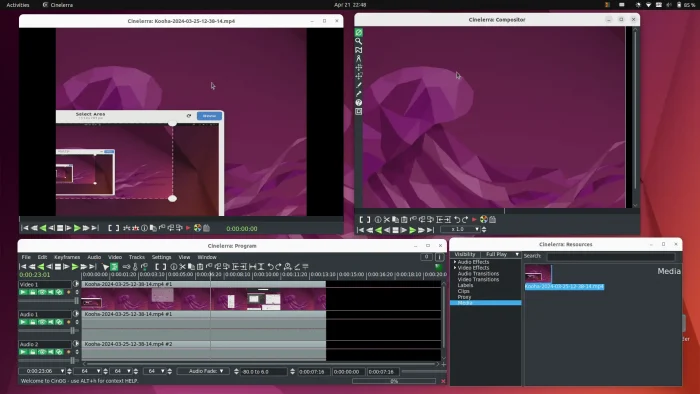
Download & Install Cinelerra GG

The GG edition now provides the official binary package for AppImage package.

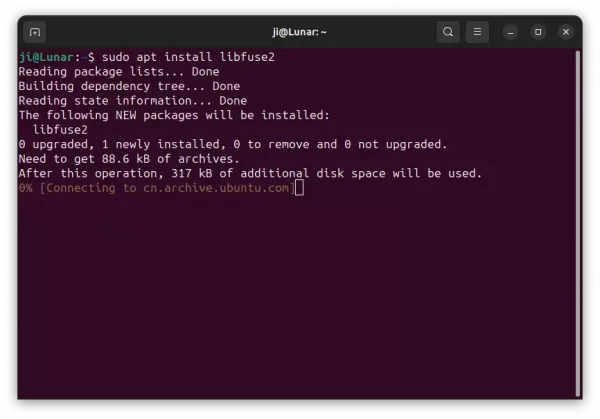
1. Ubuntu does not support AppImage out-of-the-box since 22.04. To enable it, press Ctrl+Alt+T on keyboard to open terminal, then run command:

sudo apt install libfuse2
2. Then, select download the latest version of the AppImage from its website:

Scroll down in that page and click download the latest package. At the moment of writing, it’s “CinGG-20240229-x86_64.AppImage” (for modern Intel/AMD CPUs).

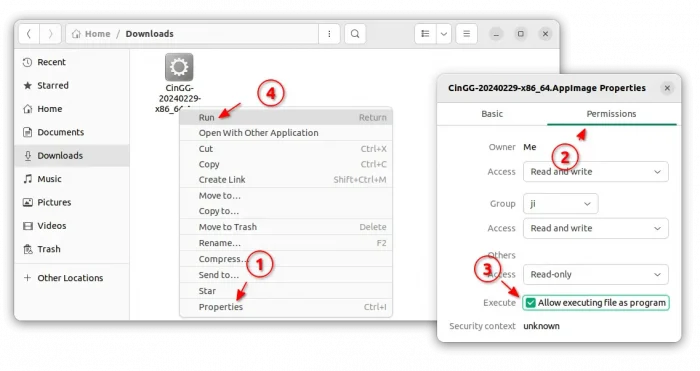
3. After downloaded the package, right-click on it in file manager, then click go to its “Properties” dialog.

Next, navigate to Permissions tab and click enable “Allow executing file as program”. Finally, click Run the AppImage file to launch the video editor:
4. Create an App icon for Cinelerra.

If you want to launch the video editor from start menu or Gnome ‘Show Apps’ screen just like other normal apps. Then, click launch text editor first.
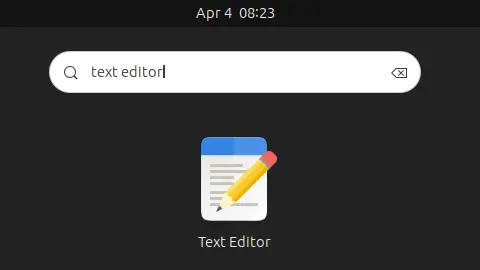
When text editor opens, create a new empty file (if it does not open a new one), then write following lines into it:

[Desktop Entry]
Name=Cinelerra GG
Comment=MultiMedia Editor
Categories=AudioVideo;AudioVideoEditing;
Encoding=UTF-8
Exec=/home/ji/Apps/CinGG-20240229-x86_64.AppImage
Icon=Cinelerra
Terminal=false
Type=Application

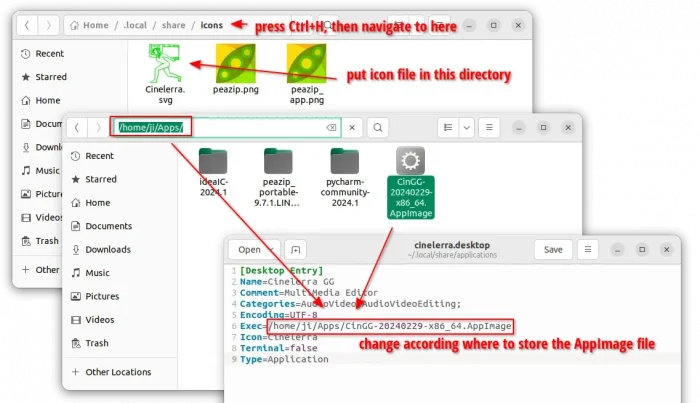
IMPORTANT: In the lines above, you need to replace the value for “Exec”! In my case, I moved the AppImage file into my custom “Apps” folder in user home. So, it’s “/home/username/Apps/file-name.AppImage”. You have to change it to yours!

And for icon, you need to download one from web. Either .png or .svg file. Re-name to Cinelerra.png (or Cinelerra.svg depends on image type), and put it to “.local/share/icons” directory.
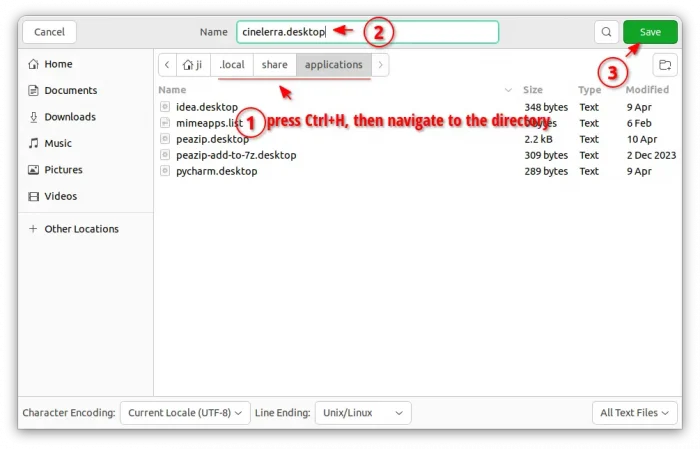
When done editing the text file, click “save” (or save as), then select save the file to .local/share/applications directory, whatever name as you want with “.desktop” extension.
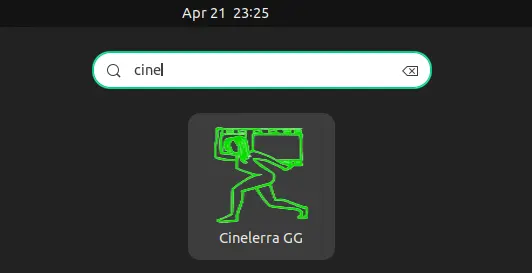
If everything’s done properly, you’re able to search for and launch the video editor from menu a few moments later.
Uninstall Cinelerra GG

To uninstall the video editor, just delete the .AppImage file from your file manager. Then, also remove the .desktop file from ‘.local/share/applications’ directory, as well as the icon file from ‘.local/share/icons’.