![]()
After 2 years of development, Flightgear 2020.3 was released as the latest stable version of the flight simulator. Here’s how to install it in Ubuntu 18.04, Ubuntu 20.04, Ubuntu 22.04, Ubuntu 24.04, and derivatives.
FlightGear 2020.3 release highlights:
- New default Keflavík International Airport (BIKF)
- Aircraft updates:
- The A320 has been overhauled
- The C182 gained an excellent integration of the FG1000 glass-cockpit, as did the J3 Cub and the Diamond DA40.
- The SEPCAT Jaguar GR.1, Bombardier Q400 and twenty more aircraft were added.
- FlightGear now simulates tides covering and uncovering shallow areas (littoral areas), like tidal flats (mudflats).
- Textures can be cached & compressed for faster loading and reduced memory use, giving better performance.
- Connection to the VATSIM network via SWIFT is officially supported.
- Better translation support, and handling of non-ASCII file names.
- Many view improvements, including a new Tower-AGL view.
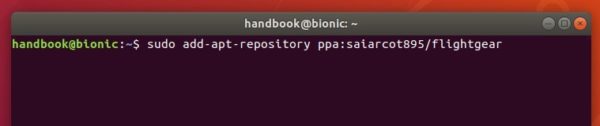
1.) To install the flight simulator, first open terminal either from system application menu or by pressing Ctrl+Alt+T on keyboard.
When terminal opens, run command to add the PPA repository:
sudo add-apt-repository ppa:saiarcot895/flightgear
Type user password (no asterisk feedback) when it prompts and hit Enter to continue.
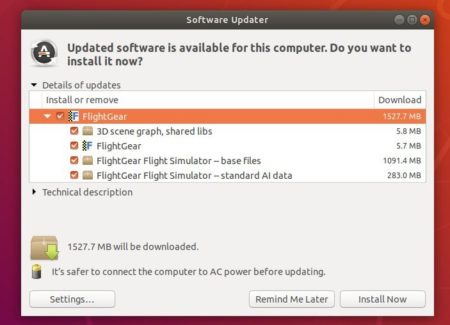
2.) Then refresh system package cache and install the software via command:
sudo apt update

sudo apt install flightgear
If an old version was installed, you can also upgrade it via Software Updater utility.
Uninstall:
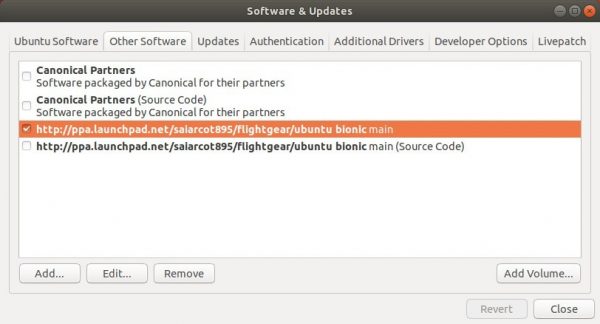
To remove FlightGear PPA, either go to Software & Updates > Other Software, or run command:
sudo add-apt-repository --remove ppa:saiarcot895/flightgear
And remove the flight simulator if you want by running command:
sudo apt remove --autoremove flightgear flightgear-data