This simple tutorial shows you how to install Rockbox Utility on Ubuntu 22.04, Ubuntu 22.04, and Ubuntu 20.04.
What is Rockbox:
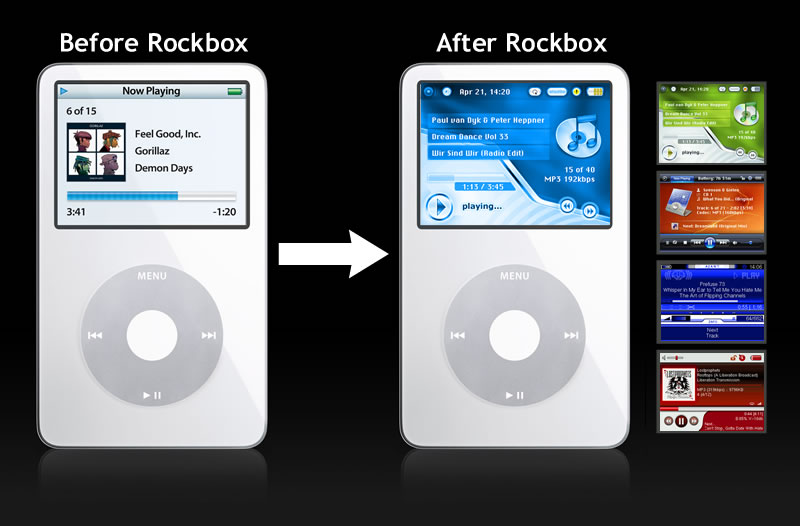
As you may know, Rockbox is a free and open source replacement for the standard firmware in various forms of digital audio players (DAPs). It offers an alternative to the player’s operating system, in many cases without removing the original firmware, which provides a plug-in architecture for adding various enhancements and functions. Enhancements include personal digital assistant (PDA) functions, applications, utilities, and games. Rockbox can also retrofit video playback functions on players first released in mid-2000. Rockbox includes a voice-driven user-interface suitable for operation by visually impaired users.
What is Rockbox Utility
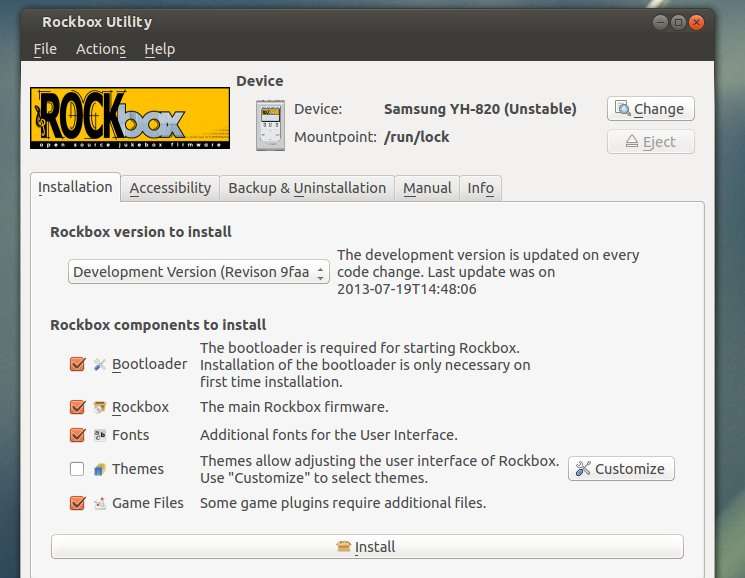
Rockbox Utility is a free computer application that is used to install and manage Rockbox on DAPs. It provides automatic installation of Rockbox, as well as themes and voice files, directly onto a DAP with minimal user interaction.
Rockbox Utility is updated frequently as support for new devices is added. Currently supported devices include iPod, iPod Mini, iPod Nano, Archos Jukebox series, Cowon X5, M5, M3, iRiver H10/H100/H300, Mpio HD200, Packard Bell Vibe 500, Philips GoGear, Samsung YH, SanDisk, Toshiba, Olympus. Read more
Features:
- Base
- Bootloader installation
- Rockbox installation
- Extras
- Fontpack installation
- Theme installation
- Game files installation (i.e. freedoom)
- Accessibility
- Install voice file (from the webpage)
- Create voicefile
- Create .talk clips
- Uninstallation
- Uninstall bootloader
- Uninstall Rockbox (partial, or full)
- Manual
- Access to the Manual of your device
- Info
- Shows all installed parts of Rockbox
Install Rockbox Utility:
The Rockbox Utility now provides universal AppImage package for Linux users.
Just go to the download page via the link below:
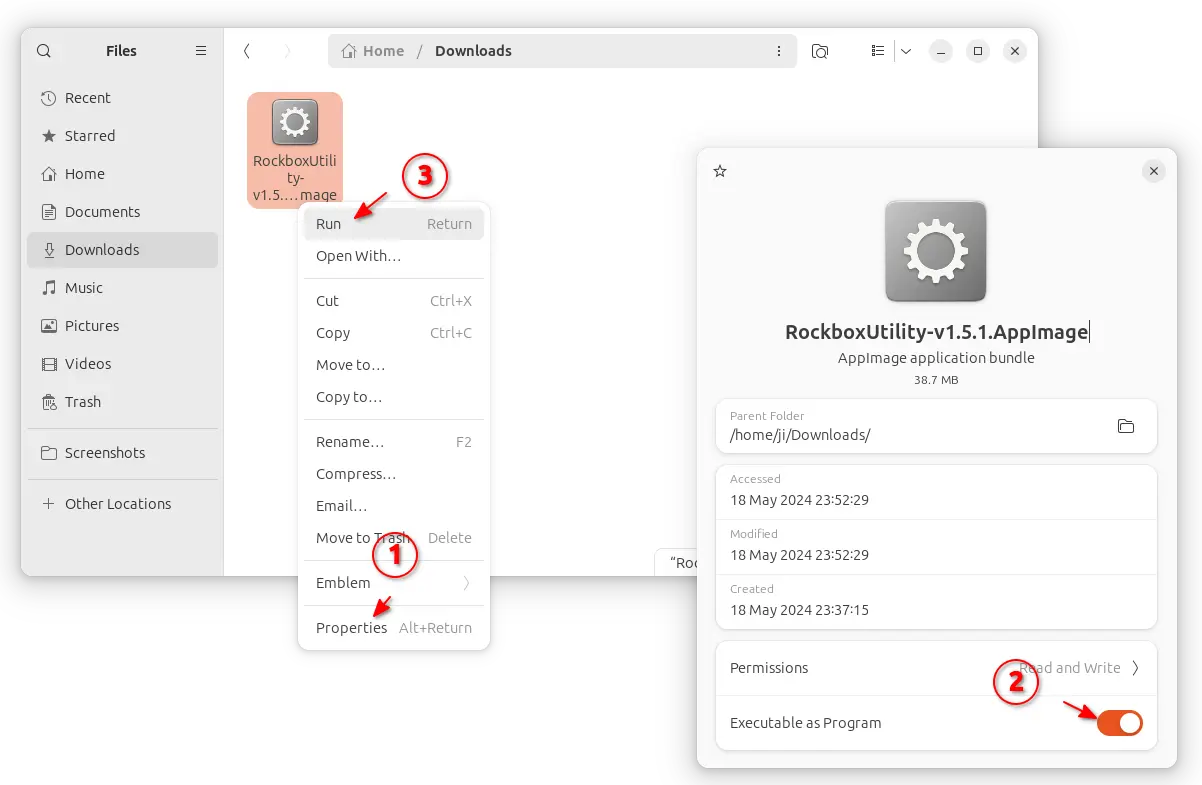
Then click the link to download the package for Linux. At the moment of writing, the latest is RockboxUtility-v1.5.1.AppImage.
After downloaded the package, right-click on it in file manager, go to “Properties”, and enable “Executable as Program” option (under Permissions tab for 22.04 and earlier). Finally, click Run the AppImage will launch the app.
NOTE: Ubuntu 22.04 and higher does NOT support AppImage out-of-the-box. You need to press Ctrl+Alt+T on keyboard to open terminal, then run command to get it support:
sudo apt install libfuse2