Archives For November 30, 1999

Want to create an USB installer for Microsoft Windows, but only has a Linux PC (or server)? Here’s how to do the trick in Ubuntu, Arch, Fedora, and their based systems, e.g., Linux Mint, Manjaro.

WoeUSB-ng

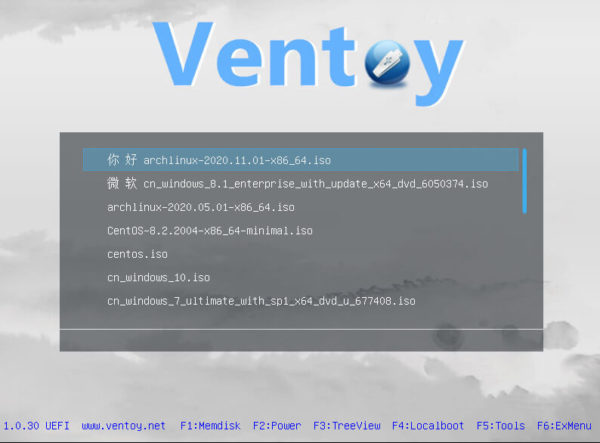
Today when I was installing Windows 7 on my 10 years old laptop, the first I tried is booting the ISO image via Ventoy USB stick. Sadly, it just didn’t boot!

So, I turned to WoeUSB-ng. It’s a free open-source tool to create a Windows USB stick installer from a real Windows DVD or iso image.

It’s a rewrite of WoeUSB in Python programming language with graphical interface support! With it, you can burn Windows Vista, Windows 7, Window 8.x, Windows 10 and Windows PE into USB with following boot mode:

  • Legacy/MBR-style/IBM PC compatible bootmode
  • Native UEFI boot for Windows 7 and later (FAT file-system only).

Step 1: Install WoeUSB-ng

Arch Linux users just need to run yay -S woeusb-ng command in terminal to install the app.

1.) Install Dependency

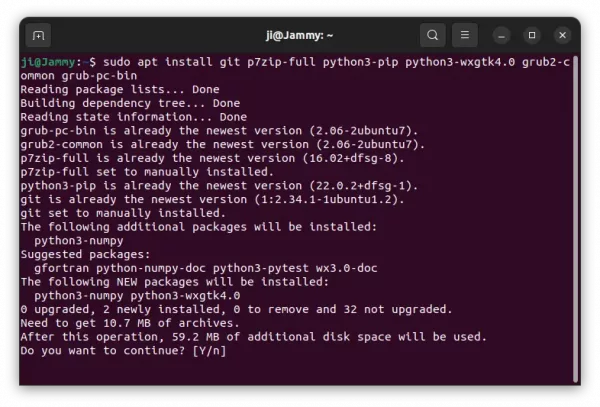
Firstly, press Ctrl+Alt+T on keyboard to open terminal. When it opens, run the command below to install the dependencies:

sudo apt install git p7zip-full python3-pip python3-wxgtk4.0 grub2-common grub-pc-bin

Type user password for sudo authentication, though there’s no asterisk feedback

For Fedora, run the command below instead:

sudo dnf install git p7zip p7zip-plugins python3-pip python3-wxpython4

2.) Install WoeUSB-ng

As a Python application, it’s easy to install via the pip package manager. To do so, just run command:

sudo pip3 install WoeUSB-ng

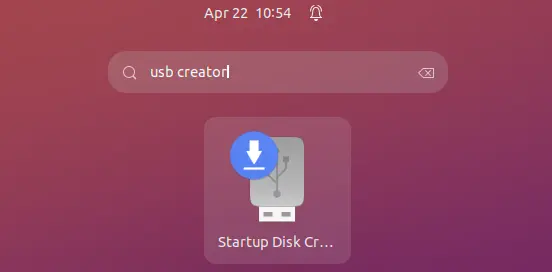
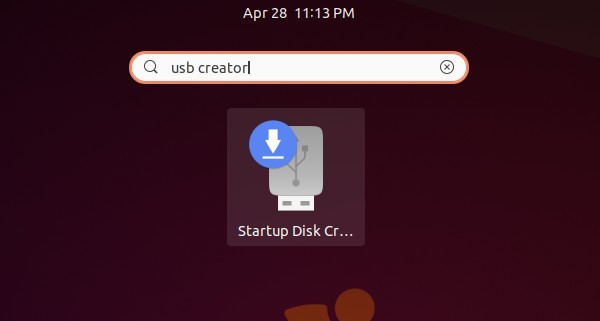
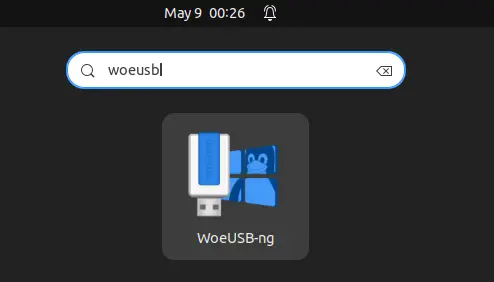
Once installed, click the top-left “Activities” button, then search for and open the tool:

Step 2: Create Windows USB Installer via WoeUSB-ng

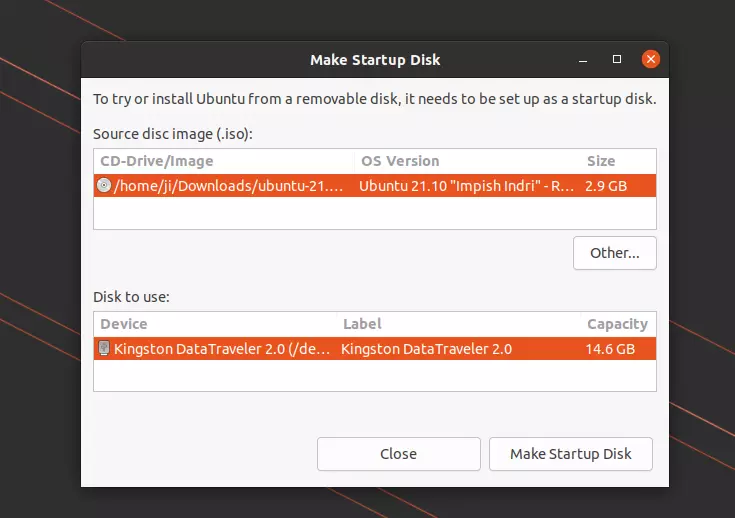
Firstly, you need to download the Windows ISO image or insert the CD/DVD drive, plug in your USB stick (8GB+ is recommended).

Then, launch WoeUSB-ng from start menu, select your ISO image or CD/DVD drive and highlight the USB stick (click “Refresh”) if not in list.

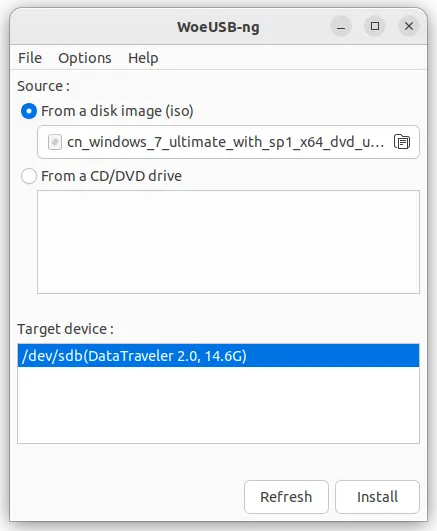
Before clicking the “Install” button, backup your data in the USB stick. It by default formats the drive into FAT, though you can select “NTFS” in options.

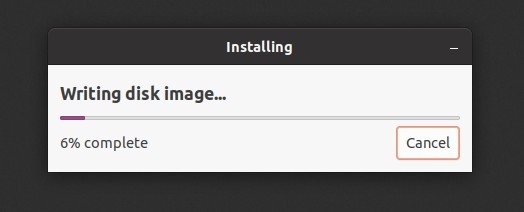
After clicking “Install” and confirm in pop-up dialog, it will open a new small dialog indicates the installing process.

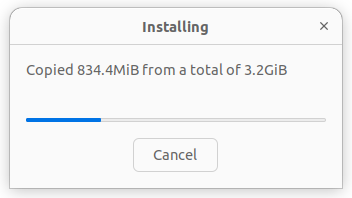
If everything goes OK, it should prompt “Installation Succeed” when done. Plug the USB stick in target machine and select boot it in BIOS or UEFI, and enjoy!

Create USB Windows Installer from command line

Running Linux without a desktop session? The tool also has command line options to do the job.

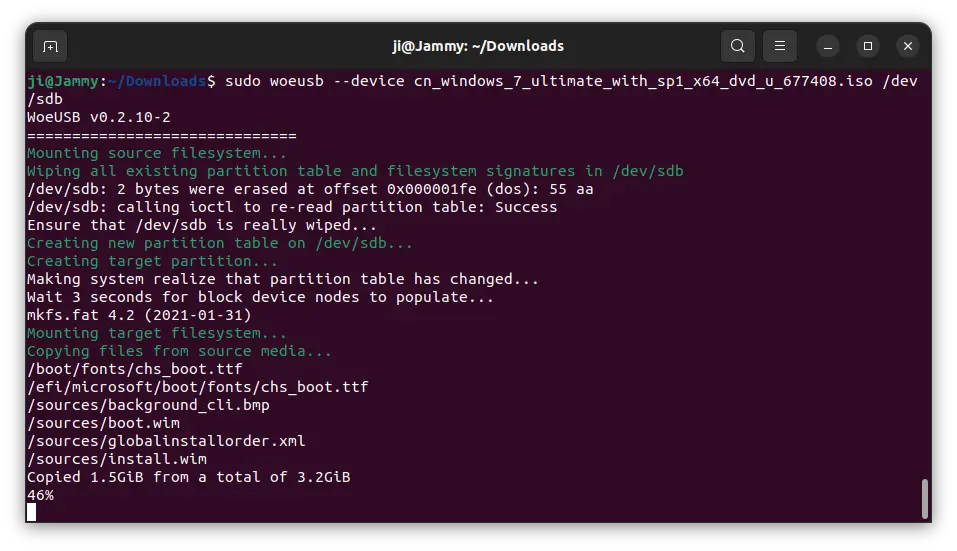
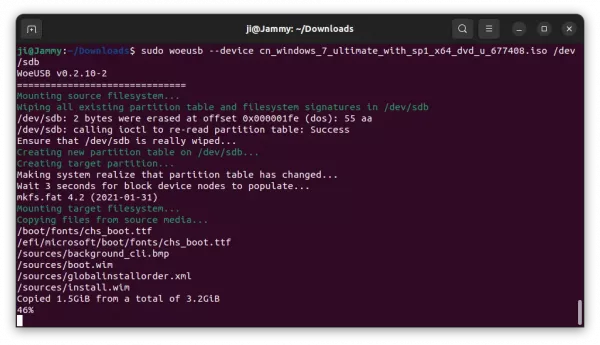
Firstly, find out the USB stick device name (usually /dev/sdb) via command:

sudo fdisk -l

Then, run the command to create installer from iso image (run woeusb -h to get more options):

sudo woeusb --device /PATH/TO/ISO /dev/sdb

And for BIOS boot, it’s better to add ‘–workaround-bios-boot-flag’ to workaround BIOS bug that won’t include the device in boot menu.

Uninstall WoeUSB-ng

To remove the application, open terminal and run the command:

sudo pip3 uninstall WoeUSB-ng

Then clear the shortcut icon via command:

sudo rm /usr/share/applications/WoeUSB-ng.desktop

The new Ubuntu 22.04 LTS has been released! If you’re going to do a fresh install, then this tutorial may help to burn the ISO image into your USB stick.

Requirements:

To follow this tutorial, you need following things to get start:

Step 1: Verify the Downloads

Before burning the ISO image, it’s better to verify the data integrity. If you’re confident that the iso image is OK, you may just skip this step.

For Linux, simply run the command below in terminal and compare the output with the “SHA256SUMS” file in previous download link.

sha256sum ~/Downloads/ubuntu-22.04-desktop-amd64.iso

For Windows user, search for and open CMD, and run command (replace YOUR_USER accordingly):

certutil -hashfile C:/Users/YOUR_USER/Downloads/ubuntu-22.04-desktop-amd64.iso SHA256

Verify iso image

Step 2: Backup

Creating boot-able USB installer will format your USB stick. All data stored in USB will be cleared!! So it important make a backup first.

Step 3: Burn the ISO image

Firstly, plug in your USB stick and do following steps depends on which operating system you have.

Option 1: For Ubuntu PC:

If you’re now running with an old Ubuntu system, just search for and open “Startup Disk Creator” from the Activities overview screen.

When it opens, it should select the USB drive automatically as well as the ISO image. If not, click on “Other” button, then browse and select the Ubuntu 22.04 iso image.

Click on “Make Startup Disk” button, then type user password to authentication. Then just wait, the process should be done in a few minutes!

Option 2: For Windows, MacOS, and other Linux:

There are a few other tools to create Linux USB installer. Here I tried the UNetbootin, which works in Linux, Windows, and MacOS.

Firstly, download the free open-source tool from its website:

Then start the app, it should automatically detect your USB stick. Just click on the ‘…’ button to select the Ubuntu 22.04 iso image, and then click on OK to start burning it.

Ignore the second dialog, it’s a bug persists for a period of time, though it won’t affect the USB burning process.

Option 3: Use Ventoy

Ventoy is a new solution for booting iso image from USB. With it, you can just save images in normal way, along with other files. When you try to boot from USB, it will look for the iso images automatically and provide the option to boot them.

However, it seems not working quite good with UEFI. At least it does not work in my laptop with secure boot enabled. See here for more.

When everything’s done successfully, select boot your USB stick from BIOS (UEFI) and enjoy!

ubuntu bootable usb

Want to create a bootable live-USB for installing Ubuntu on your machine? Well, here’s how to do it in Windows, Linux, or Mac OS.

I used to use UNetbootin to create bootable Live USB. However, the USB drive does not boot after writing with recent Ubuntu ISO images. So here I’m going to introduce you few other USB writing tools.

Though I prefer the style of Ventoy, it however does not install in my USB stick for unknown reason. If you need bootable USB with other data transfer usage unaffected, try it!

Requirements:

Firstly you need an USB stick with at least 4 GB storage. And backup your data before getting started.

Also a PC, Laptop / Notebook, or even Raspberry Pi running Linux, Windows, or Mac OS.

And download Ubuntu ISO image from either releases.ubuntu.com or ubuntu.com/download

Create Bootable USB from Ubuntu:

If you’re now working on Ubuntu, that’s great, simply search for and launch Startup Disk Creator. Other Ubuntu based systems can get it by installing the usb-creator-gtk package.

When the tool opens, click on “Other …” and select the Ubuntu ISO image. Plug-in USB stick and it will auto-detect it.

Finally click on “Make Startup Disk“, click OK to confirm and type your user password to get start.

When done, it should prompt you installation complete. That’s it.

Create Bootable USB from Other Linux, Windows, Mac OS.

For all other systems I’d recommend USBimager if no system built-in tool available, though there are many other USB creating tools in the web.

USBimager is a free and open-source tool with really simple interface. It small in package size with less than 200 KB. And it works on old systems, minimum system required Windows XP, Mac OS 10.13. Also it’s available for Raspberry Pi.

1.) Firstly select download the USBImager package from your system:

2.) Then install and/or launch the tool, select ISO image via three dots “…” button and choose your USB stick from drop-down menu after plugged in.

Finally click on “Write” to start creating the USB installer.

The bottom bar will show the process info with data size and time left.

When done, you’ll see “Done. Image written successfully in xxx” message in the bottom.

That’s it. Enjoy!

To do a fresh Ubuntu install, I’m always first burning the ISO image into USB drive, and then boot up with the USB drive and install Ubuntu into hard disk.

I used to use Unetbootin to create the startup USB drive. However, it has been dropped from Ubuntu repositories since Ubuntu 18.04 LTS. And Unetbootin .bin package is not well burning the ISO image in my case.

In this quick tutorial, I’m going to tell you that the default Gnome USB Creator can do the job easier and more straightforward:

1. First download Ubuntu iso from releases.ubuntu.com, and plug-in your USB drive.

2. Search for and launch usb creator (Start Disk Creator) in application menu:

3. When it opens, click the Other button and choose the downloaded ISO image.

Finally click the Make Startup Disk button to start burning the ISO into selected USB drive.

That’s it! When everything’s done, boot the USB drive in your machine and try or install Ubuntu.