


![]()
Since Ubuntu 23.04 Lunar Lobster, the default system fonts for the texts in system menus, documents, and app windows have been changed.
The new font is slim. And, I’ve written a tutorial about how to try it out in Ubuntu 22.04 and 20.04. If you prefer the old one, here’s how to revert it back in Ubuntu 24.04 LTS.
Compare to Ubuntu 23.04/23.10, the new font in Ubuntu 24.04 looks better now in my opinion. Because, the default fonts have been changed:
- from ‘
Ubuntu Regular‘ to ‘Ubuntu Sans‘ for interface text. - from ‘
Ubuntu Mono Regular‘ to ‘Ubuntu Sans Mono‘ for monospace text.
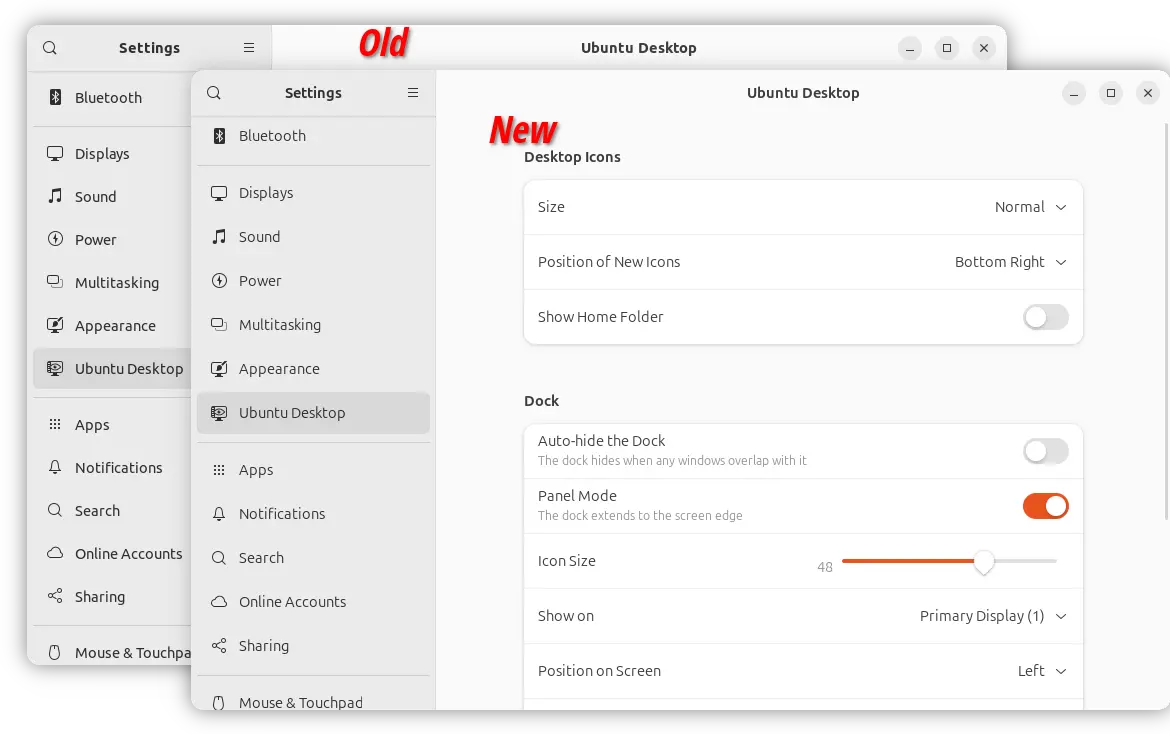
Default fonts changed in Ubuntu 24.04
Install old Ubuntu Fonts in Ubuntu 24.04
1. Install the classic font
Since Ubuntu 23.10, a new package fonts-ubuntu-classic is available in system repository for those who prefer the classic font.
To install the package, press Ctrl+Alt+T on keyboard to open up a terminal window. Then, run command:
sudo apt install fonts-ubuntu-classic
You may run sudo apt update to refresh system package cache first if the command above somehow does not work for you.

After installing the classic fonts, text in terminal may become un-readable. In the case, just log out and back in.
2. Download & install classic font for Console (Optional)
The classic font for console (terminal) so far is NOT available in Ubuntu 24.04 repository. For choice, you may manually download and install the package for Ubuntu 22.04.
To do so, launch a terminal window (Ctrl+Alt+T), and download the classic font for console package via command:
wget -c https://launchpad.net/ubuntu/+archive/primary/+files/fonts-ubuntu-console_0.83-6ubuntu1_all.deb
Next, install the package by running command:
sudo apt install ./fonts-ubuntu-console_0.83-6ubuntu1_all.deb

3. Apply the classic fonts
Option 1: Use Gnome Tweaks to apply classic fonts:
After installed the classic fonts, it won’t apply automatically, because the default font names have changed as mentioned.
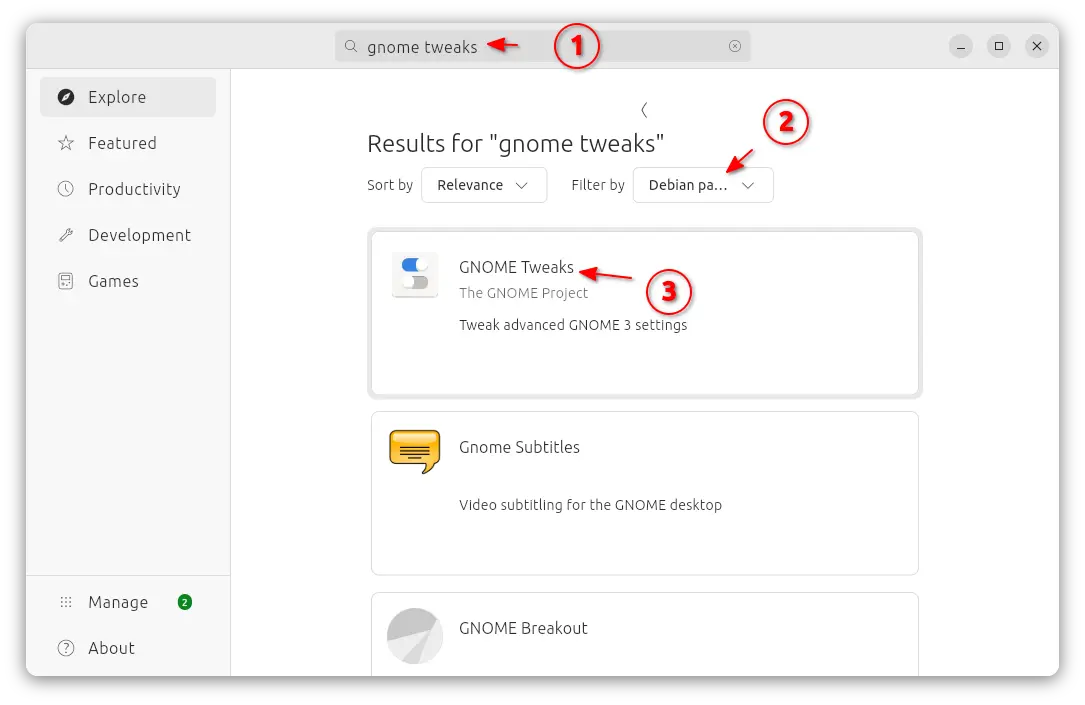
To switch back the old ones, first search for and install GNOME Tweaks from App Center.
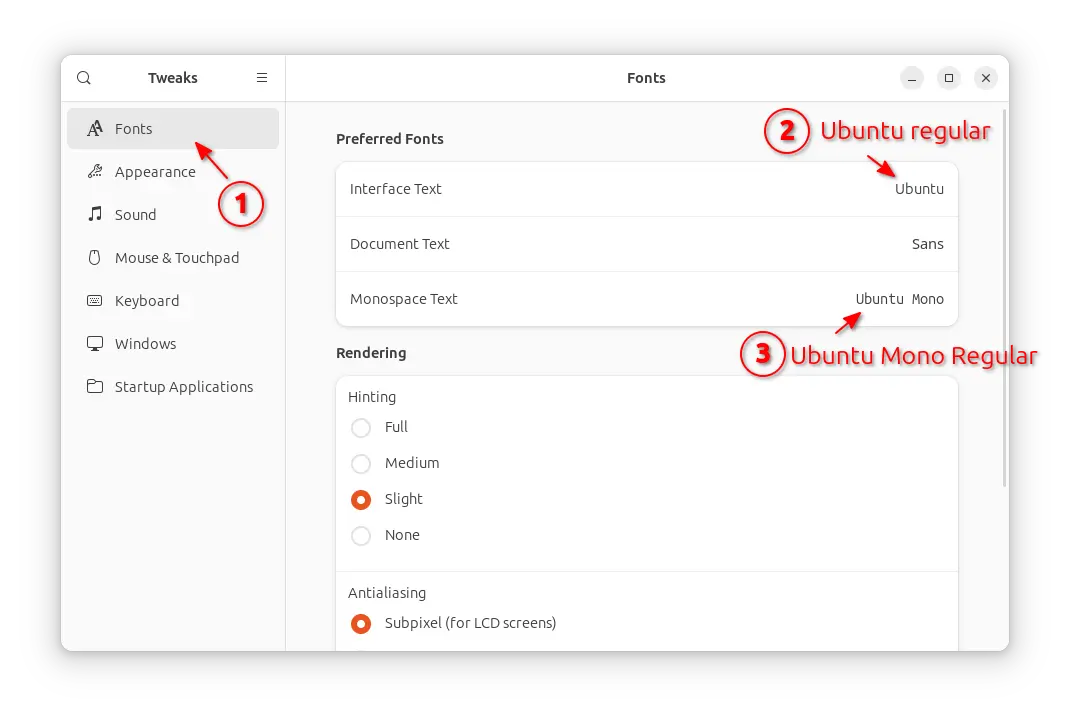
Next, launch Gnome Tweaks, and in the first “Fonts” tab:
- Select Ubuntu Regular as Interface Text font. It will be displayed as ‘Ubuntu’ after selection.
- And select Ubuntu Mono Regular for Monospace Text, if you also installed the classic font for console.
Option 2: use Linux commands to apply the classic fonts
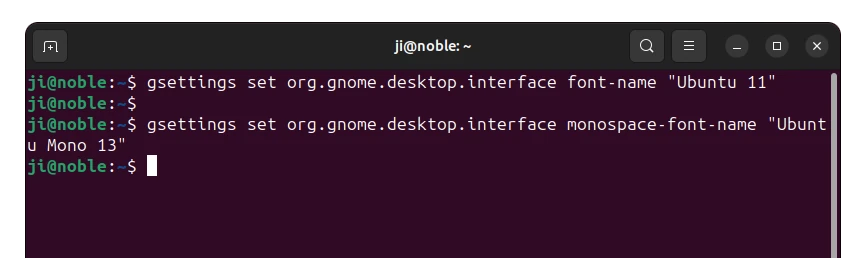
For those who are OK with Linux commands, open up a terminal window (Ctrl+Alt+T) and run the commands below one by one instead:
gsettings set org.gnome.desktop.interface font-name "Ubuntu 11"
gsettings set org.gnome.desktop.interface monospace-font-name "Ubuntu Mono 13"
Lock & Prevent updating to new fonts
To prevent your system from automatically updating to the new fonts, you have to lock the old fonts packages that were just installed via the previous step.
Thanks to @Alex Farran, lock package version via Synaptic package manager only prevents itself and ‘Software Updater’ from upgrading the package. However, apt command and may be other tools can still upgrade the fonts. So, the best choice can be running the command below in terminal:
sudo apt-mark hold fonts-ubuntu fonts-ubuntu-console
For the graphical way (NOT work for apt), first open App Center, search for and install Synatic Package Manager.
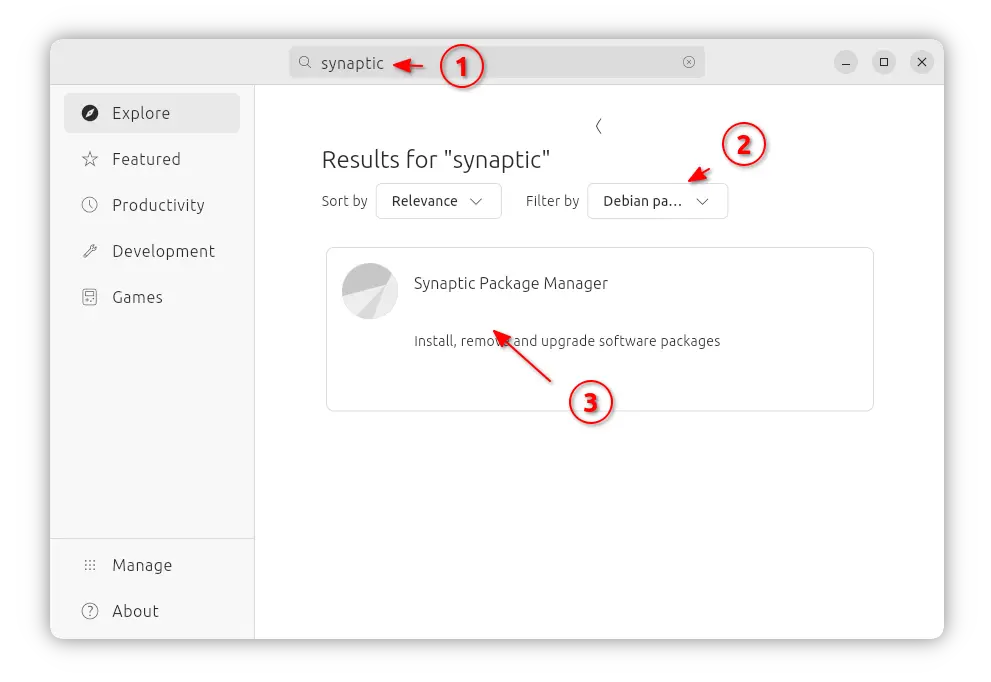
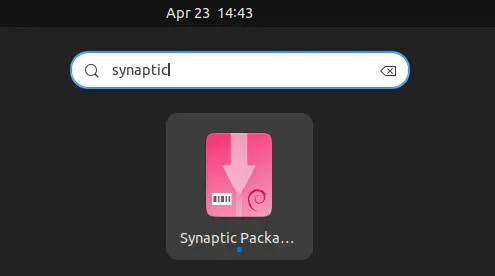
Then launch “Synaptic”, click “Search” and search “fonts-ubuntu“. Finally, do:
- Press and hold Ctrl then highlight both “fonts-ubuntu” and “fonts-ubuntu-console” packages.
- Go to menu “Package -> Lock Version”.

How to go back the new Ubuntu Fonts
First, open terminal (Ctrl+Alt+T) and run command to unlock the font packages:
sudo apt-mark unhold fonts-ubuntu fonts-ubuntu-console
Then, also search for and launch Synaptic package manager.
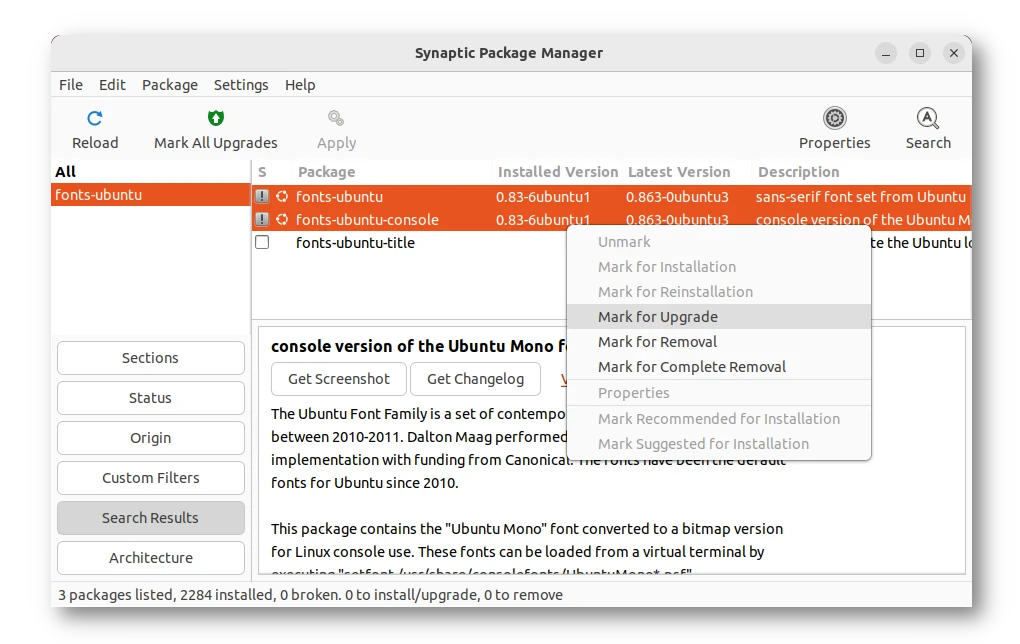
When it opens, search “fonts-ubuntu“. Then do:
- highlight both “fonts-ubuntu” and “fonts-ubuntu-console” packages via Ctrl + mouse click.
- Go to menu “Package” and un-check “Lock Version” (skip if NOT enabled).
- Next, right-click on both packages and select “Mark for Upgrade“.
- Finally, click on “Apply” button.
When done, reset the font names by running commands in terminal (Ctrl+Alt+T) one by one:
gsettings reset org.gnome.desktop.interface font-name
gsettings reset org.gnome.desktop.interface monospace-font-name


Thanks for this. When I upgraded to 23.04 I initially thought something was wrong with my system’s font rendering due to the change. I much prefer the old one.
Thanks for the guide. The new Ubuntu 23.04 fonts didn’t look well to me when comparing with 22.10 (it’s hard to read and recognize letters) so I downgraded.
That is very helpful, thank you. The new fonts are almost unreadable.
Version locking doesn’t seem to be working. A few days ago I installed the version 0.83 and locked both packages.Today I can see they were upgraded back to 0.86.
Locking the version will stop Synaptic from upgrading a package, but that setting is ignored by other tools, such as the software updater. Instead, put the font packages on hold with
$ aptitude hold fonts-ubuntu
$ aptitude hold fonts-ubuntu-console
Yes, it works. Thanks
Locking in synaptic only prevents synaptic from upgrading the packages. To stop other programs from updating them you need to put them on hold with aptitude hold package_name.
Hi !
And what if I’d like to change the fonts to, let’s say Ubuntu Condensed ?
gnome-tweaks used to be able to do that but it’s no longer the case in 23.04 ( it only changes shell font – panel, app’s and activities views ) it’s not applied in Nautilus for instance.
Can you just install fonts-ubuntu-classic and apply it using ubuntu tweak tool?
Ubuntu Tweak Tool works! Thanks for the tip. It’s was broken in my case when I was writing this tutorial.
Thanks a lot. Somehow you always pick up the important topics. Very helpful again!
Still searching for my lost verdana, now have little boxes in place of text on title bars and task bar menus.
Reboot banished the boxes, still no verdana.
Works for me all I had to do was sudo apt install fonts-ubuntu-classic and it works immediately noithing else