This simple tutorial shows you how to map a network drive, Windows share as example, onto Ubuntu 14.04 LTS with read and write permission permanently.
UPDATE-2024: This tutorial is outdated, and no longer works in current Ubuntu releases!!
All things will be done in a terminal window. Not familiar with Linux command? Don’t be afraid, just paste the command into terminal and hit enter to run one by one. There will be a few pictures to make things more clear.
Preparation:
There are a few preliminary actions we need to do before we can start mounting using cifs.
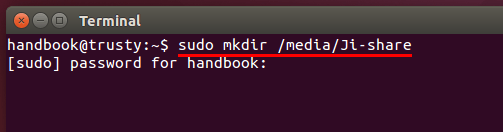
1. Press Ctrl+Alt+T on keyboard to open the terminal. Paste the command below and run to create a mount point, you can replace ‘Ji-share’ to what you want.
sudo mkdir /media/Ji-share
2. Install cifs-utils, which provides support for cross-platform file sharing with Microsoft Windows, OS X and other Unix systems.
Install it from Ubuntu Software Center, or via below command:
sudo apt-get install cifs-utils
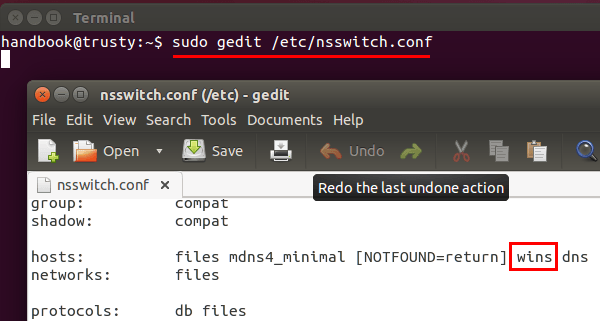
3. Edit the /etc/nsswitch.conf:
sudo gedit /etc/nsswitch.conf
Find the line looks like:
hosts: files mdns4_minimal [NOTFOUND=return] dns
change it into:
hosts: files mdns4_minimal [NOTFOUND=return] wins dns
4. Run below command so that your Ubuntu can resolve Windows computer name on a DHCP network.
sudo apt-get install libnss-winbind winbind
Reboot Ubuntu, or restart your network.
Mount (map) network drive:
Now edit the fstab file to mount network share on start up.
1. Make a backup by running the command below:
sudo cp /etc/fstab /etc/fstab_old
If you need to restore your backup, run:
sudo mv /etc/fstab_old /etc/fstab
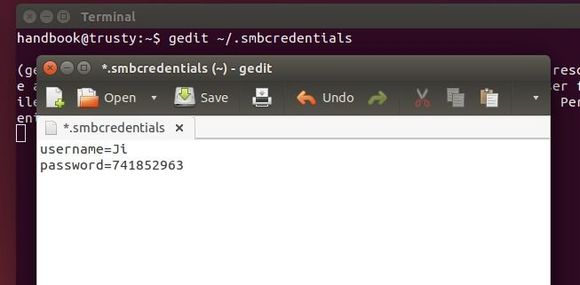
2. Create a credentials file via:
gedit ~/.smbcredentials
insert the username and password for accessing the remote share. Replace “Ji” & “741852963” with yours and save the file.
username=Ji
password=741852963
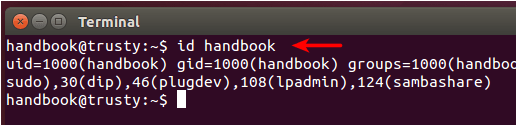
3. Run command to get your gid and uid. Replace handbook with your user name.
id handbook
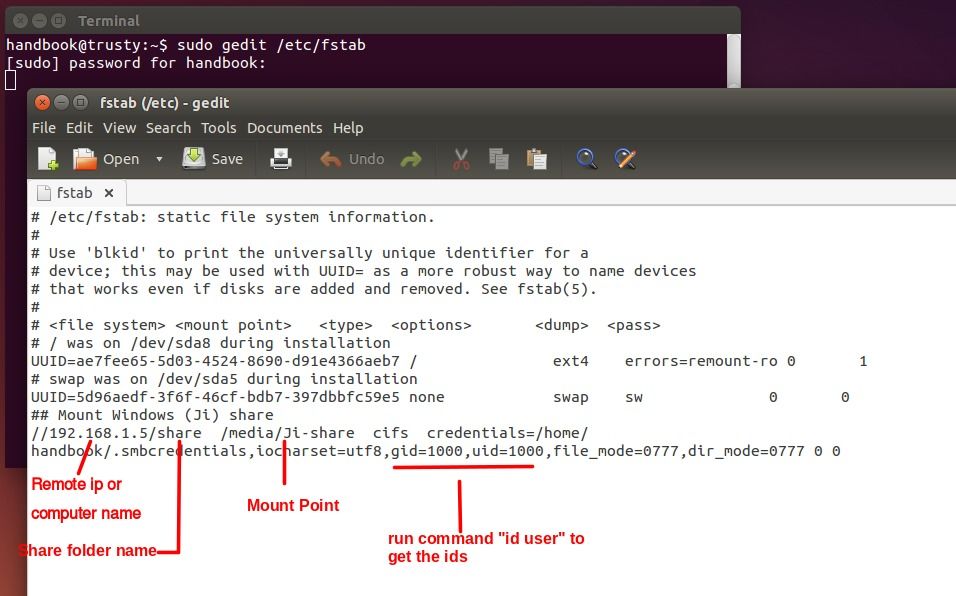
4. Now edit the fstab by running the command:
sudo gedit /etc/fstab
Add below line (one line) to the end and save it. REPLACE WORDS IN RED!
//192.168.1.5/share /media/Ji-share cifs credentials=/home/handbook/.smbcredentials,iocharset=utf8,gid=1000,uid=1000,file_mode=0777,dir_mode=0777 0 0
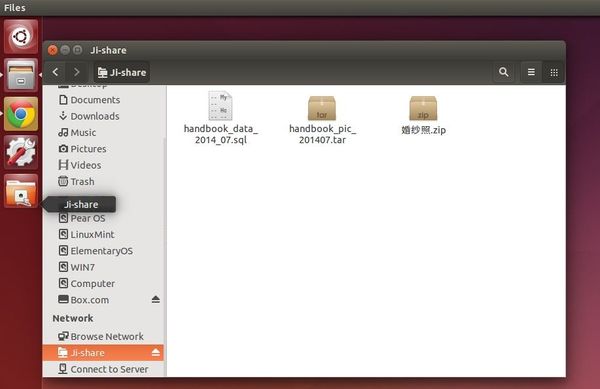
Finally run sudo mount -a in terminal and you’ll get the network share mapped in Unity Launcher and Nautilus file browser: