For developers who want to prepare their project for the latest Python releases, here’s how to install the current Python 3.15 pre-release in all current Ubuntu releases.
Python 3.15 is so far in the development stage, which features explicit lazy imports for faster startup times, frozendict and sentinel built-in types, a dedicated profiling package for organizing Python profiling tools, new PyBytesWriter C API to create a Python bytes object, and more. See the what’s new page for details.
How to Install Python 3.15 (Pre-release So far)
Python is easy to install in Ubuntu by either using the popular Deadsnakes PPA or building from the source. Choose either one that you prefer.
Option 1: Install Python 3.15 from PPA
For Ubuntu 22.04, Ubuntu 24.04, Ubuntu 26.04 and their derivatives such as Linux Mint 21/22, the Deadsnakes PPA has made the packages for all supported CPU architecture types: amd64, arm64/armhf, ppc64el, and s390x.
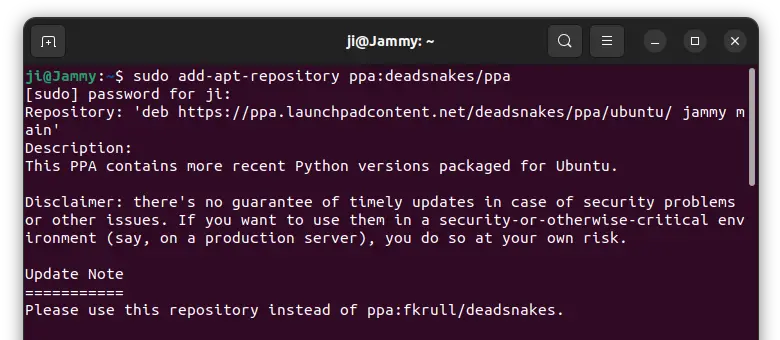
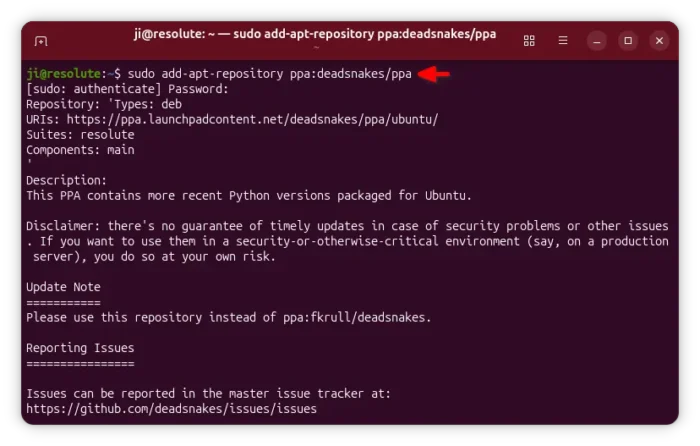
1. First, press Ctrl+Alt+T on keyboard to open terminal. Then paste the command below and hit run to add PPA:
sudo add-apt-repository ppa:deadsnakes/ppa
Type user password (no asterisk feedback) when it asks and hit Enter to continue.
2. Then refresh package cache. It should be done automatically during adding PPA, though Linux Mint user may need to do this job manually by running command:
sudo apt update
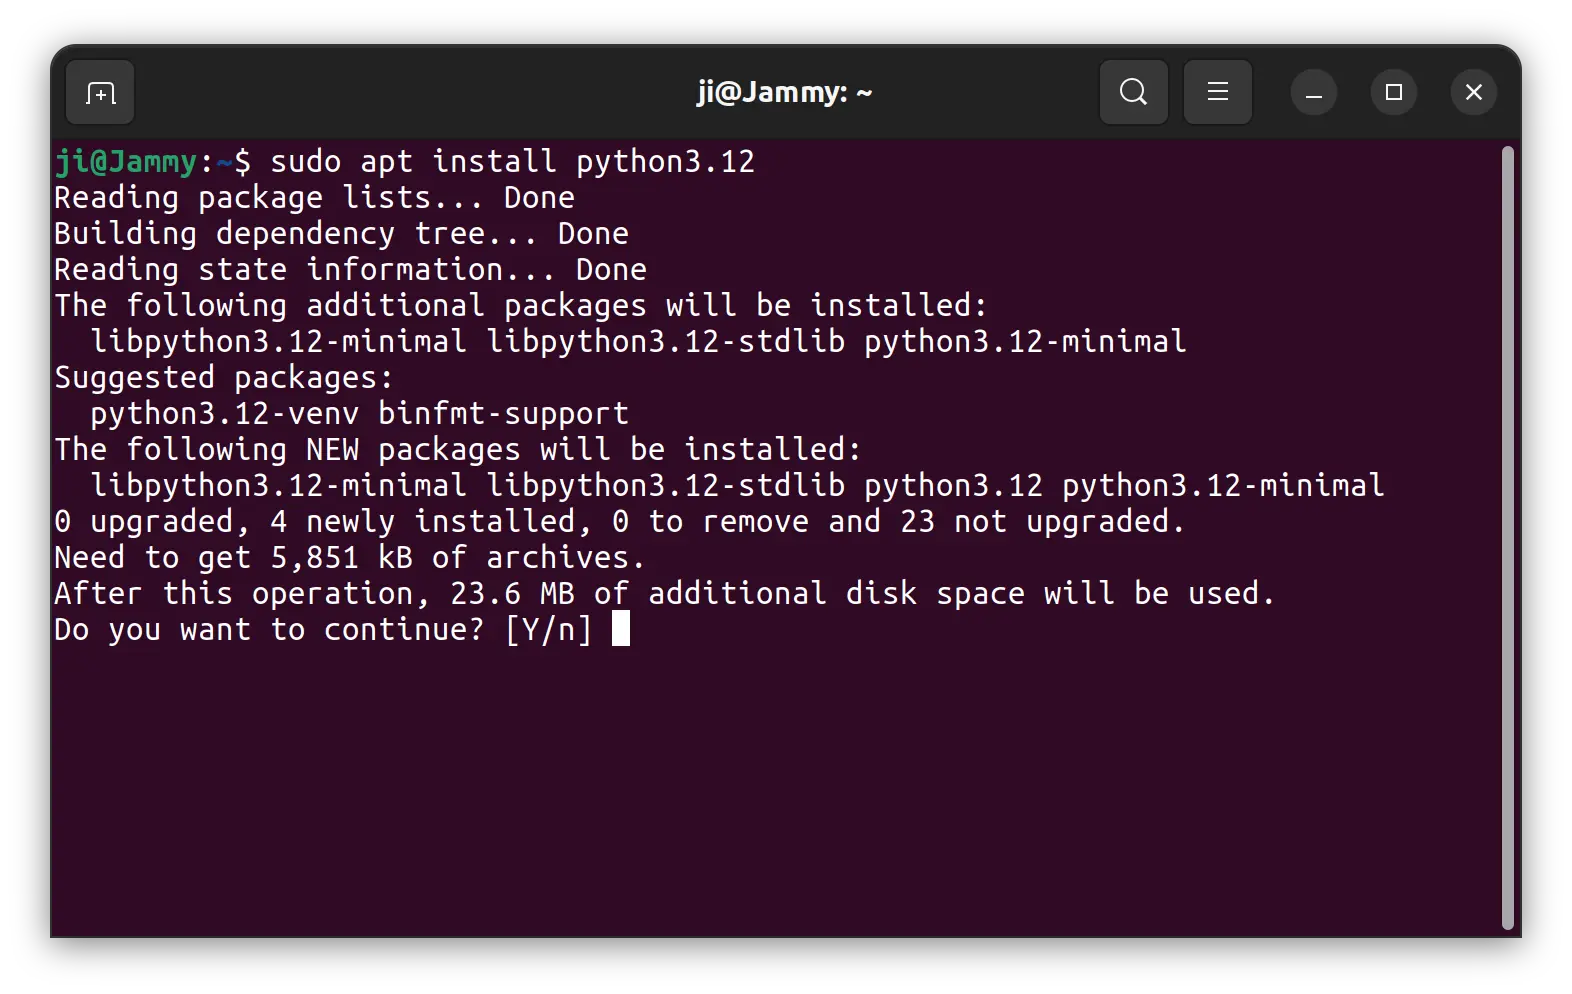
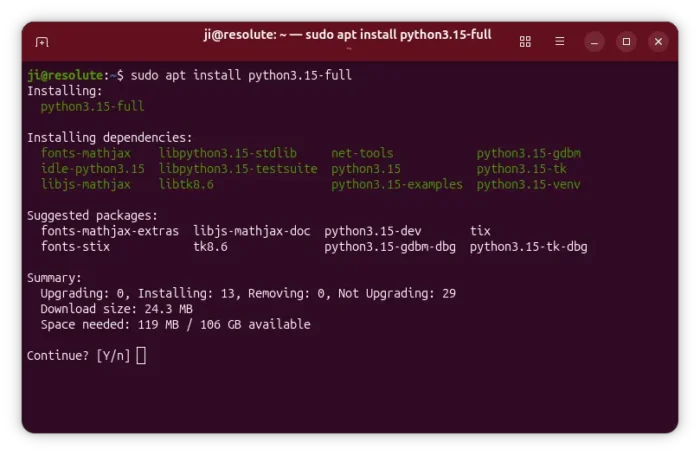
3. Finally, run command to install Python 3.15:
sudo apt install python3.15-full
As you see in the screenshot, this command will install Python 3.15 as well as the dbm database, Tk applications, and pyvenv binary support.
You may also install idle-python3.15 package for the default IDE using Tkinter, or replace python3.15-full with python3.15 for the minimal install.
Option 2: Compile and install Python 3.15 from source
Don’t trust third-party repositories or you’re running Ubuntu 20.04 or Ubuntu 18.04 that PPA does not support? It’s easy to build Python from the source tarball.
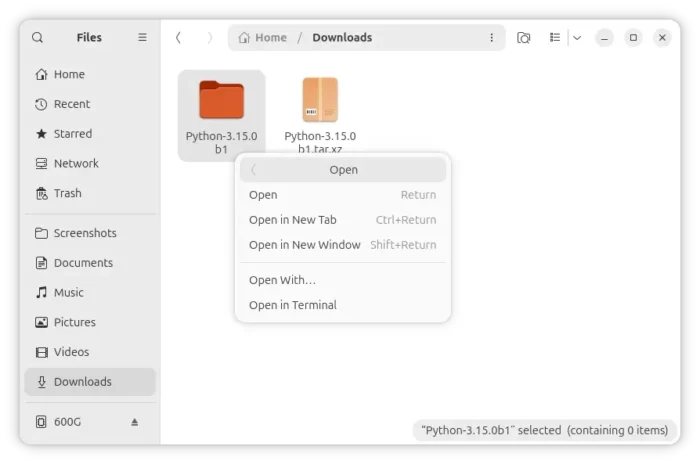
1. First download the source tarball from its ftp download page:
2. Then open ‘Downloads’ folder, extract the source tarball, finally right-click on source folder and select “Open in Terminal”.
3. When terminal opens, run the command below to install the dependency libraries for building the source:
sudo apt install wget build-essential libreadline-dev libncursesw5-dev libssl-dev libsqlite3-dev tk-dev libgdbm-dev libc6-dev libbz2-dev libffi-dev zlib1g-dev
Then, run commands below one by one to configure and build Python:
./configure --enable-optimizations
sudo make -j8 && sudo make altinstall
Verify:
Once installed Python 3.15, verify by running command:
python3.15 --version && pip3.15 --version
Set Python 3.15 as default (for PPA package)
NOTE: If you built Python 3.15 from source via the steps above, then it should be already set as default. Try running python3 --verison to verify!
It’s NOT recommended to set non-preinstalled Python package as default for Python3, because it may break some applications.
If you insist, try to set python3.15 as default by running the commands below one by one:
- First, run command below to check the pre-installed (current default) Python verison:
python3 --version
It’s version 3.14 for Ubuntu 26.04, 3.12 for 24.04, or 3.10 for 22.04.
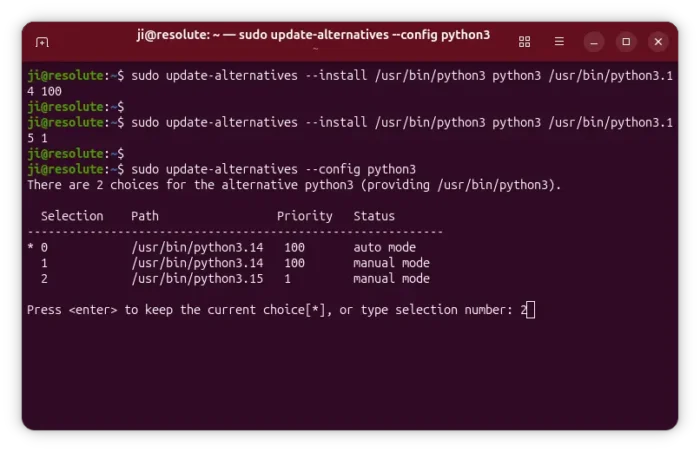
- Then, run command below to add
/etc alternatives for default python3 (replace version 3.14 with your Ubuntu’s default version number):
sudo update-alternatives --install /usr/bin/python3 python3 /usr/bin/python3.14 100
And, add Python 3.15 as an alternative link to python (replace /usr/bin/python3.15 according last command output).
sudo update-alternatives --install /usr/bin/python3 python3 /usr/bin/python3.15 1
- Finally, run command below to configure default for
python3:
sudo update-alternatives --config python3
After that, run python3 --version to verify. And, you may re-run the last command at anytime to switch the default back to the pre-installed one.
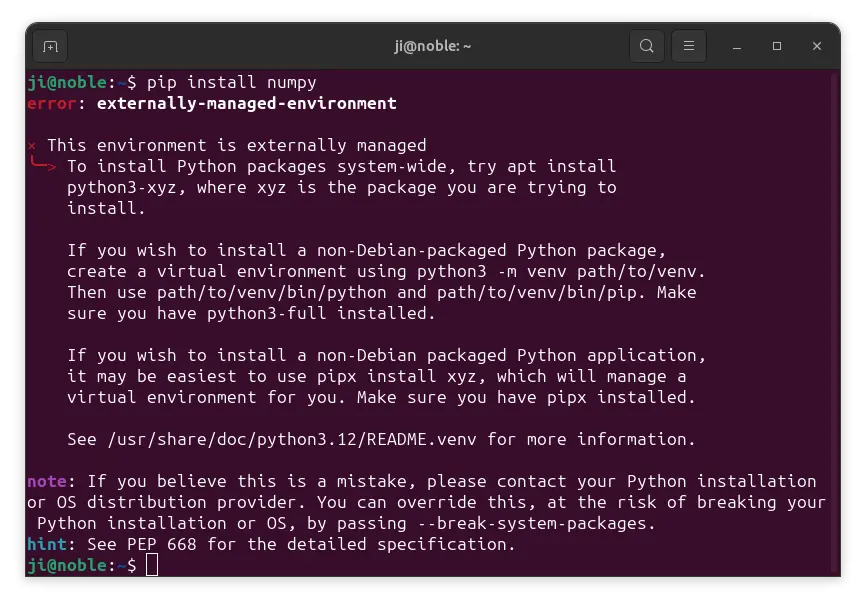
Use pip installer for Python 3.15
Due to PEP 668, pip install does no longer work like before. The recommended way to use pip is create a virtual environment first, though there are few workarounds.
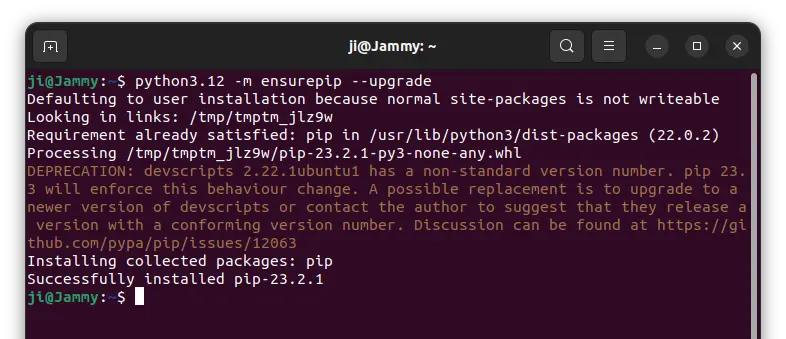
First run command to install the pyvenv binary (if you installed the package from PPA):
sudo apt-get install python3.15-venv
Then, create a virtual environment by running command:
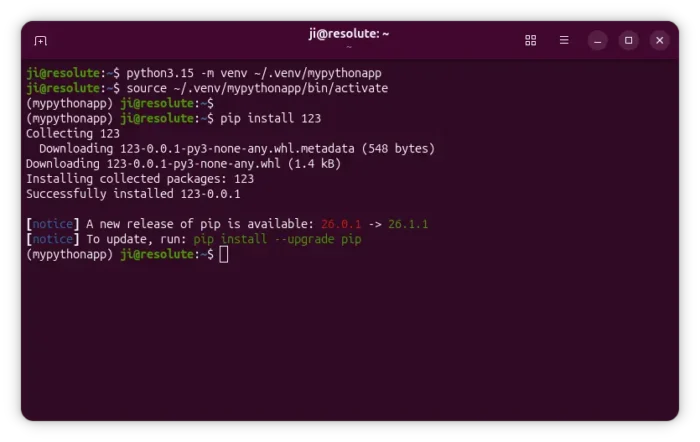
python3.15 -m venv ~/.venv/mypythonapp
This command will create a .venv hidden folder in your user home folder then create a virtual environment called mypythonapp (replace the name as you want).
Next, use the source command to get into that virtual environment:
source ~/.venv/mypythonapp/bin/activate
Finally, run pip command to install a python package.
Tips: Without running source command every time, you may optionally add that virtual environment into PATH, so it can be run in anywhere in terminal.
To do so, either run command below, which works for the terminal window only, or paste it into the end of .profile file (press Ctrl+H in user home to view it) and log-out and back in.
export PATH=$HOME/.venv/mypythonapp/bin:$PATH
Uninstall Python 3.15:
If you installed Python 3.15 using the PPA repository, simply open terminal and run command to remove it:
sudo apt remove --autoremove python3.15 python3.15-full
For the PPA, run command to remove it:
sudo add-apt-repository --remove ppa:deadsnakes/ppa
If you built the Python 3.15 from source tarball, then there’s no uninstaller script to automate the job.
However, you may manually remove the installed files by running commands:
cd /usr/local/bin && sudo rm python3* pip3* idle3* pydoc3*
cd /usr/local/lib && sudo rm -R python3.15 pkgconfig/python* libpython3.15.a