Archives For November 30, 1999

Wine Stable

The new development version Wine 4.15 was released one day ago. Here’s how to install it in Ubuntu 19.04 and/or Ubuntu 18.04.

Wine 4.15 release highlights:

  • Initial implementation of the HTTP service.
  • Stack unwinding support on ARM64.
  • Better multi-monitor support on macOS.
  • RichEdit control optimizations.
  • Various bug-fixes, including fixes to Dragon Age, World of Warcraft 7, Need For Speed, etc.

How to Install Wine 4.15 in Ubuntu:

Note: following steps may not work in Ubuntu 18.04 due to unmet dependencies issue. Please comment if you have a solution.

1. Open terminal either via Ctrl+Alt+T keyboard shortcut or by searching for ‘terminal’ from application menu. When it opens, run following commands to download and install the key:

wget -nc https://dl.winehq.org/wine-builds/winehq.key && sudo apt-key add winehq.key

Type user password (no asterisk feedback) when it prompts and hit Enter.

2. Then add Wine repository for Ubuntu 19.04:

sudo apt-add-repository 'deb https://dl.winehq.org/wine-builds/ubuntu/ disco main'

For other Ubuntu releases, replace disco in the code with:

  • bionic for Ubuntu 18.04, Linux Mint 19.x

3. Install unmet dependence: faudio

The wine devel package requires libfaudio0 library which is not available in Ubuntu repositories.

As a workaround, run command to add the third-party PPA, which offers the packages for Ubuntu 18.04, Ubuntu 19.04.

sudo add-apt-repository ppa:cybermax-dexter/sdl2-backport

4. Finally run command to install Wine 4.14, which will automatically install the required libfaudio0 libraries.

sudo apt install --install-recommends winehq-devel

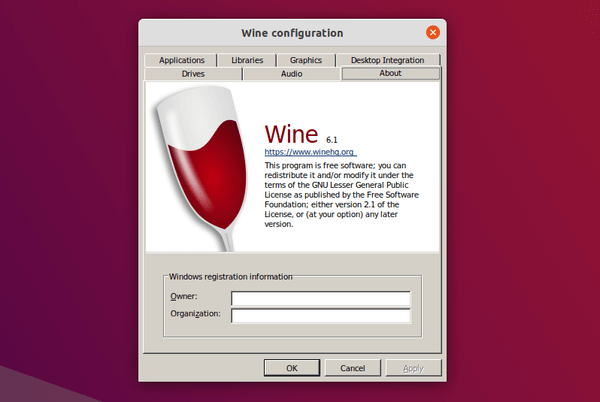
Once installed, run winecfg to bring up the configuration window and check Wine version.

Uninstall:

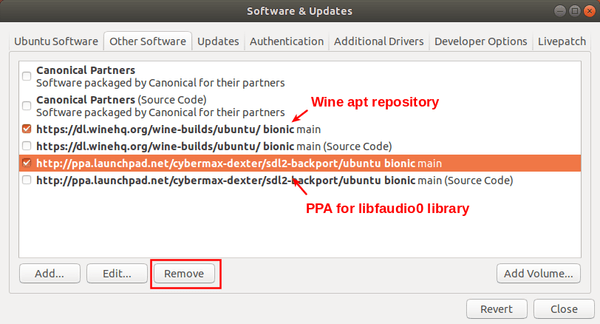
Open Software & Updates and navigate to Other Software tab. Then remove the PPA, and Wine apt repository lines.

To remove Wine devel package, run command:

sudo apt remove --auto-remove winehq-devel

Wine Stable

The new development release Wine 4.9 was released today. Here’s how to install it in Ubuntu 18.04, Ubuntu 18.10, and Ubuntu 19.04.

Wine 4.9 release highlights:

  • Initial support for installing Plug and Play drivers.
  • Support for building 16-bit modules in PE format.
  • A lot of code moved to the new KernelBase DLL.
  • Various game controller fixes.
  • Use higher performance system clocks if available.
  • Various bug fixes.

How to Install Wine 4.9 in Ubuntu:

1. Open terminal either via Ctrl+Alt+T keyboard shortcut or by searching for ‘terminal’ from app menu. When it opens, run following commands to download and install the key:

wget -nc https://dl.winehq.org/wine-builds/winehq.key && sudo apt-key add winehq.key

Type user password (no asterisk feedback) when it prompts and hit Enter.

2. Then add Wine repository for Ubuntu 19.04:

sudo apt-add-repository 'deb https://dl.winehq.org/wine-builds/ubuntu/ disco main'

For other Ubuntu releases, replace disco in the code with:

  • bionic for Ubuntu 18.04, Linux Mint 19.x
  • cosmic for Ubuntu 18.10.
  • xenial for Ubuntu 16.04, Linux Mint 18.x

3. Install unmet dependence: faudio

The wine devel package requires libfaudio0 library which is not available in Ubuntu repositories.

As a workaround, run command to add the third-party PPA, which offers the packages for Ubuntu 18.04, Ubuntu 18.10, Ubuntu 19.04.

sudo add-apt-repository ppa:cybermax-dexter/sdl2-backport

4. Finally run command to install Wine 4.9, which will automatically install the required libfaudio0 libraries.

sudo apt install --install-recommends winehq-devel

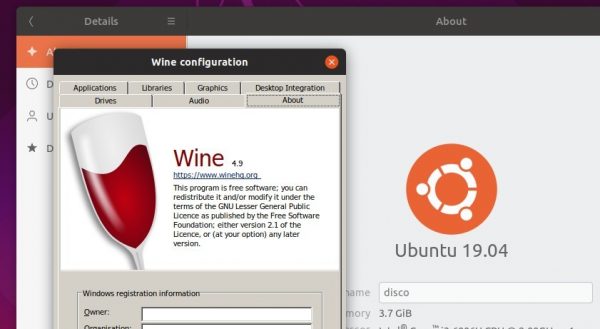
Once installed, run winecfg to bring up the configuration window and check Wine version.

Uninstall:

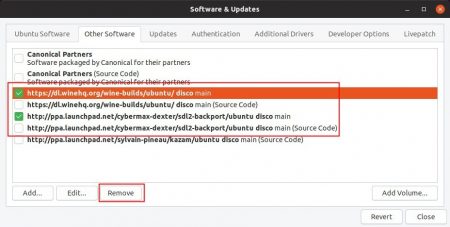
Open Software & Updates and navigate to Other Software tab. Then remove the PPA, and Wine apt repository lines.

To remove Wine devel package, run command:

sudo apt remove --auto-remove winehq-devel

Wine 3.0.4 Released with Lots of Bug Fixes

Last updated: January 25, 2019

Wine Stable

Wine, an open-source compatibility layer allows to run Windows apps on Linux, released the new stable version 3.0.4 a day ago with lots of bug-fixes.

Wine 3.0.4 added a lot of icons in Shell32, and fixed 47 bugs affecting Total Commander, SuperPower 2, ODB++ Viewer, Wechat, World of Warcraft, Total War, Wargaming Game Center, Overwatch, and more.

How to Install Wine 3.0.4 in Ubuntu:

The new release packages will be made into official Wine apt repository in a few days.

At that time, you can do following steps to install it in Ubuntu 18.04, Ubuntu 16.04, Ubuntu 14.04, and derivatives.

1. Open terminal via Ctrl+Alt+T or by searching it from app launcher. When it opens, run command to add the repository key:

wget -nc https://dl.winehq.org/wine-builds/winehq.key && sudo apt-key add winehq.key

Type your password (no asterisks feedback due to security reason) when it asks and hit Enter.

2. Add wine repository via command:

sudo apt-add-repository https://dl.winehq.org/wine-builds/ubuntu/

For Linux Mint 19, use following command instead (replace bionic with xenial for 18.x):

sudo apt-add-repository 'deb https://dl.winehq.org/wine-builds/ubuntu/ bionic main'

3. Finally check updates and install wine stable packages:

sudo apt-get update

sudo apt-get install --install-recommends winehq-stable

NOTE: If you get the unmet dependencies issue while installing Wine, try aptitude instead via command:

sudo apt install aptitude; sudo aptitude install winehq-stable

For more details, see the official documentation.

Uninstall:

To remove wine-stable package, run command in terminal:

sudo apt-get remove --autoremove wine-stable wine-stable-amd64

To remove Wine repository, launch Software & Updates utility and navigate to Other Software tab.

Wine Stable

The new development release Wine 3.21 was announced a day ago with some improvements and various bug-fixes.

Wine 3.21 release highlights:

  • Typelib marshaller rewrite using NDR functions.
  • Graphics support on recent Android versions.
  • Support for memory font resources in DirectWrite.
  • Joystick support improvements.
  • A lot of bugs were fixed in the release, including issues with Guild Wars 2, Microsoft .NET 2.0, Crysis Warhead, and more.

How to Install Wine 3.21 in Ubuntu:

As usual, Wine’s apt repository will build the new release packages for Ubuntu 14.04, Ubuntu 16.04, and Ubuntu 18.04 in 2 or 3 days.

Open terminal either via Ctrl+Alt+T or by searching ‘terminal’ from app launcher. When it opens, run following commands one by one to and the repository and install Wine:

1. Add the official wine apt repository via command:

sudo apt-add-repository https://dl.winehq.org/wine-builds/ubuntu/

For Linux Mint 18.x, run below command instead to add the repository:

sudo apt-add-repository 'deb https://dl.winehq.org/wine-builds/ubuntu/ xenial main'

For Linux Mint 19, run this command instead:

sudo apt-add-repository 'deb https://dl.winehq.org/wine-builds/ubuntu/ bionic main'

2. Download and install the GPG keyring via command:

wget -nc https://dl.winehq.org/wine-builds/winehq.key && sudo apt-key add winehq.key

3. Finally refresh system package cache and install the latest Wine development package via commands:

sudo apt-get update

sudo apt-get install --install-recommends winehq-devel

If you got dependencies issue, install aptitude (sudo apt-get install aptitude) and replace apt-get in last command with aptitude.

Read more about installing Wine in Ubuntu.

Uninstall:

To remove wine dev release, simply run command in terminal:

sudo apt-get remove --autoremove winehq-devel

And you can remove the repository via Software & Updates utility under Other Software tab.

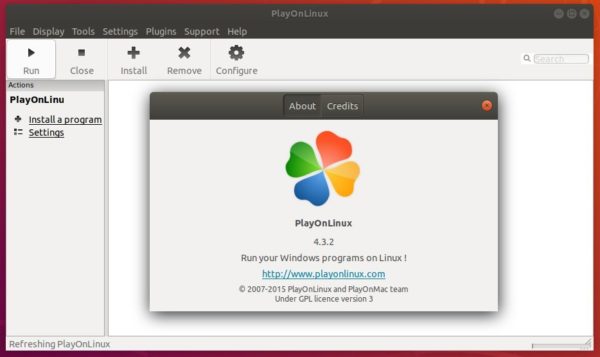
PlayOnLinux, a graphical frontend for the Wine software compatibility layer which allows Linux to install Windows-based applications, released version 4.3 a few days ago.

While Phoenicis PlayOnLinux 5 is currently under development, the POL 4.3 is a bug-fix release that also brings Phoenicis (POL 5) winebuild compatibility. POL 4 winebuilds will be deprecated.

To install PlayOnLinux 4.3, download the official .deb package:

Download PlayonLinux DEB

You can also add the PlayOnLinux apt repository via following steps:

1 Open terminal (Ctrl+Alt+T) and run command to install the keyring:

wget -q "http://deb.playonlinux.com/public.gpg" -O- | sudo apt-key add -

Type user password (no asterisks feedback) when it prompts and hit Enter.

2. Then add PlayOnLinux repository which so far supports for Ubuntu 14.04, Ubuntu 16.04, Ubuntu 18.04.

sudo sh -c 'echo "deb http://deb.playonlinux.com/ $(lsb_release -sc) main" >> /etc/apt/sources.list.d/playonlinux.list'

For Linux Mint, replace $(lsb_release -sc) with xenial for Mint 18.x, bionic for Mint 19 in the command.

3. Finally either upgrade PlayOnLinux via Software Updater or install it via commands:

sudo apt-get update

sudo apt-get install playonlinux

Uninstall:

To remove PlayOnLinux, simply run command in terminal:

sudo apt-get remove --autoremove playonlinux

To remove the apt repository, go to Software & Updates -> Other Software.

Wine Stable

Wine 3.1, the first development release towards the next Wine 4.0 stable, was released released a few days ago.

Wine 3.1 features:

  • Kerberos authentication support.
  • Window class redirection for Common Controls 6.
  • Support for X11 ARGB visuals.
  • DOSBox required for running DOS executables.

Also there are 29 bug-fixes range from fixing Qt5 applications to Grand Theft Auto V issues to Doom 4 / DOOM 2016 problems and other gaming issues.

How to Install Wine 3.1 in Ubuntu:

For Ubuntu 14.04, Ubuntu 16.04, Ubuntu 17.10, Linux Mint 17.x and 18.x, open terminal via Ctrl+Alt+T and run following commands one by one:

1. Add the official wine repository via command:

sudo apt-add-repository https://dl.winehq.org/wine-builds/ubuntu/

For Linux Mint 18.x, use following command instead to add the repository:

sudo apt-add-repository 'deb https://dl.winehq.org/wine-builds/ubuntu/ xenial main'

For Linux Mint 17.x, replace xenial in the code with trusty.

2. Install the GPG key to be able to receive software updates:

wget -nc https://dl.winehq.org/wine-builds/winehq.key && sudo apt-key add winehq.key

3. Finally update and install the latest Wine development release:

sudo apt-get update

sudo apt-get install --install-recommends winehq-devel

Uninstall:

To remove wine dev release, simply run command in terminal:

sudo apt-get remove --autoremove winehq-devel

And you can remove the repository via Software & Updates utility under Other Software tab.

Wine 3.0 Released with Direct3D 10 and 11 Support

Last updated: January 25, 2019

Wine Stable

The Wine team announced the new stable release Wine 3.0 a day ago a large number of improvements and following great changes:

  • Direct3D 10 and 11 support.
  • The Direct3D command stream.
  • The Android graphics driver.
  • Improved DirectWrite and Direct2D support.

“because of the annual release schedule, a number of features that are being worked on have been deferred to the next development cycle. This includes in particular Direct3D 12 and Vulkan support, as well as OpenGL ES support to enable Direct3D on Android.”, the Wine team announced.

For detailed changes, read the announcement.

Wine running windows app in Linux

How to Install Wine 3.0 in Ubuntu:

Wine has an official apt repository contains packages for Ubuntu 14.04, Ubuntu 16.04, Ubuntu 17.10.

Wine 3.0 binary packages are in the process of being built. Once it’s published in apt repository, do following steps to install it:

1. Open terminal via Ctrl+Alt+T or by searching it from app launcher. When it opens, run command to add the repository key:

wget -nc https://dl.winehq.org/wine-builds/winehq.key && sudo apt-key add winehq.key

Type your password (no visual feedback while typing due to security reason) when it asks and hit Enter.

2. Add wine repository via command:

sudo apt-add-repository https://dl.winehq.org/wine-builds/ubuntu/

For Linux Mint 18.x, use following command instead (replace xenial with trusty for 17.x):

sudo apt-add-repository 'deb https://dl.winehq.org/wine-builds/ubuntu/ xenial main'

3. Finally check updates and install wine stable packages:

sudo apt-get update

sudo apt-get install --install-recommends winehq-stable

NOTE: If you get the unmet dependencies issue while installing Wine 3.0, try aptitude instead via command:

sudo aptitude install winehq-stable

The command tells you which packages broke the installation. This usually caused by wrong dependency versions. You can then manually fix the dependencies via Synaptic package manager.

For more details, see the official documentation.

Uninstall:

To remove wine-stable package, run command in terminal:

sudo apt-get remove --autoremove wine-stable wine-stable-amd64

To remove Wine repository, launch Software & Updates utility and navigate to Other Software tab.

Install Google Sketchup Ubuntu 14.04

I’ve posted a tutorial about how to install Google SketchUp 2013 in Ubuntu 13.04, but it seems to be outdated. So I decide to write this how-to and hope it will help those who are trying to get Google SketchUp Make 2014 working in Ubuntu 14.04 LTS through wine.

UPDATE 2024: This tutorial is outdated! It does no longer work in current Ubuntu releases!

First of all, press Ctrl+Alt+T on keyboard to open the terminal. When it opens, run the commands below one by one to install the latest development Wine 1.7 from its PPA:

sudo add-apt-repository ppa:ubuntu-wine/ppa

sudo apt-get update

sudo apt-get install wine1.7

Once wine is installed, config it by running:

winecfg

In “Wine Configuration” window, you may:

  • Change Windows Version to Windows 7 in the bottom of the Applications tab.
  • Under Libraries tab, select ‘Riched20’ library from the drop-down list and add it

wine-configuration

Now download the Windows package of SketchUp EXE from the official link below:

Download Google SketchUp

Right-click on the EXE and select open it via Wine:

open-with-wine

Follow the install wizard and finally you’ll get SketchUp installed with shortcut icons on your desktop.

Tips:

1. On my 64 bit Ubuntu 14.04, SketchUp 2014 hangs after choosing a template. This has been reported as a bug and seemed to be fixed in Wine 1.7.19. However, I still get this error.

The workaround is disable Ruby API by launching SketchUp via:

wine "C:\Program Files (x86)\SketchUp\SketchUp 2014\SketchUp.exe" "/DisableRubyAPI"

Or, in the Properties window of the desktop shortcut, add /DisableRubyAPI to the end of command area:

disablerubyapi

2. If sketch up doesn’t work because of a problem with a graphics card

1. Run below command to bring up Registry Editor:

wine regedit

2. Navigate to HKEY_CURRENT_USER -> Software -> Google -> SketchUp version -> GLConfig -> Display

3. Change the value of HW_OK to 1 (so that it shows up as 0×00000001 (1)

Want to install and use Google Sketchup on Ubuntu 13.04 Raring? Well, this simple tutorial will show you how to do it. With the help of Wine software, you can install and use Windows software easily in Ubuntu.

Wine is a compatibility layer capable of running Windows applications on several POSIX-compliant operating systems, including Ubuntu Linux. It’s free and open-source software. Wine now is getting a lot better at handling Windows software on Linux systems.

To get started with installing Sketchup 2013 in Ubuntu, download the lastest version of wine. To do that, press Ctrl + Alt + T on your keyboard to open the terminal. When it opens, run the commands below to add its PPA.

sudo add-apt-repository ppa:ubuntu-wine/ppa

Then run below command to update package lists and install wine1.5 (Now the latest wine1.7 is recommended):

sudo apt-get update; sudo apt-get install wine1.5

Once wine is installed, run below command to configure it so that Sketchup could be installed. You may need to log out and log back:

winecfg

Next, navigate to Libraries tab, then select ‘Riched20’ library from the drop-down list and add it. When done, click OK

wine-configuration

Download Google Sketchup from http://sketchup.google.com/intl/en/download/gsu.html. Then navigate to the Downloads folder and right-click on the EXE to ‘Open with Wine Windows Program Loader’.

open-with-wine

Follow the setup wizard and finally you’ll get the shortcut on the desktop and Unity dash.

sketchup

That’s it. Enjoy!

UPDATE: If Sketchup hangs after choosing a template, try launching it with /DisableRubyAPI as a workaround. Or read the new post about install Sketchup 2014 in Ubuntu 14.04.