![]()
Already installed LEMP or LAMP on your Ubuntu server? Well, now it’s time to install wordpress CMS and get your site running!
As you may know, wordPress is a popular blogging tool and a content management system (CMS) based on PHP and MySQL. It’s free and open-source. In the steps below the lines that the user needs to enter or customize will be in red in this tutorial!
1. Setup Mysql Database for WordPress
For LEMP (Ubuntu, Nginx, Mysql, Php) without phpmyadmin installed:
Database name: wordpress_db; user name: ubuntuhandbook; password: 12345678; Change them in the code below.
Step 1 – Run command in Ubuntu Server to log into MySQL Shell with MySQL root password:
mysql -u root -pStep 2 – Create database, here I named it wordpress_db:
CREATE DATABASE wordpress_db;Step 3 – Create a new user named ubuntuhandbook:
CREATE USER ubuntuhandbook@localhost;Step 4 – Set a password for this user:
SET PASSWORD FOR ubuntuhandbook@localhost= PASSWORD("12345678");Step 5 – Grant all privileges to the new user:
GRANT ALL PRIVILEGES ON wordpress_db.* TO ubuntuhandbook@localhost IDENTIFIED BY '12345678';Step 6 – Refresh MySQL:
FLUSH PRIVILEGES;Exit MySQL shell:
exit
For LAMP (Apache2, Mysql, Php, Ubuntu Linux):
If you’ve installed LEMP and want to use PhpMyadmin to manage database, click the link in the top of this tutorial.
1. Install Phpmyadmin:
sudo apt-get install phpmyadmin
Choose apache2 webserver during the installing process and say NO to “Configure database for phpmyadmin with dbconfig-common?”
Once installed, run commands below to get it working:
sudo sh -c 'echo "Include /etc/phpmyadmin/apache.conf" >> /etc/apache2/apache2.conf' && sudo service apache2 restart
Now, go to http://UBUNTUSERVERIP/phpmyadmin/ in your client’s browser and type in root and the password you set when MySQL was installed to login.
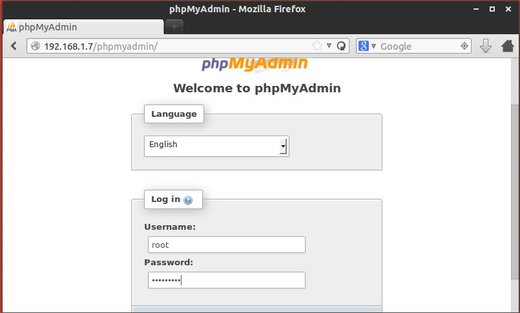
phpmyadmin login
2. Follow the below steps to create database and user with same name.
Step 1 – Click on Users then click Add User.
Step 2 – Type in your desired User name (wordpress is a good one) and ensure Use text field is selected. Ensure Host is set to Local from the drop down list and the text box will change to localhost and enter a Password and then confirm it in the Re-type box. Ensure the Password Use text field is also selected.
Step 3 – Check the box that says Create database with same name and grant all priviliges.
Step 4 – Click on Go.
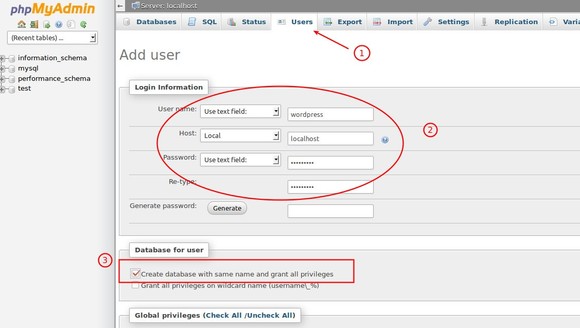
phpmyadmin create user and database
2. Download & Config WordPress:
Download the latest wordpress from its official website:
cd && wget http://wordpress.org/latest.tar.gz
Decompress the package:
tar -xzvf latest.tar.gz
Go to the result folder and create the configuration file by copying the sample file:
cd wordpress/ && cp wp-config-sample.php wp-config.php
Edit the wordpress configuration file via vi editor:
vi wp-config.php
Find the section that contains the field below and substitute in the correct name for your database, username, and password:
// ** MySQL settings – You can get this info from your web host ** //
/** The name of the database for WordPress */
define(‘DB_NAME’, ‘DATABASE_NAME_HERE‘);/** MySQL database username */
define(‘DB_USER’, ‘USER_NAME_HERE‘);/** MySQL database password */
define(‘DB_PASSWORD’, ‘PASSWORD_HERE‘);
Press i to start editing, and Esc to end editing. Finally press Shift+: followed by wq and Enter to save and exit the file.
3. Copy Files and Set Ownership:
Now move WordPress files to webserver root directory:
For LAMP:
cd && sudo rsync -avP wordpress/ /var/www/For LNMP:
cd && sudo rsync -avP wordpress/ /usr/share/nginx/html/
Set ownership of the root directory:
cd /var/www/  ###For nginx: cd /usr/share/nginx/html/

sudo chown www-data:www-data * -R

sudo usermod -a -G www-data www-data
4. Install WordPress:
Finally in your client’s web browser go to http://UBUNTUSERVERIP/wp-admin/install.php and install your wordpress site:
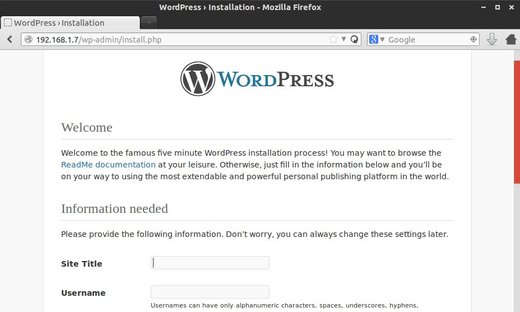
installing wordpress
Once done, if you still get “It Works!” Apache page. Run command below to edit dir.conf:
sudo vi /etc/apache2/mods-enabled/dir.conf
You will see a line of index files (index.html, index.php, index.cgi, etc) under the DirectoryIndex setting. Add index.php as the first item in the list.
After that, restart Apache server by:
sudo service apache2 restart
Now you can access your new website:

wordpress site