Archives For 13.04

Indicator-terminal is an applet in Ubuntu top panel that shows a terminal window for running commands when you click on the icon.

terminal indicator

Install Indicator-terminal in Ubuntu:

NOTE: This project is still in early development. It has bugs and may break you system. Use it at your own risk!

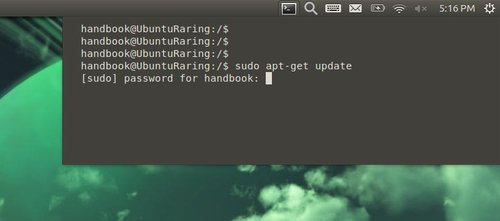
There’s a PPA for Ubuntu 13.10 Saucy, Ubuntu 13.04 Raring, Ubuntu 12.10 Quantal. Press Ctrl+Alt+T to open terminal, when it opens, run below commands one by one:

sudo add-apt-repository ppa:erasmo-marin/indicator-terminal

sudo apt-get update

sudo apt-get install indicator-terminal

Once installed, restart you machine.

To remove this indicator, run below commands in terminal:

sudo apt-get install ppa-purge

sudo ppa-purge ppa:erasmo-marin/indicator-terminal

sudo apt-get remove indicator-terminal

This brief tutorial is going to show you how to download and install JDownloader 2 Beta on Ubuntu 12.04 Precise, 13.04 Raring.

Jdownloader 2 main window

As you may know, Jdownloader is a free and open-source download manager written in Java, which allows the automatic downloading of files and split files from one-click hosting sites such as RapidShare.

For the difference between classic Jdownloader and Jdownloader 2 Beta, see:

Install JDownloader 2:

Jdownloader depends on Java 6 or 7, so first install OpenJDK from Ubuntu Software Center or Oracle Java 7 from ppa. To check current installed version, run below command in terminal:

java -version

You should see similar output:

java version “1.7.0_25”
Java(TM) SE Runtime Environment (build 1.7.0_25-b15)
Java HotSpot(TM) Client VM (build 23.25-b01, mixed mode)

To get started installing Jdownloader 2 Beta, you may check your system type (32-bit or 64-bit). Go to Unity Dash, search for and open Details to check out your OS information:

System-type-32bit-64-bit

Once you confirmed your OS type, press Ctrl+Alt+T to open terminal. When it opens, run command to download JDownloader 2 beta for Linux installer. (jdownloader download page)

  • For 32-bit os:
    wget http://installer.jdownloader.org/JD2SilentSetup_x86.sh
  • For 64-bit os:
    wget http://installer.jdownloader.org/JD2SilentSetup_x64.sh

In order to run this .sh installer, run below command to give it executable permission (Or you can do this in file Properties window.)

chmod +x JD2SilentSetup*.sh

After that, run the .sh installer via command below:

./JD2SilentSetup*.sh

It brings up the setup wizard. Follow it and you’re done!

Jdownload 2 setup wizard

Once installed, Jdownloader 2 should available in the Unity Dash.

UPDATE: To uninstall Jdownloader 2, just run the “Uninstall JDownloader” file in the installation folder to bring up uninstall wizard and follow it.

LibreOffice 4.1 has been officially released. It’s available for Ubuntu 13.04 Raring and 12.04 Precise users from the main LibreOffice PPA repository.

LibreOffice 4.1 main window

LibreOffice 4.1 features a large number of improvements in the area of document compatibility, which increases the opportunities of sharing knowledge with users of proprietary software while retaining the original layout and contents.

New Features:

  • Rotate images in Writer in 90 degree increments
  • Writer, Calc and Impress now allow embedding fonts in their documents.
  • It is now easy to include a series of photos in Impress with the “Photo Album” feature.
  • Add a Stepped Lines line type to Line and XY (Scatter) graphs
  • Especially for migrations, LibreOffice adds a number of significant improvements of interoperability with MS Office formats.
  • A very large number of bugs have been fixed
  • More.

Install LibreOffice 4.1

Press Ctrl+Alt+T on your keyboard to open terminal. When it opens, run below commands to add the LibreOffice Main repository.

sudo add-apt-repository ppa:libreoffice/libreoffice-4-1

After that, update your package lists and install the office suit. To do so, run below command:

sudo apt-get update; sudo apt-get install libreoffice

LibreOffice 4.1 about

Now you can start LibreOffice 4.1 from the Unity Dash. Enjoy!

As you may know, Jupiter is a powerful and lightweight power and hardware control applet. It has been retired and last supported release is up to Ubuntu 12.10 Quantal. However, Jupiter is available for Ubuntu 13.04 from JoliCloud Desktop Environment PPA.

Jupiter on Ubuntu 13.04

The webupd8team add the packages to the ppa and it’ll be used as a background program for JoliCloud session. I’ve installed it on my laptop and it’s working well.

Install Jupiter on Ubuntu 13.04:

Note that don’t install it on a product machine. Use it as your own risk!

Press Ctrl+Alt+T on your keyboard to open terminal. When it opens, run below command to add the PPA repository:

sudo add-apt-repository ppa:jolicloud-team/ppa

Then update package lists and install:

sudo apt-get update; sudo apt-get install jupiter

To install Jupiter support package for Eee PCs:

sudo apt-get install jupiter-support-eee

jupiter ubuntu 13.04 unity

BitDefender Anti-virus is available for Linux from its official repository. Here I’ll show you how to install it on Ubuntu 13.04 Raring Ringtail.

Ubuntu itself has few virus, you can install anti-virus program on Ubuntu Linux to scan USB devices or Windows NTFS partitions.

Objectives:

  • Install BitDefender on Ubuntu from official repository
  • Enjoy!

To get started, press Ctrl+Alt+T key combination to open terminal, then run below command to add BitDefender official repository for Linux.

sudo sh -c 'echo "deb http://download.bitdefender.com/repos/deb/ bitdefender non-free" >> /etc/apt/sources.list.d/bitdefender.list'

Then download and install the key via below command:

wget -O- -q http://download.bitdefender.com/repos/deb/bd.key.asc | sudo apt-key add -

After adding the repository, use your package manager to install BitDefender. Or run below commands to update packages list and do install:

sudo apt-get update; sudo apt-get install bitdefender-scanner-gui

Once installed, run GUI via below command. Read this tutorial to manually add a launcher.

/opt/BitDefender-scanner/bin/bdgui

bitdefender