


![]()
FreeCAD, free and open-source 3D parametric modeler, released version 0.18 recently with Python 3 and Qt 5 support. Here’s how to install it in Ubuntu 16.04, Ubuntu 18.04, and Ubuntu 19.04.
FreeCAD 0.18 release highlights:
- Extended TechDraw tools
- New sketcher tools, more stable and robust PartDesign
- Enhanced and extended Arch and BIM tools
- Redesigned Start center
- New Navigation Cube
- Specify a custom background image for FreeCAD’s main window

Install or Upgrade FreeCAD in Ubuntu:
The official FreeCAD PPA has built the latest release packages for Ubuntu 16.04, Ubuntu 18.04, Ubuntu 19.04, and their derivatives.
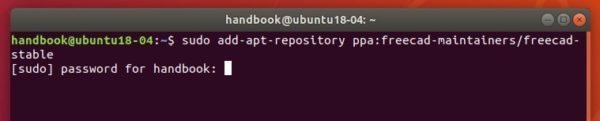
1. Open terminal either via Ctrl+Alt+T keyboard shortcut, or by searching for ‘terminal’ from app menu. When it opens, run command to add the PPA:
sudo add-apt-repository ppa:freecad-maintainers/freecad-stable
Type user password (no asterisk feedback) when it prompts and hit Enter to continue.
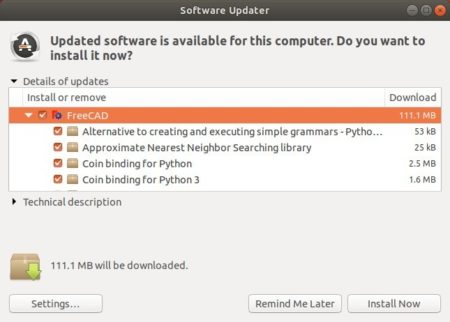
2. If a previous release was installed on your system, upgrade it via Software Updater:
Or install the software via following commands:
sudo apt update

sudo apt install freecad
Uninstall:
To remove FreeCAD, simply run command in terminal:
sudo apt remove --auto-remove freecad
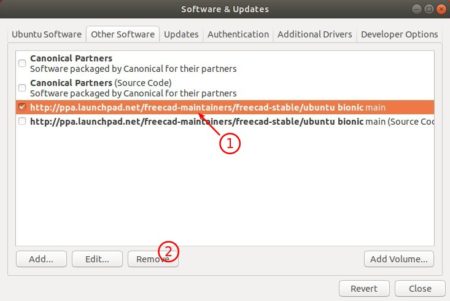
To remove the PPA, open Software & Updates -> Other Software.


FreeCAD exports all settings
All the settings of FreeCAD, all in the FreeCAD folder.
C:\Users\a←When installing the operating system, the name entered.\AppData←File Manager ~ “Hidden project” to open, the AppData folder will be displayed.\Roaming\FreeCAD
Back up the FreeCAD folder, when reinstalling, put the FreeCAD folder in its original place.
Note: To clear all settings, just delete the FreeCAD folder, then open the program, a new FreeCAD folder will be created.
FreeCAD exports toolbars and macros I made
Common path
C:\Users\a←When installing the operating system, the name entered.\AppData←File Manager ~ “Hidden project” to open, the AppData folder will be displayed.\Roaming\FreeCAD\Please take the branch path below.
Branch path
\FreeCAD\user.cfg←The “toolbar” I made is placed here.
\FreeCAD\Macro←The “Macro” I made is placed here.
Back up the file and folder, when reinstalling, put the file and folder in its original place.
Record settings with screenshots
In the event that there is no way to export the settings, Record settings with a screenshot, It is the best way.
For example: Desktop location, toolbar location, and more…
Record settings with a screenshot, When reinstalling, It will be restored soon.
The same is true for mobile phones.
Tanks Mr. Ji, greetings from Mexico.
Thank you!