Archives For April 30, 2022

Got some beautiful photo images? Let me show you how to set them as desktop slideshow, so it will be your Ubuntu background wallpaper and switch automatically in certain time interval.

Option 1: Use Shotwell

Using Shotwell is the easiest way to do the job in Ubuntu. You don’t need to install anything, as it available out-of-the-box.

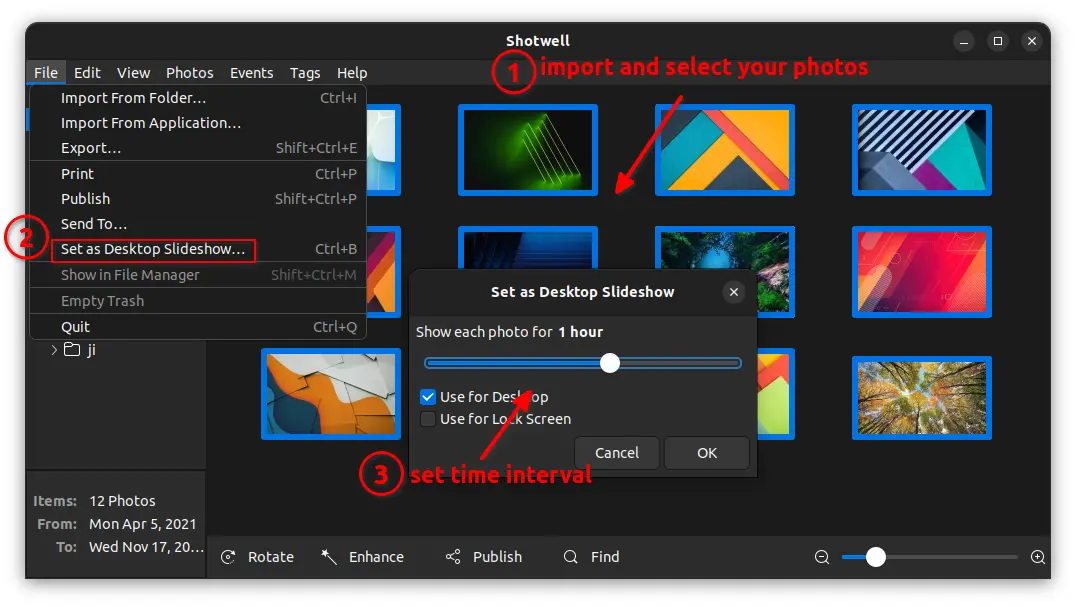
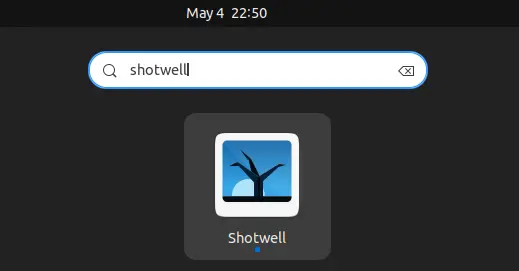
Just search for and open the app from Activities overview screen. Import (via File menu) and select your photos (Ctrl or Shift + Click), then you may use “File -> Set as Desktop Slideshow” option to set them as wallpaper and change automatically.

You may set time interval from 5 seconds up to 1 day. And, the slideshow will work even in next boot, until you select another wallpaper in “System Settings -> Background” page.

Option 2: Use Gnome Extension

There’s an extension can do the job, not only for Ubuntu, but also for Fedora and other Linux using GNOME desktop (e.g., Arch, Manjaro, CentOS, etc).

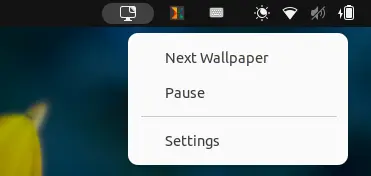
It’s light, simple and just do the basic function as well as options to manually go next wallpaper, and stop changing automatically.

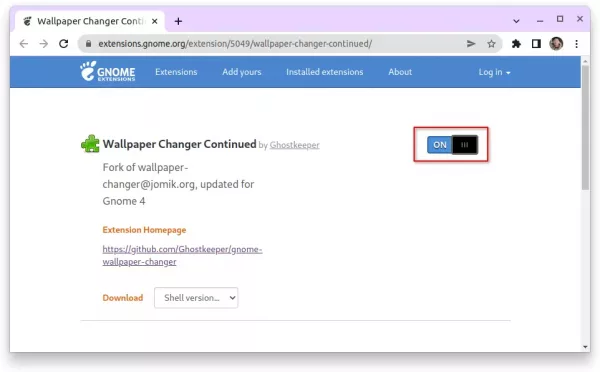
Install the extension

Firstly, press Ctrl+Alt+T on keyboard to open terminal and run the command to install the agent package:

sudo apt install chrome-gnome-shell

Secondly, turn on the toggle icon in the link page below to install the extension.

NOTE: The pre-installed Firefox does not support installing Gnome Extension so far, use another browser or install the Deb version instead. And, for the first time, you need to install browser extension and refresh the page to see the toggle button.

Option 3: Use Variety

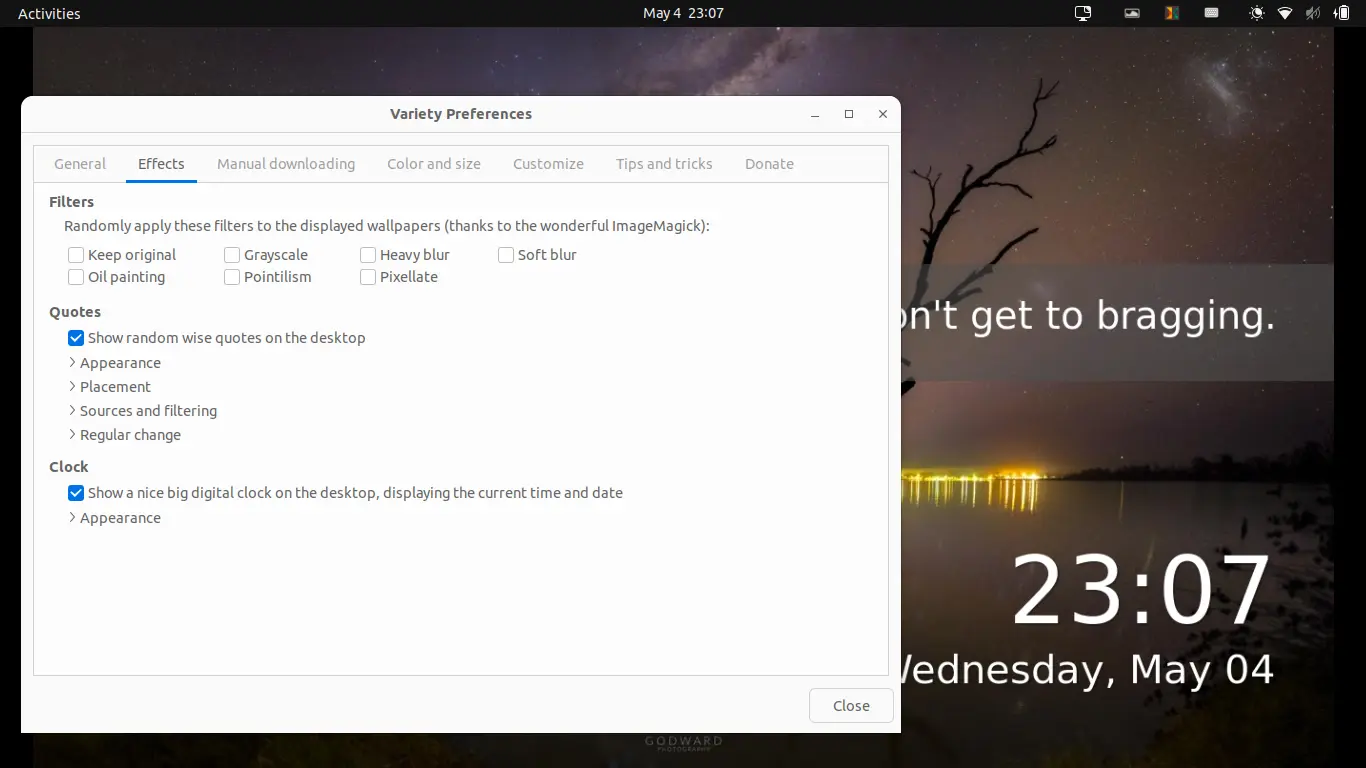
Besides automatically changing your desktop wallpaper, Variety is a good choice that also supports for downloading photo images from flickr, deviantart, unsplash, etc.

What makes it different is that it supports displaying custom text and digital clock on wallpaper. As well, it can apply random effect to your wallpapers, e.g., blur, oil painting.

To install Variety in Ubuntu, either press Ctrl+Alt+T on keyboard to open terminal and run command:

sudo apt install variety

or just search for and click install in Ubuntu Software.

Option 4: Use Wallch

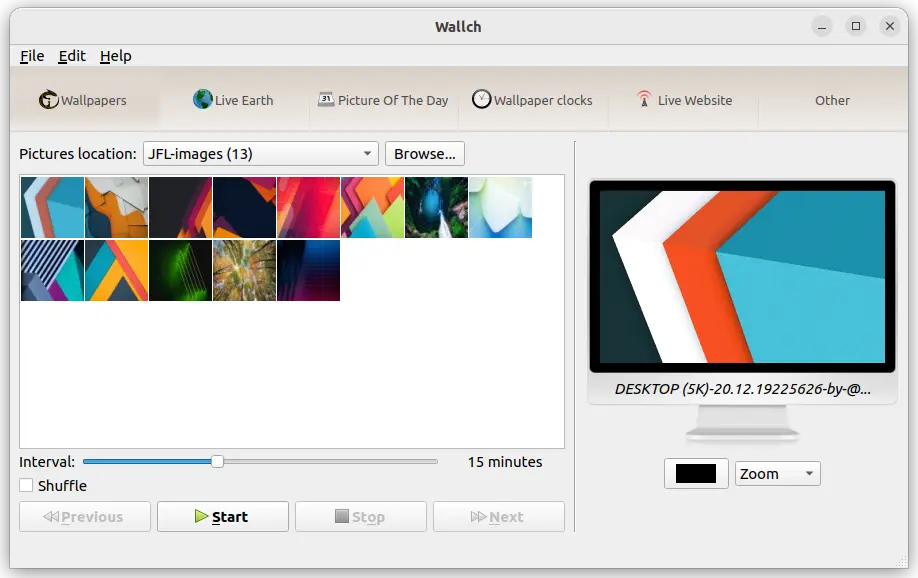
Wallch was a popular wallpaper managing app for Linux. Though it’s not been updated for a long period of time, the basic desktop slideshow function still works. And, it can be a choice for old desktop environments.

However, the live earth, daily picture, wallpaper clocks and live website features never work in my case.

To install Wallch, either use Ubuntu Software or run command in terminal:

sudo apt install wallch

Option 5: Group your images via XML file

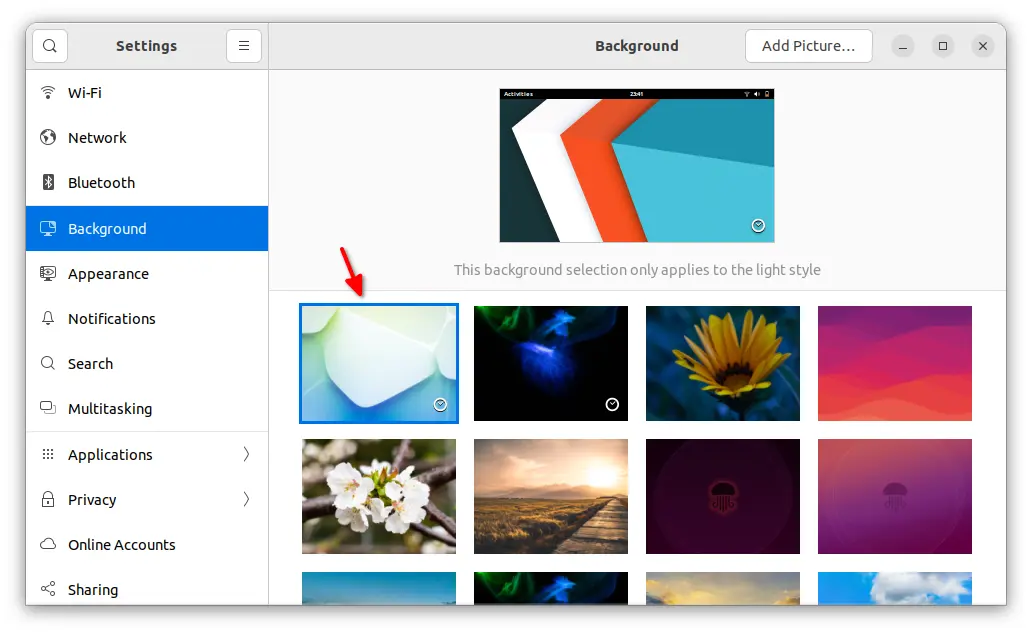
If you would like to add your desktop slideshow as a choice in Background selection page, then this is for you.
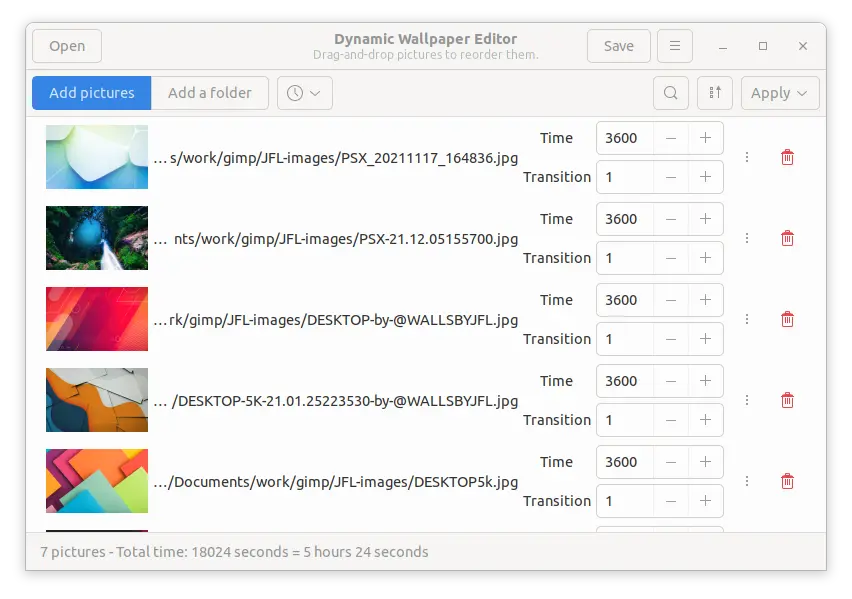
1.) Create XML:

Firstly, you need to create a XML file that defines which photo images to use, how long each wallpaper will be displayed, transition time, etc.

To make things easy, you may install “Dynamic Wallpaper Editor” by running following 2 commands one by one in terminal (Ctrl+Alt+T):

sudo apt install flatpak
flatpak install https://dl.flathub.org/repo/appstream/com.github.maoschanz.DynamicWallpaperEditor.flatpakref

2.) Make use of XML:

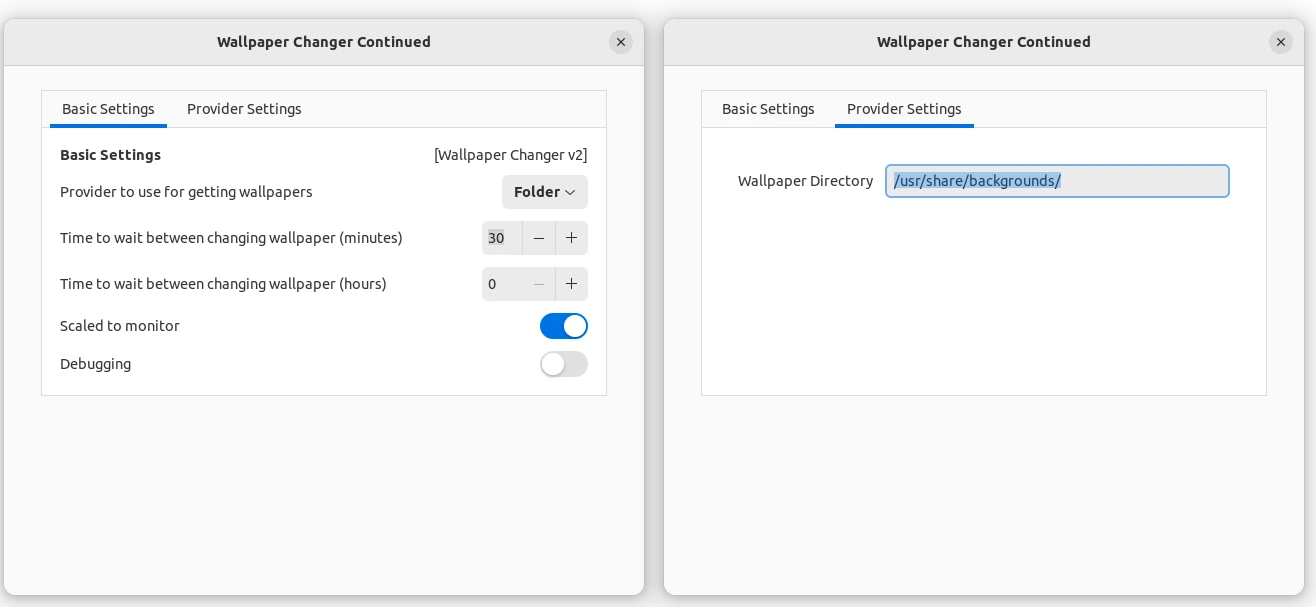
After creating XML file or files, you need to put them into “~/.local/share/backgrounds” folder.

  • Run command in terminal (Ctrl+Alt+T) to create the folder in case it does not exist.
    mkdir -p ~/.local/share/backgrounds
  • Open that folder in file manager to do copy & paste things.
    nautilus .local/share/backgrounds/

For each XML, you have to create another XML under “~/.local/share/gnome-background-properties”.

  • Run command to create that folder in case it does not exist.
    mkdir -p ~/.local/share/gnome-background-properties
  • Open that folder in file manager to create another XML files.
    nautilus ~/.local/share/gnome-background-properties

In this new XML file, you need to add following lines:

<?xml version="1.0" encoding="UTF-8"?>
<!DOCTYPE wallpapers SYSTEM "gnome-wp-list.dtd">
<wallpapers>
  <wallpaper>
    <name>TYPE NAME HERE</name>
    <filename>PATH-TO-DESKTOP-SLIDESHOW-XML</filename>
    <options>zoom</options>
    <pcolor>#2c001e</pcolor>
    <scolor>#2c001e</scolor>
    <shade_type>solid</shade_type>
  </wallpaper>
</wallpapers>

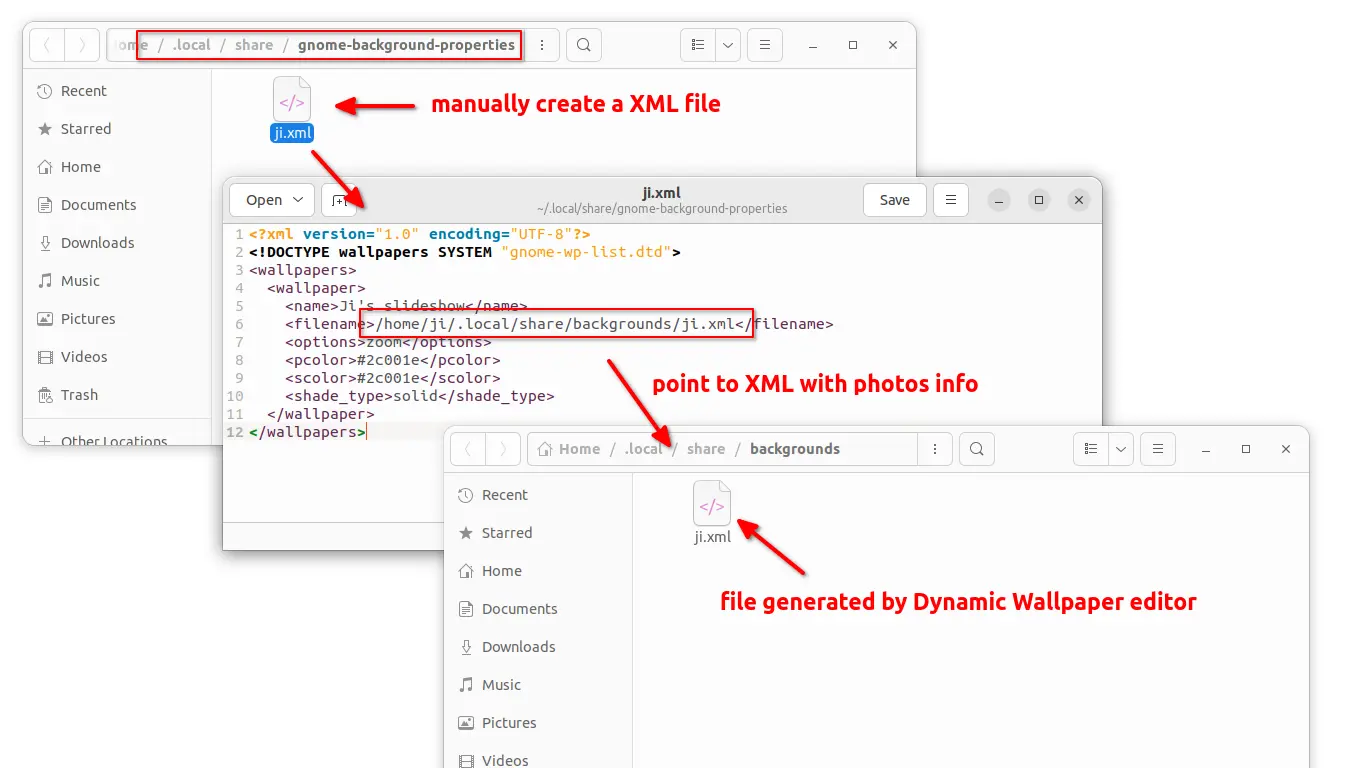
As the picture shows, you have to type the full path (‘/home/USERNAME/.loca/share/…’) to the generated XML you created in previous step. If you did everything correctly, you should see the new choice (with little clock) in Background settings page.

That’s all. Enjoy!

Mozilla Firefox has reached its 100th release! It has been more than 17 years since the first 1.0 was released in 2004.

Firefox 100 now supports for displaying subtitles in the pop-out video (Picture-in-Picture mode) for YouTube, Prime Video, and Netflix videos. Also, it supports video captions on websites that use WebVTT (Web Video Text Track) format, like Coursera.org, Canadian Broadcasting Corporation, and many more.

For macOS 11 with HDR-compatible screens, users can now enjoy HDR video on YouTube out-of-the-box, though you have NOT to enable “optimize video streaming while on battery”.

For Windows, hardware accelerated AV1 video decoding is enabled for support GPUs, including Intel Gen 11+, AMD RDNA 2 Excluding Navi 24, GeForce 30. Though, AV1 Video Extension from the Microsoft Store is required.

Other changes in Firefox 100 include:

  • Detect and offer choice if Firefox does not match system language on first run.
  • Add multiple languages support for spell checking.
  • Enable video overlay to reduce power usage for Windows user with Intel GPU.
  • Support credit card autofill and capture in the United Kingdom.
  • Ignore less restricted referrer policies
  • Choose preferred color schemes for websites.
  • Support for profiling multiple java threads
  • Add Geckoview APIs

Get Firefox 100:

For the release note as well as download link, go to Mozilla web site:

For Ubuntu users, Firefox 100 will be available in next few days. Just keep your system up-to-date and you’ll get the release soon.

For Ubuntu 22.04 (and old Ubuntu 16.04), you may install Firefox 100 as .deb from Mozilla Team PPA (Need to set PPA priority, see HERE for more).

Ubuntu’s default Rhythmbox music player finally released a new version with podcast improvements, code cleanup, and various bug-fixes.

It has been more than 2 years since the last release of Rhythmbox music player. The new Rhythmbox 3.4.5 comes with improvements to the podcast support:

  • Rewritten podcast downloader with better resume and retry
  • Use podcast episode GUIDs to handle episode URL changes
  • Fixes for feed description, album art, and downloading issue.

The release also ported DAAP plugin to libdmapsharing-4.0 API, enabled UTF-8 support in metadata scanner. The app ID has been renamed to “org.gnome.Rhythmbox3”. And, it has now switched to Meson for its building system.

Other changes include:

  • Remove soundcloud plugin, mmkeys plugin, and gnome-settings-daemon MediaKeys plugin
  • Song info ui, webremote plugin, and many other fixes.
  • And, translation updates. See more here.

How to Get Rhythmbox

Ubuntu usually won’t update the package for all current Ubuntu releases. So far, the only way to get Rhythmbox is using the Linux universal Flatpak package.

1. Press Ctrl+Alt+T on keyboard to open terminal. When it opens, run the commands below to install the Flatpak daemon:

sudo apt install flatpak

Ubuntu 18.04 and Ubuntu 16.04 need to add the Flatpak PPA first.

2. Next, all current Ubuntu releases may install the player by running the command below in terminal:

flatpak install https://dl.flathub.org/repo/appstream/org.gnome.Rhythmbox3.flatpakref

To avoid duplicated app icons, you may remove the system default package via sudo apt remove rhythmbox

Uninstall Rhythmbox flatpak

For any reason, you can remove the package easily by running the command below in terminal window:

flatpak uninstall org.gnome.Rhythmbox3

And cleanup unused runtimes via flatpak uninstall --unused.

Want to set a certain size of your desktop icons and/or change the spacing between them? Here’s how to do the job in Ubuntu 22.04.

Ubuntu 22.04 defaults to GNOME desktop 42 and uses an extension called “Desktop Icons NG” (DING in short) to handle shortcut icons on desktop.

It provides 4 icon sizes (“Tiny”, “Small”, “Normal”, and “Large”) in ‘Appearance‘ settings for choose from.

Change icon size via Appearance settings page

If somehow the default icon sizes do not meet you need, then you may edit the source file and customize the 4 sizes manually.

1. Edit the config file

Firstly, press Ctrl+Alt+T on keyboard to open terminal. When it opens, run command to edit the file which is located in ‘/usr/share/gnome-shell/extensions/[email protected]/’ directory:

sudo gedit /usr/share/gnome-shell/extensions/[email protected]/enums.js

sudo is required as it’s a system wide extension and you need to type user password to authenticate when running the command.

When file opens, you’ll see the first line (except the comments) defines the icon sizes in pixels:

var ICON_SIZE = { ‘tiny’: 36, ‘small’: 48, ‘standard’: 64, ‘large’: 96 };

Just change the number 36, 48, 64 and 96 will replace the corresponding ‘tiny’, ‘small’, ‘normal’, and ‘large’ icon sizes.

And, change the numbers in lines of “ICON_WIDTH” and “ICON_HEIGHT” will adjust how large the square area that each icon takes. It’s the orange area when you drag and drop an icon, which can be useful if you want to change the icon spacing.

NOTE: The change will take place for all system users. For single user only, you may copy the extension folder to local directory ‘.local/share/gnome-extensions’. However, the option in “Appearance” won’t work for the local copy.

2. Apply change

After editing and saving the config file, search for and open “Gnome Extensions” app.

App to Manage your extensions

Install the tool via sudo apt install gnome-shell-extension-prefs command if you don’t have it.

When the app opens, turn off “Desktop Icons NG” extension and turn it on again will apply the changes you made in previous step.