


![]()
After doing a fresh install of Ubuntu system, users usually have to do a list of configurations before the system is ready for use. And, here are a list of the top things I can tell for the Ubuntu 24.04 LTS.
1. Install back some default apps
If you didn’t choose “Extended selection” option while installing Ubuntu 24.04, then you’ll find that many apps are missing!
There’s no office suite, no video/music player, no email app … If you need some of them, then just launch the new App Center from left panel, then search and install any of them back.
Tips: the new App Center prefer Snap package that runs in sandbox. If you like the classic Deb package, select it from “Filter by” selection box.
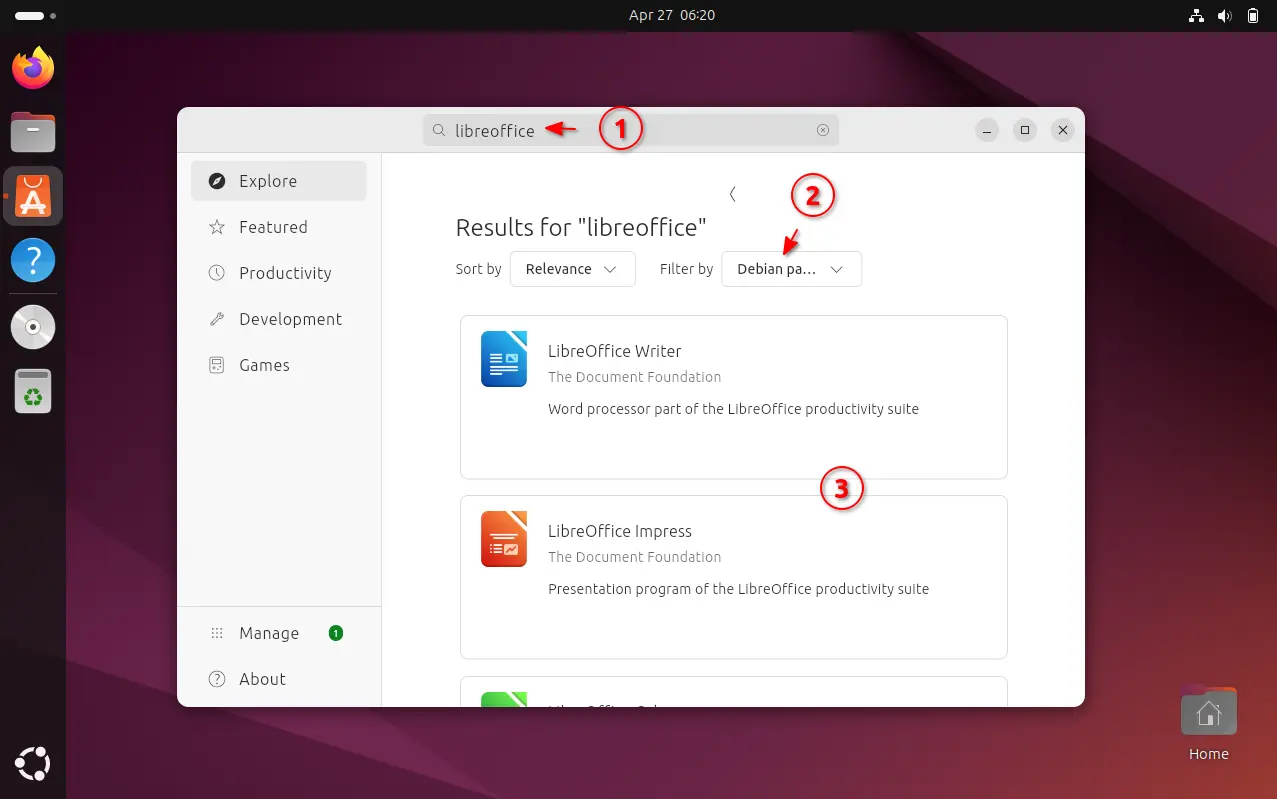
As far as I know, there are following default apps missing in the default install in Ubuntu 24.04. All of them are available to install in App Center.
- LibreOffice office suite.
- Archive Manager (aka file roller).
- Shotwell photo manager.
- Backups (Déjà Dup Backups).
- Gnome Camera, the new app replaces Cheese.
- Totem video player.
- Rhythmbox music player.
- Document Scanner.
- Thunderbird email. It’s now defaults to Snap, see how to revert back to Deb version.
- Startup Disk Creator.
- Remmina remote desktop client.
- Transmission torrent download app.
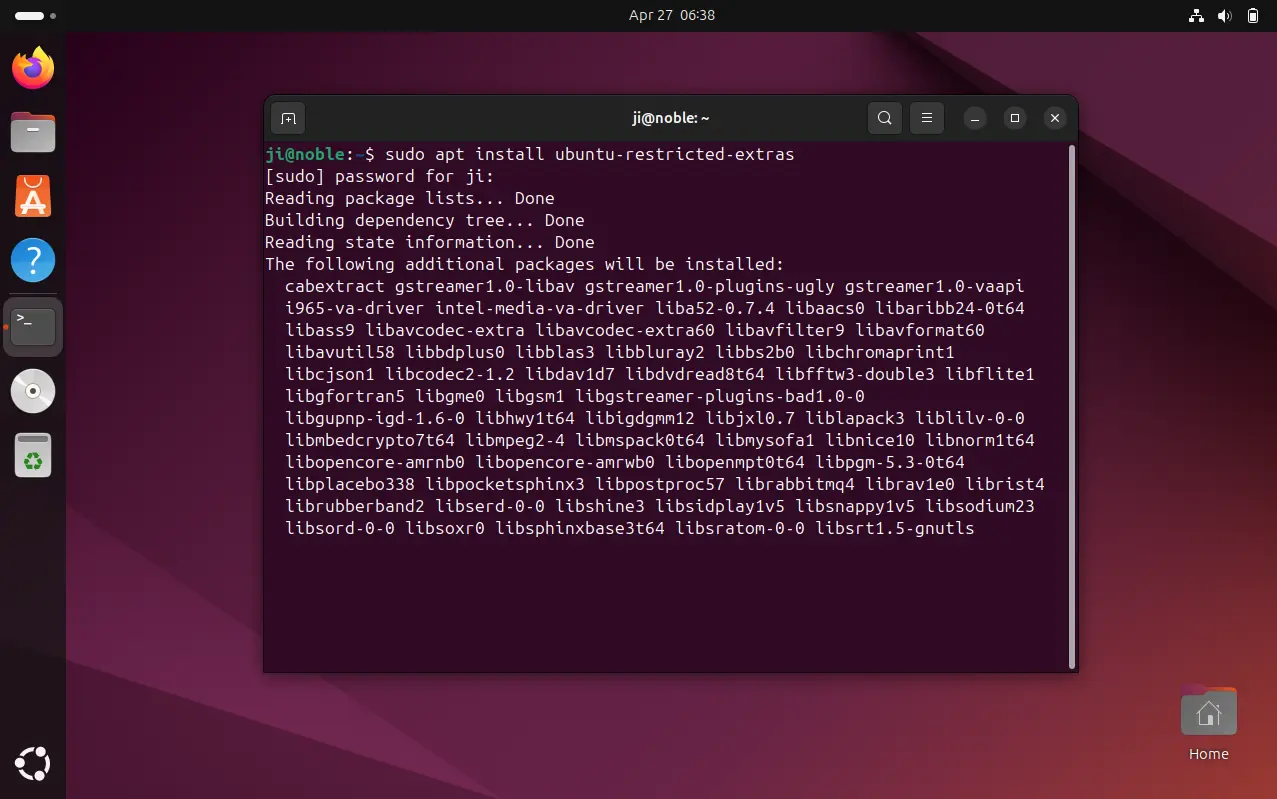
2. Install Multimedia Codec
For playing video and audio files using default players, Microsoft TTF fonts, RAR archive supports, and some other media codecs, press Ctrl+Alt+T to open up a terminal window, and run command:
sudo apt install ubuntu-restricted-extras
Type user password (no asterisk feedback, just type in mind) when it asks for sudo authentication and hit Enter.
While downloading & installing the MS fonts, it will prompt to accept licence, use Tab key to highlight OK and hit Enter.
3. Enable ‘New Documents’ context menu option
GNOME (developed by another team) is working to make it easy to create new documents (see developer’s blog).
In current GNOME 46, user still need to manually create an empty document in ‘Templates’ folder to enable this context menu option.
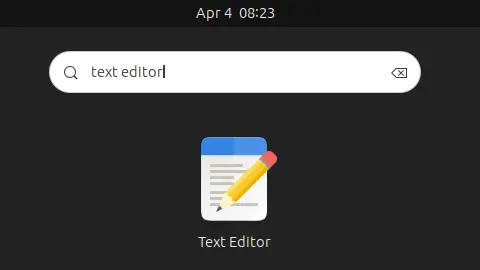
First, click top-left ‘pill and dot’ button to open the overview screen. Then search for and open ‘Text Editor’.
If it does NOT open a new empty file (new text editor by default restore the last opened files), then, click “+” to create new file with empty content, and press Ctrl+S to open the save dialog.
Finally, do:
- Choose save to user’s “Templates” folder.
- Type whatever name (e.g., Empty Document, Untitled Document) you want to display as menu option.
- Finally, click Save button.
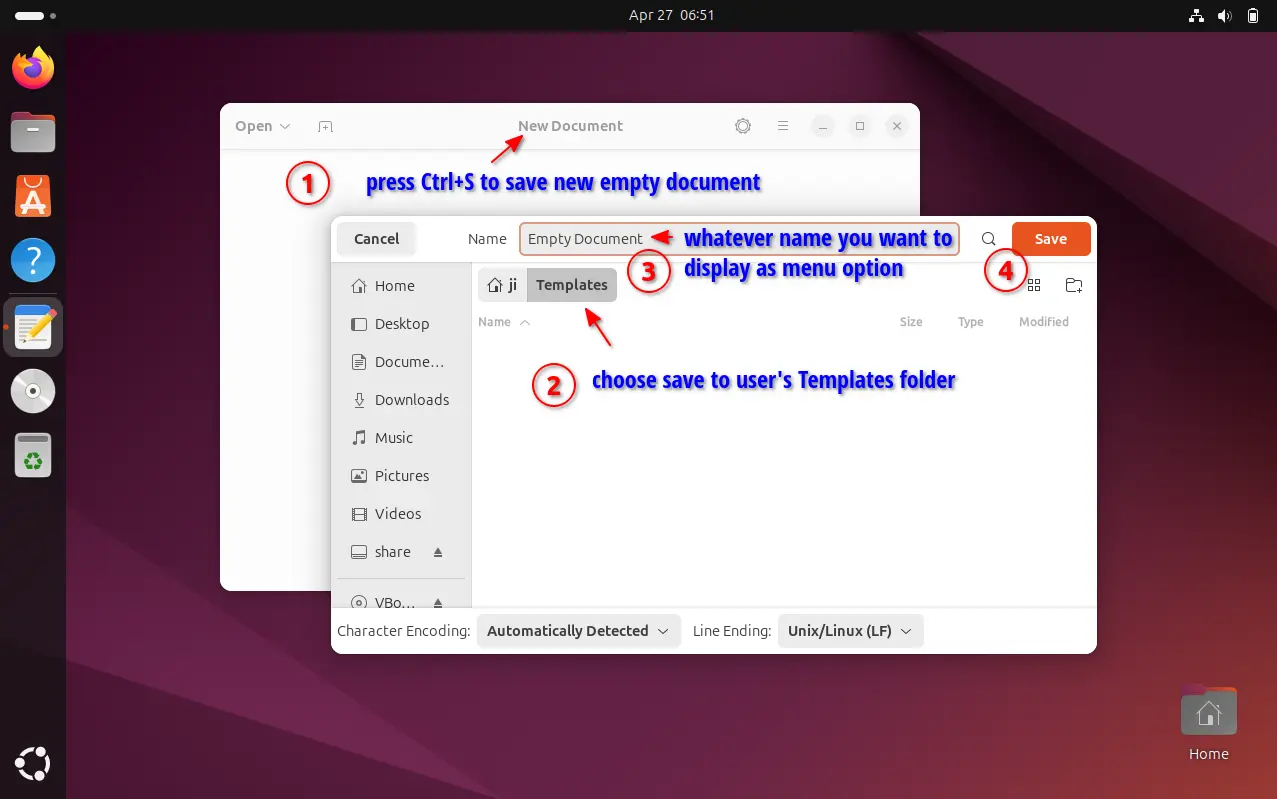
When done, open ‘Files’ app (the Nautilus file manager), right-click on blank area will show you the New Documents option.
4. Install A Few Graphical Configuration Tools
Many configure options are hidden and not available in the default ‘Settings’ (aka Gnome Control Center). You need a few more graphical configuration tools.
a.) GNOME Tweaks provides graphical options to configure:
- System Fonts.
- Themes for sound, icon, cursor, legacy GTK3 apps.
- Title bar buttons, click actions, startup applications, and more.
It’s can be installed either from App Center or by running command below in terminal:
sudo apt install gnome-tweaks
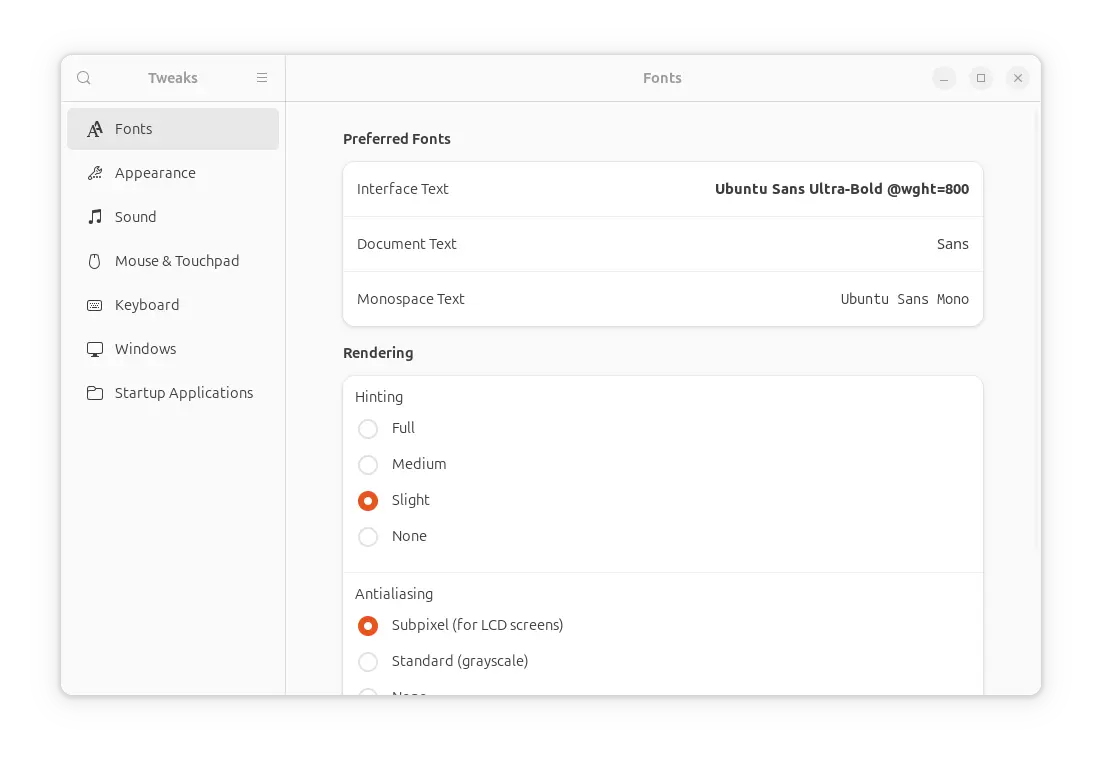
GNOME Tweaks
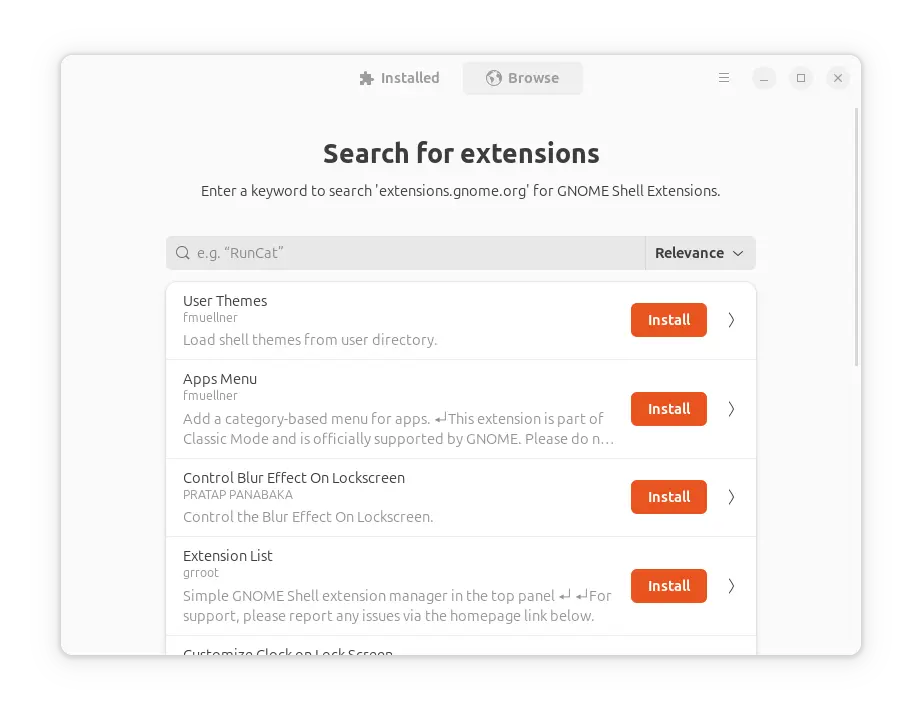
b.) GNOME Extensions or GNOME Extension Manager, to manage and install Gnome shell extensions. Both are available in App Center.
Though I prefer Gnome Extension Manager a bit more, which also supports browsing and installing extensions. It can also be installed by running command in terminal:
sudo apt install gnome-shell-extension-manager
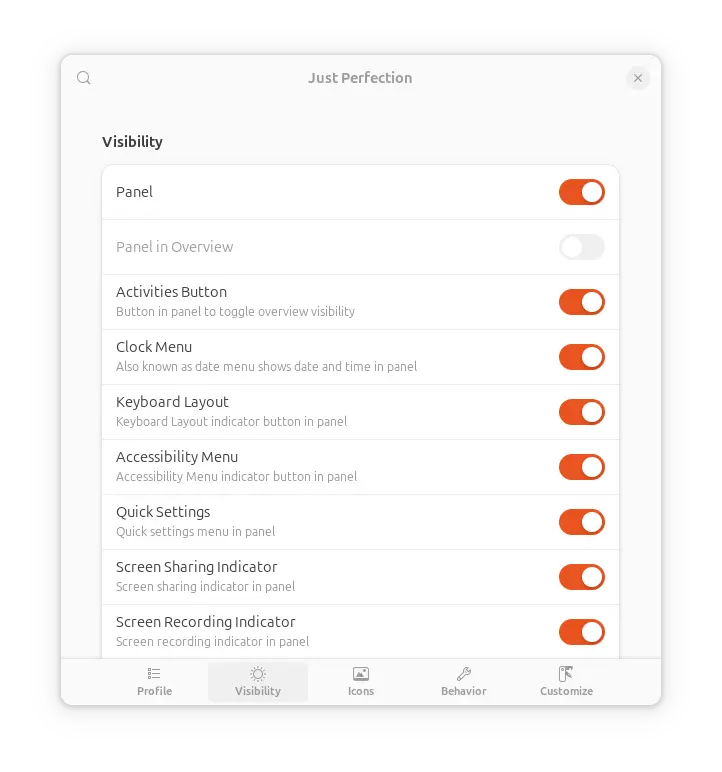
c.) Just Perfection. It’s an Extension that provides many options to toggle visibility of the desktop components (e.g., panel, clock), configure panel size, padding, and behaviors.
Just Perfection can be installed and launched using GNOME Extension Manager.
d.) Grub Customizer. It’s a graphical app to configure the boot menu entries. Set default boot entry, add kernel parameter, and change the appearance of the boot-loader menu.

To install the app, just open terminal (Ctrl+Alt+T) and run commands below one by one to add the official PPA and install the package:
sudo add-apt-repository ppa:danielrichter2007/grub-customizer
sudo apt-get update
sudo apt-get install grub-customizer
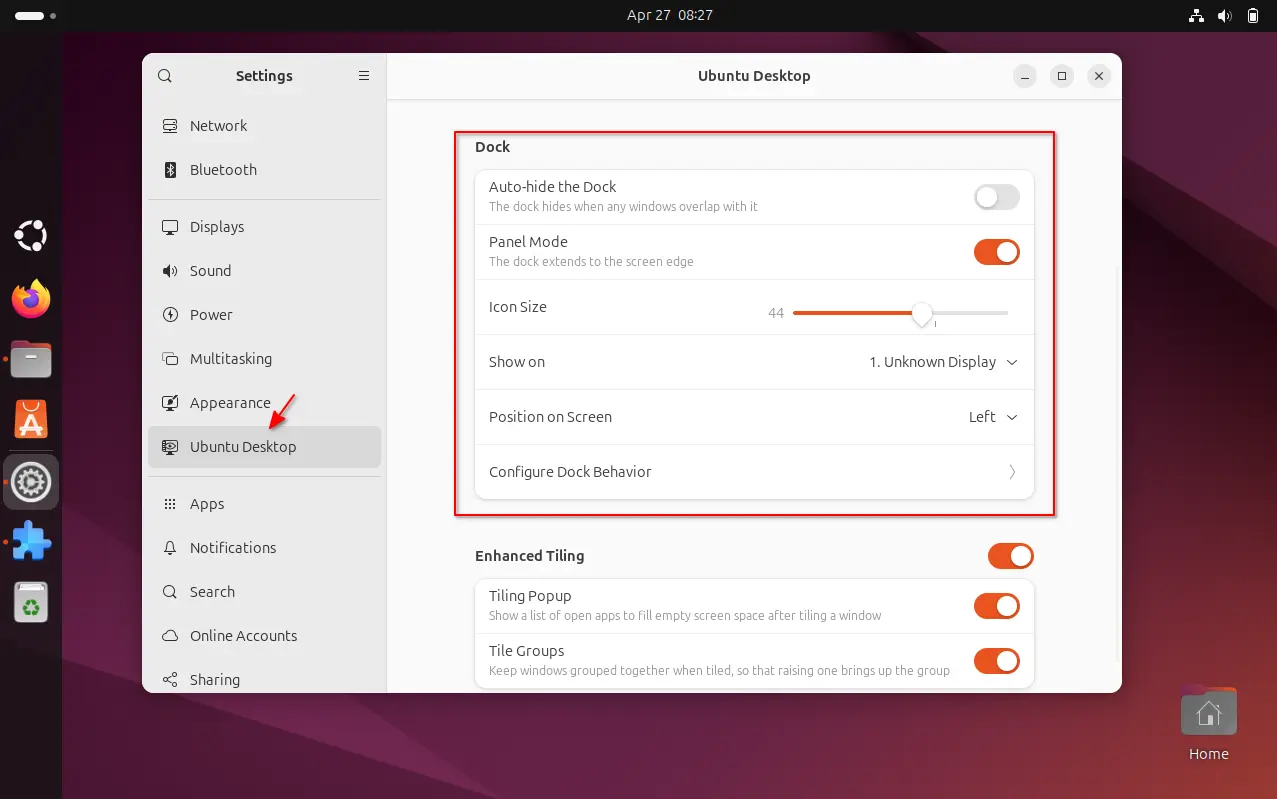
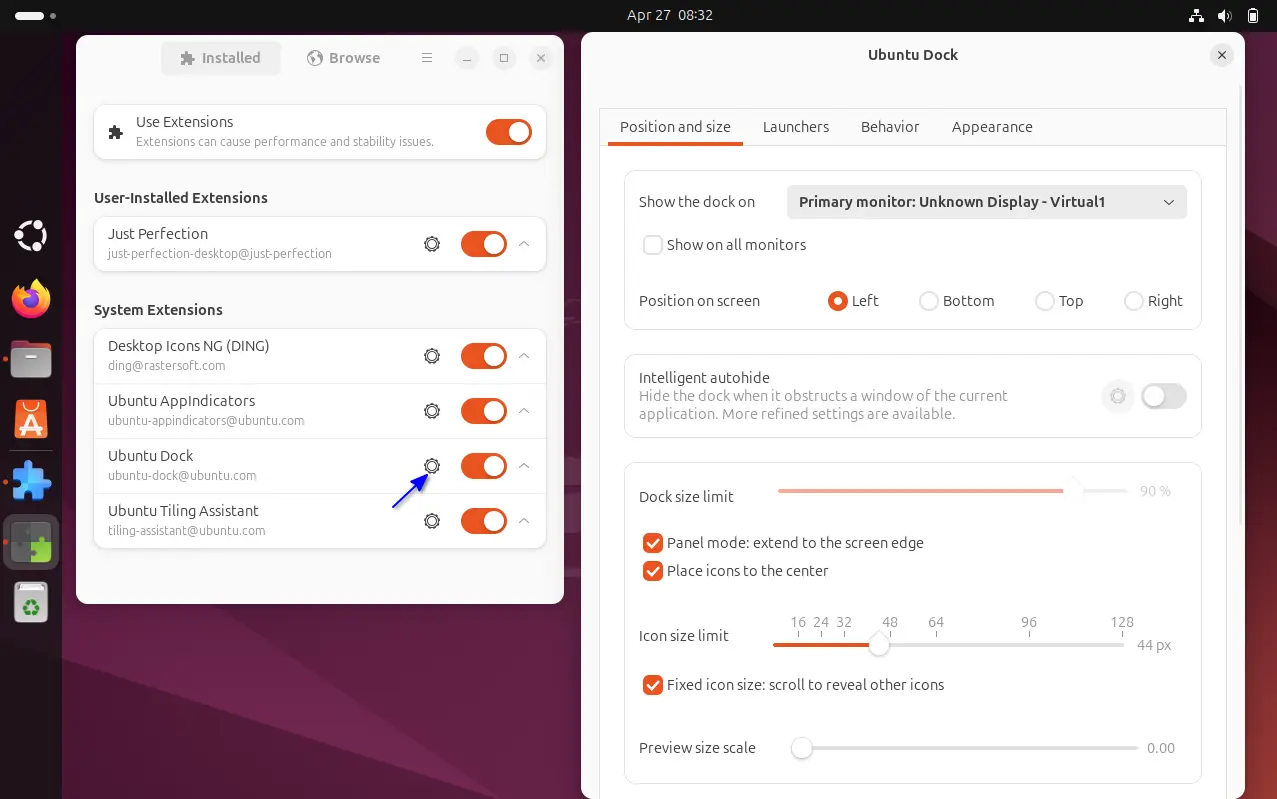
5. Configure the left Dock/Panel
The left panel, aka Ubuntu Dock, is highly configurable.
By launch “Settings” and navigate to ‘Ubuntu Desktop’ in left, you’ll see the options in right to:
- Auto-hide the dock.
- Shorten the dock (panel mode or not).
- Change dock icon size.
- Move to bottom or right.
- Show on multiple displays.
- And configure behavior, such as hide mounted volumes, USB stick, and trash icon.
In Ubuntu 24.04, user can also launch GNOME Extensions or GNOME Extension Manager, then click open the setting (gear icon) for ‘Ubuntu Dock’ extension.
There, it provides even more configure options for the dock. They include:
- center app icons.
- move Ubuntu logo icon to center and/or top.
- change background color, opacity.
- and more.
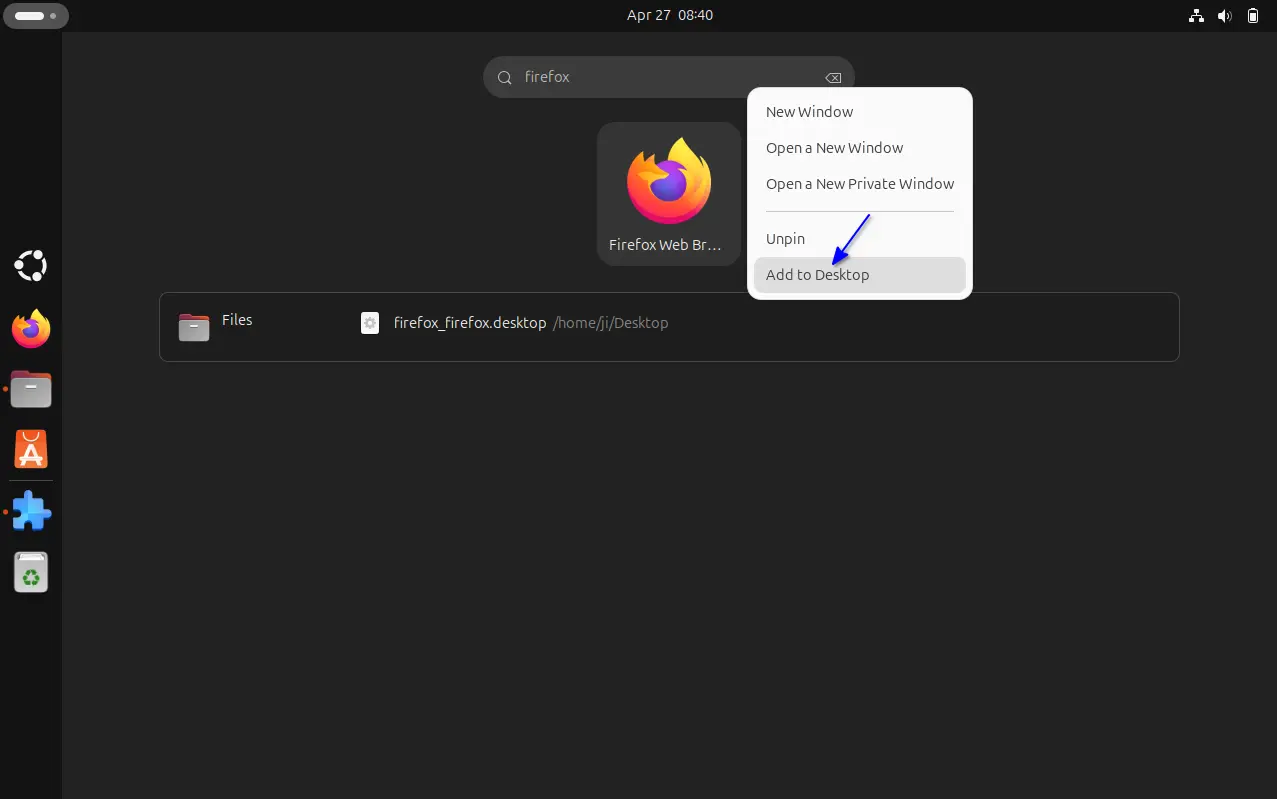
6. Add App Icons to Desktop
If you prefer to add your app shortcut icons to the desktop, then just install Gnome Extension Manager, and use the tool to search and install “Add to Desktop” extension.
NOTE: The extension does NOT support GNOME 46 (default desktop for 24.04) at the moment of writing. But it works in my case. Just click the” Unsupported” button and choose “Install Anyway”.
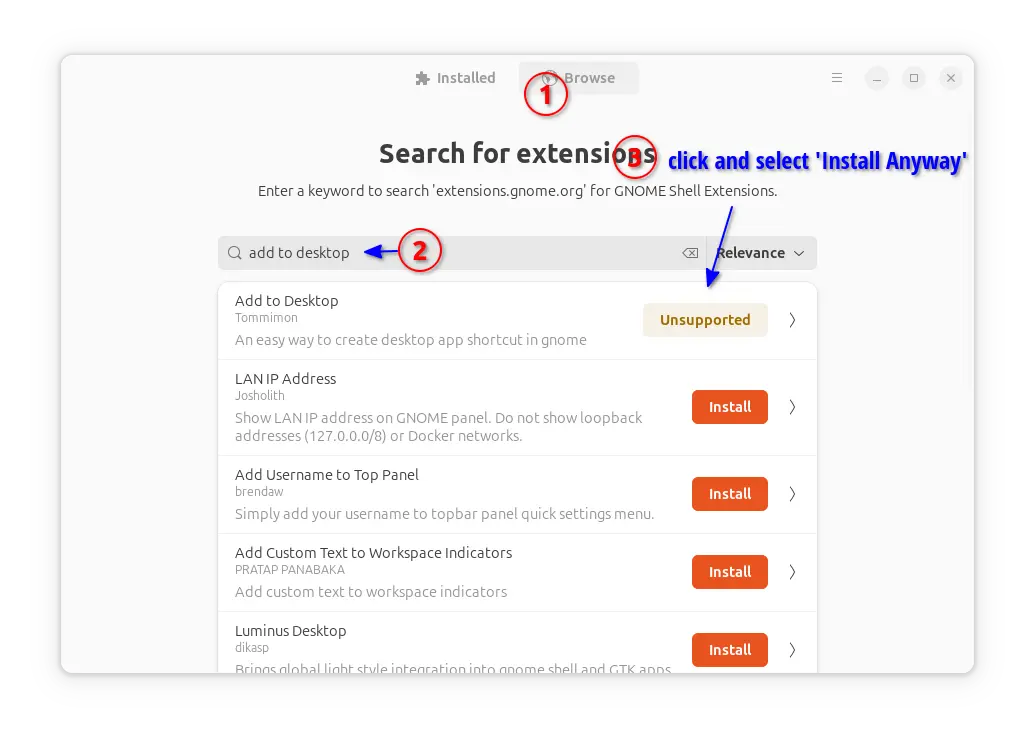
Next, press Super (Windows Logo) key to open the overview screen. Search any app, right-click the icon and select “Add to Desktop” option will add it to the desktop.
7. Handle local .deb package
Due to switch to the new App Center, Ubuntu 24.04 by default lacks an app to open & install local .deb package. When you trying to open a .deb file, it will pop-up dialog says:
“Could Not Display “xxxx.deb”. There’s no app installed for “Debian package” file.”
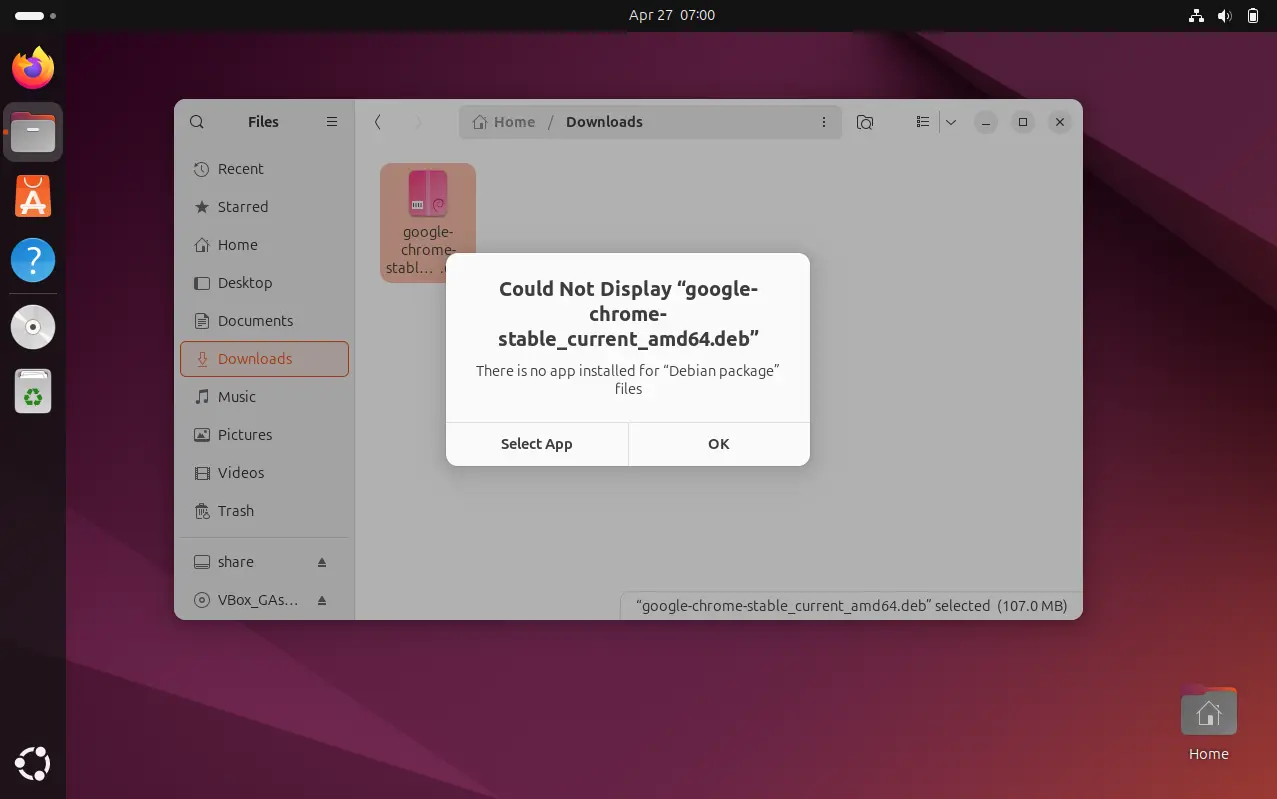
Here are a few workarounds, choose either one that you prefer:
Option 1: Install GNOME Software, either from App Center or by running sudo apt install gnome-software command in terminal. Then, there’ll be a “Software Install” context menu option to open & install local .deb file. However, GNOME Software always run in background that takes about 200 MB RAM memoray.
Option 2: Install Gdebi package installer either from App Center or by running sudo apt install gdebi command. Then, you can right-click on a .deb file, and select “Gdebi” from Open With dialog and set to always use it to handle the deb file. This is the best choice in my own opinion, and Linux Mint use this app as default to handle local deb.
Option 3: Advanced users can simply open up a terminal window (Ctrl+Alt+T), and run the command below instead to install any local .deb file:
sudo apt install drag-and-drop-deb-file-here
8. Enable Flatpak and AppImage support
Ubuntu is focusing on Snap and Deb packages support, however, many popular apps today support Linux through Flatpak or AppImage packages.
To enable Flatpak support, simply press Ctrl+Alt+T to open terminal, and run command:
sudo apt install flatpak
(Optional) Then, you can add the Flathub repository, which hosts the most Flatpak apps, by running command:
flatpak remote-add --if-not-exists flathub https://dl.flathub.org/repo/flathub.flatpakrepo
To install a Flatpak app package, either use command:
flatpak install drag-and-drop-local-flatpakrel-file-here
Or go to Flathub.org and use the command (click down arrow beside “Install” button) in individual app page to install the package.
To enable AppImage support, just open terminal and run command:
sudo apt install libfuse2
Then, right-click on local AppImage file, enable “Executable as Program” option, finally click run the file to launch app.
And More
There can be many other things to do to make Ubuntu 24.04 better for use. They vary depend on users. Please leave your comment below, if you have any other good advice to tweak the Ubuntu Desktop.


thanks a lot. Im starting on Mint 22 :) Part 2 we need AMD app ( OC , UV . temperature, clock settings) , Logitech mouse support , tuya hardware support , android emulators to start android apps
“And configure behavior, such as hide mounted volumes, USB stick, and trash icon”
Trash icon option cannot be found in 24.04, please explain what did you mean exactly.