This simple tutorial shows how to enable RDP remote desktop for extended screen in Ubuntu 22.04, Ubuntu 24.04, and Ubuntu 25.04 with default GNOME desktop.
Since Ubuntu 22.04, the default GNOME desktop has built-in RDP support. The function has feature to share screen in ‘extend’ mode.
In this mode, Ubuntu won’t mirror the primary display, but create virtual extended screens for remote access.
Each remote connection is limited to its own virtual screen. You can drag and drop any app windows to that screen, allowing remote users to see and/or manipulate, while keeping sensitive data un-accessible in primary screen.
Or, you can use remote client PC/laptop’s monitor wirelessly to setup multiple screens for the Ubuntu machine. Though, operating in the virtual external monitors will be a bit laggy.
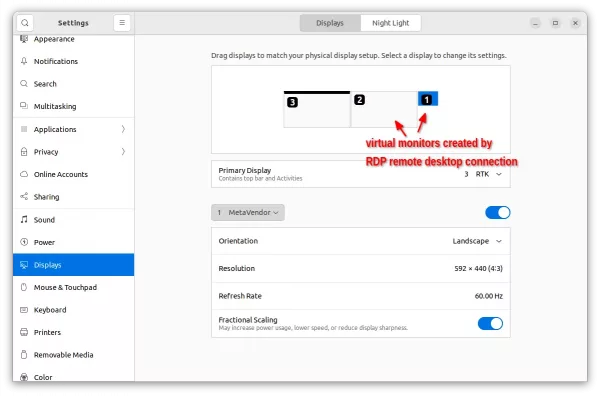
In the screenshot below, there are 2 machines connected to my Ubuntu PC via RDP remote desktop protocol. So, there are 2 virtual displays created. Each remote machine can access Ubuntu through its own virtual screen. While, user in front of Ubuntu can operate all the 3 screens (if 2 other monitors are sitting nearby).
Step 1: Enable RDP remote desktop
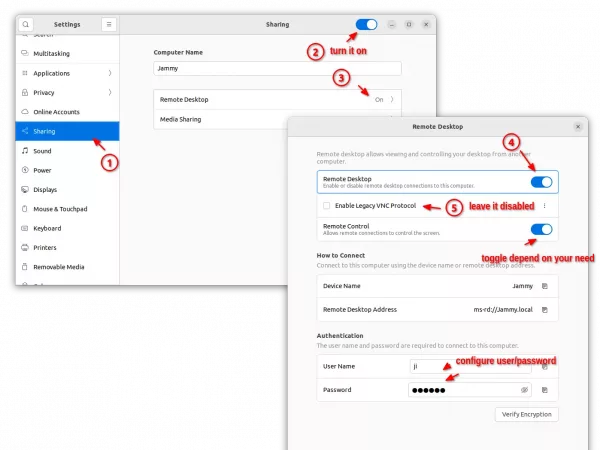
Firstly, open Settings and navigate to ‘Sharing‘. Then, click open ‘remote desktop’ configuration dialog. Enable that function and leave ‘Enable legacy vnc protocol’ disabled. Also, toggle remote control and setup password according to your need.
For Ubuntu 24.04, go to Settings -> System -> Remote Desktop, then enable “Desktop Sharing” and configure other options as you want.
Step 2: Setting Screen Sharing Mode
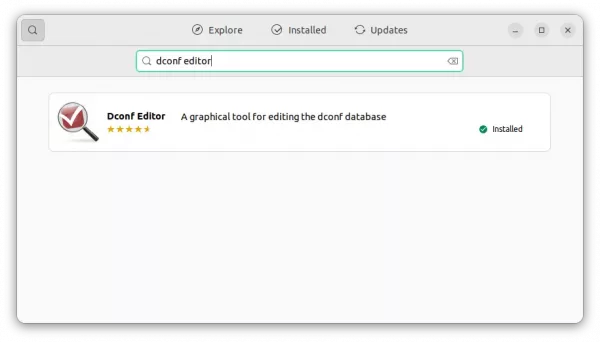
Then, search for and install Dconf Editor (if you don’t have it) from Ubuntu Software.
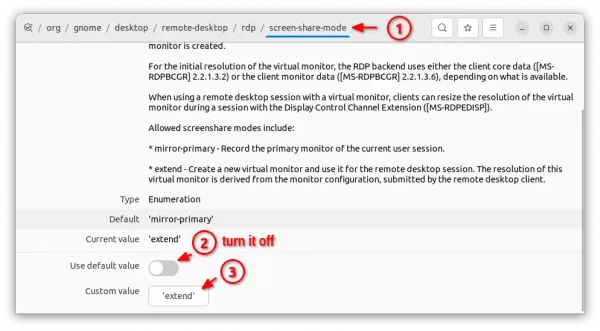
Then, launch ‘Dconf Editor’ and navigate to /org/gnome/desktop/remote-desktop/rdp/screen-share-mode. Finally, turn off ‘Use default value’ and set Custom value to extend.
For those who are familiar with Linux command, this step can be done by opening terminal (Ctrl+Alt+T) and running a single command:
gsettings set org.gnome.desktop.remote-desktop.rdp screen-share-mode 'extend'
Finally, you can share your IP address, user and password you set in step 1 to your friends for accessing remotely.
In addition:
To access outside of home/local network, you need to setup either DMZ host or IP port forwarding (3389 in the case). The setting varies depends on your router, so I won’t cover it here.
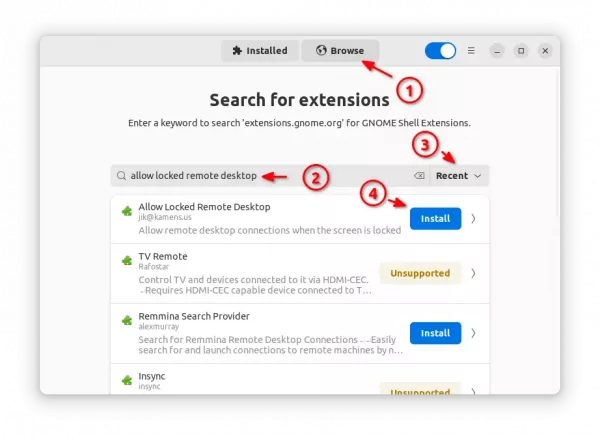
Also, if you don’t plan to sit in front of the Ubuntu machine all the time, install the “Allow Locked Remote Desktop” could be useful to prevent connection lost due to screen lock.
To do so, install and open “Extension Manager” from Ubuntu Software. Then, use it to search and install the extension from ‘Browse’ tab.




Hey Thanks!
I tried this on Ubuntu 22.04 with x11 and wayland but as I connect, there is just an empty screen in the RDP. And fails later with Error 0x108.
Do you have an Idea, how it could be fixed?
I have the same problem as reiner probably.
If I set to mirror-primary, it works. then I see a duplicate of my main screen.
But as soon as I’m on ‘extend’, the RDP session immediately quits after authentication
This no longer works in 23.10 because the mouse cursor on the extended display is invisible.
I have the exact same situation as Dave