


![]()
This tutorial shows how to install and setup Veyon for classroom management in Ubuntu 24.04, Ubuntu 22.04, Ubuntu 20.04, and Debian 12, though it should also works in Windows 10 & 11.
Veyon is a free and open-source software for monitoring and controlling computers across multiple platforms. It supports monitoring all computers in one or multiple classrooms, view or control computers, and broadcast the teacher’s (or student’s) screen in real-time.
Besides the basic monitor, control, screen sharing features, the program also can do:
- Lock student computers screen.
- Power on/off, reboot student computers.
- Send message, start app, open website, take screenshot, and transfer files to student computers.
Requirements
The software requires computer with:
- 2 GB or higher RAM
- Multi-core (2-4 CPU cores) CPU.
- Recommends a Gigabit network for more than 10 computers.
- Computers in same local network (though LDAP also supported)
NOTE: for Ubuntu 24.04 and later, you need to switch to X11 session (choose “Ubuntu on Xorg” from login screen), as Veyon so far does NOT support Wayland.
Step 1: Install Veyon
The software is available in Debian and Ubuntu repository but old. For the most recent version, it provides official packages for Windows, and most Linux, including Ubuntu, Debian, Centos, Fedora, and openSUSE.
User can choose to download the package from either Github releases page or its website via the link below:
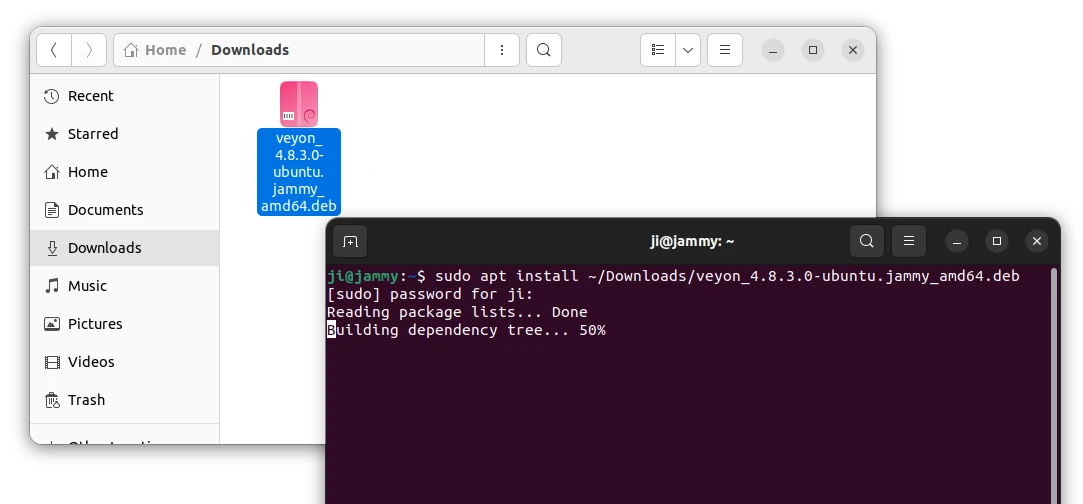
After downloading the .deb package, Debian/Ubuntu users and install it by pressing Ctrl+Alt+T on keyboard to open terminal and run command:
sudo apt install ~/Downloads/veyon*.deb
The command above will install all the package, whose filename start with veyon, and include .deb as extension. Instead of typing ~/Downloads/veyon*.deb, you may drag’n’drop the downloaded package into terminal to auto-insert PATH to that file.
The download link above only provides packages for amd64 (Intel/AMD) platform. If you want to install in ARM devices, try the Ubuntu PPA which however contains the package lags a bit behind.
Step 2: Setup Veyon
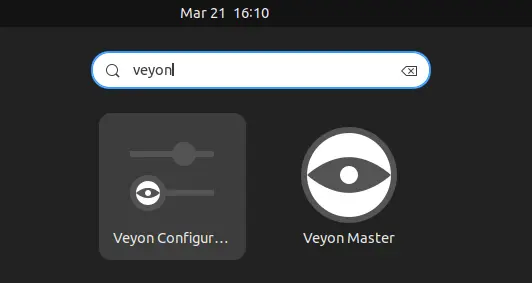
After installing the app in all the computers, it will show you 2 app icons in menu:
- Veyon Master for teacher to monitor and control computers.
- Veyon Configurator for configure options.
Basic Setup For All Computers for Both Teacher & Students
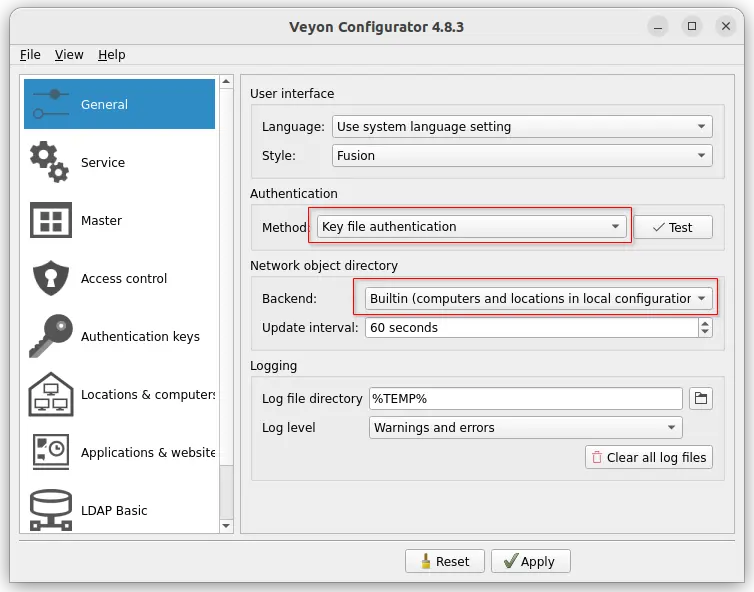
For all the computers, first launch “Veyon Configurator”.
Under “General” tab, do:
- set Key file authentication as Authentication Method.
- set Builtin (computers and locations in local configuration) as Backend of Network object directory.
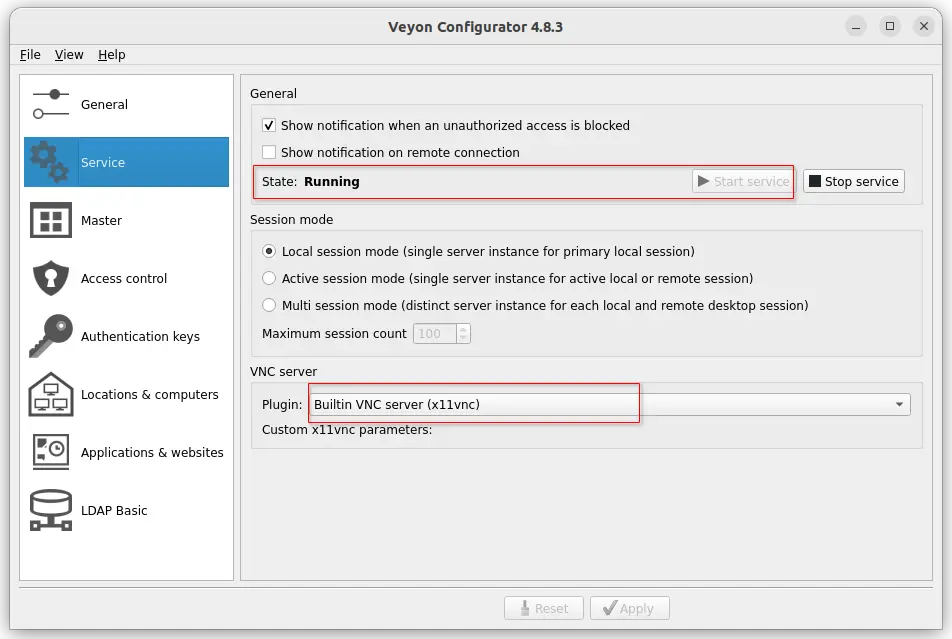
Then, navigate to “Service”, and do:
- Click “Start service” to run the service.
- Choose Builtin VNC server (x11vnc) as VNC server plugin.
Under “Access control”, check Grant access to every authenticated user (default), which is usually enabled by default. Finally, click Apply button!
Tips: The config dialog has “Save settings to file (Ctrl+S)”, and “Load settings from file (Ctrl+O)” menu options, allows to export settings, then import for multiple machines.
Generate Key Pair (for Teacher Computer only)
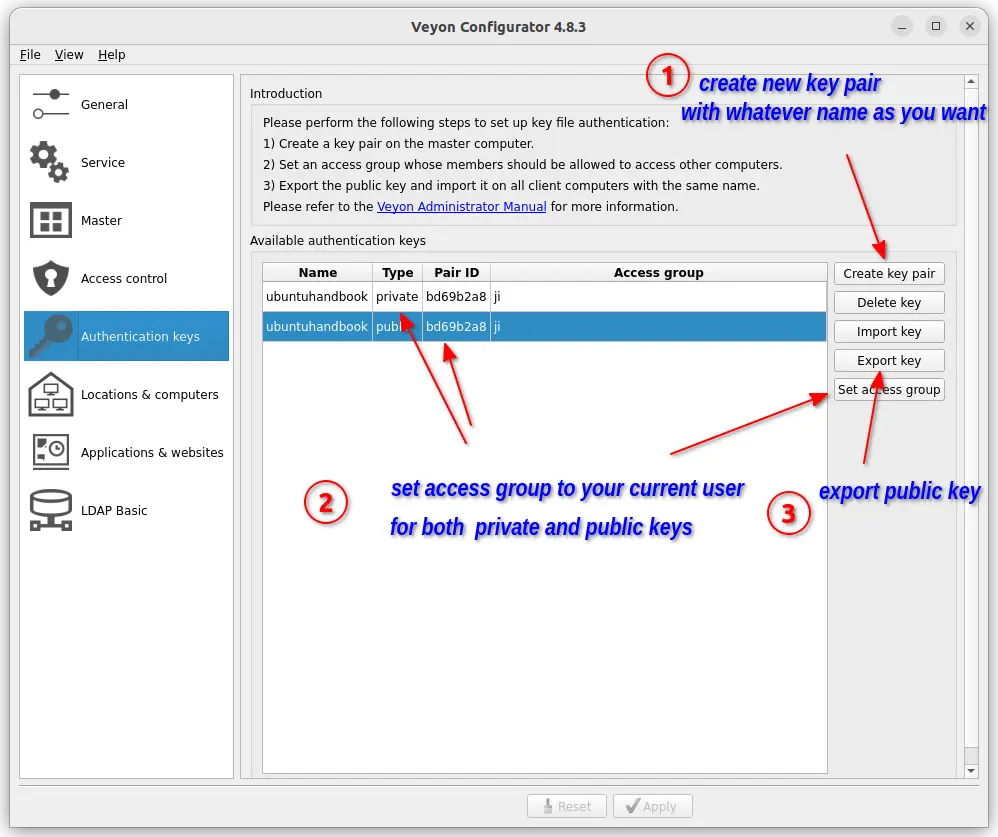
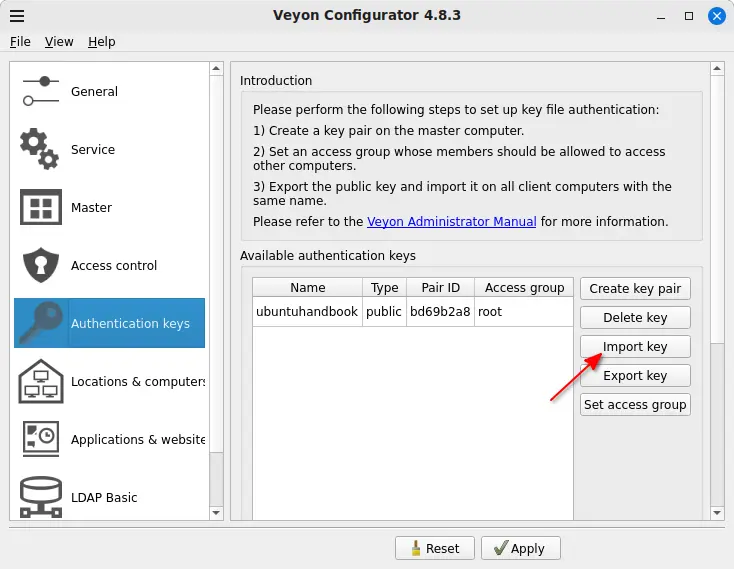
Also in “Veyon Configurator” config dialog, navigate to “Authentication keys” setting page. There do:
- click “Create key pair” and type a name in pop-up dialog to create key pair.
- select private and public keys one by one from the list and click “Set access group“, then set access group to your user! (For Windows, set access group to “Users”)
- finally, select public key from the list, and click “Export key” to export public key to a file.
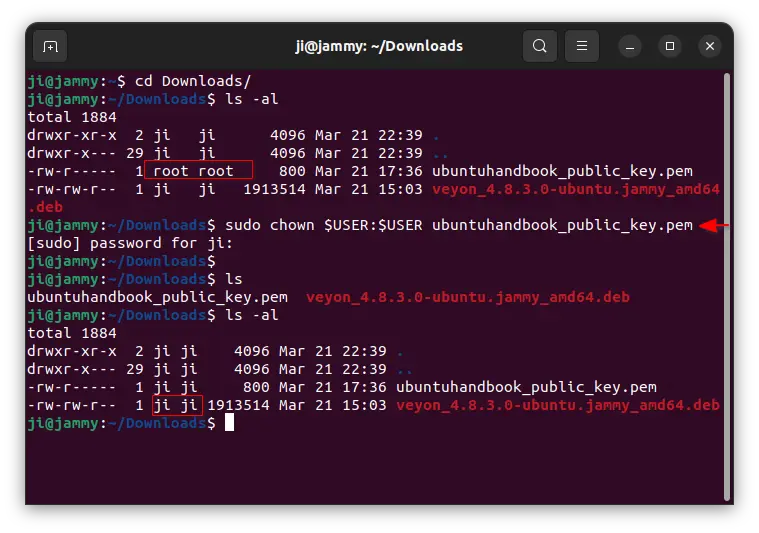
In Ubuntu, the exported public key file belongs to root user. To change the ownership, press Ctrl+Alt+T on keyboard to open terminal and run command:
sudo chown $USER:$USER ~/Downloads/ubuntuhandbook_public_key.pem
Here I exported the file to “Downloads” folder, and name the file as “ubuntuhandbook_public_key.pem”, you need to replace them in command accordingly!
Add student computers (for Teacher Computer only)
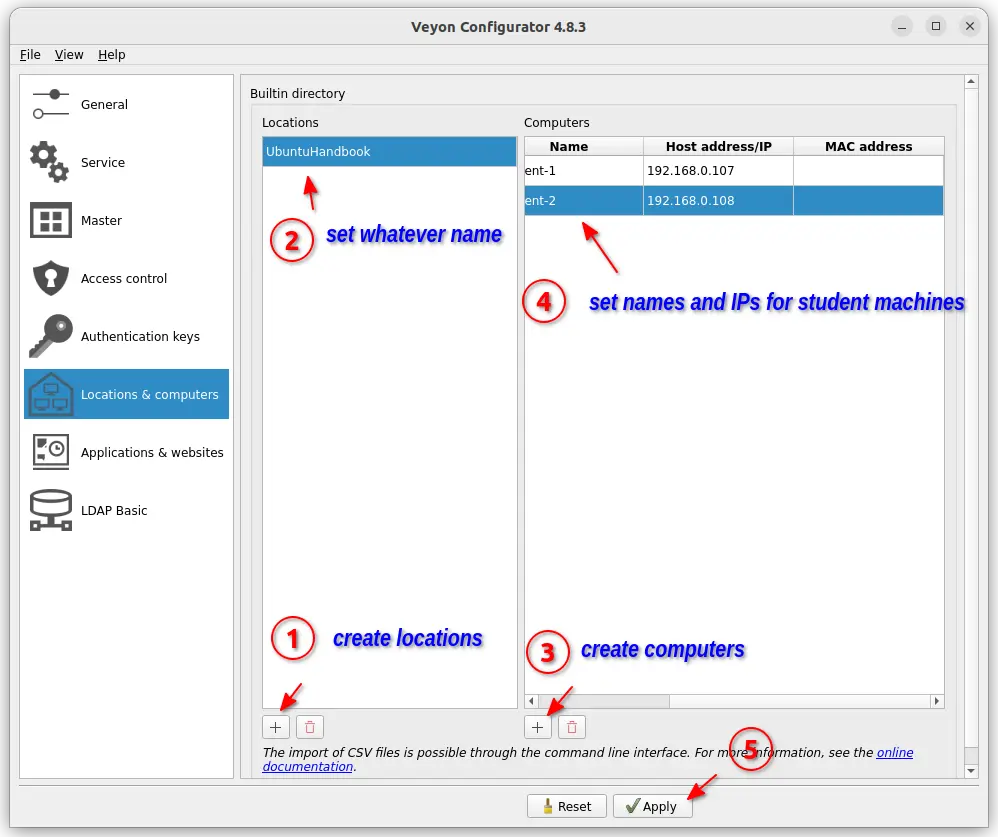
Next, navigate to “Locations & computers” page, and do:
- Click “+” icon in the bottom to add a location, and set whatever name as you want.
- Highlight the location you just added, then click “+” in right to add computers.
- For each computer, set a name (that will displayed in Master window) and add the IP address of that student computer, while MAC address is optional.
When done, click “Apply” button in the bottom.
Import Public Key (for Student Computers)
For each student computer, navigate to “Authentication keys” page in Veyon Configurator. Then, click “Import key” and click import the public key, that is generated on teacher’s computer.
Tips: Without using USB stick or a file transfer app, Debian/Ubuntu can open terminal and run command to create a small http file server. For example, share files under ‘Downloads’ folder via command:
cd ~/Downloads && python3 -m http.server
Then, all computers in the network, can access the http file server and download the file by visiting http://teacher-computer-ip-address:8080 in web browser.
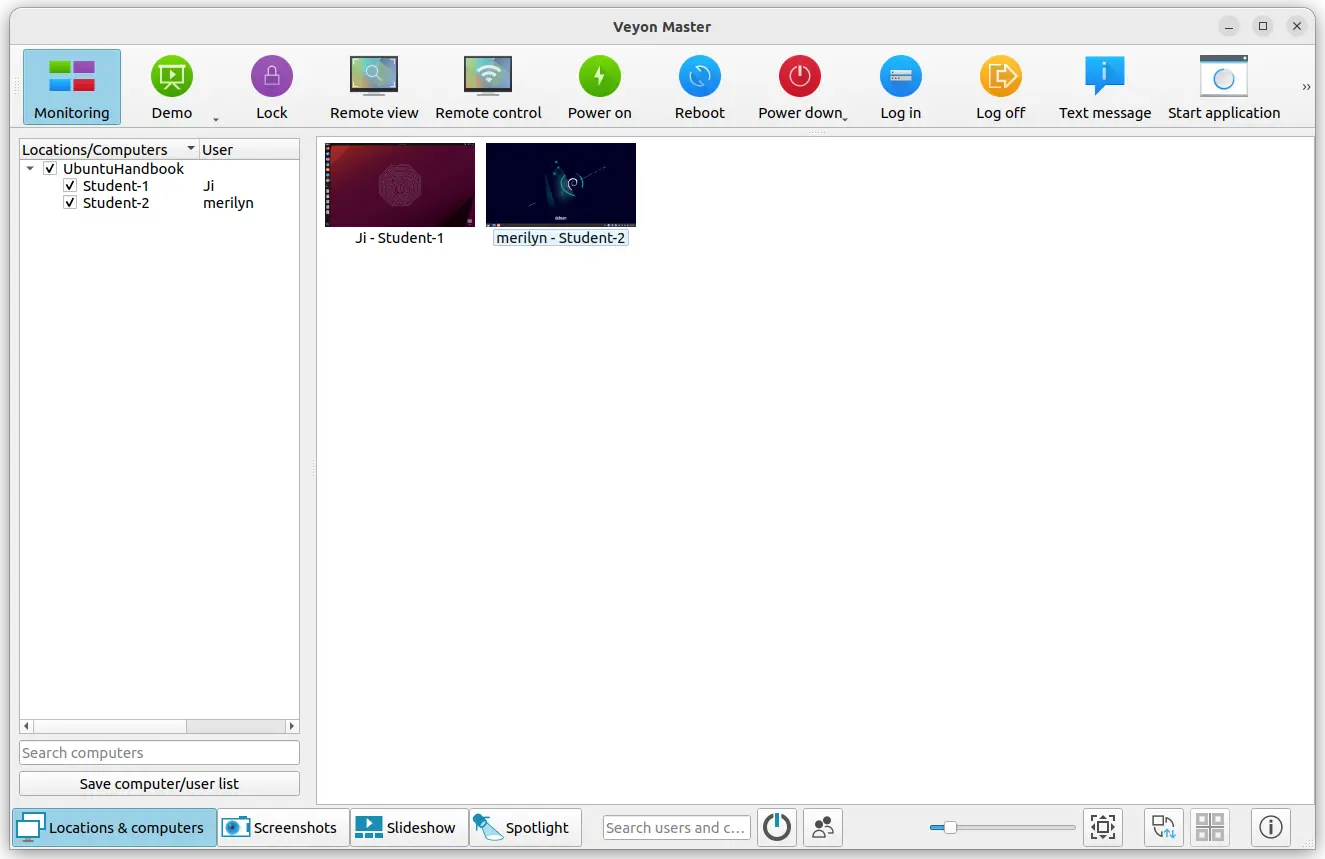
Start Veyon Master
Finally, in teacher’s computer, launch “Veyon Master” from start menu (or ‘Activities’ overview depends on desktop environment).
When the Master window opens, click “Locations & computers” in the bottom left. Finally, enable the check-box for your location/computer. If everything’s done successfully, all your student computers will be listed in right, with thumbnails of their desktops.
Tips 1: Students computer with same username seems not working good in my case. It’s better to create user accounts for student computers with different names.
Tips 2: It’s better to login student computers with standard (non-admin) user accounts. So, they don’t have permission to change Veyon configure options.
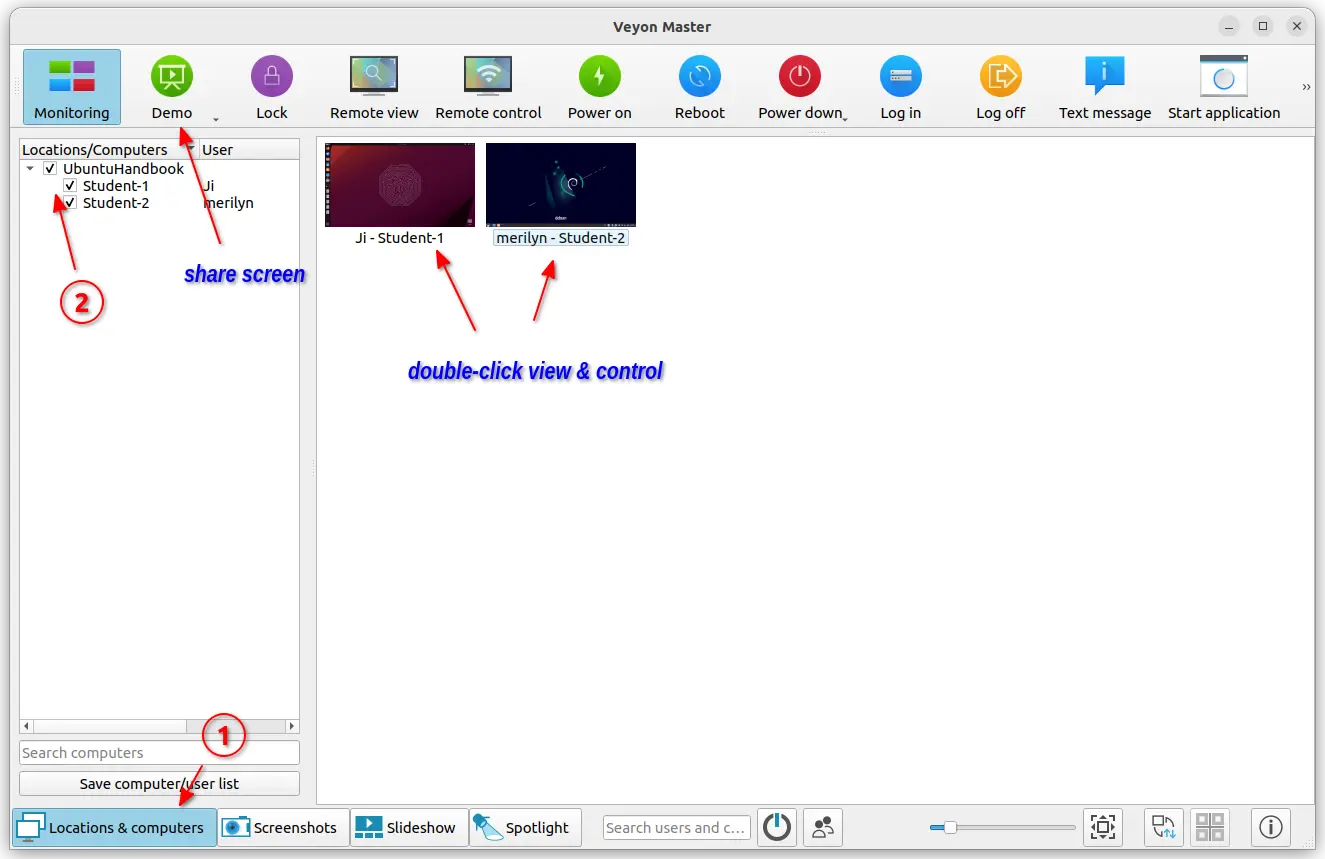
Double-clicking on any one of the thumbnails will open the student’s screen (View only mode), while there’s an overlay option in top to disable “View Only” mode to take control of it. By clicking on “Demo” icon on header-bar, you may choose to share either teacher’s screen or selected student’s screen in either full-screen or window mode. For more about Veyon, see the official doc.
Uninstall:
To uninstall Veyon on Debian or Ubuntu, press Ctrl+Alt+T on keyboard to open terminal and run command:
- Stop and disable the server:
systemctl disable --now veyon.service
- Uninstall Veyon:
sudo apt remove --autoremove veyon
For Windows, just use “Veyon Configurator” to stop the service, then uninstall the software using System Settings.


whenever i launch the configurator i get an error
Could not start with administrative privileges. Please make sure a sudo-like program is installed for your desktop environment! The program will be run with normal user privileges.
The local configuration backend reported that the configuration is not writable! Please run the Veyon Configurator with higher privileges.
As I can see you never tried to install Veyon and get it work on ubuntu because ubuntu with wayland won’t work at all.
please don’t write posts you don’t know about.
max