


![]()
This is a step by step guide shows how to install Google Chrome web browser and keep it up-to-date in Ubuntu 24.04 LTS and Ubuntu 25.10.
Google Chrome is the top popular web browser today. It is a proprietary software free for use. For those who prefer open-source, then Google also offers Chromium browser for choice.
Google Chrome is available to install in Linux on only Intel/AMD platform through 2 ways! They are:
- official and native .deb/.rpm package.
- unofficial community maintained Flatpak package, runs in sandbox environment.
Here I’m going to show you how to install the browser in both ways. Choose either that you prefer.
Option 1: Install Google Chrome native Deb package
Google provides direct download links, as well as software repository that contains the browser package through .deb for Debian/Ubuntu, and .rpm for Fedora and openSUSE.
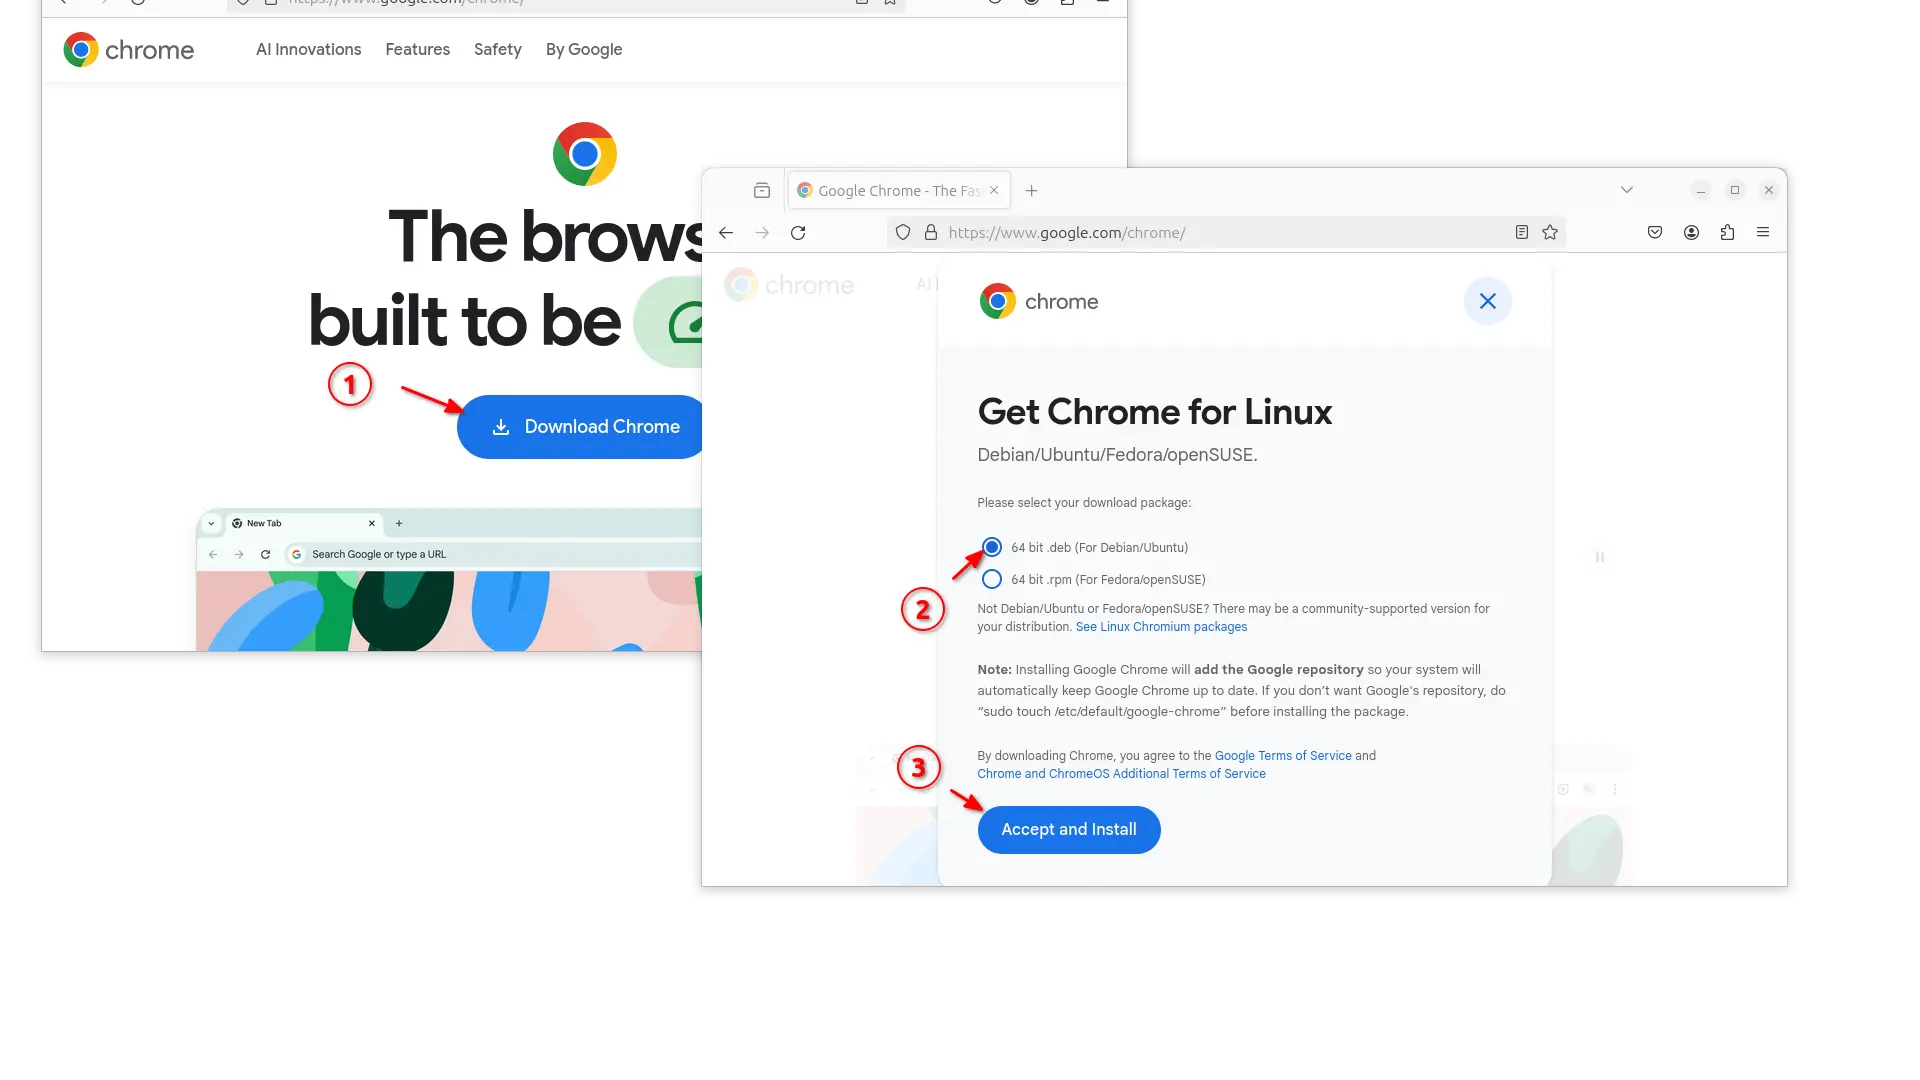
Download & Install the Deb package
The package is available to download at the link below:
NOTE: If you’re trying to download the package on a non-Linux system (e.g., Windows), or the link somehow does not work for you, then go directly to next step (Setup Google Chrome Repository) and install it from command line.
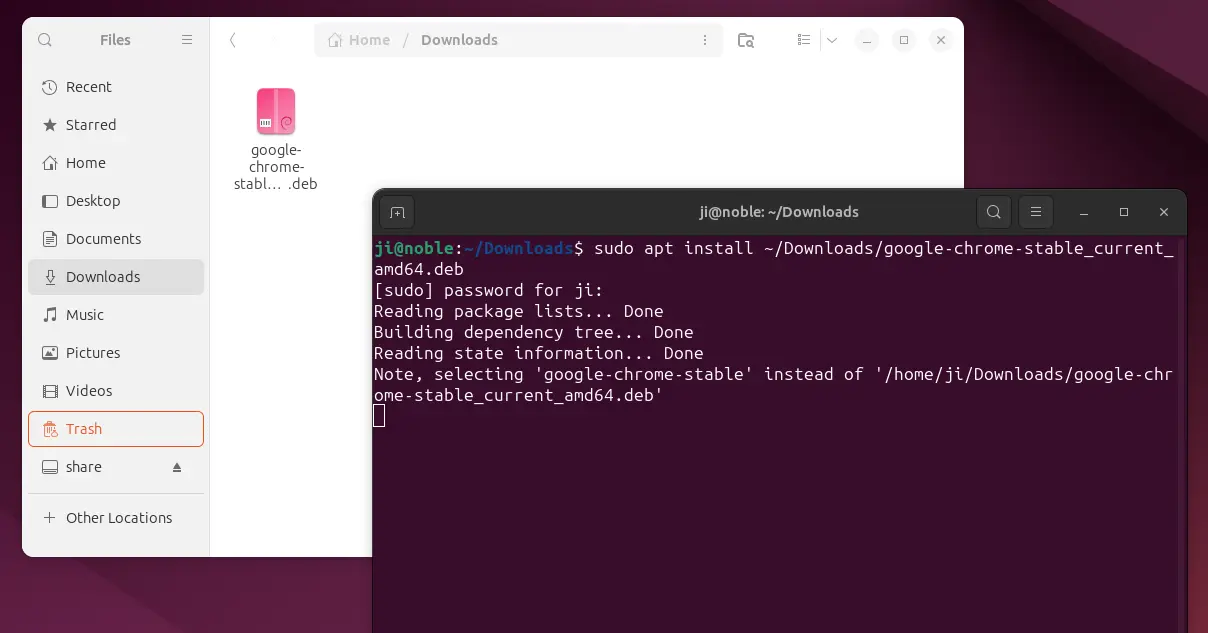
After downloaded the .deb package, press Ctrl+Alt+T on keyboard to open terminal, then run command to install it:
sudo apt install ~/Downloads/google-chrome-stable*.deb
Instead of typing ~/Downloads/google-chrome-stable*.deb, you can just drag’n’drop .deb file into terminal to insert the path to file.
Once installed, search for and launch the browser either from start menu or Gnome ‘Show Apps’ screen depends on your desktop environment, and enjoy!

Setup (Modify) Google Chrome Repository for updates
If the download link above does not work for you, then you can follow this step to manually add the source repository and install .deb package using apt command.
When you install the Deb package, it also automatically adds the Google Chrome repository into your system. It HOWEVER use the old deprecated method that’s not secure due to Debian policy change.
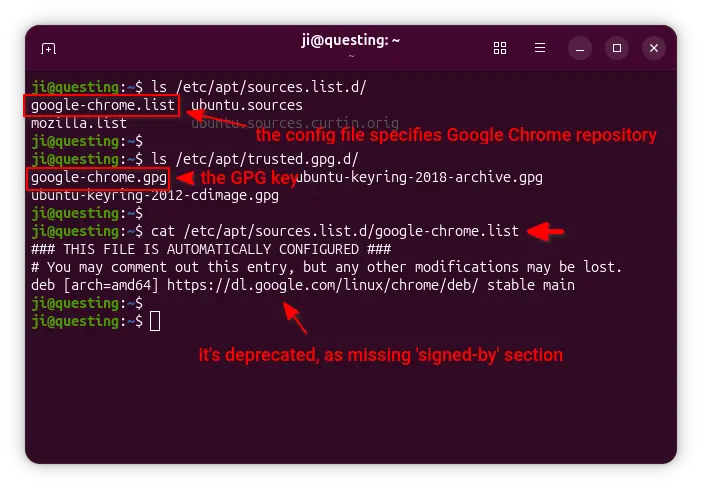
the default Google Chrome repository, which is however deprecated
To correct it or manually add the repository, do following steps below one by one:
- First, press
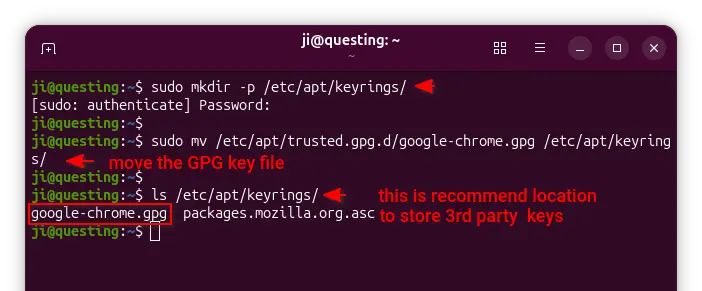
Ctrl+Alt+Ton keyboard to open terminal. Then, run command to create/etc/apt/keyrings, and move the GPG key to that directory:sudo mkdir -p /etc/apt/keyrings/
sudo mv /etc/apt/trusted.gpg.d/google-chrome.gpg /etc/apt/keyrings/
If you don’t have the key (run
ls /etc/apt/keyringsto tell), then run the command below to download & save to target location:wget -qO - https://dl.google.com/linux/linux_signing_key.pub | gpg --dearmor | sudo tee /etc/apt/keyrings/google-chrome.gpg
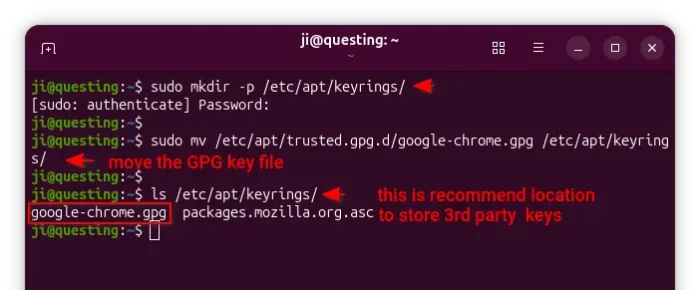
Move the key file to the correct location
- Next, remove the auto-added config file:
sudo rm /etc/apt/sources.list.d/google-chrome.list
Tips: since 25.10, there’s
sudo apt modernize-sourcescommand to auto transform.listto.sources, though you need to manually edit ‘signed-by’ section in this case. - Then, add new one by running the command below in terminal:
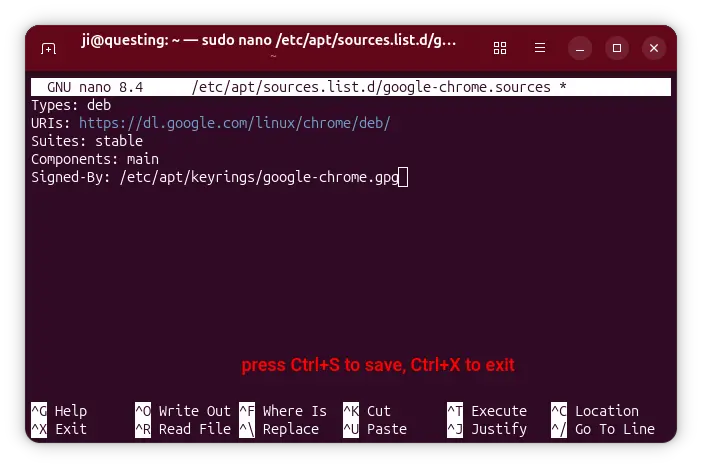
sudo nano /etc/apt/sources.list.d/google-chrome.sources
The command will create the config file in “Deb822” file format, that are default for official Ubuntu repositories and PPAs, then open it in
nanocommand line text editor.When it opens, paste the follow lines:
Types: deb
URIs: https://dl.google.com/linux/chrome/deb/
Suites: stable
Components: main
Architectures: amd64
Signed-By: /etc/apt/keyrings/google-chrome.gpg
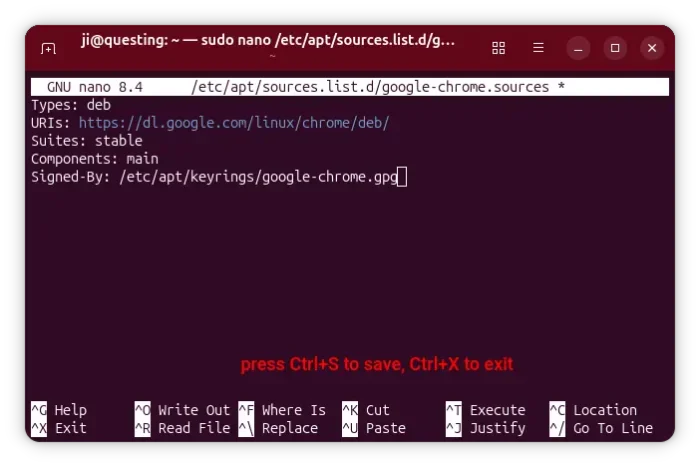
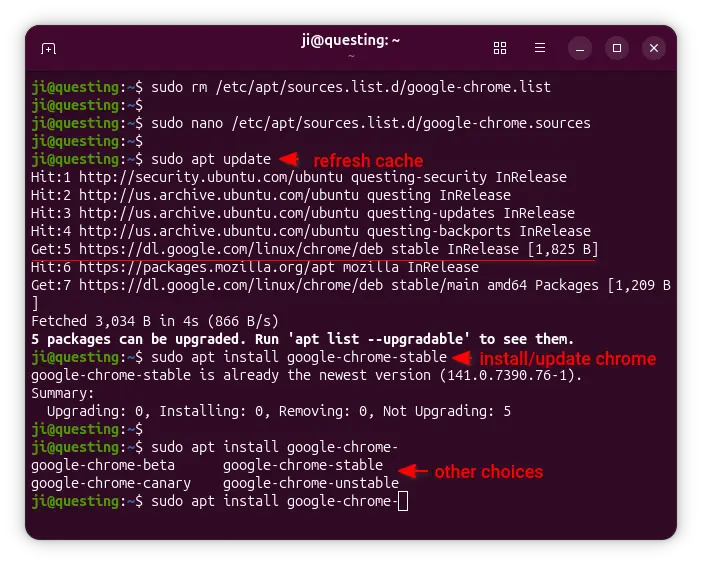
- Finally, save the file by pressing Ctrl+S and exit via Ctrl+X. Then, refresh package cache via command:
sudo apt update
If you didn’t download & install the Deb, you may then run the command below to install the web browser:
sudo apt install google-chrome-stable
As you see in the screenshot, you may also install google-chrome-beta or google-chrome-unstable package for beta or unstable, etc, versions.
Update Google Chrome
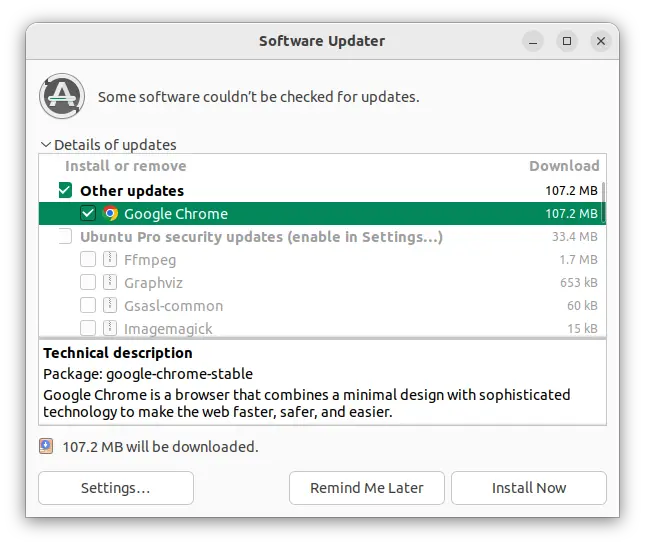
If a newer version of the browser is rolling out, then you can re-run the last apt install command to update.
Or, launch Software Updater utility to check updates along with system package updates.
Option 2: Install Google Chrome via Flatpak
Flatpak is an universal package format that can be installed in most Linux. It runs in sandbox environment, and takes more disk space due to run-time libraries.
The good side is that, it’s easy to configure the permission access, such as Webcam, Microphone, and user folders, for those who care more about personal data.
Tips: Linux Mint 21+ and Fedora 38 + (with 3rd party repository enabled) can directly search for and install the Google Chrome Flatpak pakage from either Software Manager or Gnome Software
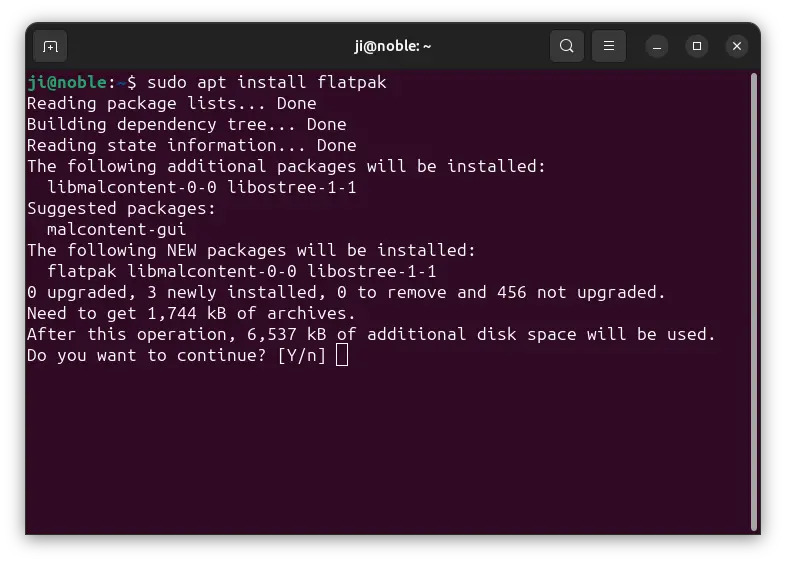
1. For Ubuntu, first press Ctrl+Alt+T on keyboard to open up a terminal window, and run command to install the daemon package to enable Flatpak support:
sudo apt install flatpak
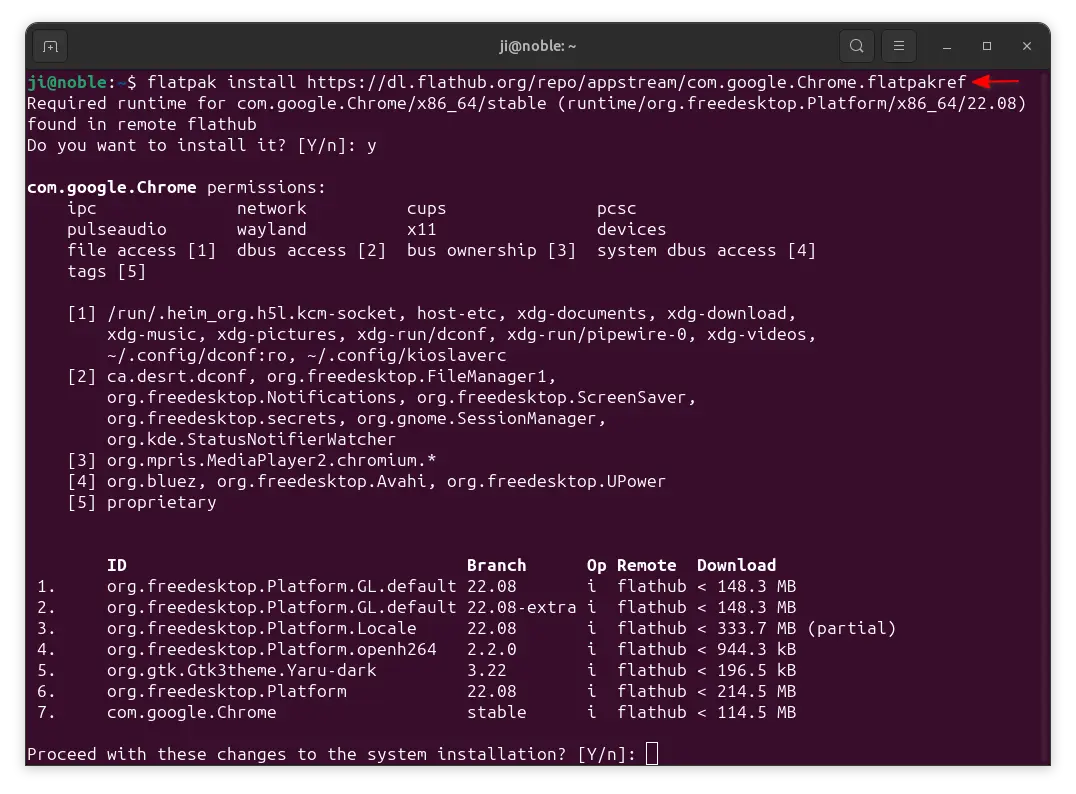
2. Next, install the browser as Flatpak using command:
flatpak install https://dl.flathub.org/repo/appstream/com.google.Chrome.flatpakref
3. For future releases, run command to update:
flatpak update com.google.Chrome
Finally, search for and launch it from either start menu or Gnome overview (may need to log out and back in first). Or, run the command below to start it from terminal:
flatpak run com.google.Chrome
To manage the permission of the Flatpak package, simply install and use Flatseal:
flatpak install https://dl.flathub.org/repo/appstream/com.github.tchx84.Flatseal.flatpakref
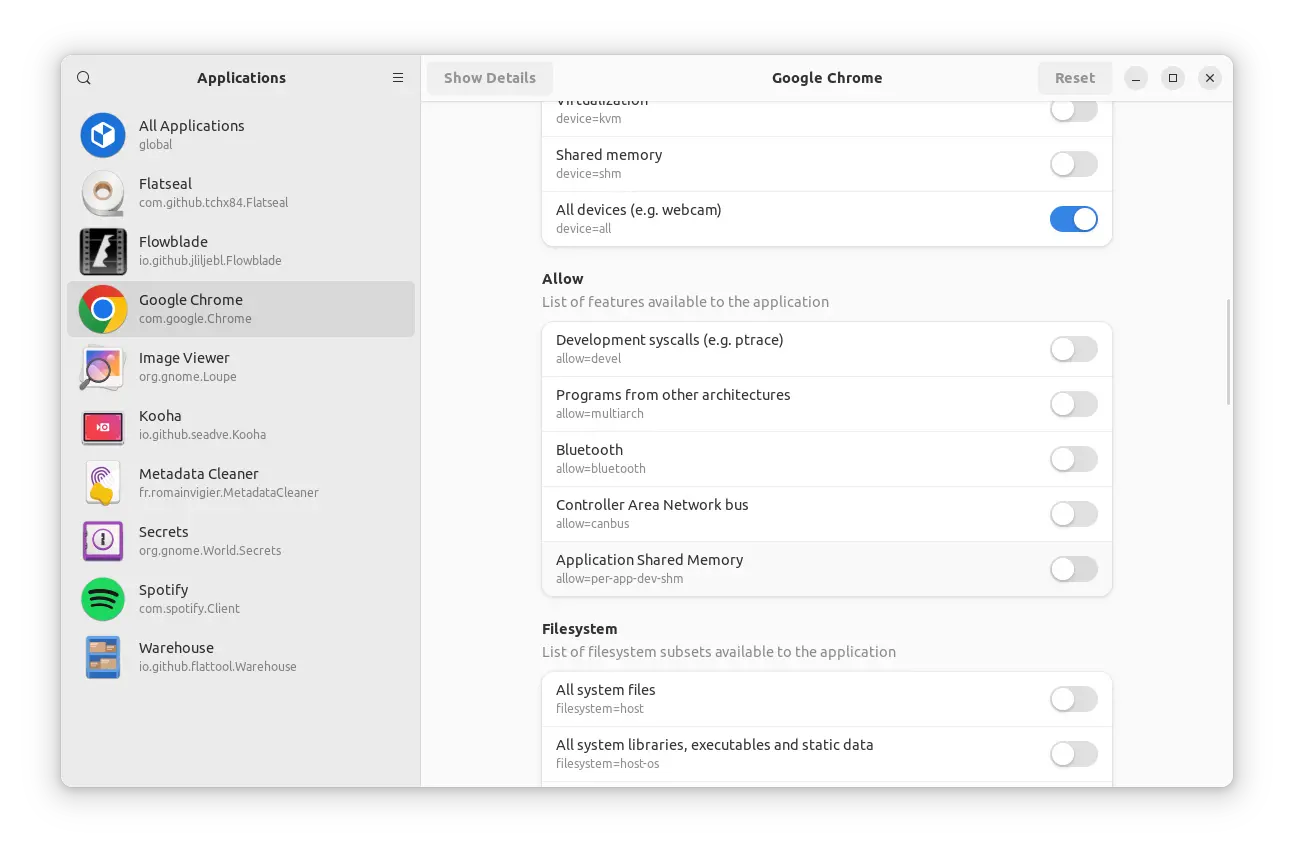
Manage Flatpak package permission using Flatseal
Uninstall Google Chrome
To uninstall the .deb package, open terminal (Ctrl+Alt+T) and run command:
sudo apt remove --autoremove google-chrome-stable
And, remove the source repository by deleting the key and source file:
sudo rm /etc/apt/keyrings/google-chrome.gpg /etc/apt/sources.list.d/google-chrome.*
Finally, run sudo apt update to refresh system package cache.
To uninstall the Flatpak package, use command:
flatpak uninstall com.google.Chrome
And, run flatpak uninstall --unused to remove unused run-time libraries.


Hi Ji,
What is your opinion about installing apps from Flatpak vs. Snap vs. .deb native packages?
Especially for the browsers like Chromium-based ones.
I read that Chromium browsers have better site isolations and installing them from Flatpak is worsening their sandboxing. There are also claims that overall sandboxing of the native app is better than Flatpak’s.
Thanks,
Sorry I don’t know how Chromium works, but I prefer the deb package when available, since it has better performance and less issues compare to Flatpak and Snap.
However, Flatpak and Snap run apps in virtual sandbox environment that can be safer than
.deb. They are universal Linux package format make easy for software developers to support more Linux Distros with less work. And, they usually build with most recent dependency libraries in bundle with newer features.IMO, Flatpak and Snap tends to be future of Linux app packages, though the open-source community seems to prefer Flatpak a bit more.
Thanks for the time to reply.
I agree that Snap and Flatpak seem like the future, especially from a compatibility point of view. I’m more interested in security-wise.
Some people said the Snap sandbox is better than Flatpak, but they don’t fully trust Snap as some parts of the backend on Ubuntu/Canonical are not open-source.