![]()
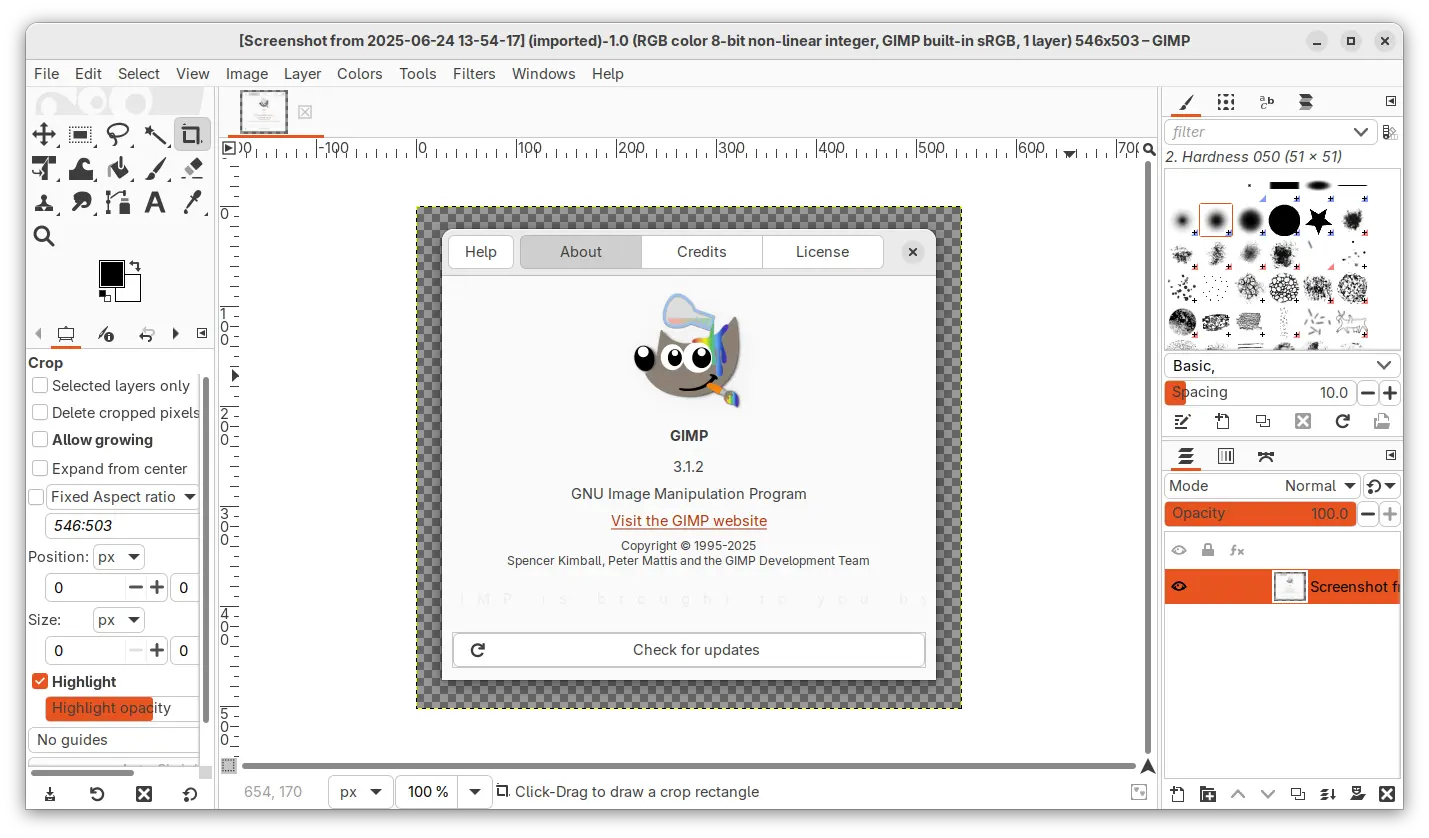
GIMP 3.1.2, the first development release for the next major GIMP 3.2, was released!
The new release of this popular image editor improved the built-in system theme, added many new file formats support, and introduced new painting mode.
News, Tutorials, Howtos for Ubuntu Linux
![]()
GIMP 3.1.2, the first development release for the next major GIMP 3.2, was released!
The new release of this popular image editor improved the built-in system theme, added many new file formats support, and introduced new painting mode.

![]()
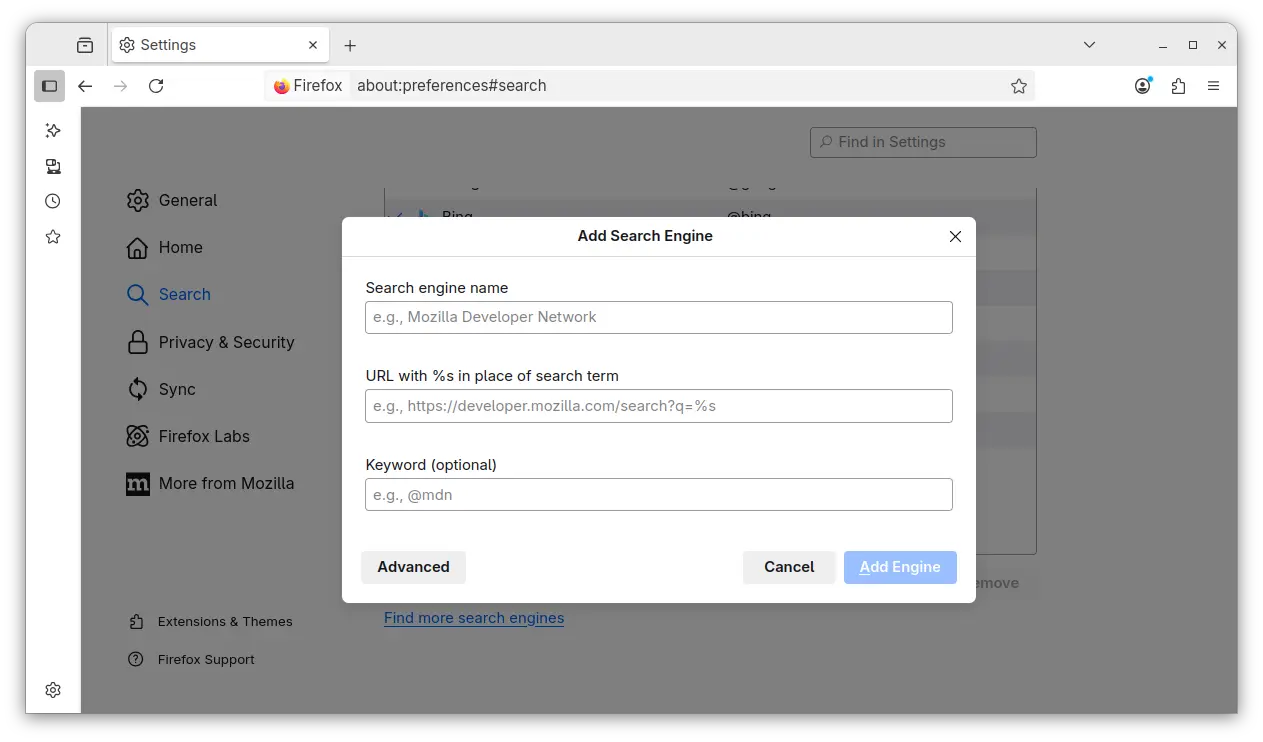
The 140.0 release of Firefox web browser is available to download after 4 weeks of development and beta testing.
In addition to Google, Bing, DuckDuckGo, and Wikipedia, the new release introduced custom search engine support. User now can either right-click search field of a supported website and select Add Search Engine, or go to “Settings -> Search” to add search engine with custom name, URL, and optional keyword.
![]()
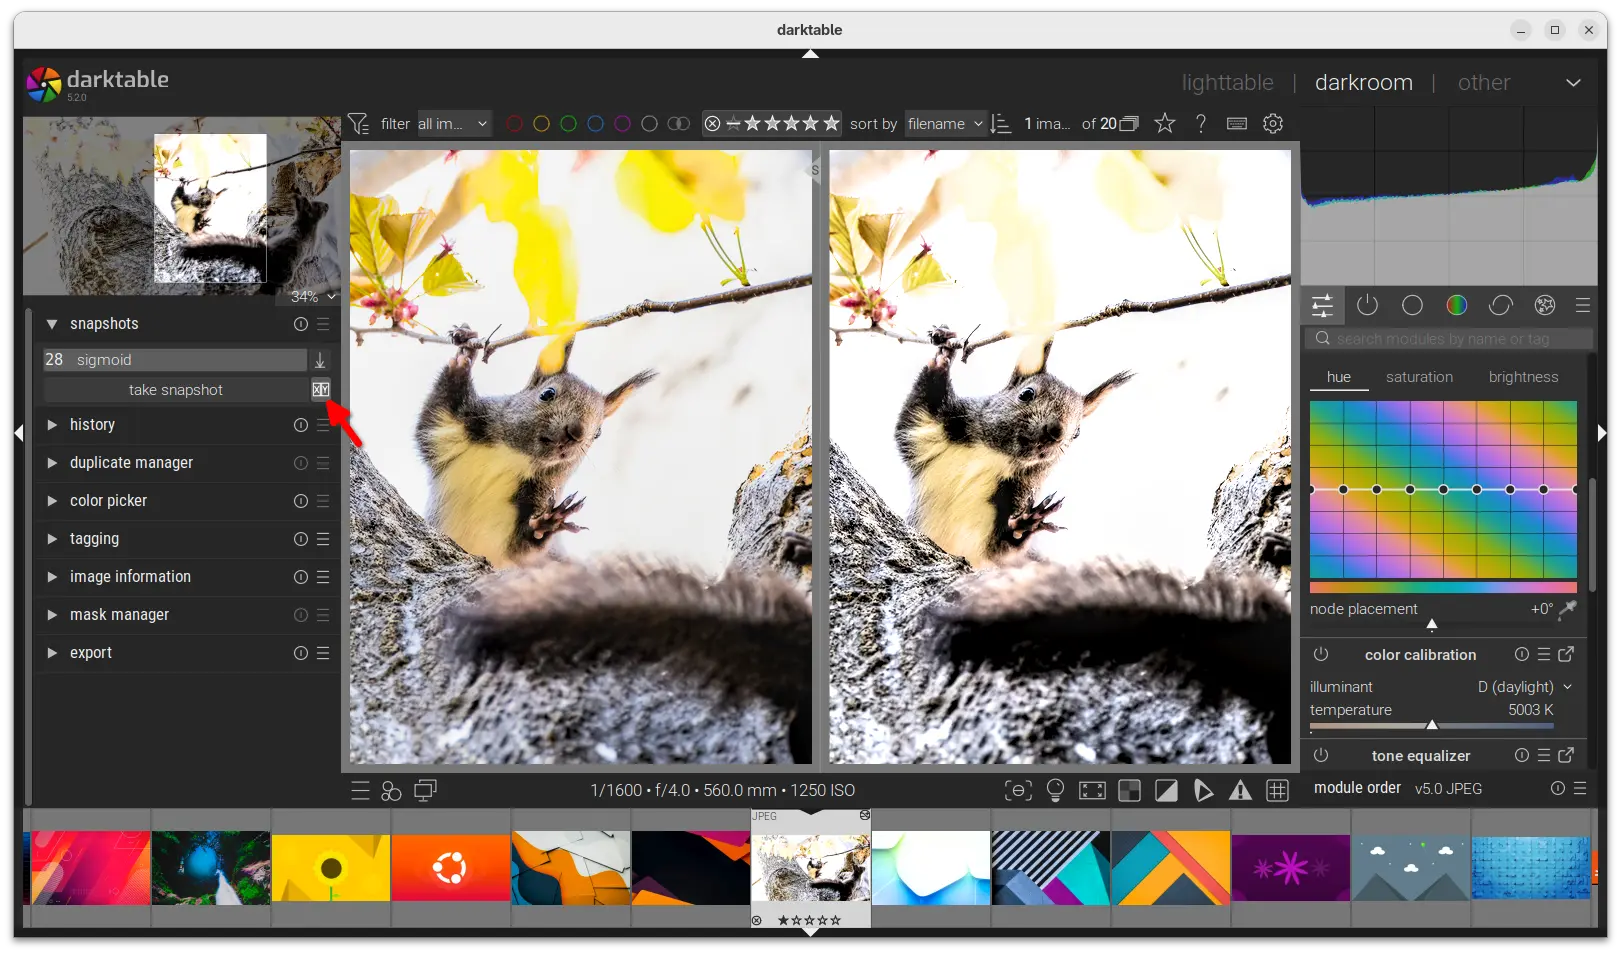
Darktable, the popular free open-source photography app and raw developer, released new 5.2.0 version few days ago!
The new release introduced side-by-side view (aka split view) to preview the different between snapshot and current images. And, it can be enabled by clicking on the “X|Y” icon next to “take snapshot” button.
![]()
This is a step by step guide shows how to mirror your iOS or iPadOS screen onto Ubuntu computer desktop through Apple AirPlay.
AirPlay is a protocol allowing to stream or share content from Apple Devices to Apple TV. Thanks to free open-source software (FOSS), it’s also easy to setup AirPlay server on Windows and Linux PC to receive content from Apple devices.

my iPhone screen on Ubuntu 24.04 desktop
![]()
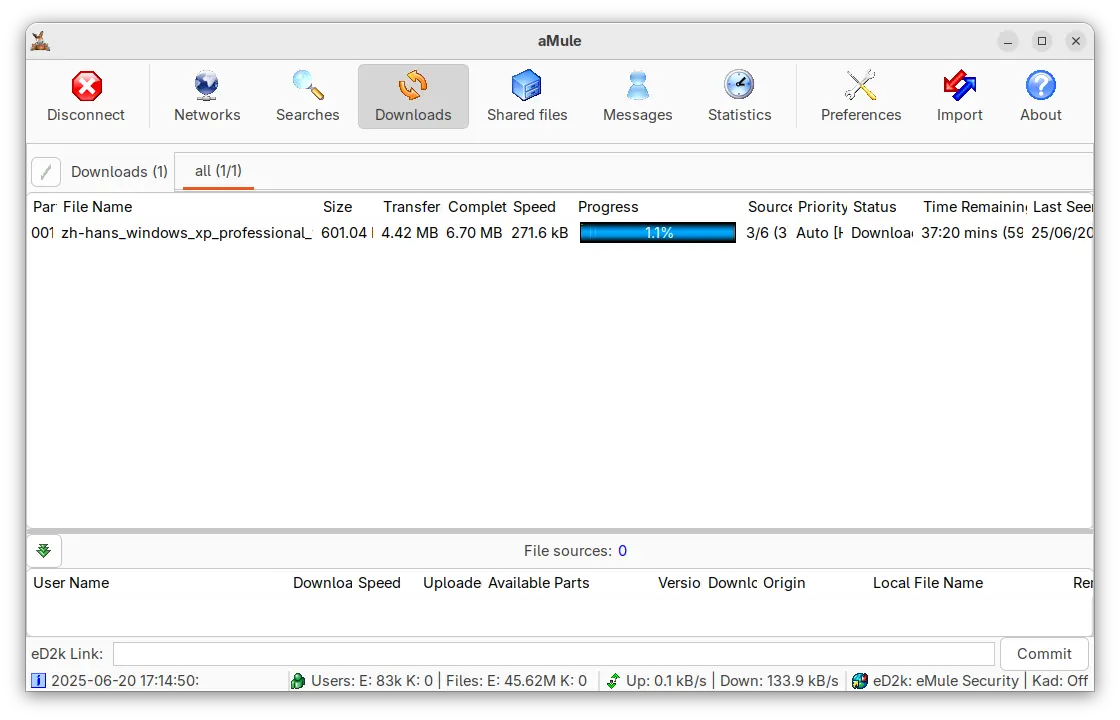
Got ED2K download link, but don’t know how to open it? Try aMule, eMule based app that works in most Linux Distributions.
ED2K (aka eDonkey2000) is a peer to peer file sharing network. The original project has discontinued, but the popular open-source fork eMule is still alive. As eMule is Windows only app, aMule forked it with multi-platform (Linux, FreeBSD, OpenBSD, Windows, MacOS X and X-Box) support.
![]()
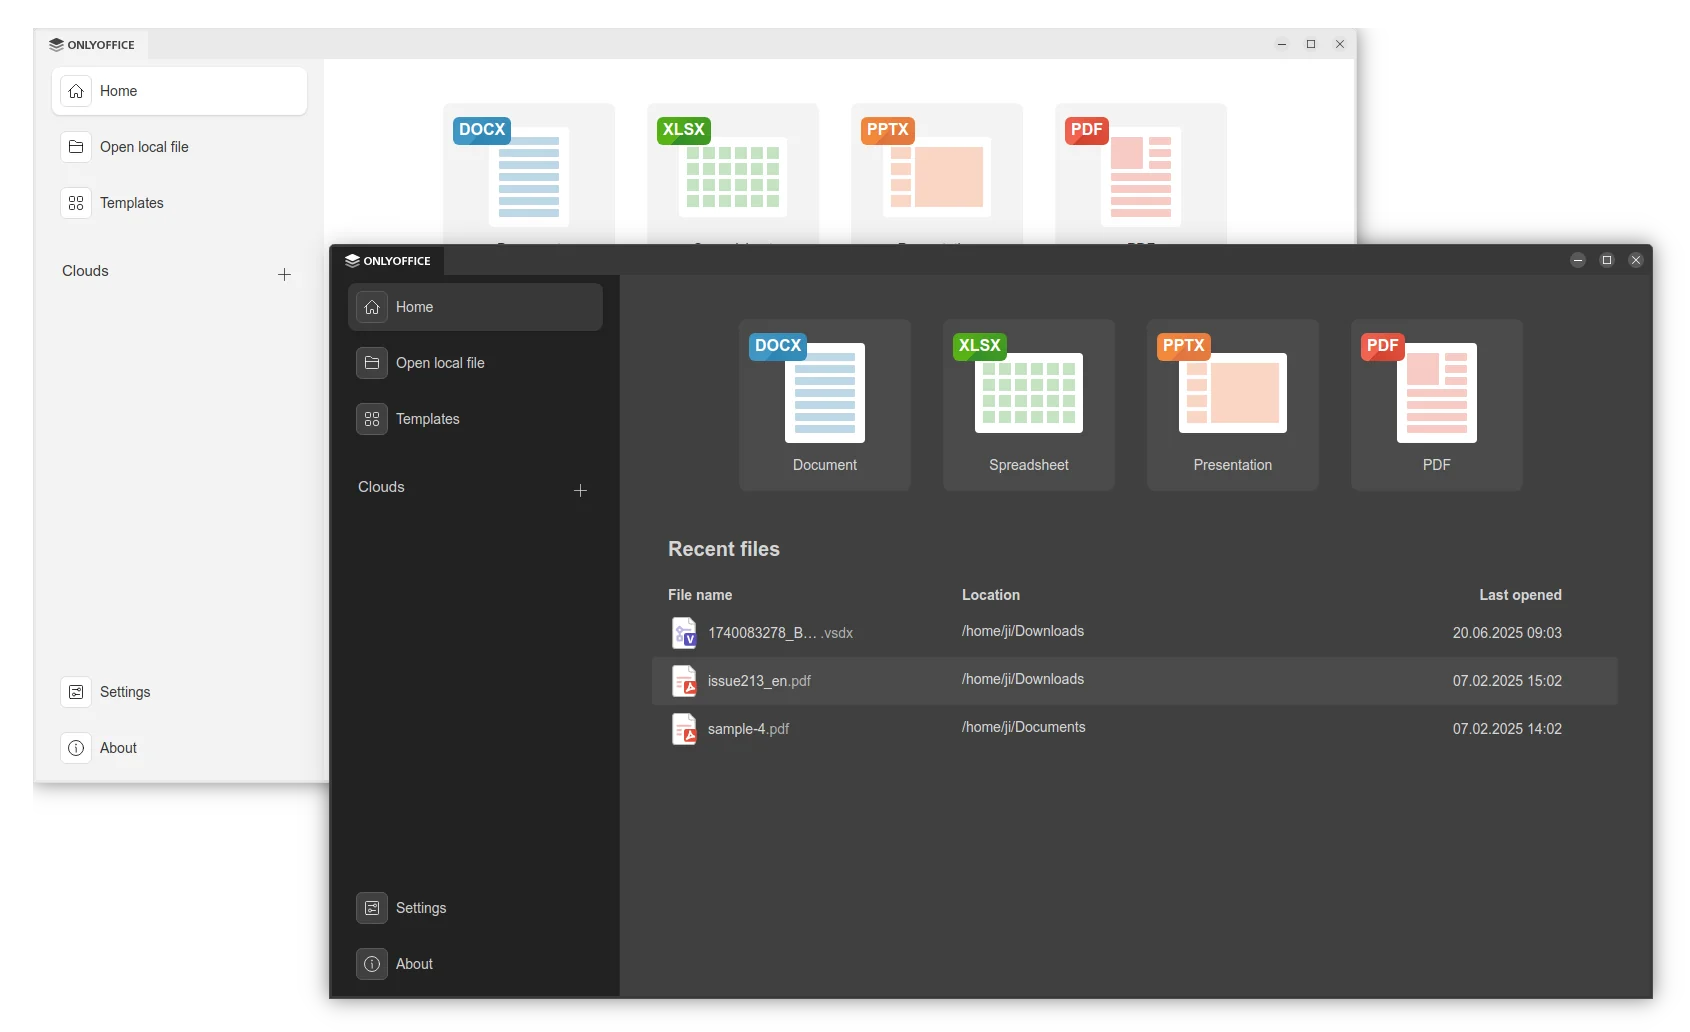
OnlyOffice, the popular free open-source office suite, released new 9.0 version for its offline use desktop editors hours ago.
The new release introduced 2 new themes Modern Light and Modern Dark with redesigned UI elements and icons, as well as redesigned start window with focus on simplicity.

Want to play Windows only steam games on your Linux computer? It’s easy to do the job by using Proton.
As you know, there’s a popular free open-source app called Wine, allowing to run Windows apps and games on Linux, macOS, and BSD. And, there are some graphical wine front-ends, such as PlayOnLinux, Bottles, and Lutris, to help installing and managing Wine apps and games.
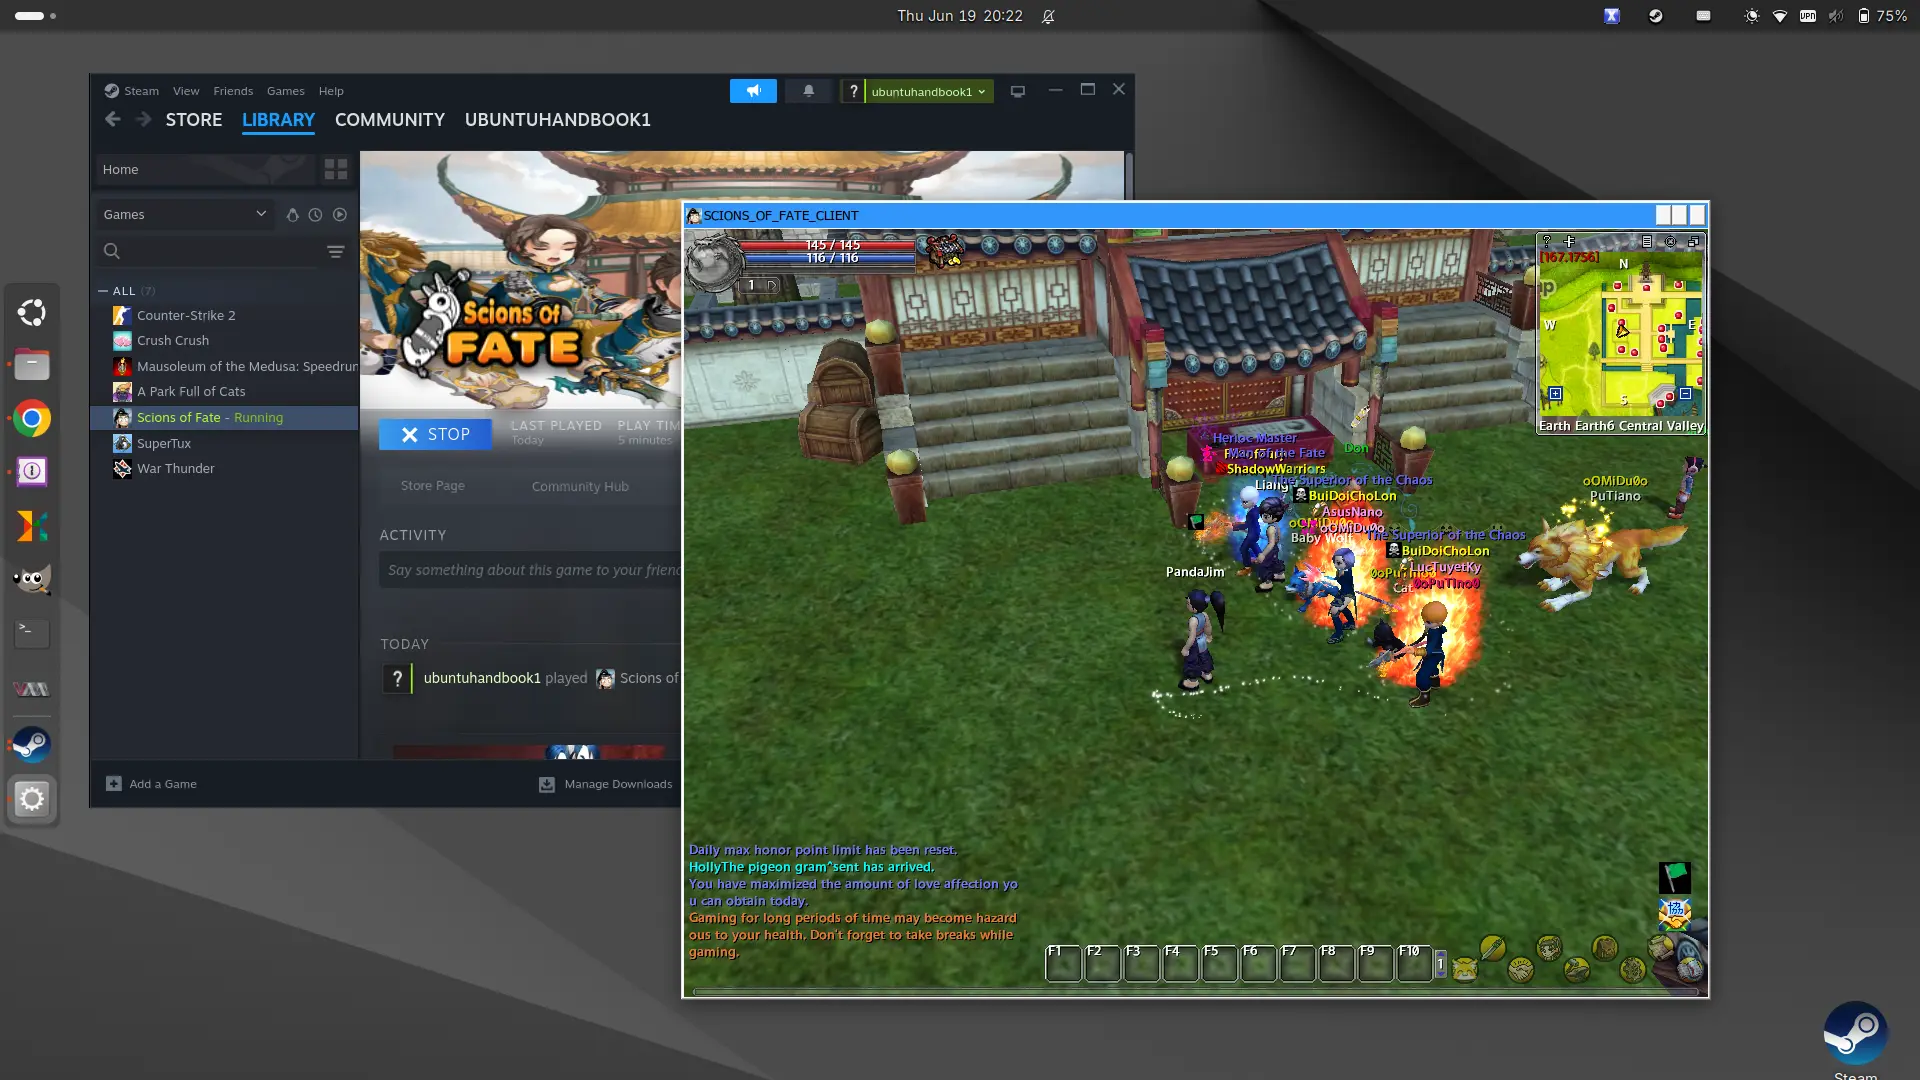
Play Windows only game SOF in Ubuntu 24.04
![]()
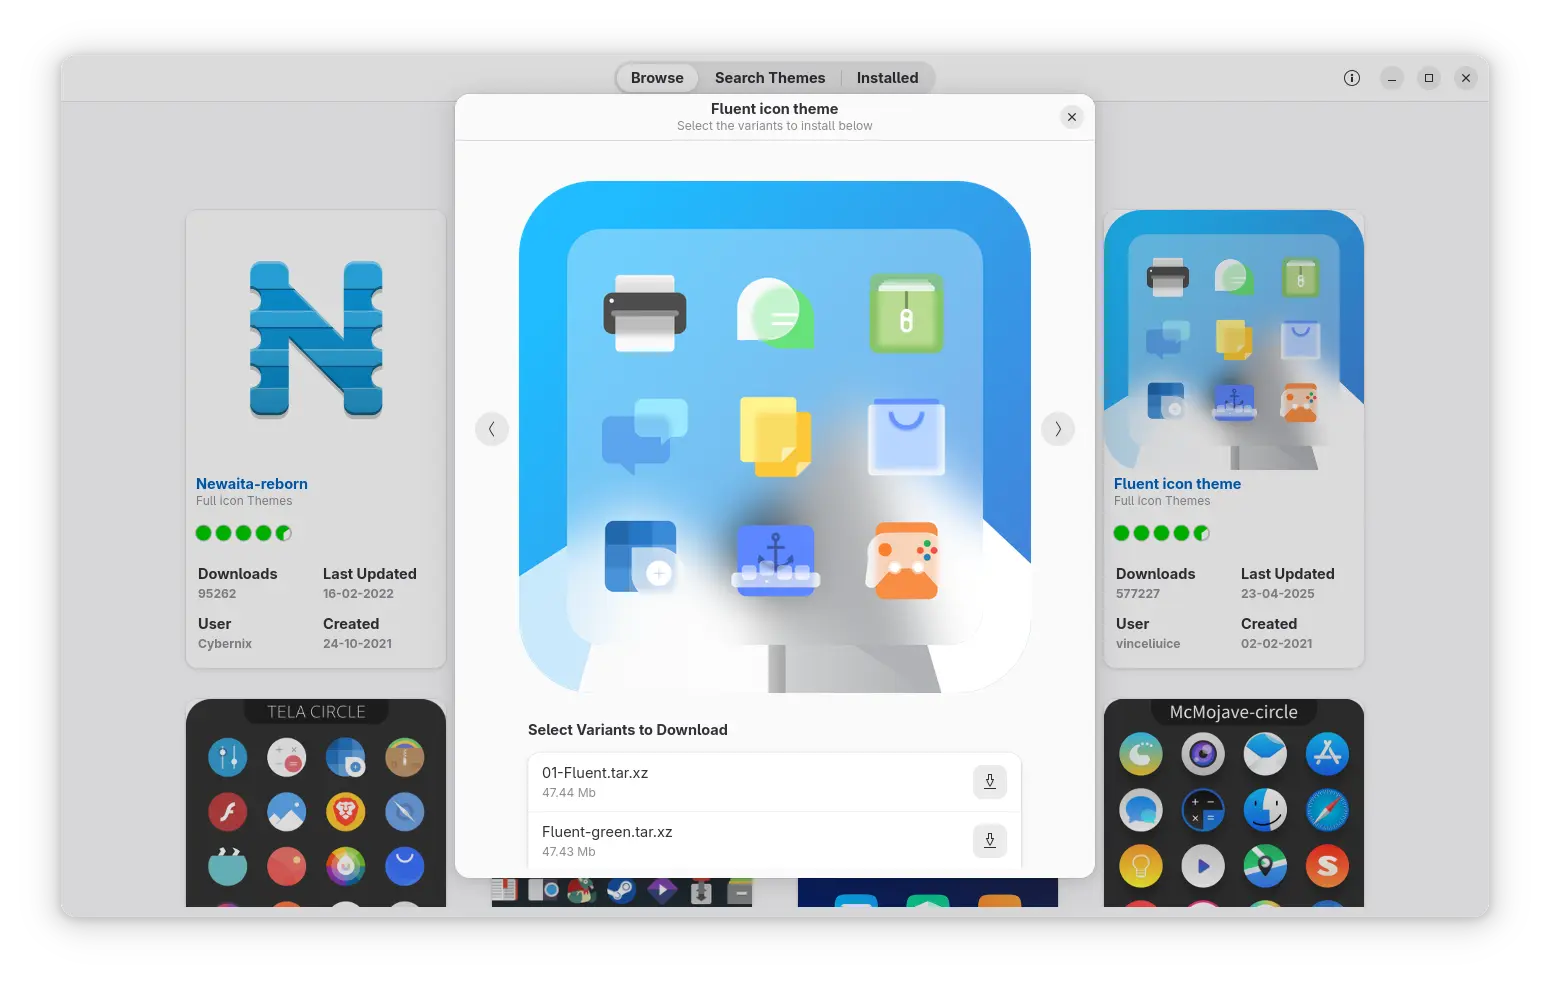
Want to try out different wallpapers, icons, and/or app themes in Linux? There’s new app lets you browse tons of wallpapers, icons, GTK and Gnome Shell themes, and install any one with single click.
It’s Linux Theme Store, a free open-source Rust written application that features GTK4 user interface designed for GNOME.
![]()
For KDE Plasma users, the new 6.4 release of this Linux desktop environment is out today!
Except the major 6.0, KDE Plasma usually rolls out new feature releases every 4 months. And Plasma 6.4 is the new update since February, which improved color rendering, tablet support, and the built-in screenshot tool.
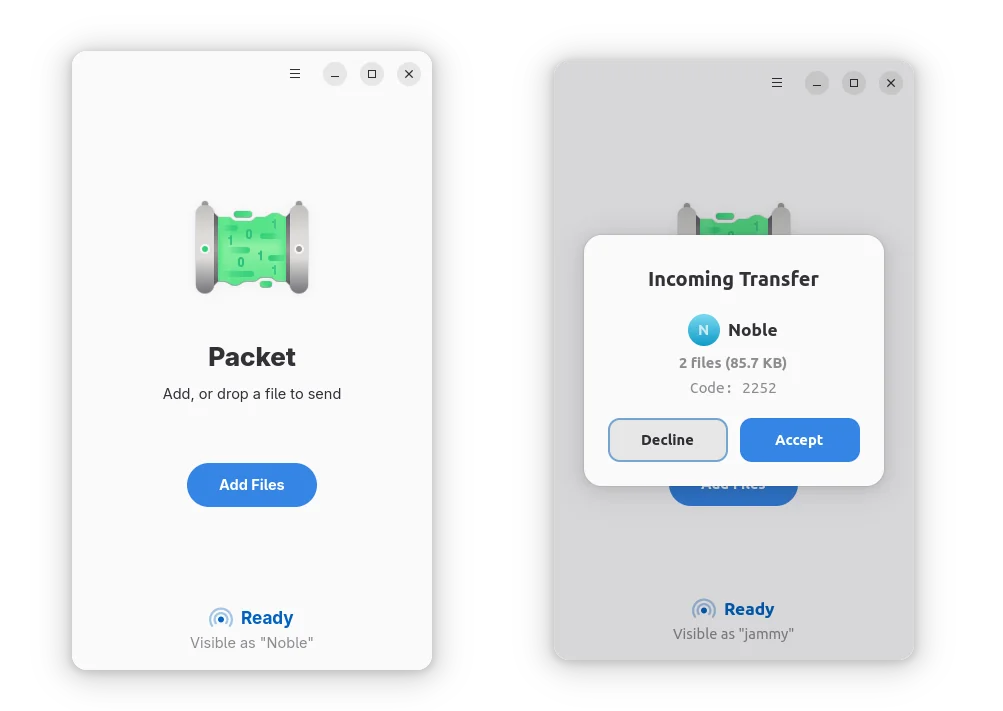
![]()
Packet, free open-source Android Quick Share app for Linux, updated with GNOME Files (aka Nautilus) context menu option support!
For those who don’t know about Packet, it’s new Linux file transferring application written in Rust programming language, and uses GTK4 + LibAwaita for its modern interface designed for GNOME.