Archives For November 30, 1999

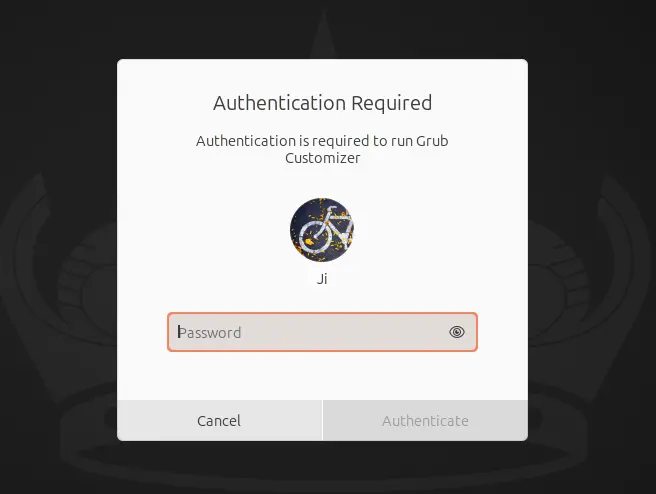
When launching some apps (e.g., GParted, Synaptic, or Grub Customizer), install/uninstall packages with App Center or Software Updater, it always pops-up a dialog asking for admin password to authenticate.

This is great for security! But for lazy men who don’t want to type user password again and again after logged in (or unlocked screen), it may be OK to disable the authentication window when using their computers at home or other safe places.

Password Authentication Pop-up in Ubuntu

Continue Reading…

Ubuntu is working on a new desktop security center and prompting-client. Here’s how to try it out in current Ubuntu 24.04 LTS.

It’s an experimental new feature that will land in next Ubuntu 24.10. Which, provides graphical interface to make it easier for users to control the file/folder access permission for Snap apps.

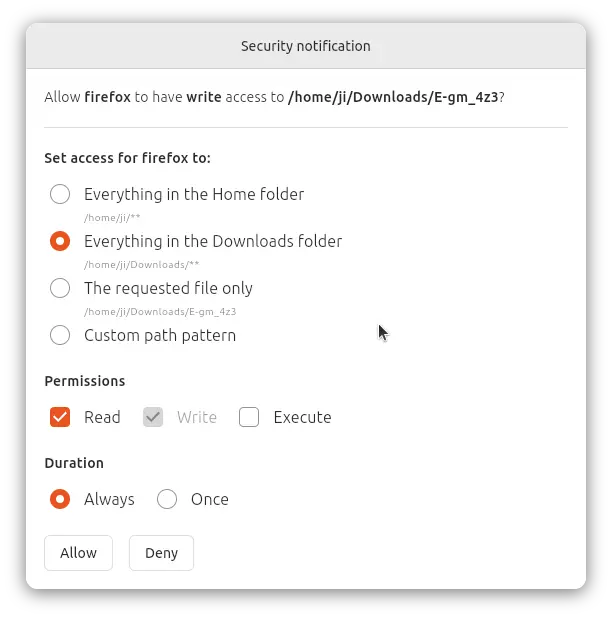
For example, when browsing web via Firefox (the preinstalled Firefox is a Snap package). You found a good image and want to save it to local folder, or you just want to download something. Before the downloading process starts, it will pop-up a dialog as the screenshot shows you, asking for user permission to allow writing to the file or folder.

Pop-up for file/folder access permission

Continue Reading…

This tutorial shows how to enable One Time PassWord in Ubuntu 24.04 for either local or remote SSH login.

One Time PassWord, OTPW in short, is a PAM module which is useful for allowing a user to login public or shared computer/server using a single-use password, that works only for one time.

By generating a list OTPW passwords, and configuring your system to allow OTPW logins, it will ask random one of the OTPW passwords on every login. And, that password will never work again once logged in successfully with it.

Continue Reading…

How to Encrypt An Existing Ubuntu 24.04 System

Last updated: September 6, 2024 — 5 Comments

This is a step by step tutorial shows how to encrypt Ubuntu, while preserving its data, after you installed it on your computer.

While installing Ubuntu 24.04, if you didn’t choose to use the entire disk, then there’s no graphical option to enable encryption. You can however manually encrypt the full Ubuntu system afterward.

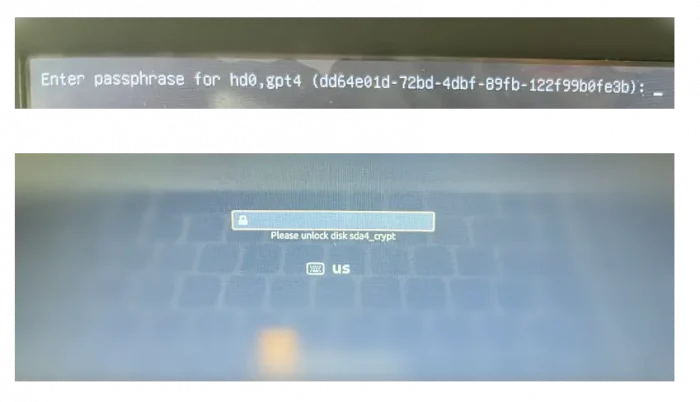
So, on every boot of the Ubuntu system, it asks to input password to unlock boot entry (if /boot partition is also encrypted), then asks again to unlock disk partition before user being able to login.

it asks password twice to unlock boot entry & then root partition

Continue Reading…

This is a step by step beginner’s guide shows how to encrypt your home directory in Ubuntu 24.04 LTS.

As you may know, the new installer in Ubuntu 24.04 only supports encrypting the entire disk. If you want to dual boot Ubuntu with another OS in single disk, there’s no option so far to encrypt only the Ubuntu file-system partition.

In the case, you may choose to encrypt your home folder to keep personal data and files safe.

There’s NO visible difference after encrypted your home directory. You can login just like before, read and write files, run apps and play games. Because, it’s automatically decrypted using your password.

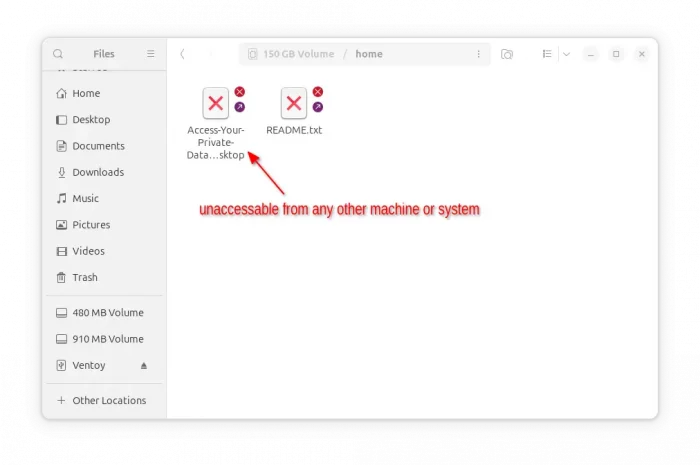
But, if you lost your computer/laptop, then no one can access your files in the home folder, without the login password or the encryption passphrase. Accessing from another operating system will show something like the screenshot below shows you:

Encrypted home is not accessible from other machine or OS

Continue Reading…

This tutorial shows how to disable USB, either the full sub-system or for certain USB ports, in Ubuntu 24.04 or Ubuntu 22.04.

For server or production machines, disable USB can be useful for data privacy, virus protection, and other security reasons. For Ubuntu and most other Linux, here I’m going to show you how to disable USB via 3 ways:

  • Disable whole USB sub-system
  • Disable USB storage only – Only disable access for USB flash drive and other storage devices.
  • Disable specific USB port

Continue Reading…

Ubuntu now provides expanded security maintenance (esm) updates for the packages in main/universe repositories through “Ubuntu Pro” service.

With it, you can get 5 years more (total of 10 years) security updates support for Ubuntu LTS. Meaning Ubuntu 22.04 support until 2032, Ubuntu 20.04 support until 2030, and Ubuntu 18.04 support until 2028.

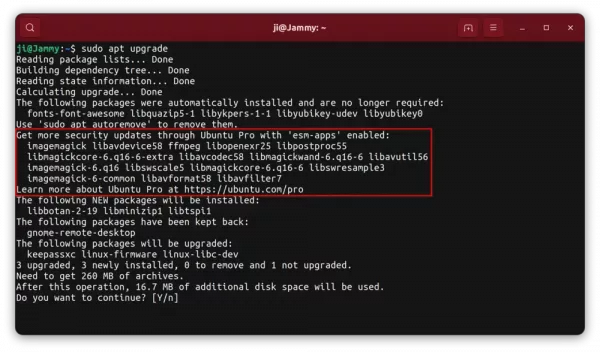
For Ubuntu Server or Desktop users that use apt upgrade to install updates, you’ll get following prompt in the output:

Get more security updates through Ubuntu Pro with ‘esm-apps’ enabled: …

In this tutorial, I’m going to show you how to get rid of this “esm-apps” prompt by:

  • either enable Ubuntu Pro security updates.
  • or skip the esm-apps updates and disable the command line prompt.

Option 1: Enable Ubuntu Pro Security Updates

For each user, Ubuntu Pro is free for up to 5 machines for personal use! Here’s how to enable it in both graphical and command line ways!

For Ubuntu Desktop

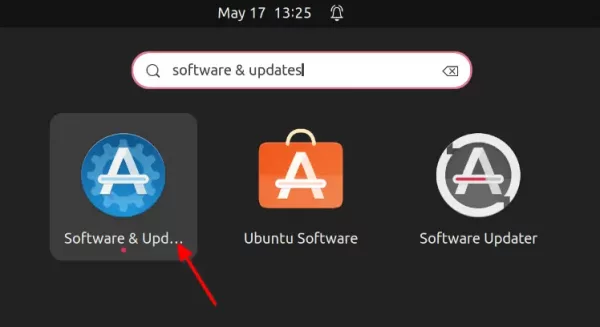
1. For Desktop users, first search for and launch “Software & Updates” tool from ‘Activities’ overview.
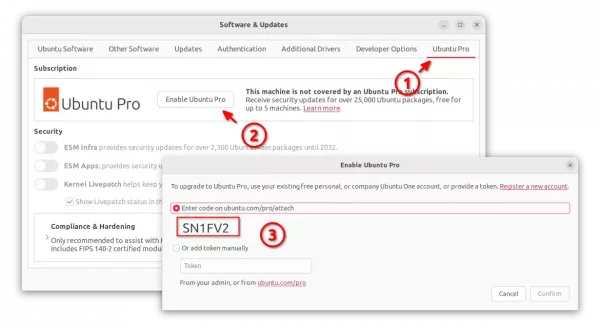
2. When it opens, navigate to “Ubuntu Pro” tab, and click on “Enable Ubuntu Pro” button. In the pop-up dialog will show you a short code.

For Ubuntu 18.04, run sudo apt update && sudo apt full-upgrade command first if you don’t see the ‘Ubuntu Pro’ tab.
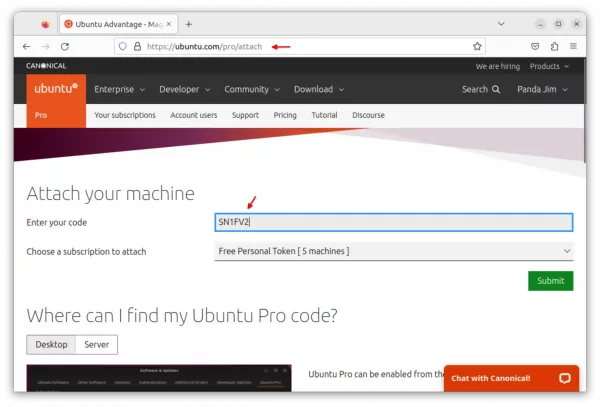
3. Next, in your web browser go to https://ubuntu.com/pro/attach. Login with your account (create for free if you don’t have one). Finally, enter the code you got in the last step, and then click “Submit”.
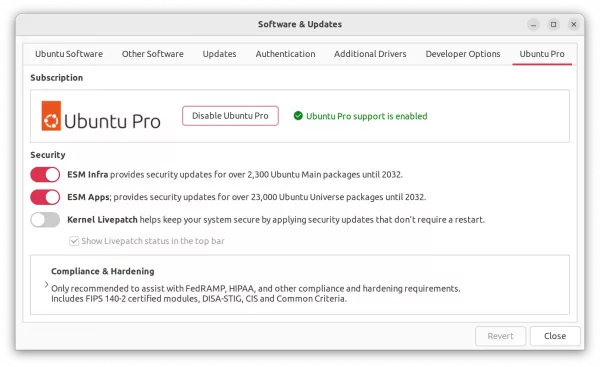
4. Finally, go back “Software & Updates” and click “Confirm” (see screenshot in step 2). When done, you’ll see the “Ubuntu Pro support is enabled” text in green. And, you can toggle the options to enable/disable ESM Infra, ESM apps, Kernel Livepatch as you want.
For Ubuntu Server (command line way)

For Server and those who prefer Linux command, this can be done by running a single command in console.

First, in web browser go to https://ubuntu.com/pro/dashboard. Log in with your account (create if you don’t have one), then copy or write down the key token.
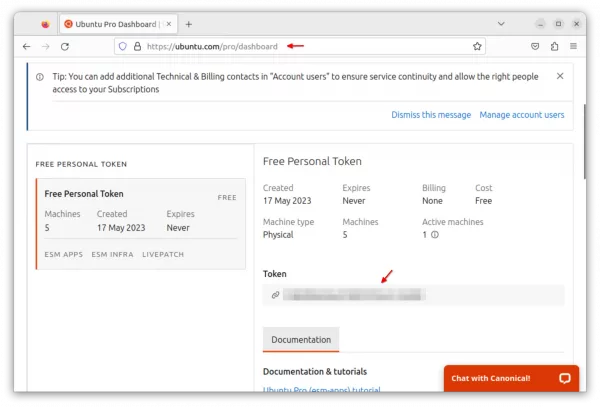
Then, in terminal or command console, run:

sudo pro attach KEY_TOKEN_HERE
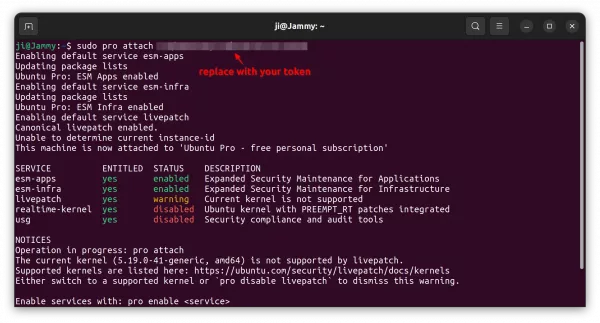
When done, it outputs the enabled and disabled services in terminal output. You can then run command to enable/disable your desired services:

  • Enable an Ubuntu Pro service.
    sudo pro enable SERVICE_NAME
  • Disable access an Ubuntu Pro service.
    sudo pro disable SERVICE_NAME

In the commands, replace SERVICE_NAME with one of esm-apps, esm-infra, livepatch, realtime-kernel.

To disable Ubuntu Pro, as well as all enabled services, run command:

sudo pro detach

Get Rid of “esm-apps” command line prompt without enabling Ubuntu Pro

UPDATE: if this step does NOT work, try to disable the Ubuntu Pro software sources instead!

If you don’t want to install the expanded security updates, you can also disable the command line prompt by removing the config file.

It’s handled by the “20apt-esm-hook.conf” config file under “/etc/apt/apt.conf.d/” directory.

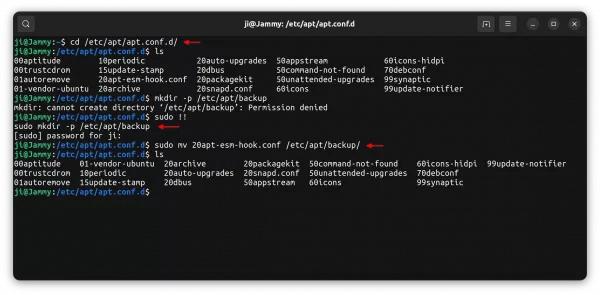
First, press Ctrl+Alt+T on keyboard to open terminal. When it opens, run command to navigate to that directory:

cd /etc/apt/apt.conf.d/

Then, create a backup folder to store the config file as backup. So, you can restore the change at any time by moving the file back.

sudo mkdir -p /etc/apt/backup

Finally, moving the config file to backup folder you just created:

sudo mv 20apt-esm-hook.conf /etc/apt/backup/

To apply change, also run sudo apt update.
To restore, run command to move the file back:

sudo mv /etc/apt/backup/20apt-esm-hook.conf /etc/apt/apt.conf.d/ && sudo apt update

That’s all. Enjoy!

Looking for a file shredder app for Linux? Raider is the one with a stupid simple user interface.

There are already a few good ways to securely delete files in Ubuntu Linux, such as BleachBit and Nautilus wipe extension. But for a large list of files or those do shred files frequently, this app could be more efficient.

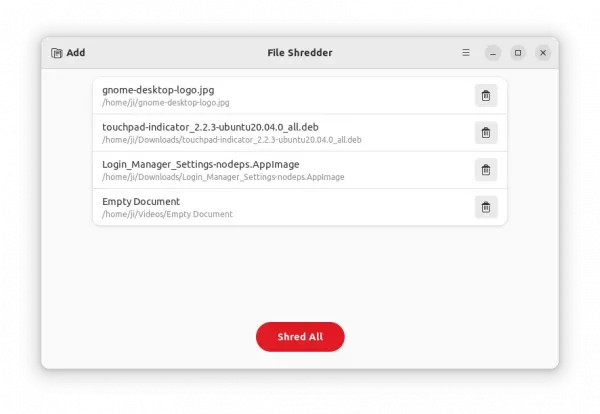
It’s Raider, also known as File Shredder, a free open-source GTK4 application. With it, you can just drag and drop files into app window, then shred as many files as you want via single mouse click.

File Shredder with Drag and Drop support

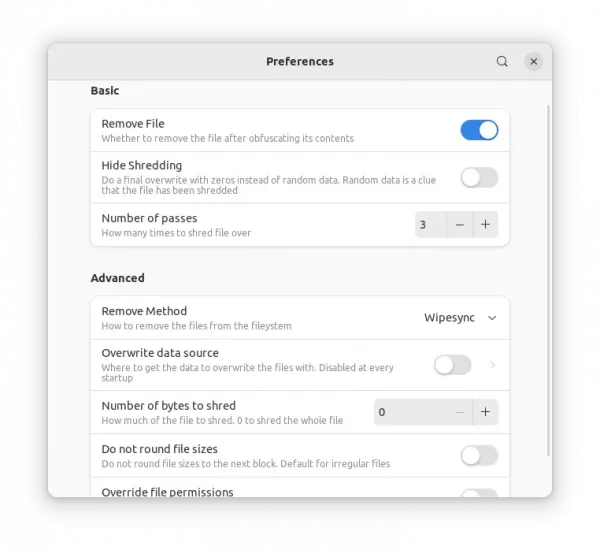
The default remove method is ‘wipesync‘ which also sync each obfuscated byte to disk. Though, you may set it to ‘wipe‘ that first obfuscate bytes in the name, or ‘unlink‘ to delete file name from the filesystem.

It by default overwrites file with random data, which however is a clue that the file has been shredded. User can choose to overwrite with zeros instead to hide shredding.

And there are options to specify how many times to shred file over, number of bytes to shred, and whether to override the file permissions.

How to Install File Shredder

The app is available to install via the universal Flatpak package, that works in most Linux.

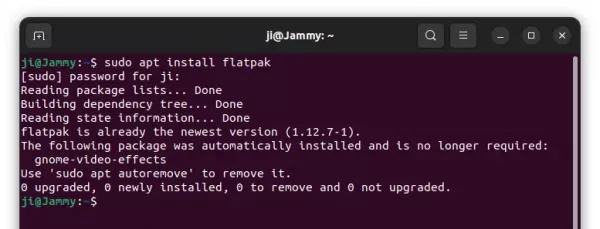
1. For Ubuntu users, first press “Ctrl+Alt+T” on keyboard to open terminal. Then, make sure the daemon package is installed by running command:

sudo apt install flatpak

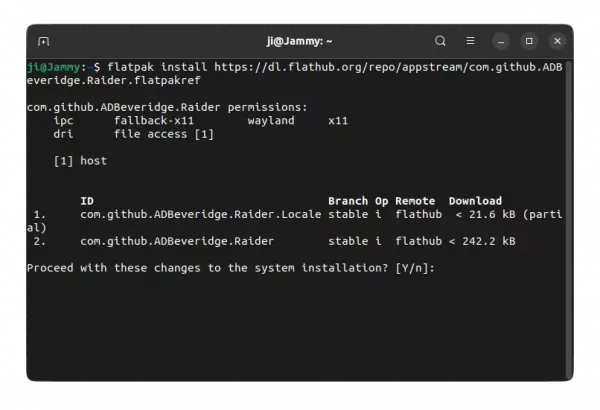
2. Next, install the tool via command:

flatpak install https://dl.flathub.org/repo/appstream/com.github.ADBeveridge.Raider.flatpakref

Once installed, launch it by either searching from ‘Activities’ overview, or using the command below:

flatpak run com.github.ADBeveridge.Raider

How to Remove File Shredder:

To remove the software, simply run command in a terminal window:

flatpak uninstall --delete-data com.github.ADBeveridge.Raider

And clear unused libraries via flatpak uninstall --unused.

This simple tutorial shows beginners how to easily wipe files, folder, and/or free disk space to protect your files from recovering in Ubuntu.

As you may know, any deleted files can be easily restored from the trash can. Even after you emptied the trash, files can still be recovered. So to prevent information leakage and protect privacy, you have to ‘wipe’ or ‘shred’ files.

1.) Firstly, open terminal either from system app launcher or by pressing Ctrl+Alt+T on keyboard.

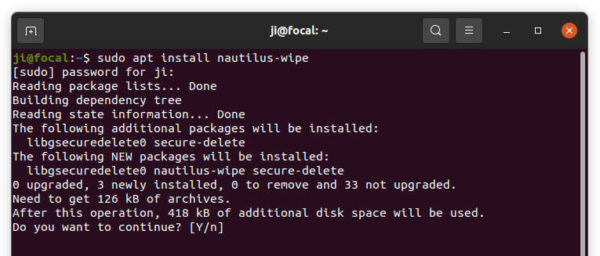
2.) When terminal opens, run command to install nautilus-wipe:

sudo apt install nautilus-wipe

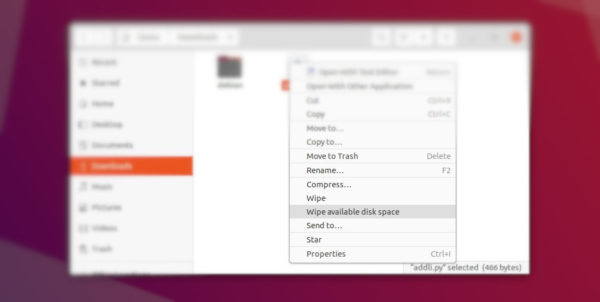
The package adds ability to wipe files, folders, and free disk space via context menu.

3.) Finally restart Nautilus file browser via command to apply change:

nautilus -q

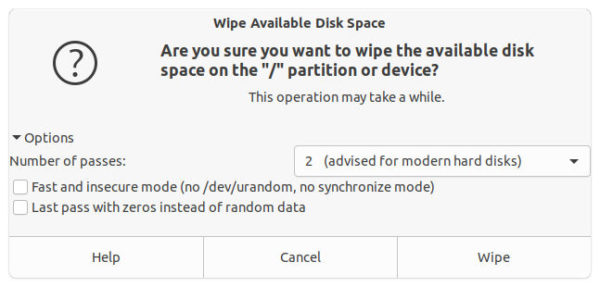
After that, you can right-click on any file or folder to ‘wipe’ or ‘wipe available disk space’.

NOTE ‘wipe available disk space’ will overwrite the free space in your system disk, so your data will not recoverable. And the process can take quite a few minutes slowing down your system.

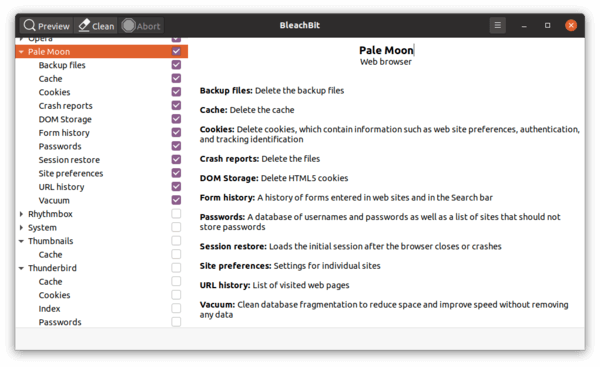
In addition to protect your privacy, you can use BleachBit to clear caches. As well, the tool offers options to shred files, folders, and wipe free space.