![]() LibreOffice, the popular free open-source office suite, rolls out the new 25.2.0 release! LibreOffice 25.2 is the third release series after switched to date-based version numbering system. The official Flatpak package has been updated for all Linux users,
LibreOffice, the popular free open-source office suite, rolls out the new 25.2.0 release! LibreOffice 25.2 is the third release series after switched to date-based version numbering system. The official Flatpak package has been updated for all Linux users, though the announcement is not ready yet at the moment. 
Archives For jimingkui

![]()
This is a step by step beginner’s guide shows how to configure Nginx to block certain IPs or IP range from accessing your website, and block all others while only you (and specified IPs) can access the wordpress login pages.
This site was under attack a few days ago. Someone made tens of thousands of constant requests that slowed down the server response. And, here’s what I did to manually block attacker’s IPs and restrict access to the login page.
Continue Reading…
![]()
Remember Plank, the simplest dock on the planet? There’s now a free open-source fork to make it fully functional in recent Linux Distributions.
Plank is a 14 years old application that provides an iOS bottom bar style dock app launcher, that’s great for lightweight Linux Desktops. The goal is to provide just what a dock needs and absolutely nothing more.
Plank seems not in active development, though it still works in recent Linux Distributions. However, it has compatibility issues and broken docklets/applets. For those who’re still using or prefer this dock, there’s now an open-source fork worth a try.
Plank in Linux Mint 22
It’s Plank-Reloaded, a fork of the original Plank project that focuses on Cinnamon desktop compatibility and modernized features.
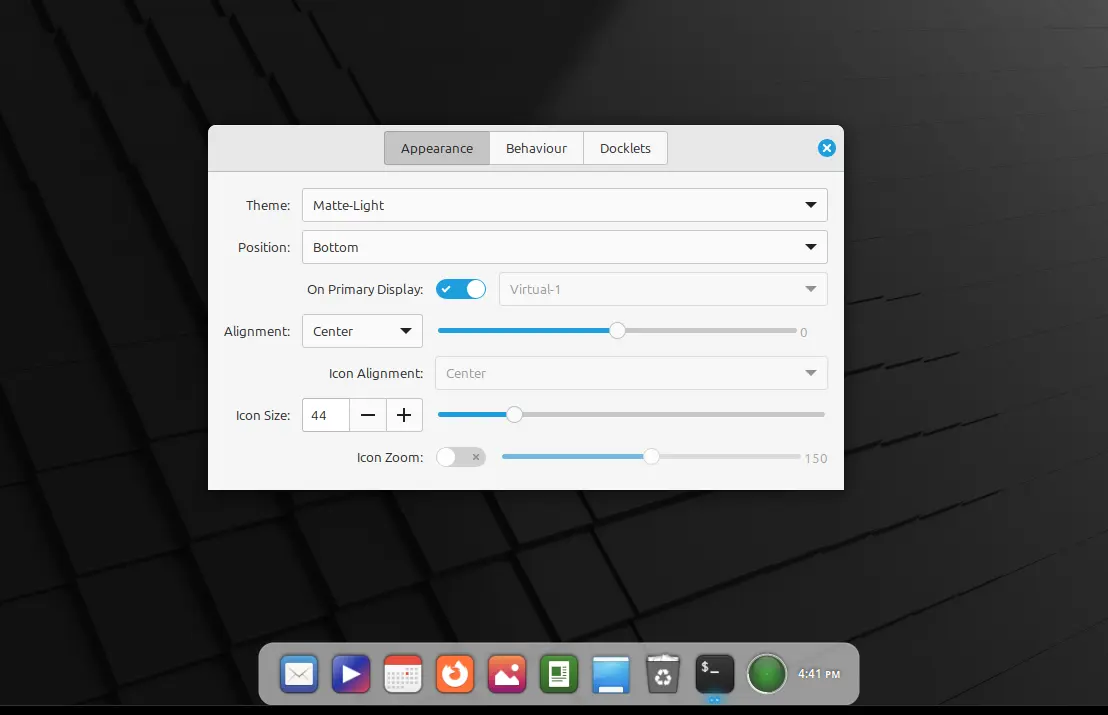
With the new dock, the Clock docklet will no longer crash. And, it features updated digital clock layout as well as a calendar when clicking on the icon.
The Battery docklet has been updated with modern UPower integration. And, the “Matte” theme has been updated to look better, along with a light variant that based on the Arian theme.
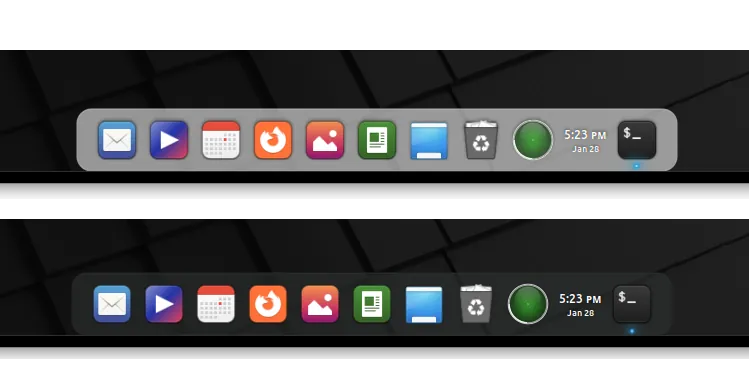
New Plank Matte and Matte-light Themes
Other changes include general code cleanup and bug fixes. If you like it, you may report issues and request features by visiting the project page.
How to Install Plank-Reloaded
NOTE: Plank so far does NOT work on Wayland.
According to this feature request, the software developer is going to add pre-built .deb packages for Debian/Ubuntu, and Flatpak package for all Linux users.
At the moment, Arch & its based systems can install from the AUR repository.
While Ubuntu & Linux Mint users (tested on Linux Mint 22.1 & Ubuntu 24.04) can run the commands below one by one in terminal (Ctrl+Alt+T) to build from the source (this is the official guide with minor modification).
- First, remove plank in case you installed the original plank package from system repository:
sudo apt remove plank libplank-common libplank1
- Then, install the dependency libraries for building/running the dock:
sudo apt install git autogen autoconf autopoint libtool make valac libgnome-menu-3-0 libgnome-menu-3-dev libxml2-utils libgee-0.8-dev libbamf3-dev libwnck-3-0 libwnck-3-dev bamfdaemon
- Next, clone the source:
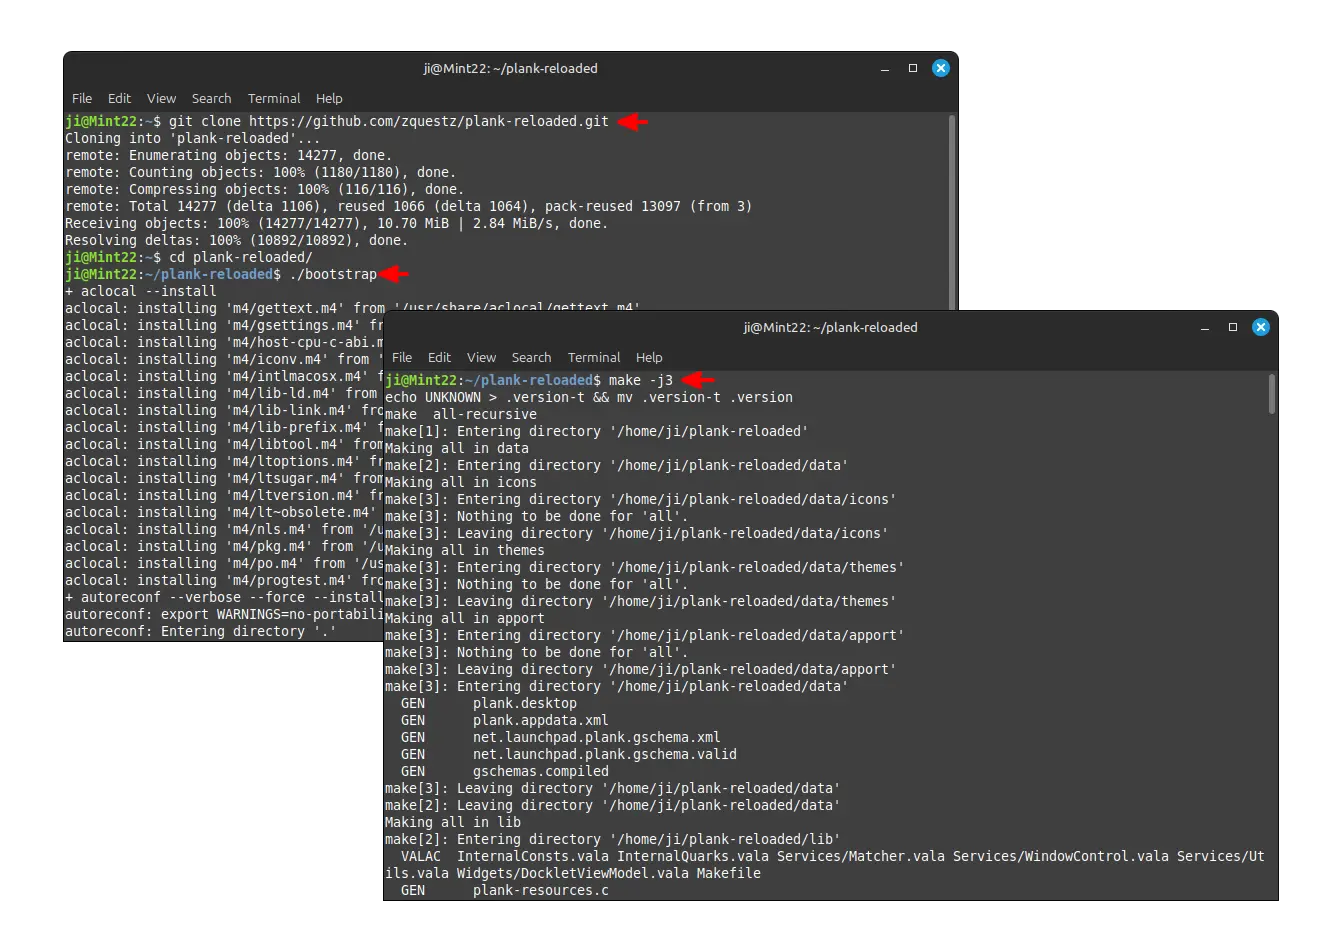
git clone https://github.com/zquestz/plank-reloaded.git
- Navigate into the source folder you just cloned:
cd plank-reloaded
- Finally, run command to configure, build, and install plank-reloaded:
./bootstrap
make -j2
sudo make install
Here,
-j2option in second make command means to start 2 thread in parallel. You may change the number according how many CPU cores you have.
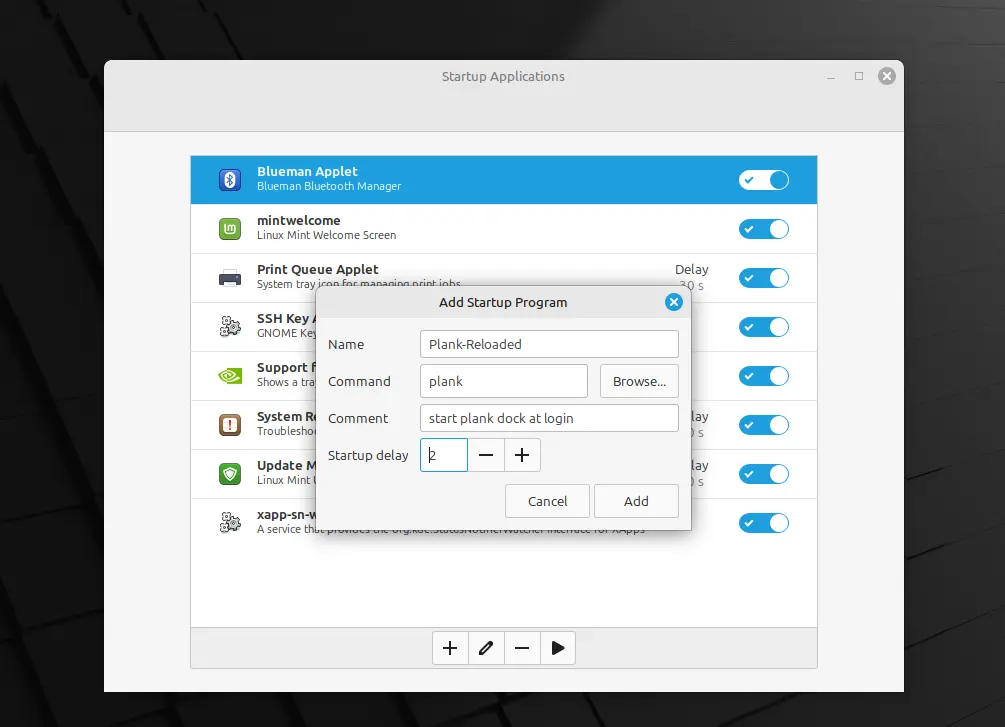
After successfully built the Plank-Reloaded, you may either run plank command in terminal to start the dock, or add it as startup program to auto-start at login.
Uninstall:
Until you removed the source folder, you may navigate into that folder in terminal and run command below to uninstall:
sudo make uninstall
![]()
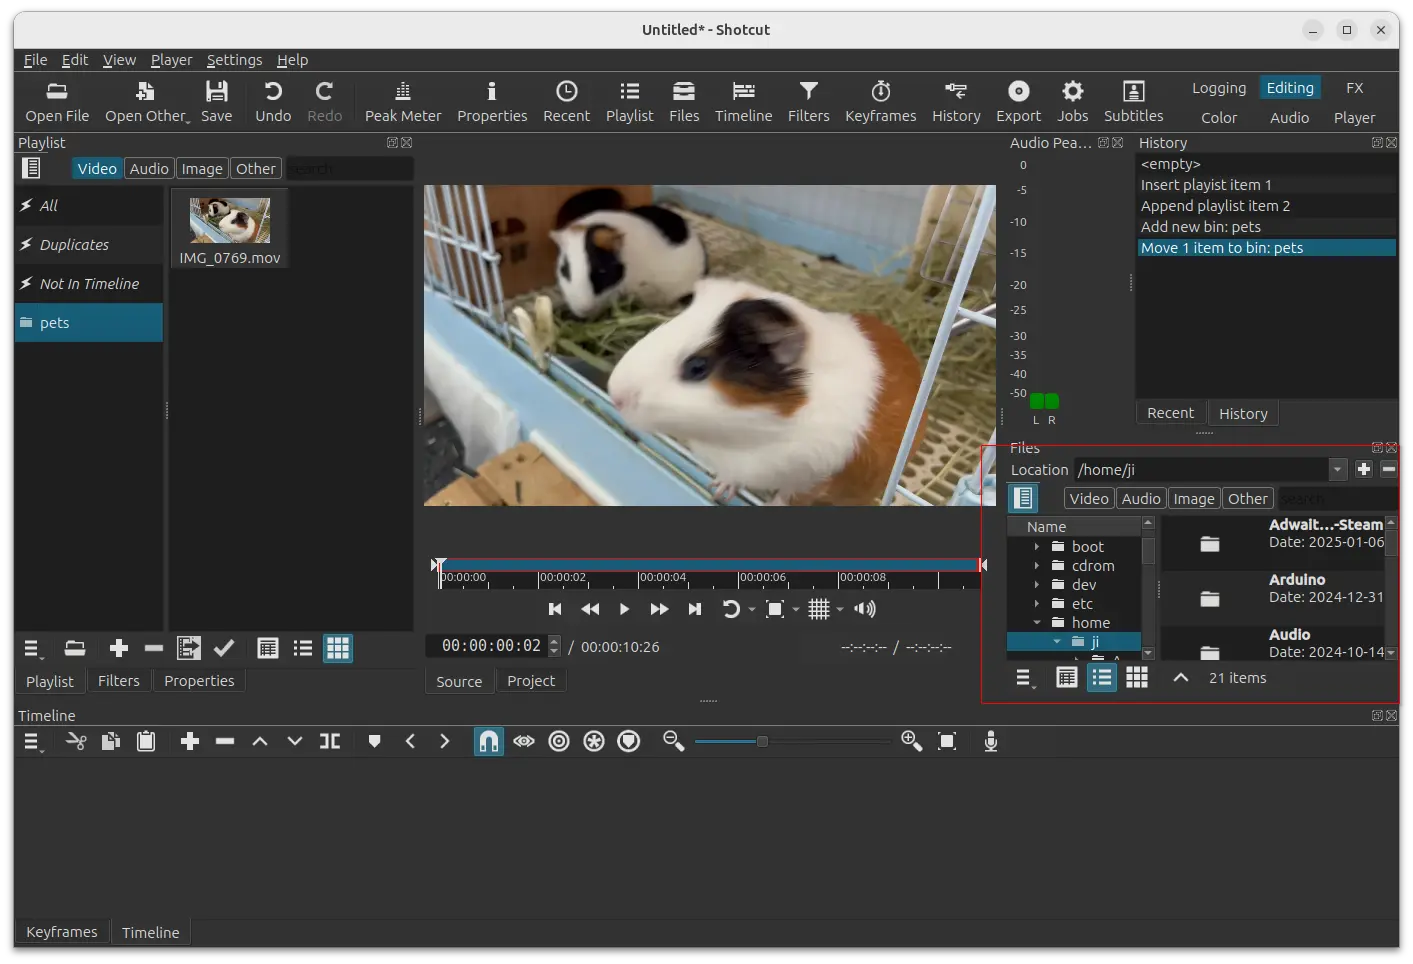
Shotcut video editor released new 25.01 version today. See what’s new in this monthly release and how to install guide for Ubuntu.
Shotcut 25.01 introduced built-in file browser that can be toggled on/off through either “View -> Files” menu or Ctrl+Shift+4 keyboard shortcut. In addition, there’s new “Show in Files” option in Properties and Jobs, to quickly locate the file in built-in file browser.
![]()
The first alpha release of GNOME 48 is out today! See what’s new in the desktop environment that will be default in next Ubuntu 25.04 and Fedora Workstation 42.
First, GNOME 48 introduced new core app called Decibels. It’s a simple audio player that features playback speed adjustment, easy seek controls, and shows the waveform of the track.
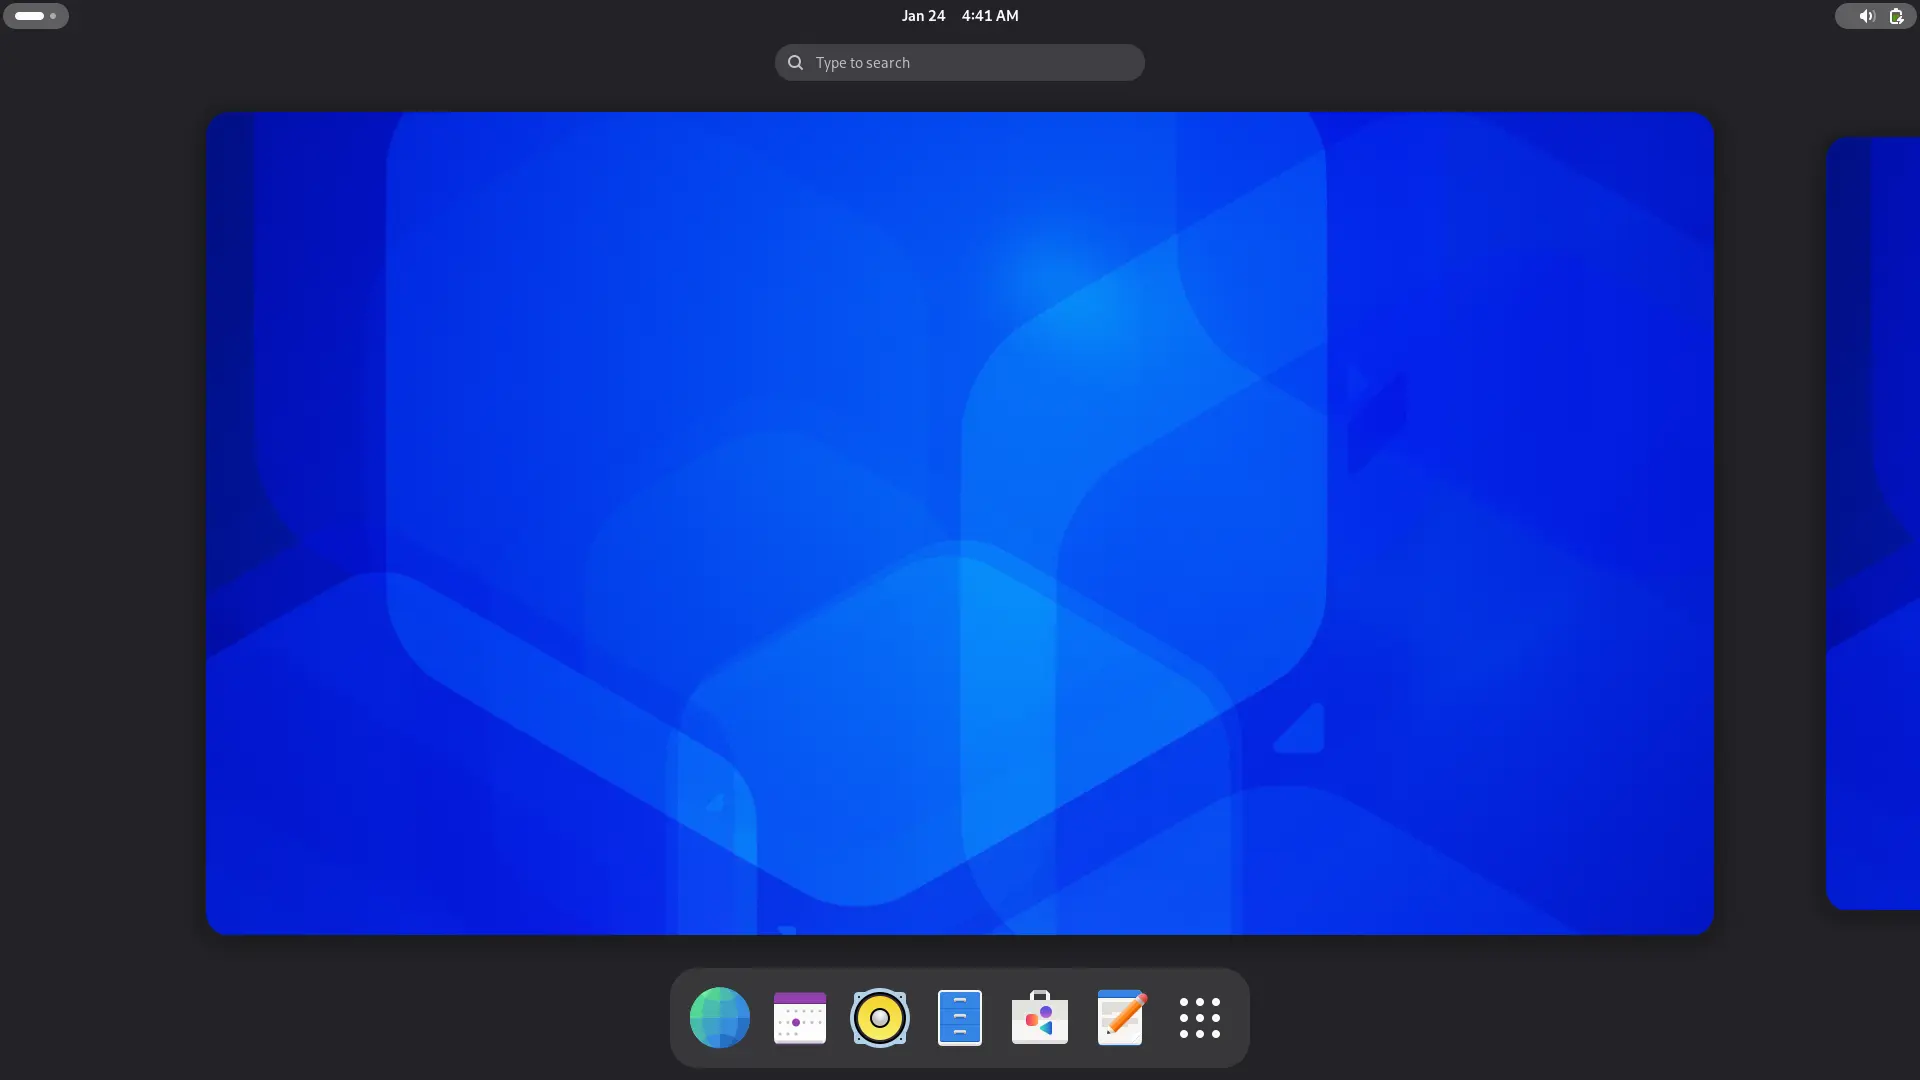
GNOME 48

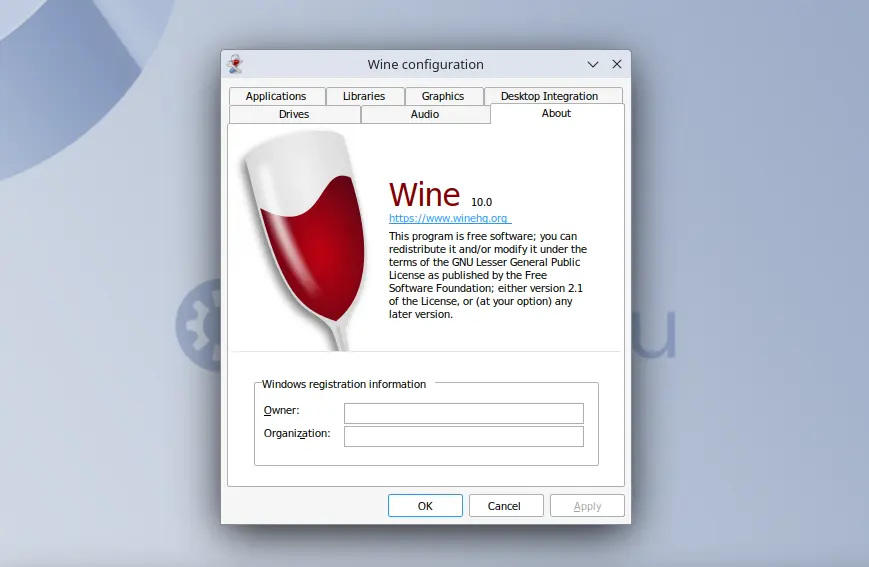
Wine, the popular free open-source compatibility layer for running Windows apps/games in Linux/Unix, announced new 10.0 major release on Tuesday!
The new release features Hi-DPI scaling support. Instead of exposing high-DPI sizes to applications that don’t expect it, it now automatically scale non-DPI aware windows.

Oracle announced new Virtualbox 7.1.6 release this Tuesday with various bug-fixes, performance improvements, and minor new features.
VirtualBox had heavy screen tearing and flickering issue in Linux VMs running with recent Kernel and Wayland for a period of time, that’s why I switched to QEMU/KVM.
Since the last 7.1.4, VirtualBox greatly improved the flickering, black screen and other screen update issues. In the new release, it also fixed issue with Linux guest screen flickering when guest was using VMSVGA graphics adapter.
Meaning now recent Ubuntu, Fedora Workstation and other Linux with Wayland work great again in VirtualBox virtual machines!
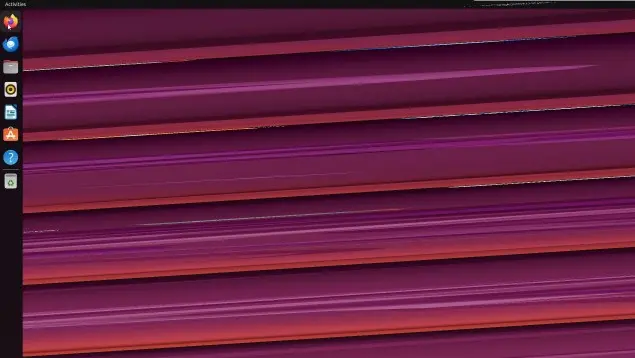
screen tearing and flickering issue finally fixed
![]()
Want to install Kodi home theater software v21.3 “Omega” via native .deb package? Here’s a PPA for Ubuntu 24.04 LTS, though unofficial.
Kodi has an official Ubuntu PPA, which has not been updated for long time. The official package for Linux now is Flatpak that runs in sandbox environment.
For those who don’t like Flatpak or have issue running the software in sandbox, here’s an unofficial PPA available for Ubuntu 24.04 and Linux Mint 22 users.
![]()
Linux Kernel 6.13 is released! Linus Torvalds announced it in lkml.org on Sunday:
So nothing horrible or unexpected happened last week, so I’ve tagged and pushed out the final 6.13 release.
It’s mostly some final driver fixes (gpu and networking dominating – normal), with some doc updates too. And various little stuff all over. The shortlog is appended for people who want to see the details (and, as always, it’s just the shortlog for the last week, the full 6.13 log is obviously much too big).
The new kernel introduced many new drivers, performance improvements, new & updated hardware support!
For AMD, it features new AMD 3D V-Cache Optimizer driver, for Ryzen X3D CPUs with larger 3D V-Cache to help optimize performance, supports PCIe TPH that is found with new AMD EPYC 9005 “Turin” servers, and uses AMD P-State driver as default in these CPUs.
![]()
Kodi, the popular free open-source home theater software, released new 21.2 version today with many improvements and tons of bug-fixes.
First, the new Kodi 21.2 features significant speed increase of library scans (back to v20 level) as well as faster artwork caching.