![]()
This simple tutorial is going to show you how to check MD5, SHA1, SHA256, SHA512 file hash in Ubuntu and most other Linux systems.
After downloading a file from the web, it’s important to verify the file integrity. This can be done by checking the hash code of the local file, then compare to the one from the download page. The hash code of local file and the one from download page should be same, before safe for use.
Method 1: Single command to check MD5 or SHA Hash
For most Linux, there’s built-in command line tool to check the file hash.
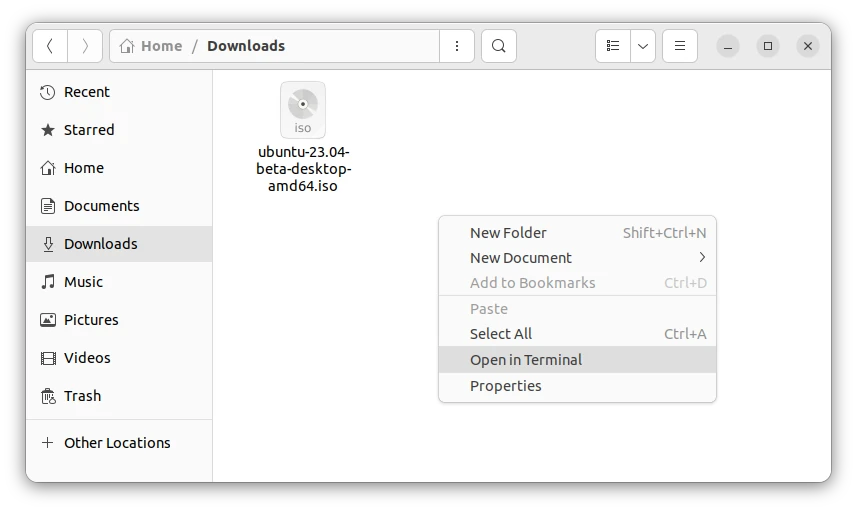
1. First, open file manager and navigate to the folder that contains the file you want to check. Then, right-click on blank area and select ‘Open in Terminal‘ (or ‘Open Terminal Here’)
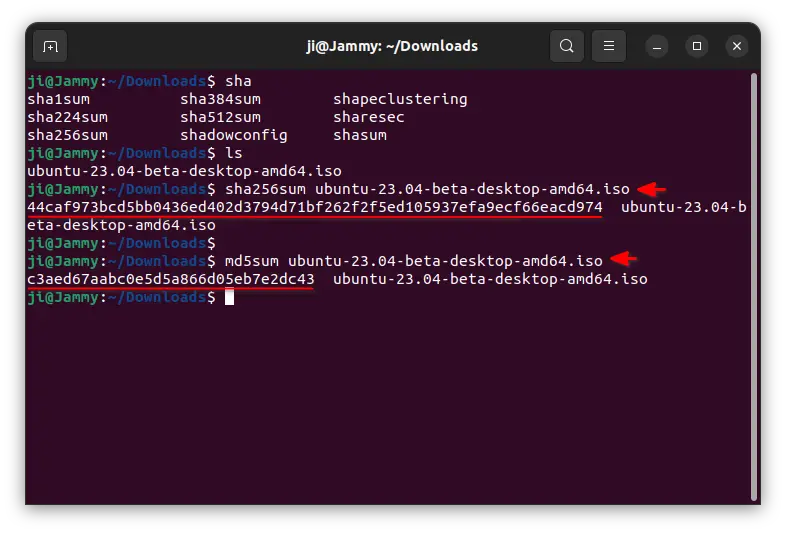
2. When terminal opens, type sha and hit Tab key will show you available commands to do the job.
For example, to check sha256 checksum, use command:
sha256sum file_name_here
To check sha1 checksum, use command:
sha1sum file_name_here
Or use command below instead by replacing number 256 with 1, 224, 384, 512, 512224, 512256 accordingly:
shasum -a 256 file_name_here
To check MD5, use command:
md5sum file_name_here
Depends on your machine, the command will take a few seconds to output the hash code. Then, you can compare it with the one from the file download page.
Method 2: Check File Hash in File Manager
Without running a Linux command every time, user can choose to install a file browser extension. So, it’s possible to right-click on the file, and go to its “Properties” dialog to check the file hash.
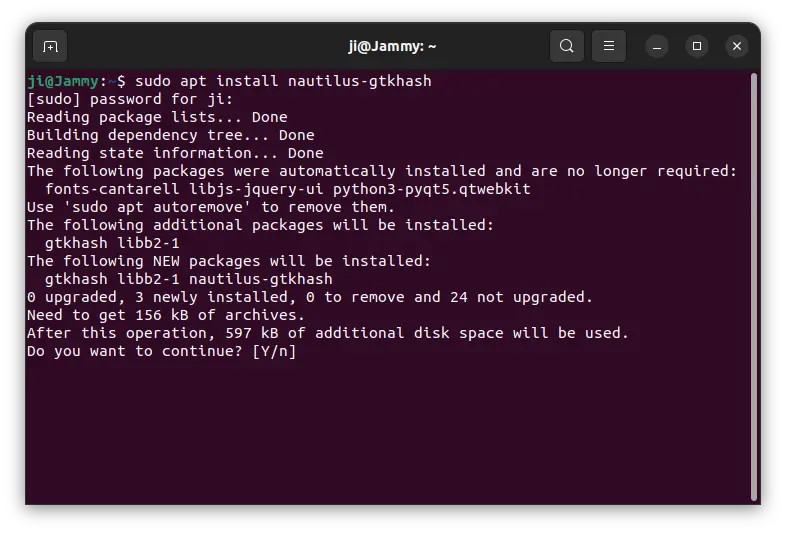
1. First, press Ctrl+Alt+T on keyboard to open terminal. When it opens, run command to to install the file manager extension:
sudo apt install nautilus-gtkhash
Depends on your Desktop Environment, replace nautilus-gtkhash with:
- thunar-gtkhash for XFCE desktop’s file manager.
- nemo-gtkhash for Cinnamon desktop’s nemo file manager.
- caja-gtkhash for MATE desktop.
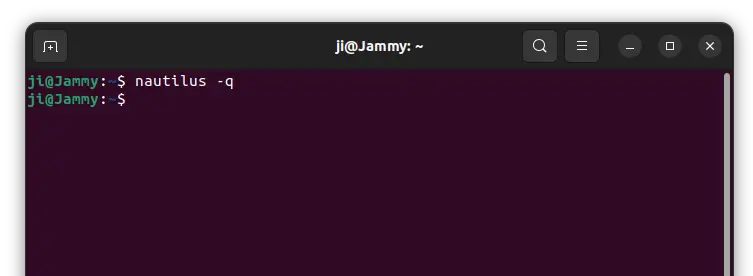
2. Once installed, run command to quit file manager:
nautilus -q
Also, replace nautilus depends on which file manager you’re using.
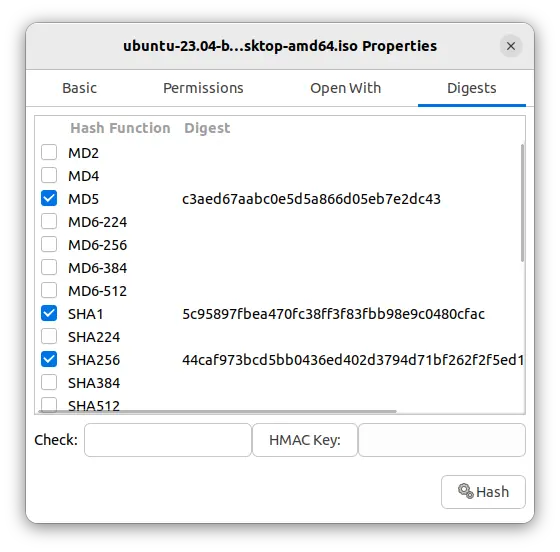
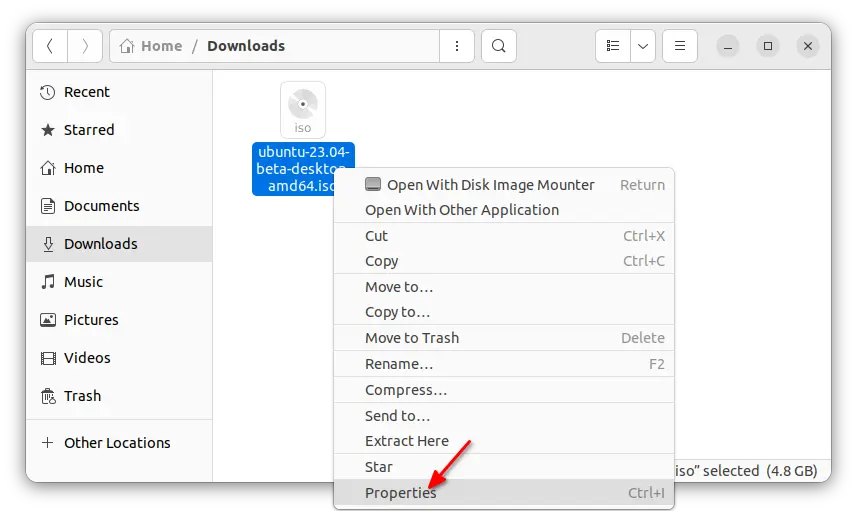
3. Finally, open the folder that contains the file to check the hash. Right-click on it and click on “Properties“.
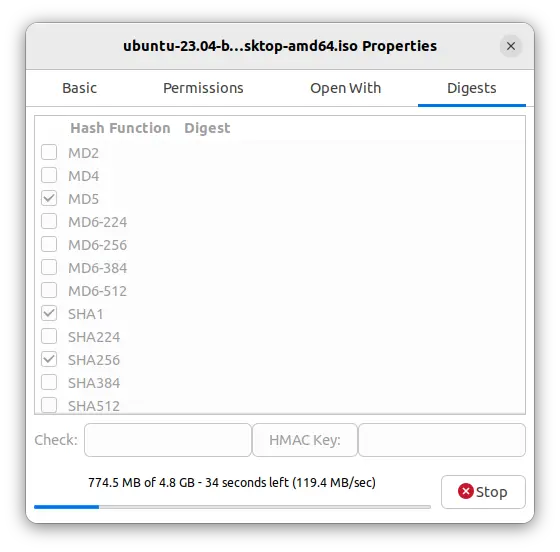
4. In pop-up dialog, navigate to the last “Digests” tab. Tick the desired hash function, and click on the bottom right “Hash” button to start checking.
When done, compare the hash code with the one from the download page and done!