Archives For App Review

Mechvibes is a desktop application that plays mechanical keyboard key-press sound when your type on your keyboard.

It’s a side project that I made for myself since when I use my own mechanical keyboard at late night or in the office and my parents and my coworkers hate that a lot because the sound of the keyboard is very loud (especially in quiet places). So if you are facing this issue just like me then this product is for you!

With Mechvibes, you can:

  • Set custom keyboard sound set by recording any sound you like
  • Use your laptop keyboard or non-mechanical keyboard at work and still hear your loved sound.
  • Use this app as any purpose as you want

How to Install Mechvibes in Ubuntu:

The software can be easily installed in Ubuntu 18.04 and higher via Snap package in Ubuntu Software utility.

Once installed, launch the software from system application menu. And you may read the official document about Mechvibes Editor.

There are quite a few color picker applications for Ubuntu Linux. Colorpicker is another one written with Electron, and works in Linux, Windows, and Mac OS.

The colorpicker tool features:

  • pin app window to the foreground.
  • A picker opens an eyedropper to pick a color from your desktop
  • Colorsbook, a color manager
  • show three bar of shading — hue bar, natural bar and lightness bar
  • Toggle Opacity range
  • Show colors from the clipboard

How to Install ColorPicker in Ubuntu:

The software is available in Ubuntu Software as Snap package (runs in sandbox). Simply search for and install colorpicker app and enjoy!

If you prefer .deb or .appimage, go to the Github releases page:

Colorpick Github

Delta Chat is a free open-source Telegram or Whatsapp like messenger that works on Linux, Mac, Windows, iOS, and Android.

Delta Chat doesn’t have its own servers but uses the most massive and diverse open messaging system ever: the existing e-mail server network.

Chat with anyone if you know their e-mail address, no need for them to install the software! All you need is a standard e-mail account.

Download Delta Chat:

The software offers deb, appimage, and flatpak packages for downloading on its website:

Delta Chat Download

Install the messenger, login via your Email address and enjoy!

For Gmail, you’ll need to turn on “Less secure app access” in account settings > security web page.

Notable is an open-source Markdown-based note-taking application that works in Linux, Mac OS, and Windows.

Notes are written and rendered in GitHub Flavored Markdown, no WYSIWYG, no account required, no proprietary formats, and the app isn’t bloated.

Notable has a pretty user interface and it features:

  • Markdown editor, the same one VS Code uses.
  • Notes and attachments stored locally on your disk
  • Dark theme support.
  • Zen mode that provides a minimalistic editing and reading experience
  • Import Evernote and Boostnote notes
  • Export notes to Markdown, HTML or PDF.
  • Fuzzy search, attachments, synchronization with Dropbox, and more.

How to Install Notable in Ubuntu:

Although Notable Snap package is available in Ubuntu Software, it’s recommended to download the .deb from the link below:

Notable Releases (.deb)

Scroll down a little, click download the ‘notable_x.x.x_amd64.deb‘ packages, then install it either via Gdebi package installer or simply double click on the deb.

Finally open the software from your system application menu and enjoy!

Remote Touchpad is an open-source utility allows to remote control the mouse and keyboard connected to your computer from the web browser of a smartphone or any other device with a touchscreen.

Remote Touchpad supports Flatpak’s RemoteDesktop portal (experimental), Windows and X11.

Simply run the utility on your machine. It outputs an URL along with QR code in a terminal window. To take control open the displayed URL or scan the QR code in your phone.

The utility is available as Snap package. You can simply search for and install remote touchpad in Ubuntu Software:

It also available to install via Flatpak package, see the Flathub repository.

Once installed, launch the utility from your system application menu.

Then go to the displayer URL or scan the QR code in your phone and enjoy!

UPDATE: Ephemeral DISCONTINUED since 2022. And, it’s no longer available in Ubuntu Software as Snap package.

Ephemeral, a private-by-default, always-incognito browser for elementary OS, now can be easily installed in Ubuntu 18.04 and higher via Snap package.

Ephemeral is a stripped down private browser that’s perfect for avoiding persistent cookies or web trackers. Close the window and all traces of your browsing are removed from your device.

Ephemeral is developed by Cassidy James Blaede, co-founder & CXO at elementary, Inc. It is designed and developed on and for elementary OS. And the community build Snap package made it available to install in Ubuntu.

To install Ephemeral web browser in Ubuntu 18.04, Ubuntu 19.04, Ubuntu 20.04, open terminal (Ctrl+Alt+T) and run command:

snap install ephemeral

The software package should also be available in Ubuntu Software, though I don’t see it in my case.

Once you installed the web browser, launch it from system application menu and enjoy!

To remove Ephemeral web browser, run command:

snap remove ephemeral

Want to install Ubuntu on your computer but don’t have an USB drive on your hand? An open-source tool Tunic may help.

Tunic is a tool that can install Ubuntu or Linux Mint over or alongside an existing Windows install, straight from Windows, without requiring to boot from external media like a flash drive or making BIOS configuration changes.

The software asks all questions at beginning, so you don’t have to babysit the install. It supports Linux Mint, Ubuntu, and most official Ubuntu flavors. And all the process is automated, it downloads the iso image, installs Grub with Secure Boot support, alculates Linux equivalent values for your Windows locale and user account, and finally reboots and runs the installer.

Features of Tunic include:

  • Shrink C: volume to make space for Linux, so you can dual boot them.
  • Disables Windows fast start.
  • Provide tools to assist with freeing up space for Linux.

And, requirements include:

  • 64-bit Windows 10
  • Single drive hosting the C: volume
  • 4 GB RAM or higher.
  • At least 15 GB of free disk space
  • UEFI
  • Administrator user permissions
  • Internet access for downloading iso image.

As a new project, it may have bugs! BACKUP your data before getting started! For more about Tunic, as well as the download link, go to its project page in Github.

Gotify Indicator is a simple tool in the system tray area to send and receive messages via your own Gotify server.

Gotify is a server that can send and receive messages. It works as a push notifications server. It’s a free open-source tool written in Go language, and features a web UI, allowing to sending messages via a REST-API, subscribing/receiving messages via a web socket connection, and managing users, clients and applications.

Gotify also features iOS and Android app, a command line tool for pushing messages. While, Gotify-Indicator is a third-party indicator for Gotify in the Linux Desktop. With it you can send and receive messages directly from your computer. So you can send messages to other devices that are connected to the same server.

How to Install Gotify indicator in Ubuntu:

NOTE: The PPA package support until Ubuntu 22.04, check the PPA link below.

The developer maintains the software packages in the PPA repository for Ubuntu 16.04, Ubuntu 18.04, Ubuntu 20.04, and Ubuntu 22.04.

1.) Open terminal either by pressing Ctrl+Alt+T on keyboard or by searching for ‘terminal’ from application menu. When it opens, run command to add the PPA:

sudo add-apt-repository ppa:atareao/atareao

Type user password when it prompts and hit Enter to continue.

2.) Then install the tool via command:

sudo apt update

sudo apt install gotify-indicator

Once installed, open it from your system application launcher and you’ll see the indicator in system tray area. Setup the notification sending and receiving service (see top picture) and enjoy!

Uninstall:

To remove the PPA as well as the software package, run commands in terminal one by one:

sudo add-apt-repository --remove ppa:atareao/atareao

sudo apt remove gotify-indicator

Urban Terror, free multiplayer first person shooter, now can be installed easily via Snap package in Ubuntu 18.04 and higher.

Urban Terror is a freeware multiplayer first-person shooter video game developed by FrozenSand. It can be described as a Hollywood tactical shooter; somewhat realism based, but the motto is “fun over realism”. This results in a very unique, enjoyable and addictive game. It is available for Windows, Linux and Macs.

To install Urban Terror Snap in Ubuntu:

The game now can be easily installed as Snap (runs in sanbox) in Ubuntu 18.04 and higher. Simply search for and install Urban Terror from Ubuntu Software (or App Center in 24.04).

or run single command to install the game in Ubuntu:

snap install urban-terror

Once installed, launch the game from system application menu and enjoy!

To uninstall it, use command:

snap remove --purge urban-terror

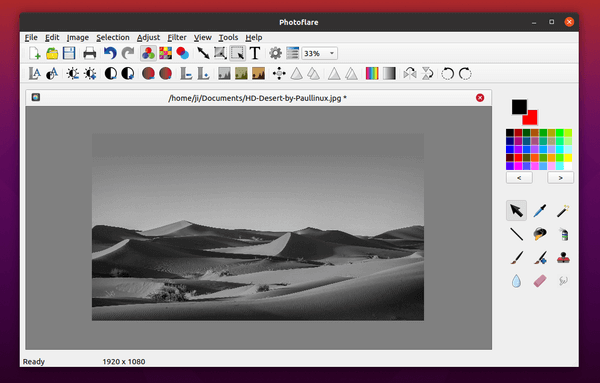
This simple tutorial shows how to install the latest Photoflare, simple but powerful image editor inspired by PhotoFiltre, in Ubuntu 18.04, Ubuntu 19.04, and Ubuntu 19.10.

Photoflare is an open-source, cross-platform image editor written in C++ with Qt5 framework. It features:

  • Simple but powerful, and very fast to do everything.
  • Works on Linux, Windows, and Mac OS.
  • Basic image editing capabilities
  • Paint brushes
  • Image filters
  • Color adjustments
  • And more advanced features such as Batch image processing.

How to Install PhotoFlare in Ubuntu:

The image editing software is available in Ubuntu universe repositories since Ubuntu 19.04, though it may be old as Ubuntu does not offer the software updates.

To install the latest version, and receive future updates via Software Updater utility, the official Photoflare stable PPA maintains the packages with support for Ubuntu 18.04, Ubuntu 19.04, and Ubuntu 19.10 so far.

1.) Open terminal by either pressing Ctrl+Alt+T on keyboard, or searching for ‘terminal’ from application menu. When it opens, run command to add the PPA:

sudo add-apt-repository ppa:photoflare/photoflare-stable

Type user password (no asterisk feedback) when it prompts and hit Enter to continue.

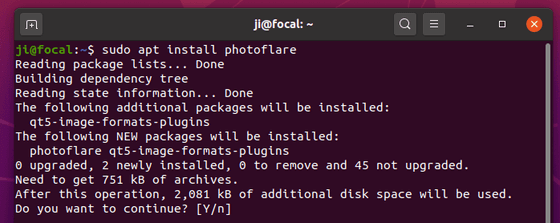
2.) After adding the PPA, install the image editor via command:

sudo apt install photoflare

Some Ubuntu derivatives may need to run sudo apt update first.

If an old version was installed, you can upgrade the software simply via Software Updater (Update Manager) utility.

Uninstall:

To remove the image editor, simply run command in terminal:

sudo apt remove photoflare

To remove the PPA repository, go to Software & Udpates -> Other Software tab and remove the repository line.