Most Linux remembers the commands that you ran in terminal or command console. It’s useful for finding out what you’ve done to the system, especially for server.
For frequently used command with a long code, you don’t need to type all the code again and again. You can re-run then using history commands option, by just a few key presses.
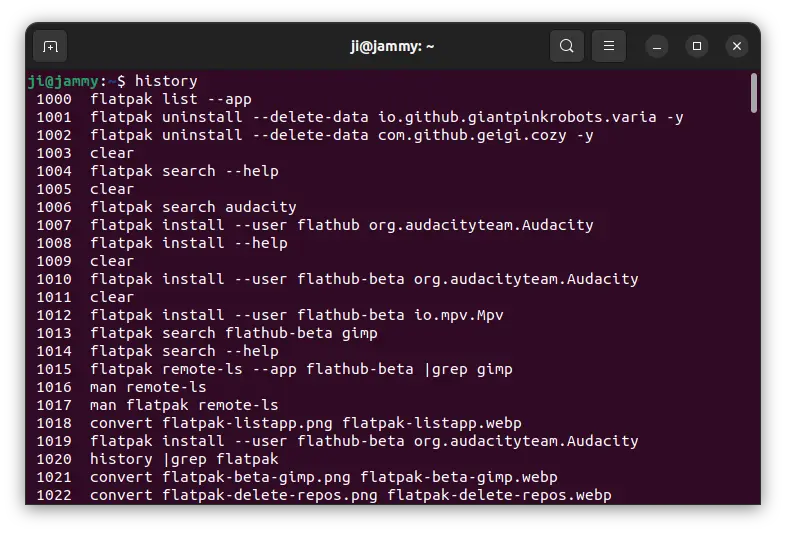
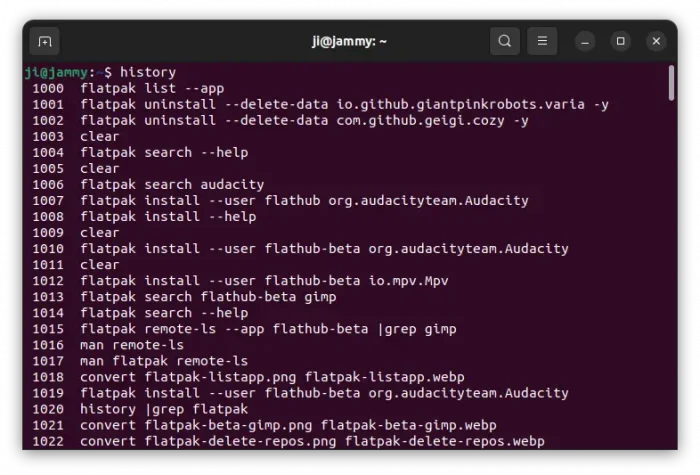
List history commands
To find out what commands you’ve run in your Linux, simply run command:
history
In the output, you’ll see a large list of commands that you ran before. And, each command has number at its beginning.
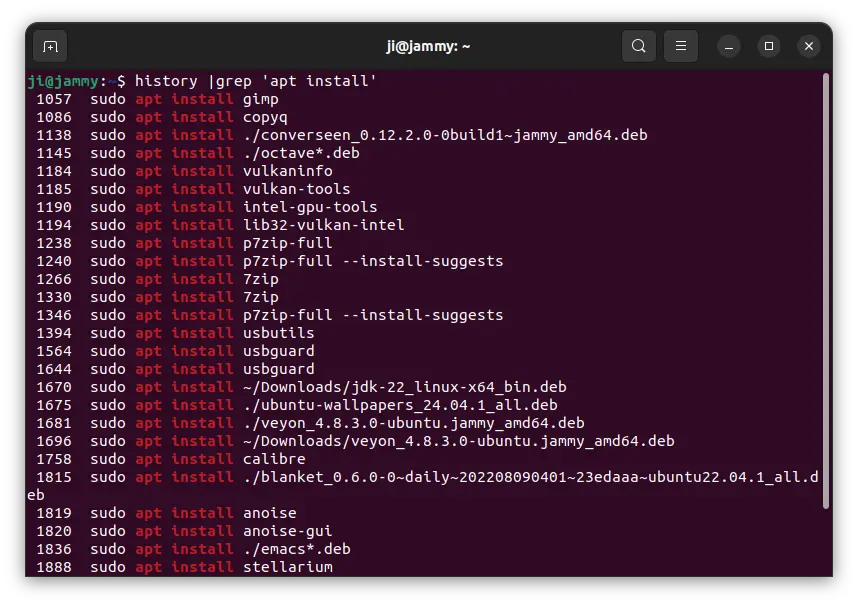
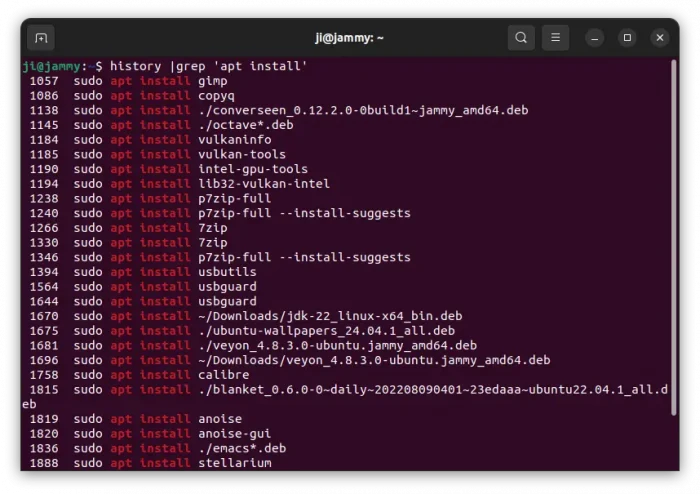
If you have too much history commands, it may be hard to browse and find out a certain command. In the case, add grep option to filter. For example, run command below to find out history commands that include apt install.
history | grep "apt install"
For choice, you may also add -E option after grep to filter with regular expressions.
Re-Run a History Command
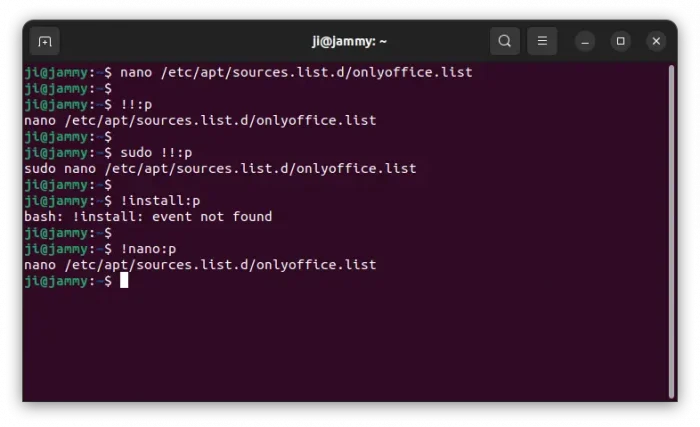
Once you got the history command, that’s too long or you don’t remember, you can simply re-run it by typing !number, where number is the number in front of that command in history output.
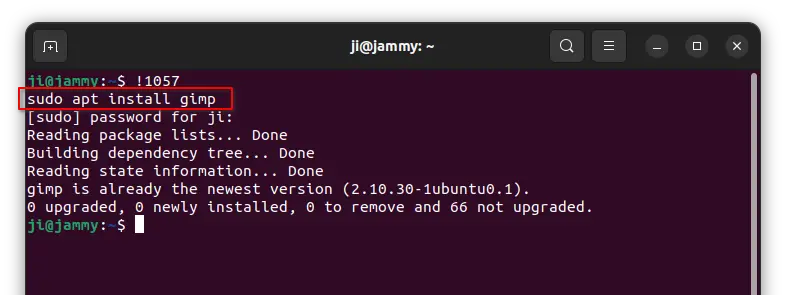
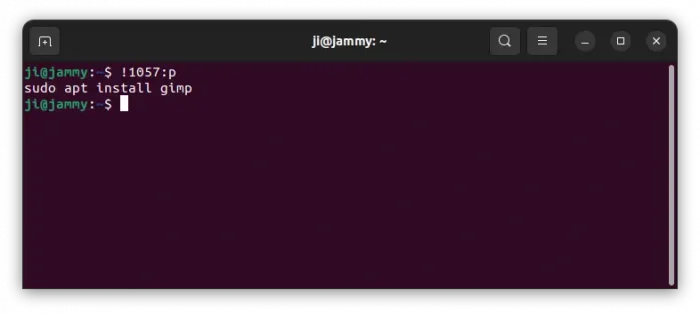
For example, run command below will re-run sudo apt install gimp, according to last screenshot. And, in terminal window it outputs what’s going to run immediately after you hitting Enter. If it’s a sudo command, it will also ask for password authentication.
!1057

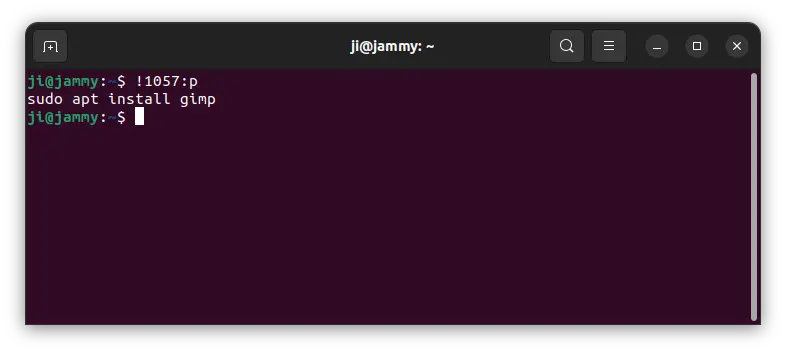
To avoid careless mistakes, you may use the command below instead by adding :p in end to first preview that history command:
!1057:p
Then re-run !1057 if you confirm it is indeed the command you want.
For the last command, without finding out the history number, just use command below will re-run it:
!!
And, you can use it along with other commands. For example, re-run last command with sudo permission:
sudo !!
Or re-run last command, then poweroff:
!! && poweroff
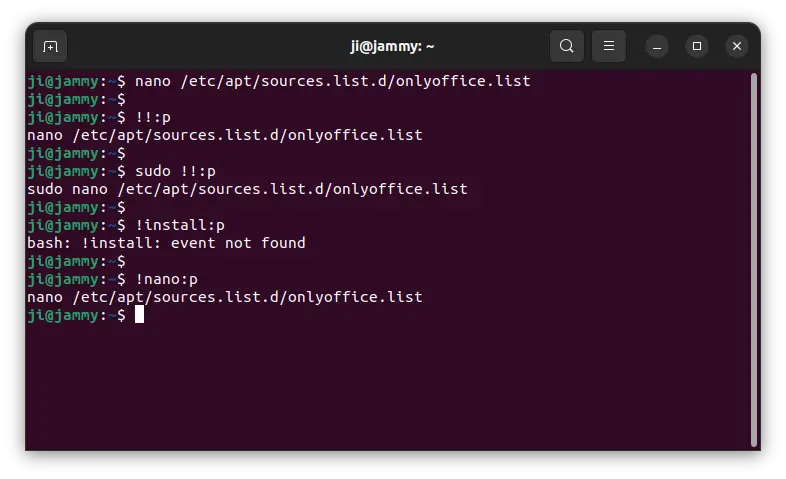
There are also more choices, for example, re-run the last command start with given string:
!sudo
The command will re-run the last command start with sudo.
And, all the commands above can follow with :p to preview command before running.