Archives For command skills

This simple tutorial shows how to search for, install, remove, and list installed Snap applications in Ubuntu from command line.

Snap is an universal Linux package format developed by Canonical, the company behind Ubuntu. Though many users hate the Snap apps, it’s hard to keep away from it since many popular applications (e.g., VLC, Spotify, VS Code, Android Studio) offer official Ubuntu binaries through Snap rather than classic deb package.

As Ubuntu Software still sucks and does not load application pages quite often, you can run followings command instead to search for & install snap applications.

1. Searching for Snap Apps in Terminal:

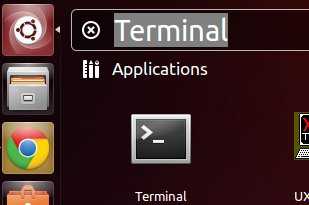
Simply open terminal from system application launcher. You can then either run snap find or snap search command follow with app name to query the store for available packages.

Both commands below do the same searching for GIMP packages:

snap find gimp

snap search gimp

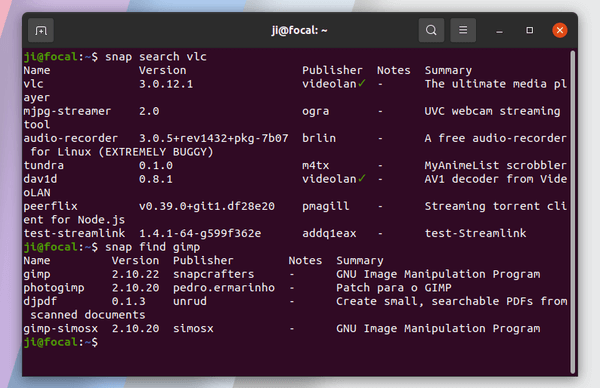
For the verified publisher, you’ll see a green check mark after the publisher name.

2. Command to Install a Snap App:

To install a Snap application package, simply run snap install command follow with the package name.

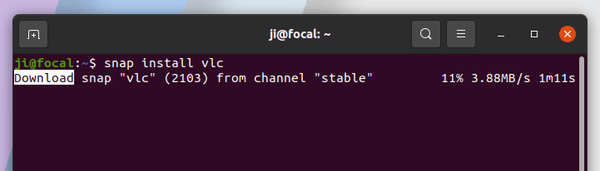
After searching for an app, you can then select install one from available packages by running command (VLC for instance):

snap install vlc

Some applications support for installing with --classic flag to access files outside user’s home directory. So, the command could be:

snap install vlc --classic

Usually, we install Snap applications from the stable channel. There are also beta, edge, candidate channels include packages for testing purpose. For example, install VLC from its Beta channel, use command:

snap install vlc --channel beta

3. How to List installed Snap applications:

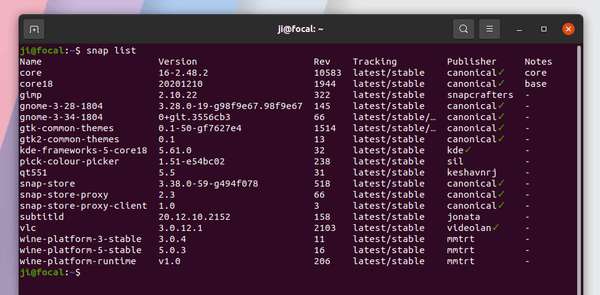
To list all installed snap applications, simply run snap list in terminal.

snap list

While “core” and “core18” are snap core packages, “snap-store”, “snap-store-proxy”, and “snap-store-proxy-client” relates to the Ubuntu Software.
All others are user installed packages, though “gnome-3-xxx” packages were installed automatically as dependency platform.

Snap apps update automatically when new release packages published. So, there may be old packages present in your system after using them for a period of time. To list all of them, use command:

snap list --all

Old packages should be marked as ‘disabled’.

4. How to Remove Snap Apps via command:

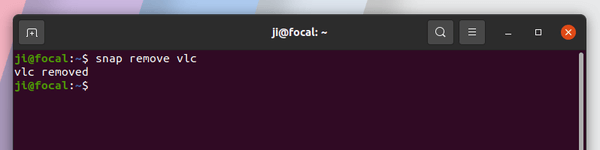
To remove a snap package, simply run snap remove command follow with package name.

In the case, I’m going to remove VLC snap package via command:

snap remove vlc

NOTE that the dependency platform (e.g., gnome and wine) won’t to be removed while removing the snap that requires it.

The previous remove command will leave a snapshot of app data on your system. Use --purge flag will clear all the app data:

snap remove --purge vlc

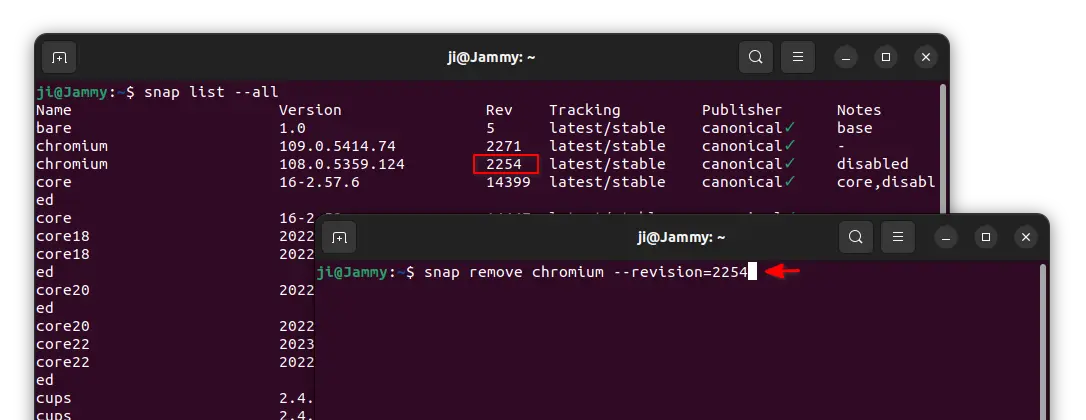
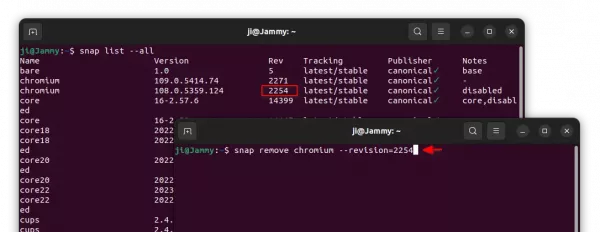
By running snap list --all command in terminal, you may see some old versions of app packages left in system marked as “disabled”. To remove one of the disabled package, there’s a ‘revision‘ flag can do the job. For example, remove chromium marked as rev 2254:

snap remove chromium --revision=2254

Thanks to @Fernando, the command below will free up disk space by removing all the old disabled snap packages:

snap list --all | awk '/disabled/{system("sudo snap remove " $1 " --revision=" $3)}'

Summary:

In brief you can run snap find APP_NAME or snap search APP_NAME to search for available packages. Use snap install PACKAGE_NAME or snap remove PACKAGE_NAME to install or remove an application. And run snap list to list all installed snap applications.

Familiar with Linux commands? You may already know many tips and tricks that will save you a lot of time.

Here are some that I have been using for a long period of time, including Tab auto-completion, when you type something in Linux terminal and hit Tab, it auto-completes the command or file path, or outputs all possible options.

And Ctrl+Shift+V will do paste text to terminal instead of Ctrl+V. Without copying to the clipboard, you can simply select / highlight the text and use mouse middle-click to paste into terminal.

Today I found a new terminal tips that I didn’t know before. Thanks to the reddit, I’m going to share it with you by following steps.

1. Drag and drop file or folder to paste the path into terminal.

Just drag and drop a file or folder into terminal, and you’ll see the full path pasted with single quotes. It’s useful if there’s special character in file path or you just don’t want to type …

2. Drag and drop a selection of text into terminal.

You can also drag and drop a selection of text into terminal, so you don’t need to do copy and paste with context menu clicks or keyboard shortcuts.

This is a step by step beginner guide shows how to check local network IP and public IP in both IP4 and IPv6 via either graphical interface or Linux commands in Ubuntu 20.04.

1. Find IP address via System Settings:

For the default Gnome desktop, you can check the wireless network IP address via:

  • Open Settings and navigate to Wi-Fi in left pane.
  • Click on the gear icon after the connected wifi network.
  • In the pop-up it shows the detailed information including your IP address.

To check the wired network IP address, do:

  • Open Settings and navigate to Network in left pane.
  • Click on the gear icon under connected wired network.
  • In the pop-up it shows the detailed information including your IP address.

2. Check Local IP address via ifconfig command:

While wired network name is usually eth0, eth1, eno1, wireless network name is usually wlan0, wlan1, wlo1, …

For other desktops or Ubuntu server without an UI, you can run ifconfig command to find your IP.

ifconfig

If the command does not exit, run command to install it: sudo apt install net-tools

3. Check Local IP address via ip command:

There’s another command looks more straightforward. Simply run:

ip address

4. Check Your Public IP address:

You can search your public ip via Google or other web search engine. If you don’t have a web browser or you’re on Ubuntu server, following commands will tell the public IP.

ifconfig will tell the public IP if you are not behind a router.

Or you can run command in console:

curl https://ipinfo.io/ip

internet speed test

Want to test your internet bandwidth without opening web browser? Well, here’s command line tool to do this using speedtest.net.

This may be help if you’re on Ubuntu Linux servers that doesn’t have a GUI. The tool is based on Python 2.4-3.3, so it works on all Canonical supported Ubuntu releases.

To install the tool, speedtest-cli:

1.) First install python-pip, a tool for installing and managing Python packages. To do so, run below command:

sudo apt-get install python-pip

2.) Install speedtest-cli via python-pip:

sudo pip install speedtest-cli

Once installed, you can use one command to test your internet bandwidth. The command is:

speedtest

You’ll see the similar output, which display you internet bandwidth as well as ISP & IP address.

Retrieving speedtest.net configuration…
Retrieving speedtest.net server list…
Testing from M-net Telekommunikations GmbH (88.217.180.40)…
Selecting best server based on ping…
Hosted by InterNetX GmbH (Munich) [2.23 km]: 18.756ms
Testing download speed………………………………….
Download: 7.81 Mbit/s
Testing upload speed…………………………………………..
Upload: 3.46 Mbit/s

One Command to Convert .NRG to .ISO in Ubuntu Linux

Last updated: September 4, 2013

NRG A .nrg file is a proprietary CD image file format used by Nero Burning ROM. In Ubuntu Linux, you can easily convert the .nrg to .iso file using the command line tool nrg2iso.

nrg2iso is available in Ubuntu universe repository. You can install it using Ubuntu Software Center. Or run below command if you’re on Ubuntu Server without GUI:

sudo apt-get update; sudo apt-get install nrg2iso

Once installed, you can convert .NGR file to .ISO via one command. For example:

nrg2iso image.nrg image.iso

That’s it. Enjoy!