Archives For November 30, 1999

Cinnamon

Linux Mint’s Cinnamon desktop has tagged its 4.0 release for more than a weeks. For those who want to try out new desktop release, here’s how to install Cinnamon 4.0 in Ubuntu 18.04.

Cinnamon 4.0 is not officially announced at the moment. It’s mentioned in the last Linux Mint blog post:

  • New panel layout, you’ll have the option to embrace the change or to click a button to make Cinnamon look just like it did before.
  • Ability to define a different icon size for each of the three panel zones
  • Mint-Y-Dark now is the default Cinnamon theme.
  • Support for mainline kernels was added to the Update Manager.
  • reduced system memory consumption, and various other changes.

Install Cinnamon 4.0 via PPA in Ubuntu 18.04:

1. Open terminal either via Ctrl+Alt+T keyboard shortcut, or from application launcher. When it opens, run command to add the PPA:

sudo add-apt-repository ppa:embrosyn/cinnamon

Type your password (no asterisks feedback) for sudo prompt and hit Enter to continue.

2. Then install Cinnamon desktop via command:

sudo apt install cinnamon

Once installed, log out and login with Cinnamon session.

Uninstall:

To remove Cinnamon desktop, run command:

sudo apt remove --autoremove cinnamon cinnamon-desktop-data

To remove the PPA, either go to Software & Updates -> Other Software, or run command:

sudo add-apt-repository --remove ppa:embrosyn/cinnamon

Virtualbox

A new maintenance release for Oracle VirtualBox 5.2 was released a day ago with audio and Linux additions fixes.

VirtualBox 5.2.22 release highlights according to the changelog:

  • Fixed a regression in the Core Audio backend causing a hang when returning from host sleep when processing input buffers
  • Fixed a potential crash in the HDA emulation if a stream has no valid mixer sink attached
  • Fixed an incompatibility with recent versions of Windows 10
  • Fixed a number of brigded networking driver crashes for Windows hosts.
  • Linux Additions:
    • Disable 3D for recent guests using Wayland
    • Fix for rebuilding kernel modules for new kernels on RPM guests
    • Further fixes for Linux 4.19
    • Fixed errors rebuilding initrd files with dracut on EL 6
    • Fixed 5.2.20 regression: guests not remembering the screen size after shutdown and restart

How to Install Virtualbox 5.2.22 in Ubuntu:

1. Remove old Virtualbox if any, by opening terminal (Ctrl+Alt+T) and running command:

sudo apt-get remove --autoremove virtualbox virtualbox-5.1

2. Download & install the latest Virtualbox package from the link below:

Download VirtualBox for Linux

Finally install the downloaded package via Gdebi (install it via Ubuntu Software) package manager.

3. If you’ve added the Oracle VBox repository, you can directly install the 5.2 release from Synaptic Package Manager or via apt command.

To add the repository, do:

Open terminal (Ctrl+Alt+T) and run command to add the repository:

sudo sh -c 'echo "deb http://download.virtualbox.org/virtualbox/debian $(lsb_release -sc) contrib" >> /etc/apt/sources.list.d/virtualbox.list'

for Linux Mint 19, replace $(lsb_release -sc) with bionic in the code.

Virtualbox Official Linux repository

Setup the keyring so to trust the updates from the repository:

wget -q https://www.virtualbox.org/download/oracle_vbox_2016.asc -O- | sudo apt-key add -

wget -q https://www.virtualbox.org/download/oracle_vbox.asc -O- | sudo apt-key add -

Finally install virtualbox 5.2 via commands:

sudo apt-get update

sudo apt-get install virtualbox-5.2

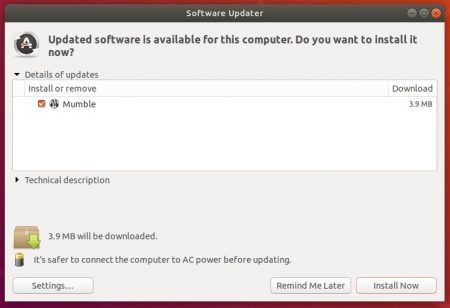
With the repository added, you can simply install the future 5.2 series updates via Software Updater.

GIMP 2.10.8 Released with Fixes and Improvements

Last updated: November 11, 2018

GIMP extra color palettes

GIMP image editor 2.10.8 was released yesterday with rendering improvements, various bug-fixes and plugins ported to new iterator API in GEGL.

GIMP 2.10.8 announcement is not ready at the moment. Here’s the changes according to the NEWS file:

  • Use adaptive chunk size instead in GimpProjection when rendering the projection asynchronously, to provide a better trade-off between throughput and responsiveness dynamically, based on how fast the processing is.
  • In all selection tools, show error on attempt to subtract-from/intersect-with empty selection.
  • Fix text along path not working with vertical text.
  • Fix Text tool’s frame position when undoing a move operation.
  • Streamline Text tool’s drawing blocking/unblocking logic.
  • When moving a text layer using the text tool (through alt+drag), don’t change the layer’s box mode to “fixed”, which is unnecessary, since the layer’s size isn’t affected.
  • Transform and deformation operations now maintain color for fully transparent pixels, making unerase and curves manipulation of alpha channel more reliable.
  • All transform tools now apply changes when you save or export/overwrite an image without pressing Enter first to confirm changes.
  • Fix wrong application position when painting on a drawable whose origin is above/to the left of the image’s origin, and there’s a selection active.
  • Port all plug-ins to the new iterator API in GEGL.
  • Improve automatic detection of HEIC/HEIF files.
  • Improve RawTherapee discovery by looking up registry key

How to Install GIMP 2.10.8 in Ubuntu:

The latest GIMP Ubuntu packages will be available via following 3 ways: (Be patient, the packages will be available in a few days):

Method 1. Otto Meier’s PPA maintains most recent GIMP packages for Ubuntu 18.04 and Ubuntu 18.10.

Adding the PPA (open terminal via Ctrl+Alt+T and run command) allows to upgrade the stock GIMP version to the latest.

sudo add-apt-repository ppa:otto-kesselgulasch/gimp

Method 2. GIMP also available Snap, containerized software package, for Ubuntu 16.04 and higher.

You can check available GIMP snap package version via command: snap find gimp.

To install the snap package, simply search for and install GIMP snap from Ubuntu Software. Or run command in terminal:

snap install gimp

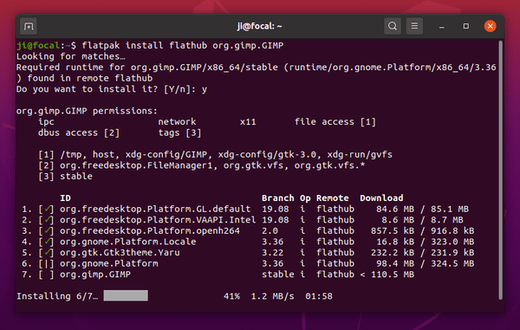
Method 3. GIMP flatpak, containerized software package, is available for Ubuntu 16.04 and higher. See HERE for details.

Ruby, interpreted object-oriented scripting language, now can be installed easily in Ubuntu 16.04 and higher via Snap package.

The official Ruby snap, containerised software package, was finally released for Linux Desktop. While Ruby is always old in Ubuntu universe repositories, Ruby snap is always updated!

How to Install Ruby Snap in Ubuntu:

1. (Only required for Ubuntu 16.04) Open terminal (Ctrl+Alt+T) and run command to make sure snapd daemon is installed:

sudo apt install snapd snapd-xdg-open

Type user password (no asterisks feedback) when it prompts and hit Enter to continue.

2. For Ubuntu 18.04 and higher, directly install the Ruby snap from Ubuntu Software:

or install it via command (also works in Ubuntu 16.04):

snap install ruby --classic

3. Once installed successfully, check via command /snap/bin/ruby --version:

That’s it!

FFMPEG 4.1 Released with AV1 Support in MP4

Last updated: November 6, 2018

FFMPEG

FFmpeg multimedia libraries released version 4.1 today with a lot of new filters, codec decoders, and more.

FFMPEG 4.1 release highlights according to the changelog:

  • support for AV1 in MP4
  • support mbedTLS based TLS
  • AV1 parser
  • SER demuxer
  • ATRAC9 decoder, ilbc decoder, IMM4 video decoder
  • AVS2 video decoder via libdavs2
  • Brooktree ProSumer video decoder
  • MatchWare Screen Capture Codec decoder
  • WinCam Motion Video decoder
  • RemotelyAnywhere Screen Capture decoder
  • AVS2 video encoder via libxavs2
  • pcm vidc decoder and encoder
  • decoding S12M timecode in h264
  • deblock filter, tmix filter, amplify filter, fftdnoiz filter
  • aderivative and aintegral audio filters
  • pal75bars and pal100bars video filter sources
  • adeclick filter, adeclip filter
  • libtensorflow backend for DNN based filters like srcnn
  • vc1 decoder is now bit-exact
  • lensfun wrapper filter, colorconstancy filter, 1D LUT filter (lut1d), cue and acue filters
  • transpose_npp filter, amultiply filter, acrossover filter
  • Block-Matching 3d (bm3d) denoising filter
  • audio denoiser as afftdn filter
  • sinc audio filter source, chromahold filter, setparams filter, vibrance filter
  • xstack filter, (a)graphmonitor filter, yadif_cuda filter

Download FFMPEG 4.1:

There’s no PPA package or Snap at the moment to make installing FFmpeg 4.0 easy in Ubuntu.

Download the source tarball:

Download FFMPEG (source)

CopyQ clipboard manager 3.7.0 was released a few hours ago with enhancements and many bug-fixes. Here’s how to install it in Ubuntu 18.04, Ubuntu 16.04, Ubuntu 18.10.

CopyQ 3.7.0 release highlights:

  • New option to show notes beside item content
  • Removed option to show icon instead of notes
  • Only plain text is Copied/Pasted from menu if Shift key is pressed
  • Customizable shortcut for Item context menu
  • Remove unmaintained Data plugin (can be replaced with a script)
  • Allow to set icon to tab groups in tree view
  • Allow export even if a tab group or an unloaded tab is selected
  • Automatic commands are no longer run in clipboard monitor context
  • Omit aborting monitor by calling abort() from automatic commands
  • Omit aborting automatic commands by changing configuration
  • Updated icons (Font Awesome 5.4.2)
  • Various bug-fixes
  • X11: Faster and safer clipboard checking and synchronization
  • X11: Prioritize checking clipboard before selection

Install Copyq 3.7.0 in Ubuntu:

The official PPA repository has made the latest packages for all current Ubuntu releases and their derivatives.

1. To add the PPA, open terminal (Ctrl+Alt+T) from application launcher and run command:

sudo add-apt-repository ppa:hluk/copyq

Input your password (no asterisks feedback while typing) when it prompts and hit Enter to continue.

2. After added the PPA repository, install CopyQ either via Synaptic package manager or by running commands in terminal:

sudo apt-get update

sudo apt-get install copyq

Once installed, start the clipboard manager from application launcher and you’ll see the icon in system tray area.

Uninstall:

To remove the software, either use Synaptic package manager or run command:

sudo apt-get remove --autoremove copyq

To remove PPA repositories, launch Software & Updates and navigate to Other Software tab.

PPSSPP Sony PSP emulator 1.7 was released a few days ago with a large number of compatibility and bugfixes. Here’s how to install it in Ubuntu 18.04, Ubuntu 18.10, Ubuntu 16.04, and Ubuntu 14.04.

PPSSPP 1.7 release highlights:

  • Fix for insta-crash on Galaxy Note 9, some Xiaomi devices, and the new nVidia Shield
  • Vertex range culling on most platforms, fixes DTM: Race Driver and similar
  • Major speed boost in some Gundam and Earth Defense Force games
  • Fix for issues with post processing shaders in GL 3+
  • Fixes to sound output switching on Windows (WASAPI)
  • Detects DirectInput devices when running
  • Simple Discord integration
  • New debugging APIs
  • Task switching made a lot more robust (fixes GPD XD problems)
  • Texture decoding optimizations
  • Tons and tons of miscellaneous bugfixes and compatibility fixes

How to Install PPSSPP 1.7 in Ubuntu:

Open terminal either via Ctrl+Alt+T keyboard shortcut or by searching for ‘terminal’ from software launcher. When it opens, do following steps one by one to install PPSSPP in all current Ubuntu releases.

1. Copy and paste the command and hit run to add the PPA:

sudo add-apt-repository ppa:ppsspp/stable

Type your user password (no asterisks feedback) when it prompts and hit Enter to continue.

2. Then refresh system package cache and install the latest PPSSPP via commands:

sudo apt-get update

sudo apt-get install ppsspp

Replace ppsspp with ppsspp-sdl in the code for the SDL version.

Uninstall:

To remove the PPA, either go to Software & Updates -> Other Software or run command:

sudo add-apt-repository --remove ppa:ppsspp/stable

To remove PPSSPP, either use your system package manager or run command:

sudo apt-get remove --autoremove ppsspp ppsspp-sdl ppsspp-common

Vivaldi web browser 2.1 was released today with focus on Quick Commands improvements and various other changes.

Vivaldi 2.1 release highlights:

  • Enable support for AV1
  • Quick Commands improvements including:
    • Notes search
    • UI Zoom and support for command line parameters
    • Open items in a new tab via modifier keys
  • Numerous fixes, Updated translations, and Upgraded Chromium to 70.0.3538.77
  • For more, see the release note.
  • How to Install Vivaldi 2.1 in Ubuntu:

    The official Ubuntu .DEB packages are available for download at the link below:

    Download Vivaldi (DEB)

    Grab the deb matches your OS, then install it via Ubuntu Software or Gdebi package manager. Or run command in terminal:

    sudo dpkg -i ~/Downloads/vivaldi-stable_2.1*.deb; sudo apt -f install

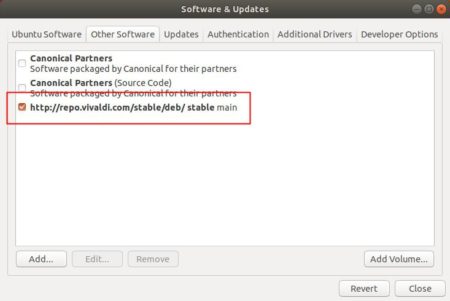
    In addition, after installed the .deb package, you can enable Vivaldi apt repository (Softare & Updates -> Other Software) to receive future updates through Software Updater:

    Firefox 63 Released! How to Install it in Ubuntu

    Last updated: October 24, 2018

    Firefox 55

    Mozilla Firefox 63.0 was released one day ago. All current Ubuntu releases can install it through security & updates repositories.

    Firefox 63.0 release highlights:

    • Performance and visual improvements for Windows users.
    • Faster tab switching, reactivity improvements for macOS users.
    • Opt to block third-party tracking cookies or block all trackers and create exceptions for trusted sites
    • WebExtensions now run in their own process on Linux
    • Added search shortcuts for Top Sites: Amazon and Google appear as Top Sites tiles on the Firefox Home (New Tab) page.
    • The Ctrl+Tab shortcut now displays thumbnail previews of your tabs

    Upgrade to Firefox 63 in Ubuntu:

    The Ubuntu Mozilla Team has published the new Firefox packages for Ubuntu 18.10, Ubuntu 18.04, Ubuntu 16.04, Ubuntu 14.04, and their derivatives.

    Simply open Software Updater (Update Manager), and install the updates after checking for updates:

    If you don’t see the Firefox updates, go to Software & Updates -> Update and make sure security & updates repositories are enabled.

    Linux Kernel

    Linux Kernel 4.19 LTS (Long Term Support) was released yesterday. Instead of Linus, Greg KH announced the new 4.19 release and wrote lots of words:

    While it was not the largest kernel release every by number of commits, it was larger than the last 3 releases, which is a non-trivial thing to do. After the original -rc1 bumps, things settled down on the code side and it looks like stuff came nicely together to make a solid kernel for everyone to use for a while. And given that this is going to be one of the “Long Term” kernels I end up maintaining for a few years, that’s good news for everyone.

    A small trickle of good bugfixes came in this week, showing that waiting an extra week was a wise choice. However odds are that linux-next is just bursting so the next -rc1 merge window is going to be bigger than “normal”, if there is such a thing as “normal” for our rate of development.

    And speaking of development, there’s that other thing that happened this release cycle, that ended up making it such that I’m the one writing this instead of Linus. Allow me the guilty pleasure of taking a few minutes to talk about that….

    What’s New in Kernel 4.19 (via omgubuntu.co.uk):

    • An alternate mode driver for USB Type-C/DisplayPort Type-C support
    • Better support for Intel’s Low Power Subsystem (LPSS)
    • Support for Qualcomm Adreno 600 series hardware
    • Initial support for Intel Icelake graphics
    • Armada atomic mode-setting
    • Ongoing DRM improvements
    • x86 KVM improvements
    • In-kernel GPS subsystem
    • General touchscreen improvements
    • Initial support for the 802.11ax WLAN
    • Various Filesystem improvements
    • Obligatory Linux power management tweaks
    • Continued Y2038 prep

    How to Install Linux Kernel 4.19 in Ubuntu:

    There are a few third-party tools, e.g., UKTools and Ukuu, make it easy to install the latest Kernel in Ubuntu.

    You can also manually download the Kernel 4.19 Ubuntu binary packages at:

    Download Kernel 4.19

    Depends on your OS type, download and install the packages in turns:

    1. linux-headers-4.19.0-xxxxxx_all.deb
    2. linux-headers-4.19.0-xxx-generic(/lowlatency)_xxx_amd64(/i386).deb
    3. linux-modules-4.19.0-xxx-generic(/lowlatency)_xxx_amd64(/i386).deb
    4. linux-image-xxx-4.19.0-xxx-generic(/lowlatency)_xxx_amd64(/i386).deb

    Select generic for common system, and lowlatency for a low latency system (e.g. for recording audio), amd64 for 64bit system, i386 for 32bit system, or armhf, arm64, etc for other OS types.

    Also you can download and install the kernel binaries via terminal commands:

    For 64-bit OS:

    cd /tmp/
    
    wget -c http://kernel.ubuntu.com/~kernel-ppa/mainline/v4.19/linux-headers-4.19.0-041900_4.19.0-041900.201810221809_all.deb
    
    wget -c http://kernel.ubuntu.com/~kernel-ppa/mainline/v4.19/linux-headers-4.19.0-041900-generic_4.19.0-041900.201810221809_amd64.deb
    
    wget -c http://kernel.ubuntu.com/~kernel-ppa/mainline/v4.19/linux-image-unsigned-4.19.0-041900-generic_4.19.0-041900.201810221809_amd64.deb
    
    wget -c http://kernel.ubuntu.com/~kernel-ppa/mainline/v4.19/linux-modules-4.19.0-041900-generic_4.19.0-041900.201810221809_amd64.deb
    
    sudo dpkg -i *.deb

    for 32-bit OS:

    cd /tmp/
    
    wget -c http://kernel.ubuntu.com/~kernel-ppa/mainline/v4.19/linux-headers-4.19.0-041900_4.19.0-041900.201810221809_all.deb
    
    wget -c http://kernel.ubuntu.com/~kernel-ppa/mainline/v4.19/linux-headers-4.19.0-041900-generic_4.19.0-041900.201810221809_i386.deb
    
    wget -c http://kernel.ubuntu.com/~kernel-ppa/mainline/v4.19/linux-image-4.19.0-041900-generic_4.19.0-041900.201810221809_i386.deb
    
    wget -c http://kernel.ubuntu.com/~kernel-ppa/mainline/v4.19/linux-modules-4.19.0-041900-generic_4.19.0-041900.201810221809_i386.deb
    
    sudo dpkg -i *.deb

    Once installed, restart your computer and enjoy!

    Uninstall Linux Kernel 4.19:

    Restart your machine and select boot with the previous kernel in boot menu ‘Grub2 -> Advanced Option for Ubuntu’. Then run command to remove Linux Kernel 4.19.0:

    sudo dpkg --purge linux-image-4.19.0-041900-generic linux-image-unsigned-4.19.0-041900-generic