Archives For November 30, 1999

PyCharm IDE

PyCharm IDE 2020.1 was released a day ago as the first major release in 2020. The new version features interactive rebasing, smarter debugging, and JetBrains Mono font.

PyCharm 2020.1 release highlights:

  • Interactive Rebasing: Commits can get messy, which is why you need to be able to rebase your branch. Now, PyCharm allows you to do so visually and with unprecedented ease.
  • Smarter Debugging: PyCharm’s debugger now makes it easy to see what’s happening in the middle of a complex statement. When stepping in, the debugger will ask you exactly what part of the statement you want to investigate further.
  • JetBrains Mono: PyCharm helps you read your code by navigating your project effectively, and now also by presenting your code in a font designed specifically for it.
  • Django Template Imports: PyCharm Professional Edition makes life easy for web developers by offering code completion (and debugging) in Django templates. We’ve made a couple improvements on this front: auto import for custom tags and better completion.

How to Install PyCharm 2020.1 in Ubuntu:

Jetbrains offers official Snap package for Linux desktop, which runs in sandbox and always updated.

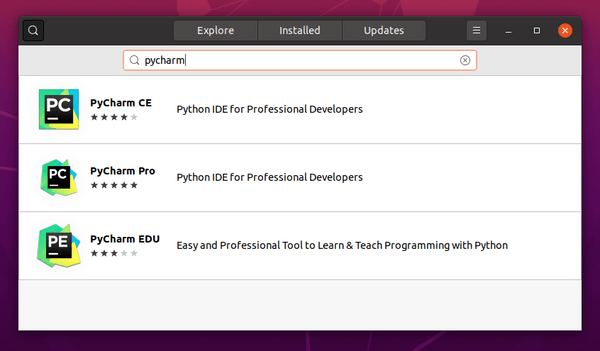
For Ubuntu 18.04 and higher, simply open Ubuntu Software, search for and install pycharm packages:

For those prefer native .deb package, keep an eye on the unofficial PPA though it’s not updated at the moment of writing.

PyCharm IDE

PyCharm 2019.2 was released today with exciting new features, initial Python 3.8 support, improved Jupyter Notebook experience, and many more other changes.

PyCharm 2019.2 release highlights:

  • Improved Jupyter Notebook integration. Some of the most requested features have been implemented.
  • Syntax highlight support for many other languages, C#, C++, Groovy, Lua, Makefiles, and more.
  • cURL format is now supported for HTTP requests.
  • Add support for some major Python 3.8 features.
  • Full-text search across multiple data sources
  • Improved debugging and variable refactoring experiences.
  • For more details, see the release note.

How to Install PyCharm 2019.2 in Ubuntu:

Jetbrains offers official Snap package for Linux desktop, which keeps the IDE always up-to-date.

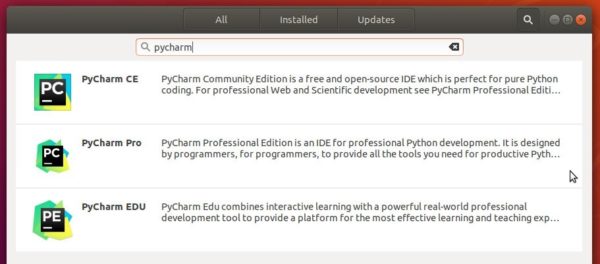
For Ubuntu 18.04 and higher, simply open Ubuntu Software, search for and install pycharm packages:

For Ubuntu 16.04, open terminal (Ctrl+Alt+T) and install snapd daemon via command:

sudo apt install snapd snapd-xdg-open

Then install PyCharm snap package via command:

sudo snap install pycharm-community --classic

In the command replace pycharm-community with pycharm-professional for the professional edition.

Uninstall:

To remove the PyCharm snap package, either use Ubuntu Software or run command in terminal:

sudo snap remove pycharm-professional pycharm-community

PyCharm IDE

PyCharm IDE 2019.1 was released yesterday with many new features and improvements. Here’s how to install it in Ubuntu.

PyCharm 2019.1 release highlights:

  • Completely redesigned Jupyter Notebooks support
  • Improved quick documentation for HTML and CSS.
  • Navigate quickly to recent locations, rather than files.
  • Python 2.6 and 3.4 are no longer supported.

How to Install PyCharm 2018.3.1 in Ubuntu:

Jetbrains offers official Snap package for Linux desktop, which keeps the IDE always up-to-date.

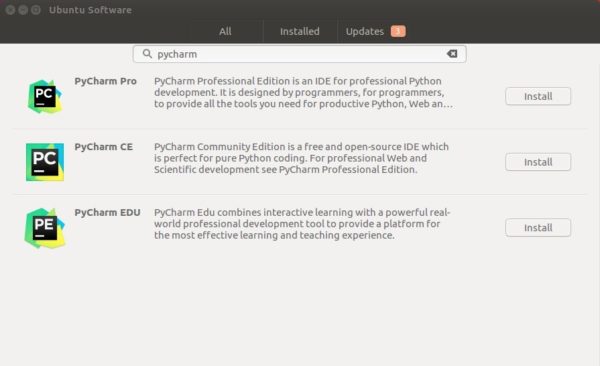
For Ubuntu 18.04 and higher, simply open Ubuntu Software, search for and install pycharm packages:

For Ubuntu 16.04, open terminal (Ctrl+Alt+T) and install snapd daemon via command:

sudo apt install snapd snapd-xdg-open

Then install PyCharm snap package via command:

sudo snap install pycharm-community --classic

In the command replace pycharm-community with pycharm-professional for the professional edition.

Uninstall:

To remove the PyCharm snap package, either use Ubuntu Software or run command in terminal:

sudo snap remove pycharm-professional pycharm-community

PyCharm 2018.3.1 Released with Various Bug Fixes

Last updated: December 6, 2018

PyCharm IDE

PyCharm IDE released version 2018.3.1 one day ago with various bug fixes. Here’s how to install it in Ubuntu 16.04 and higher.

PyCharm 2018.3.1 release highlights:

  • A fix for the recently added WSL support in PyCharm 2018.3
  • An issue where PyCharm couldn’t correctly authenticate over SSH using a passphrase-protected private key has been resolved.
  • A few fixes for Docker and Docker Compose
  • Fixes for the embedded terminal
  • Many fixes coming from WebStorm, DataGrip and IntelliJ IDEA

How to Install PyCharm 2018.3.1 in Ubuntu:

Jetbrains offers official Snap package for Linux desktop, which keeps the IDE always up-to-date.

For Ubuntu 18.04 and higher, simply open Ubuntu Software, search for and install pycharm packages:

For Ubuntu 16.04, open terminal (Ctrl+Alt+T) and install snapd daemon via command:

sudo apt install snapd snapd-xdg-open

Then install PyCharm snap package via command:

sudo snap install pycharm-community --classic

In the command replace pycharm-community with pycharm-professional for the professional edition.

Uninstall:

To remove the PyCharm snap package, either use Ubuntu Software or run command in terminal:

sudo snap remove pycharm-professional pycharm-community

PyCharm IDE

JetBrains PyCharm IDE 2018.3 was released one day ago with new features and great improvements.

PyCharm 2018.3 features:

  • Windows Subsystem for Linux (WSL) interpreters for Windows users developing apps for Linux.
  • Multiline TODOs support.
  • Great usability improvements for search everywhere feature.
  • Performance improvements to F-string.
  • Additional options for optimizing imports
  • GitHub pull requests
  • Cassandra support

How to Install PyCharm 2018.3 in Ubuntu:

Jetbrains offers official Snap package for Linux desktop. For Ubuntu 18.04 and higher, simply open Ubuntu Software, search for and install pycharm packages:

For Ubuntu 16.04, open terminal (Ctrl+Alt+T) and install snapd daemon via command:

sudo apt install snapd snapd-xdg-open

Then install PyCharm snap package via command:

sudo snap install pycharm-community --classic

In the command replace pycharm-community with pycharm-professional for the professional edition.

Uninstall:

To remove the PyCharm snap package, either use Ubuntu Software or run command in terminal:

sudo snap remove pycharm-professional pycharm-community

PyCharm IDE

PyCharm IDE released version 2018.2.5 today with some important bug-fixes. PyCharm 2018.2.5 features following changes:

  • An issue that causes PyCharm to crash on Ubuntu 16.04 has been resolved
  • Matplotlib 3.0.0 can now be imported in the Python Console
  • Python code now folds correctly after it’s minimized with Ctrl+Shift+Numpad – (Cmd+Shift+- on macOS)
  • Pycharm fails to generate tensorflow skeletons
  • Gnome-Shell crashes upon replace in path confirmation action
  • And other bug-fixes. See the release note.

How to Install PyCharm 2018.2.5 in Ubuntu:

Jetbrains offers official Snap package for Linux desktop. For Ubuntu 18.04 and higher, simply open Ubuntu Software, search for and install pycharm packages:

For Ubuntu 16.04, open terminal (Ctrl+Alt+T) and install snapd daemon via command:

sudo apt install snapd snapd-xdg-open

Then install PyCharm snap package via command:

sudo snap install pycharm-community --classic

In the command replace pycharm-community with pycharm-professional for professional edition.

Uninstall:

To remove the PyCharm snap package, either use Ubuntu Software or run command in terminal:

sudo snap remove pycharm-professional pycharm-community

PyCharm IDE

PyCharm python IDE 2018.2 was released yesterday. Here’s how to install it in Ubuntu 18.04, Ubuntu 16.04.

PyCharm 2018.2 release highlights:

  • Fully supports pipenv: easily create projects with pipenv, create a pipfile, and have PyCharm update it for you when you install packages.
  • Improved support for pytest: code completion and inspections are now support for pytest fixtures.
  • Redesigned quick documentation for easy use and better look.

See the feature video for more about PyCharm 2018.2:

How to Install PyCharm 2018.2 in Ubuntu:

It’s quite easy to install the latest PyCharm in Ubuntu since JetBrains offers the official snap packages in snap store.

Simply open Ubuntu Software and search for PyCharm. You’ll see the community, professional, and educational packages are available.

You can also install the software by running command in terminal (Ctrl+Alt+T):

snap install pycharm-community

For professional version, replace pycharm-community with pycharm-professional in command.

Note for Ubuntu 16.04 users first time installing a snap package, make sure if the snapd is installed via command:

sudo apt install snapd snapd-xdg-open

PyCharm IDE

The first release of PyCharm python IDE 2018 was announced earlier today with great new features.

PyCharm 2018.1 release highlights:

  • Data scientists can now define code cells in their files, and choose exactly which parts to execute. No more need to re-import your data every time you finetune your analysis!
  • Do you run Python code on remote machines? Configuring an SSH remote Python interpreter is now easier than ever.
  • Even though Python 3.7 isn’t out yet, PyCharm 2018.1 already fully supports developing Python 3.7 code.
  • Those of you who take pride in having precise commits will be pleased to hear that you can now choose which chunks of files to include in your git commits.
  • PyCharm is the Python IDE that knows your code, and PyCharm 2018.1 knows Python code better than ever with new code intelligence features.
  • Docker Compose file format 3.3 and later are now supported. Also, performance of Docker Compose interpreters has improved significantly.

How to Install PyCharm 2018.1 in Ubuntu:

Jetbrains offers official snap packages for Ubuntu Linux users. You can install it in Ubuntu 16.04, Ubuntu 17.10, Ubuntu 18.04 via following steps.

1. (Ubuntu 16.04 only) For those who never installed a snap package, open terminal (Ctrl+Alt+T) and run command to install snapd daemon:

sudo apt-get install snapd snapd-xdg-open

No visual feedback while typing your password due to security reason.

2. Then you can search for and install PyCharm via Ubuntu Software:

Or run command in terminal instead to install the IDE:

snap install pycharm-community --classic

For professional, replace pycharm-community with pycharm-professional in the code.

PyCharm IDE

Jetbrains announced the release of its Python IDE, PyCharm 2017.3.2, a day ago. Here’s how you can install it in Ubuntu 16.04 and higher.

Changes in PyCharm 2017.3.2 include:

  • Type annotation ahead of time. You can’t put an inline type annotation when defining a variable in a for or a with statement, so you need to provide the annotation in a separate place, read more on the ticket. This is now supported in PyCharm.
  • ‘Show command line afterwards’ now works correctly for remote interpreters. And further fixes to this feature
  • Various SQL syntax fixes for PostgreSQL and Oracle (PyCharm Professional Edition bundles all DataGrip features)
  • React code completion improvements (PyCharm Professional Edition bundles all WebStorm features)
  • And more, see the release notes for details

How to Install PyCharm 2017.3.2 in Ubuntu:

You can easily run the new release in Ubuntu either via:

method 1: official Linux binaries. NON-INSTALL version, just extract and run executable file to launch the IDE:

Download PyCharm Linux binary

method 2: or install the Snap package. App run in sandbox. Support for Ubuntu 16.04 and higher:

Simply open terminal via Ctrl+Alt+T or by searching for ‘terminal’ from app launcher. When it opens, run command:

snap install pycharm-community --classic

For professional edition, run following command instead:

snap install pycharm-professional --classic

Once installed, launch the IDE from your application launcher and enjoy!

Uninstall:

To remove the snap packages, either use Ubuntu Software or run command in terminal:

sudo snap remove pycharm-community pycharm-professional

For those who prefer traditional Ubuntu PPA, keep an eye on the launchpad PPA.

PyCharm IDE

Jet Brains announced the release of PyCharm 2017.3 earlier today. Here’s how to install it in Ubuntu 16.04, Ubuntu 17.04, Ubuntu 17.10, Ubuntu 18.04.

PyCharm 2017.3 release highlights:

  • Performance improvements: Python indexing is twice as fast, JavaScript indexing is up to 40% faster, configuring SSH interpreters is much faster (in some cases over 100x), and more!
  • The new release makes creating and selecting Python interpreters easier.
  • A new scientific mode, which puts all the tools you need for data science at your fingertips (professional version only)
  • An all new HTTP client for those who build (REST) APIs.
  • Fully supports for Django 2.0 (professional edition only)
  • Supports running Python modules (python -m )
  • Supports for SSH config files

How to Install PyCharm 2017.3 in Ubuntu:

You can easily run the new release in Ubuntu via either:

method 1: official Linux binaries. NON-INSTALL version, just extract and run executable file to launch the IDE:

Download PyCharm Linux binary

method 2 (recommended): or install the Snap package. WELL integrated with Ubuntu. Support for Ubuntu 16.04 and higher:

Simply open terminal via Ctrl+Alt+T or by searching for ‘terminal’ from app launcher. When it opens, run command:

sudo snap install pycharm-community --classic

For sudo prompts, input your password (no visual feedback while typing) when it asks and hit Enter.

For professional edition, run following command instead:

sudo snap install pycharm-professional --classic

Once installed, launch the IDE from your application launcher and enjoy!

Uninstall:

To remove the snap packages, either use Ubuntu Software or run command in terminal:

sudo snap remove pycharm-community pycharm-professional