For those prefer installing apps via the classic apt method, you can now install Blender 2.92 via PPA in Ubuntu 20.04, Ubuntu 20.10, and also Ubuntu 16.04, Ubuntu 18.04.
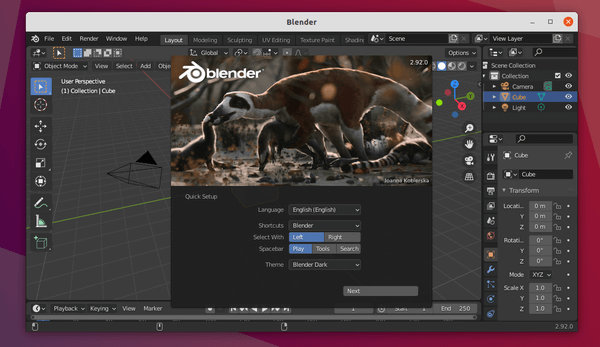
The open-source 3D modeller software Blender 2.92 was released a few days ago. Features “a completely new workflow for editing meshes, new physics simulation methods, faster Cycles rendering, better compositing with Eevee, and so much more.”
Blender offers official Snap package, which runs in sandbox, and is available to install directly from Ubuntu Software. As well, a Linux portable package is available to download in its website. For those prefer the classic deb packages, Thomas Schiex’s PPA has made it for Ubuntu 20.04 and Ubuntu 20.10 uses.
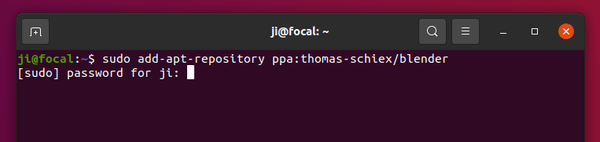
1. Add Blender PPA:
Firstly open terminal from system application launcher. When it opens, run command to add the PPA:
sudo add-apt-repository ppa:thomas-schiex/blender
Type user password, no asterisk feedback, when it asks and hit Enter to continue.
The PPA does not support for Ubuntu 16.04 and Ubuntu 18.04, but another PPA do! It however requires a few more PPA for updated libaries, see the PPA description for detail.
2. Install or update Blender:
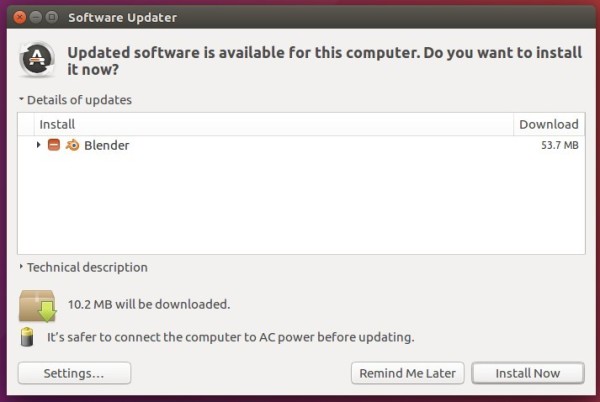
If you have an old version of Blender packages installed via apt method, open Software Updater (Update Manager) and update the software:
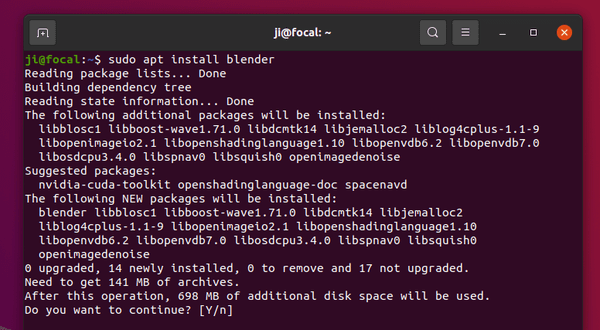
Or run commands in terminal to install / update the package:
sudo apt update

sudo apt install blender
3. Fix missing libLLVM-6.0.so.1 issue:
Blender 2.92 does not start in my Ubuntu 20.04, and it outputs an error when running from terminal:
/usr/lib/blender/blender: error while loading shared libraries: libLLVM-6.0.so.1: cannot open shared object file: No such file or directory
This can be easily fixed by running command:
sudo apt install libllvm6.0
Not sure if the problem exists in Ubuntu 20.10, but libllvm6.0 is not available in the Groovy repository.
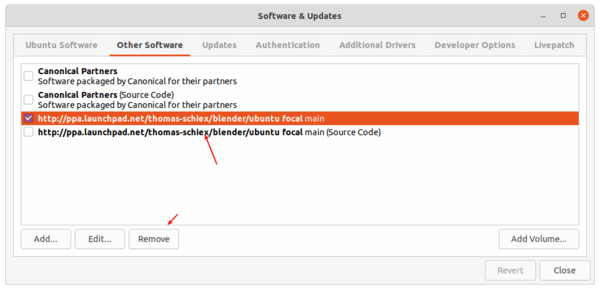
Uninstall:
To remove the Ubuntu PPA, open Software & Updates and go to Other Software tab, then remove the relevant line.
To remove Blender installed via apt, run command in terminal:
sudo apt remove --autoremove blender