Archives For disk


I have an external disk mounted in my Ubuntu 22.04 with read and write permission. It however ran into issue recently. When I tried to boot Virtual Machine from that disk, it return error “NS_ERROR_FAILURE (0X80004005)“. And, when to save VM settings it output “Runtime error opening ‘/path/to/vm-machine.vbox-tmp’ for overwriting: -113 (Write protect error.).

I was thinking that’s an configuration error in /etc/fstab for auto-mounting disk partition. Until touch command returned “Read-only file system” while ls -al and file ‘Properties’ dialog did say I have both read and write permissions.

After digging around, I found that’s something to do with Microsoft Windows. I have Ubuntu dual boot with Microsoft Windows 10. Both systems are able to access that external disk. And the issue occurs sometime after making changes to that disk from Windows 10. And, the solution is just disable “Fast Startup” in Windows.

Disable Fast Startup in Windows 10

The configuration page varies a bit in different Windows editions. Here’s how to disable the feature in Windows 10.

1. First open “Settings” from start menu. When it opens, click “System” to go power settings page.

2. In next page, navigate to “Power & sleep” in the left pane. Then, click on “Additional power settings”.

3. Then, click the “Choose what the power button do” link in the left in next pop-up dialog.

4. Finally, click “Change settings are currently unavailable” link to unlock settings option, un-check “Turn on fast startup”, and finally save changes.

This simple tutorial shows how to easily check your SSD health in Ubuntu and/or Linux Mint desktop.

I’ve been running Ubuntu Linux on my old laptop for about 7 years. Everything works well, but it recently refuses to boot sometimes when pressing on the physical power button. Not sure what’s the problem, but I guess it’s something to do the data reading issue from SSD drive.

In Windows 10, I prefer to use CrystalDiskInfo which is super easy to understand for beginners. For Linux, there’s a tool GSmartControl available for choice.

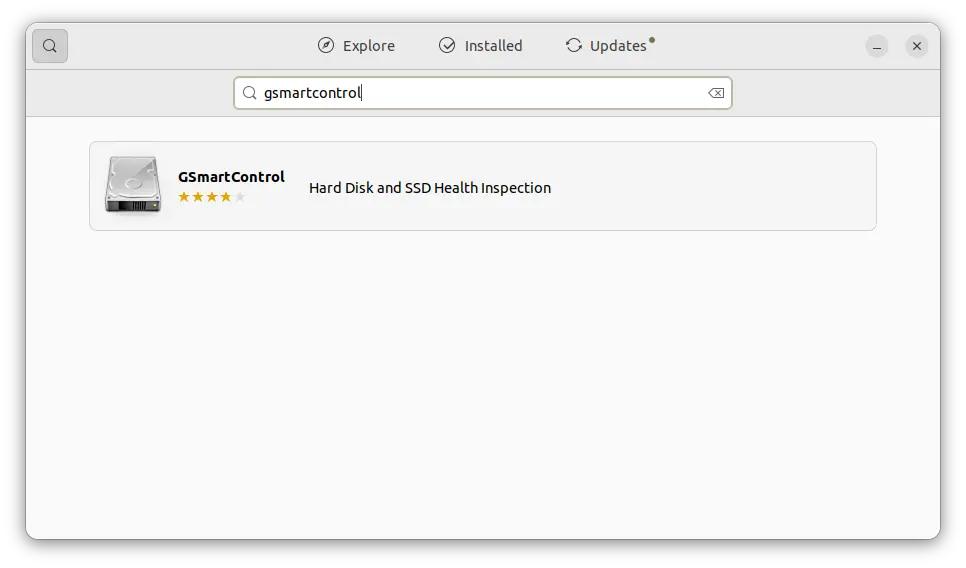
1. First, the tool is available in most Linux’s system repositories. User can just search for and install it from system package manager. For Ubuntu, it’s available to install via Ubuntu Software app:

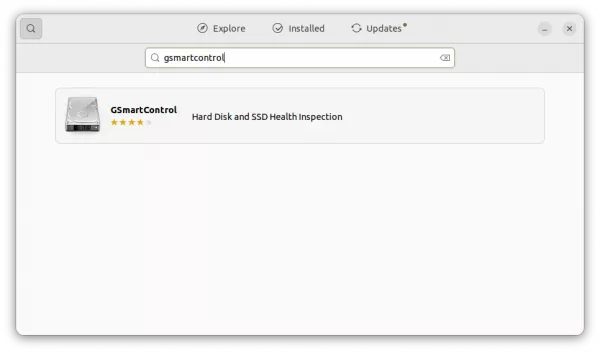
For those familiar with Linux command can run a single command in terminal (Ctrl+Alt+T) to install it:

sudo apt install gsmartcontrol

2. After that, search for and launch it from start menu (or Activities overview). It will list your SSD drive in the app window.

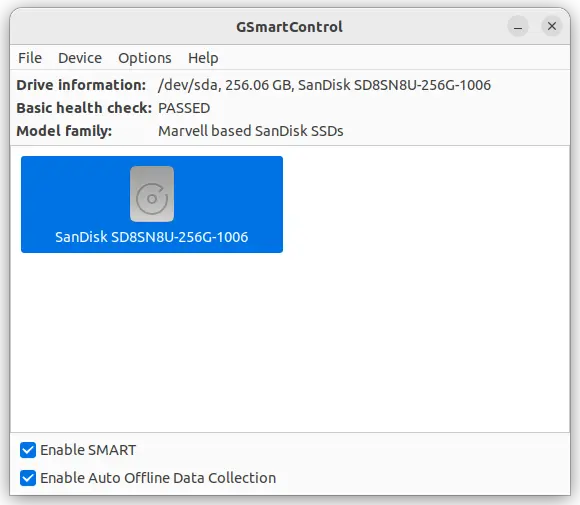
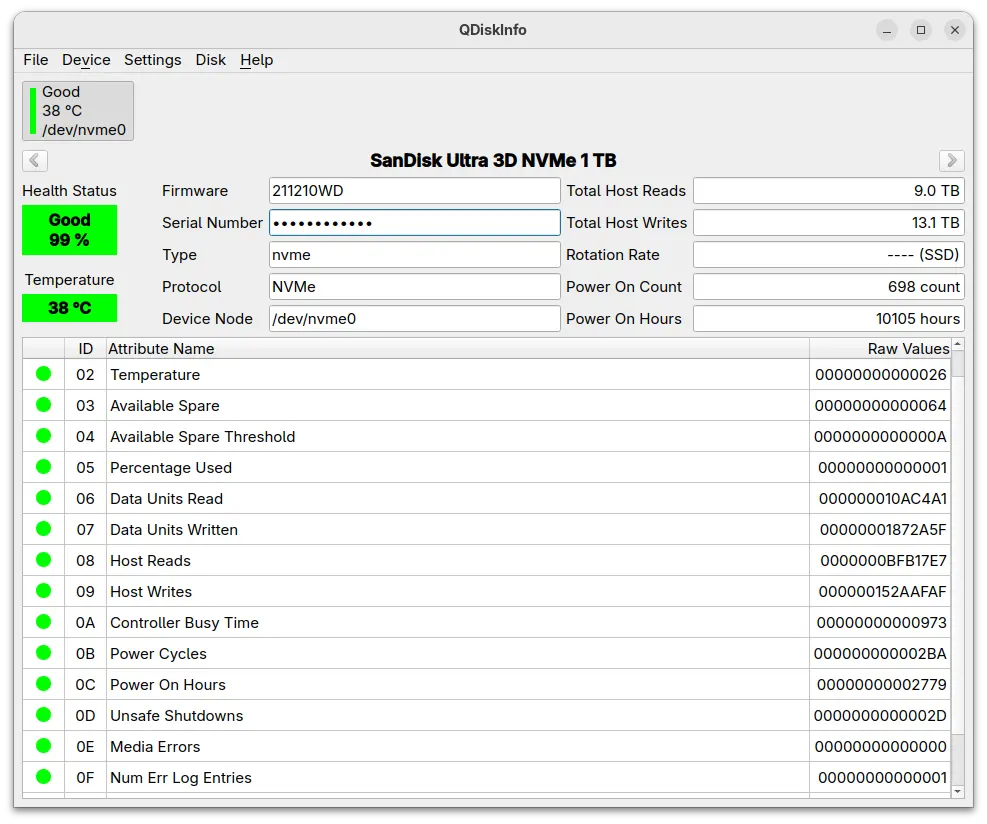
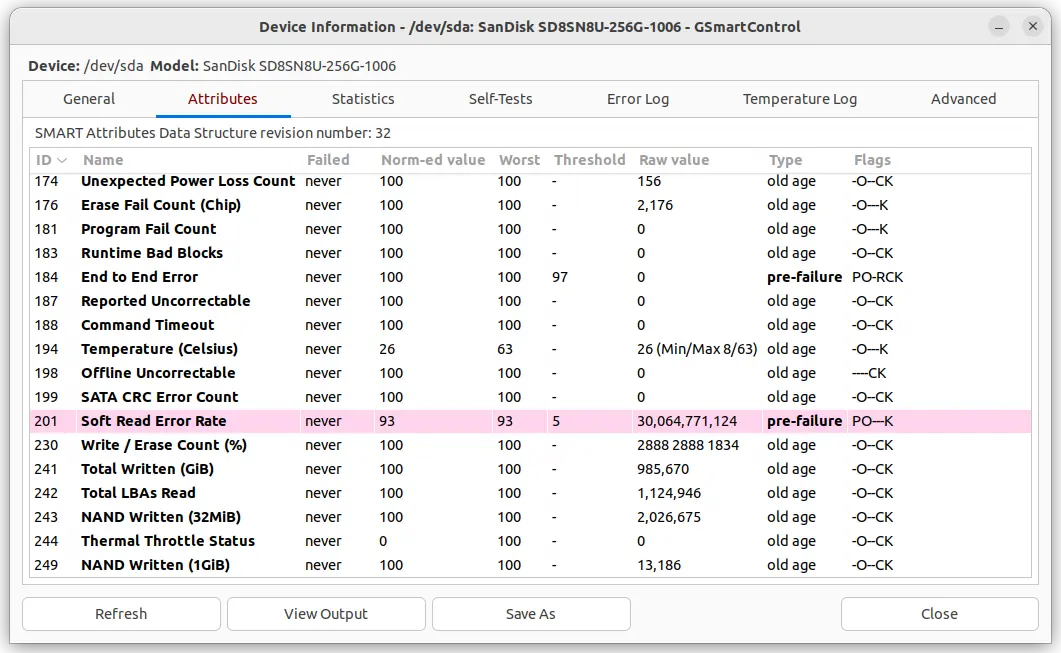
By double-clicking on the disk icon or go menu “Device -> View Details” will open the information dialog that you need.

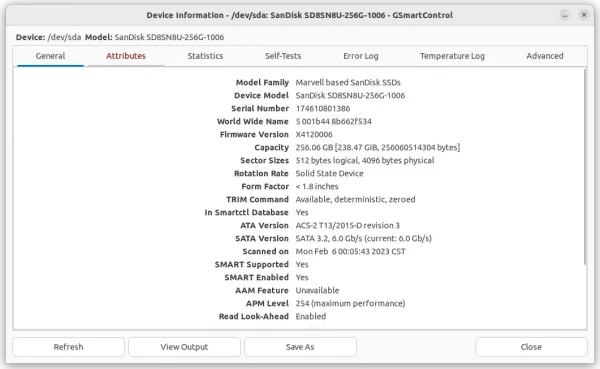
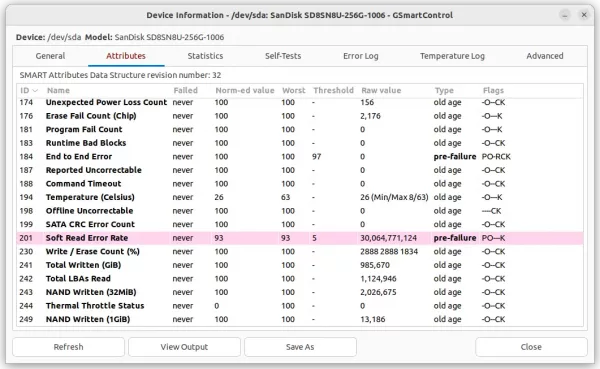
Things are not so easy to read for beginners. But it will highlight something that is not going well with red text font or background.

By moving mouse cursor over any item in the app window, there will be a tool-tip pop-over that explain with detailed information. As the screenshot below shows, it shows you:

  • power-on time.
  • total disk read and write.
  • read error rate.
  • temperature and other information.

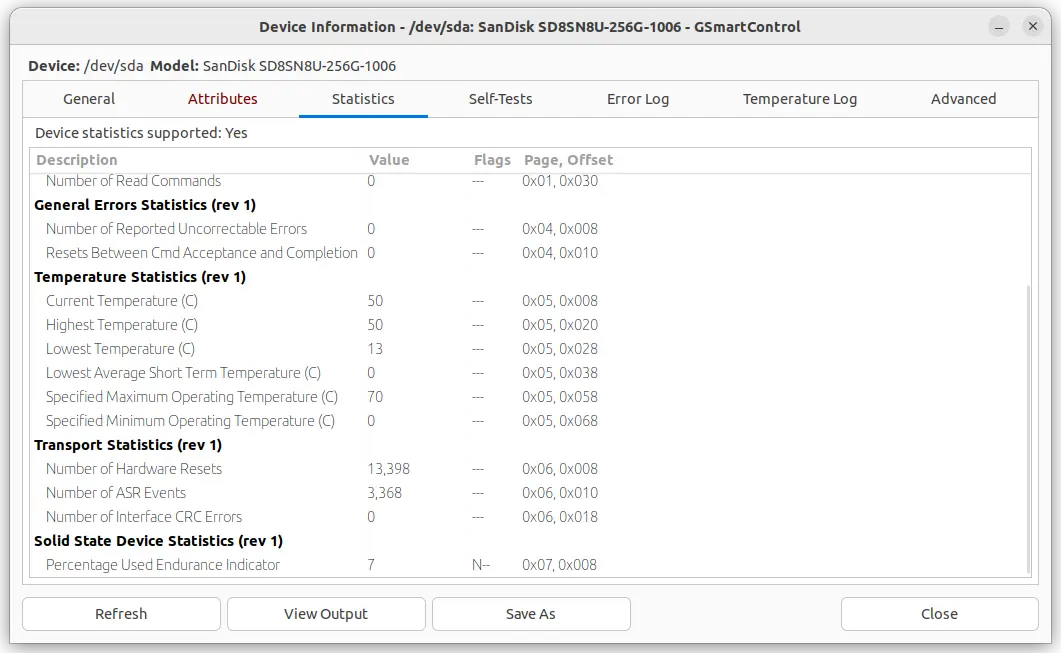
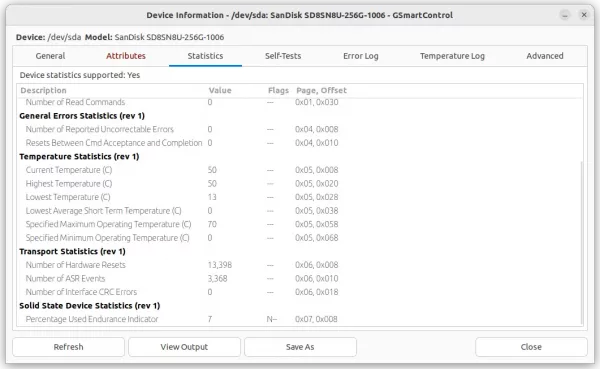
For those prefer a percentage value of the device life, go “Statistics” tab and check the value of Percentage Used Endurance Indicator. In my case as the screenshot shows, there should be still 93% left.

And you can click on “View Output” button to view all the info as text, copy and paste them into online forums to ask for help! Or, run a “Self-Tests” manually to see if there’s any error.

Free Up Disk Space by Removing Apt Cache

Last updated: August 17, 2013

This is an one-command-skill for beginners to get familiar with your Ubuntu system. Don’t be worried even if you know nothing of Linux commands. Just copy and paste following code into terminal window and hit enter to run.

When you install an application from Ubuntu Software Center, it downloads DEB installer and all dependency packages from server, then install them to your system.

Ubuntu caches the DEB installer and dependency packages in /var/cache/apt/archives after the app or software properly installed. They are useless and take place. So here’s how to remove them to free up disk space.

To get started, hit Ctrl+Alt+T to open a terminal window. Copy and paste this code and run in terminal:

sudo apt-get clean

That’s it! You’ll be prompt to type user password to get past.

You may check disk usage by opening System Monitor from Unity Dash.

System_Monitor

Enjoy!