Archives For November 30, 1999

gnome shell

This quick tutorial is going to show you how to change the transparency level of the Gnome 3 desktop top panel in Ubuntu 18.04 LTS, though

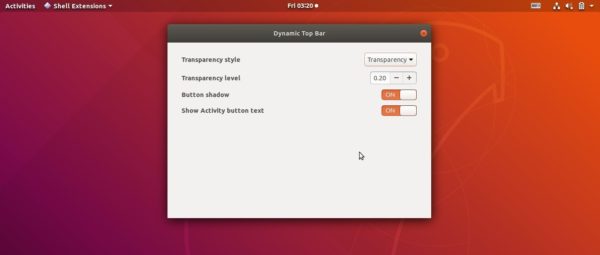
It’s easy to configure top panel transparency via a Gnome Shell extension called Dynamic Top Bar. With the extension, you can easily configure top panel transparency if app is not full screen:

  • top panel transparency style: transparency or gradient.
  • transparency level.
  • Show or hide button shadow, Activities button text.

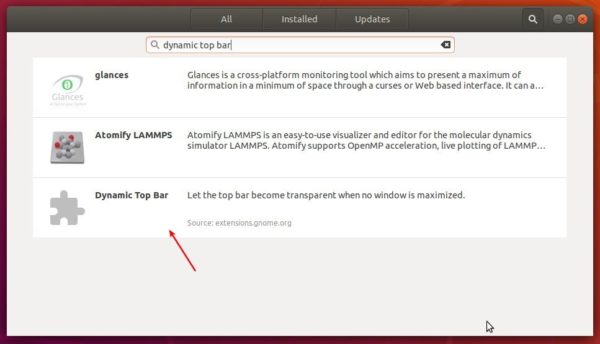
1. Open Ubuntu Software, search for and install Dynamic Top Bar

2. Once installed, go to extension settings via the install page (Ubuntu Software) or Gnome tweak tool (install it via Ubuntu Software).

That’s it. Enjoy!

gnome shell

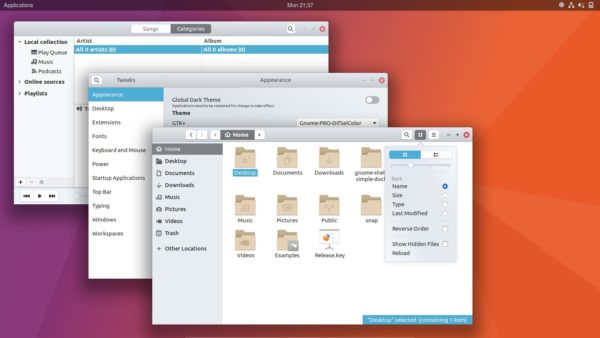
Gnome-Pro, a new GTK+ theme made by paulxfce, is a great theme for Gnome 3 Desktop with GTK > = 3.20.

A clear and easy-on-the-eyes theme that is meant for those who use the Gnome-desktop professionally on a daily basis. The focus in this theme is compatibility: GTK-2 applications and GTK-3 applications look virtually the same. Libre-office, Scribus, Evolution, Geary, Planner, GnuCash, LaTeXila, Geany, the Gimp, Inkscape,…

Chrome, firefox, Web and Opera have no issues with this theme.

About the looks, you will notice some Elementary-theme, Arc-theme and Gnome-OSX.

How to Install Gnome-Pro theme in Ubuntu 17.04:

The theme so far works on Ubuntu 17.04, Ubuntu 17.10, and it requires a few theme engines to work properly.

1. Open terminal via Ctrl+Alt+T or from app launcher, when it opens, run command to install theme engines:

sudo apt install gnome-themes-standard gtk2-engines-murrine

2. Window buttons should be moved to right corner via command:

gsettings set org.gnome.desktop.wm.preferences button-layout ":minimize,maximize,close"

3. Download the theme file from the link below:

Download Gnome-Pro (Files pane)

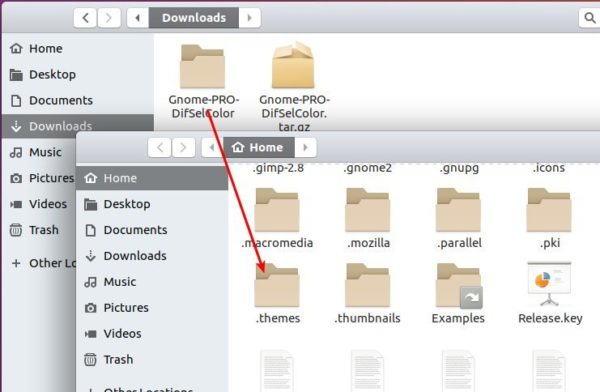
4. Extract the tarball, and move the theme folder into .themes in the root of your user directory.

Press ctrl+h to view hidden file folders, and create .themes folder if it’s not exist.

5. Finally select the theme via Gnome Tweak Tool. Log out and back in to apply changes.

gnome shell

Along with a few Gnome Shell extensions, you can now easily make Gnome Desktop look like Mac OS X with ‘Gnome-OSX’, a gnome-specific GTK3 theme.

Gnome-OSX is initially based on the Arc-theme-files. The goal is to implement the feel of OSX on the gnome-applications.

The theme mainly features:

  • Nautilus with blurred sidebar.
  • Same theming across GTK2 and GTK3.
  • Shell theme with white dock and slighty dark top-bar
  • Shell theme with dark dock and dark top-bar
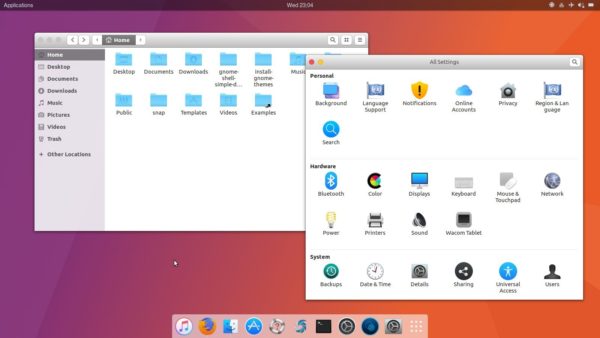
Gnome Shell in OS X style

To get this look and feel in Ubuntu 17.04, Ubuntu 16.10 Gnome Shell, do following steps:

1. Download the ‘Gnome-OSX’ theme from the link below:

Download Gnome-OSX

Under Files tab, grab the first package or the next 4 packages.
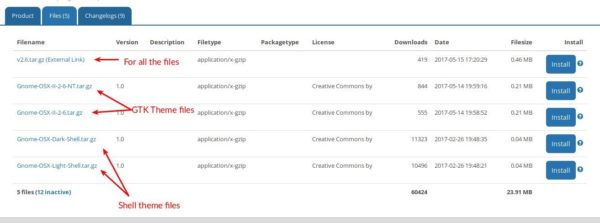
Extract the tarball and all you need is the following 4 folders:

  • Gnome-OSX-Dark-Shell
  • Gnome-OSX-Light-Shell
  • Gnome-OSX-II-2-6
  • Gnome-OSX-II-2-6-NT

2. Open file browser, press Ctrl+H (view hidden folders) and go to .themes folder (create the folder if not exist).

Then move the 4 extracted folders to .themes:
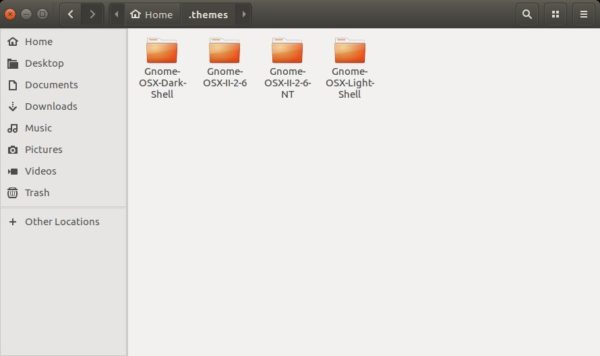
3. Apply the GTK theme and Shell theme via Gnome Tweak Tool:

See this tutorial if shell theme is disabled
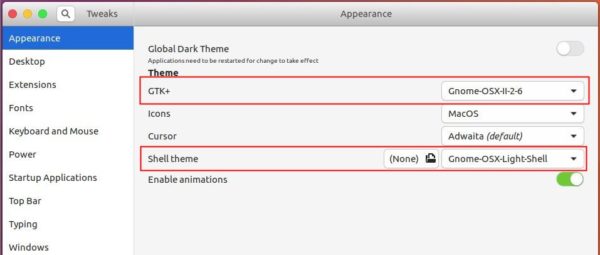
4. For the icons, I’m using the macOS icons available for download at the link below:

Download macOS icons

Also, extract and move the result folder to .icons folder (create it if not exist) in user home folder. And apply the icon theme via Gnome Tweak Tool.

5. For the bottom dock, go to the link below and install ‘Simple Dock’ extension:

or manually install the extension by following the project description.
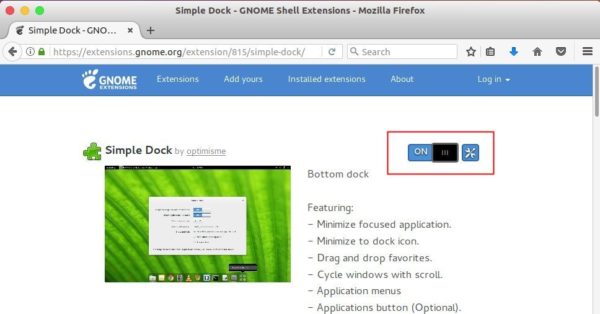
6. For the top-left corner Application menu, install this gnome shell extension.

7. To move window buttons to left, open terminal (Ctrl+Alt+T) and run command:

gsettings set org.gnome.desktop.wm.preferences button-layout "close,minimize,maximize:"

gnome shell

This quick tutorial is going to show Gnome Desktop beginners how to enable the ‘Shell theme’ drop-down box in the Gnome Tweak Tool.

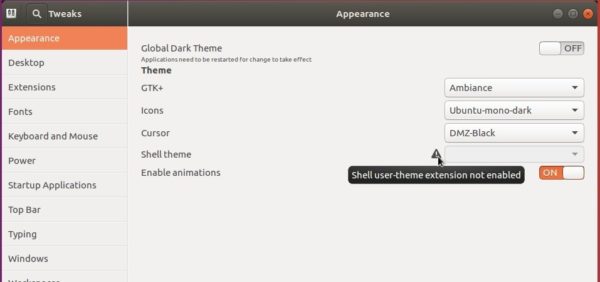
A Gnome Shell theme changes shell buttons, colors, panels, etc. The setting is disabled by default in Gnome Tweak Tool, and you’ll see the prompt “Shell user-theme extension not enabled” when you hover the cursor over the alert icon.

shell theme disabled

As it prompts, you need to enable user-theme extension. While it’s not available by default, install it via following steps:

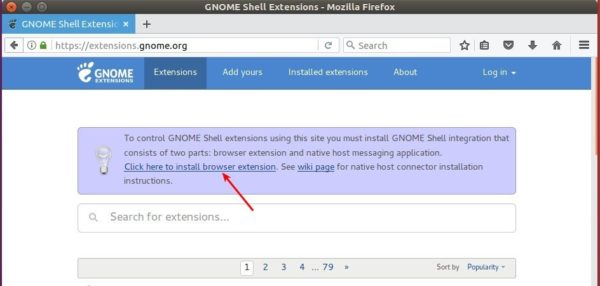
1. Open Firefox web browser and go to https://extensions.gnome.org:

Click the link text “click here to install browser extension” and follow the pop-ups to install the browser extension:

shell browser extension

2. After that, refresh the web page, if you get an error prompt that “native host connector is not detected“,

then open terminal via Ctrl+Alt+T and run command:

sudo apt install chrome-gnome-shell

gnome shell extension

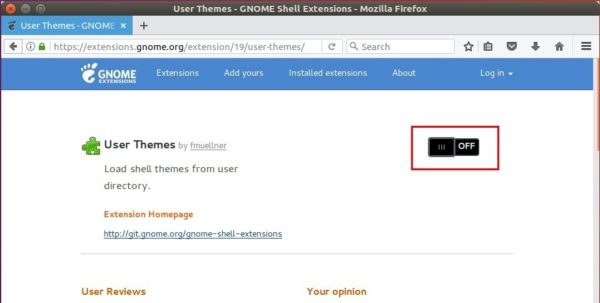
3. Finally go to https://extensions.gnome.org/extension/19/user-themes/.

Click the switch to turn on and then select install the Gnome Shell extension:

User Themes extension

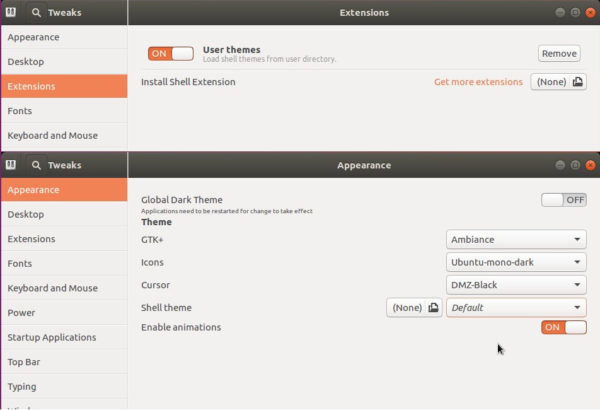
After all, restart Gnome Tweak Tool and you’ll see the Shell theme drop-down box enabled after enabled the User Themes extension.

shell theme enabled