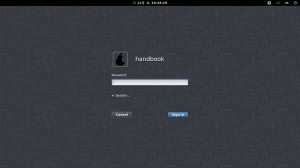
This simple tutorial shows you how to capture screenshot of the LightDM / GDM login screen in Ubuntu, Elementary OS, or Pear OS.
Besides installing your system as Virtualbox or Vmware Guest OS, we can follow the steps below to capture and share our login screens.
1. Press Ctrl+Alt+T on your keyboard to open terminal. When it opens, run command blow to check out your display manager:
cat /etc/X11/default-display-manager
handbook@handbook-1310:~$ cat /etc/X11/default-display-manager
/usr/sbin/lightdm
By default:
- Ubuntu Unity and Elementary OS Luna uses LightDM
- Pear OS 8 and Ubuntu Gnome uses GDM
2. Check out the value of $DISPLAY:
echo $DISPLAY
handbook@handbook-1310:~$ echo $DISPLAY
:0
3. Now create a simple script
echo 'sleep 20; DISPLAY=:0 XAUTHORITY=/var/run/lightdm/root/$DISPLAY xwd -root' > /tmp/shot.sh
You may change:
- 20 : the seconds of delay.
- :0 : the value of $DISPLAY. In my Pear OS 8, the value of $DISPLAY changes every login ($DISPLAY=$DISPAY +1).
- lightdm : the display manager.
4. Press Ctrl+Alt+F1 and log into TTY1.
5. Run command below to start the script:
sudo bash /tmp/shot.sh >/tmp/shot.xwd
6. Return to GUI mode by pressing Ctrl+Alt+F1.
7. Logout by normal way. While you can see login screen, wait for some seconds.
8. Login by normal way. Install imagemagick if you don’t have it installed yet.
sudo apt-get install -y imagemagick
9. Run command below and finally you can check out the image under user Pictures folder.
convert /tmp/shot.xwd ~/Pictures/loginscreen.png


