Archives For programming

GNU Octave, the free open-source application for numerical computations, released new major 9.1.0 version! Here’s how to install it in Ubuntu 20.04, Ubuntu 22.04, Ubuntu 23.10, and Ubuntu 24.04.

The GNU website has not yet announced the new release, but it’s available in the download page.

According to the changelog, the new Octave 9.1.0 overhauled dec2base, dec2bin, and dec2hex. They now accept negative inputs and fractional inputs.

It re-architected the inputParser function to get a 60% performance improvement. And, the perms function has been made faster. The audiowrite function now supports writing to MPEG audio formats (including MP3) if the sndfile library supports it. The current directory of oruntests now changes to the directory containing the files with the tests for the duration of the test.

The release features new functions, including isenv, ismembertol, isuniform, tensorprod.

The disable_diagonal_matrix, disable_permutation_matrix, and disable_range functions have been removed! Replacements are optimize_diagonal_matrix, optimize_permutation_matrix, and optimize_range

Operators, such as .+, .+=, **, and .**= are removed. Replacements are +, +=, +=, ^, and .^=. And, following function are obsolete:

  • idx_vector::bool()
  • all_ok(const Array&) in Array-util.h.
  • octave_base_value::count


Continue Reading…

Visual Studio Code announced version 1.87 as the new February 2024 release!

The release features voice dictation support in editor. With VS Code Speech extension installed, user can use voice to dictate directly into the editor.

It can be started by pressing Ctrl+Alt+V on keyboard, and stop via Escape key. Or, press and hold the key combination (Ctrl+Alt+V) to enable walky-talky mode, that the voice recognition stops as soon as the keys released.

The VS Code Speech extension now has 26 supported languages support. Each language comes as its own extension. And user can choose between them using accessibility.voice.speechLanguage setting.

Other changes in the release include:

  • Multi-cursor inline completions are previewed and applied at both the primary and the secondary cursor positions.
  • Rename suggestions from Copilot.
  • Pylance extension for Python support now has an Add Imports code action for adding missing imports.
  • Enable sticky scroll by defaul, and increase maximum display number from 10 to 20.
  • GitHub Copilot Chat suggests templates and features when adding dev container configuration files to a workspace
  • Side-by-side preview refactoring – Preview refactorings across files with multi diff editor.


Continue Reading…

Gambas released new 3.19.0 few days ago. Here’s the new features and how to to install guide for Ubuntu users!

Gambas is a full-featured object-oriented language and development environment built on a BASIC interpreter. It’s made up of a compiler, interpreter, archiver, scripter, development environment, and many extension components, for easily developing command-line, GTK2/GTK3, Qt, Database, Web, SDL applications.

The latest version so far is Gambas 3.19.0 that includes many exciting new features. First, as you see above, it has a new app icon that’s called gambas-thin. Though, I personally prefer the old one a bit more.

old gambas3 icon

The new release brings huge improvements to interpreter, to make it faster than Python, Perl and Java interpreters in all benchmarks!
Continue Reading…

This simple tutorial shows how to install Python 3.13 in Ubuntu 24.04, Ubuntu 22.04, and/or Ubuntu 20.04 LTS.

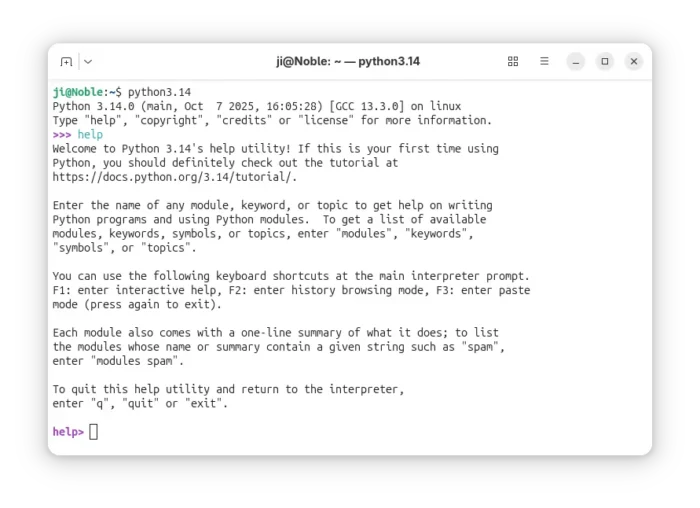
Python 3.13.0 was released on Oct 7, 2024 as the new major release that features new interactive interpreter, that supports multi-line editing, REPL-specific commands such as help, exit, clear, and quit, interactive help, history browsing, and ‘paste mode’ for pasting larger blocks of code.

CPython now has experimental support for free-threaded mode for running threads in parallel on available CPU cores, though disabled by default.

Other changes in Python 3.13.0 include:

  • New interactive interpreter, features multi-line editing and color support, as well as colorized exception tracebacks.
  • Experimental free-threaded build mode.
  • A preliminary, experimental JIT.
  • The (cyclic) garbage collector is now incremental.
  • Include a modified version of mimalloc, and enabled by default if supported by the platform.
  • Docstrings now have their leading indentation stripped, reducing memory use and the size of .pyc files.
  • The dbm module has a new dbm.sqlite3 backend that is used by default when creating new files.
  • Support for type defaults in type parameters.
  • New type narrowing annotation, typing.TypeIs.
  • New annotation for read-only items in TypeDicts.
  • Removals of many deprecated modules: aifc, audioop, chunk, cgi, cgitb, crypt, imghdr, mailcap, msilib, nis, nntplib, ossaudiodev, pipes, sndhdr, spwd, sunau, telnetlib, uu, xdrlib, lib2to3.

For more, see the official release note.

Continue Reading…

This simple tutorial shows how to install the Clang compiler 20, 19, or the old version 18, 17 in current Ubuntu 24.04, Ubuntu 22.04, and Ubuntu 20.04 LTS and correct the deprecated repository settings.

Ubuntu by default includes Clang package in its system repositories. But as time goes on, the Clang package in Ubuntu repository is getting old.

For those who need the most recent Clang compiler (so far v20), it’s easy to install and keep it up-to-date from the developer team’s official repository.

Step 1: Download the Automatic installation script

The official Clang repository, so far supports Ubuntu 20.04, Ubuntu 22.04, Ubuntu 24.04, and Ubuntu 24.10. It has a script to make adding repository and installing Clang as easy as few Linux commands.

1. First, press Ctrl+Alt+T on keyboard to open terminal. When terminal opens, run command to download the official installation script:

wget https://apt.llvm.org/llvm.sh

You may also use the script in Debian stable, though you may need to install wget first.

2. After downloading the script, add executable permission by running command:

chmod u+x llvm.sh

Step 2: Use the script to install Clang

The script automate the process of adding the official apt repository, updating package cache, and installing specific Clang version into your system.

All this can be done by running a single command. For example, install Clang-20:

sudo ./llvm.sh 20

Replace 20 with 19 for installing Clang-19, or even 18, 17 for old versions.

NOTE: Ubuntu 24.04 has Clang version from 14 – 19, Ubuntu 22.04 has Clang 11 ~ 15 in system repositories!! Don’t use the script to install Clang that’s already in your system repository.

During the process, it will ask to hit Enter to confirm adding the apt repository. Then, you may just wait until the process done.

Step 3: Modify Clang repository

The command you run in step 2 will automatically download the key file and add Clang apt repository into your system.

However, it still uses the old method that’s deprecated due to security reason! It’s recommended to do following steps to modify it to follow the new Debian policy.

NOTE: If you installed multiple Clang versions from the commands above in Step 2, then you need to do this step multiple times.

1. First, open terminal (Ctrl+Alt+T) and run commands below one by one to first make sure /etc/apt/keyrings directory exist, then move the key file from the deprecated /etc/apt/trusted.gpg.d/ to that location:

sudo mkdir -p /etc/apt/keyrings
sudo mv /etc/apt/trusted.gpg.d/apt.llvm.org.asc /etc/apt/keyrings/

2. Next, run command to edit the source file for the clang repository:

sudo nano /etc/apt/sources.list.d/archive_uri-http_apt_llvm_org_noble_*.list

When file opens in terminal window, add following in between “deb” and “http://apt.llvm.org/…”:

[arch=amd64 signed-by=/etc/apt/keyrings/apt.llvm.org.asc]

Here:

  • arch=amd64, tells your OS type is amd64 (Intel/AMD). For non-Intel/AMD platform, run dpkg --print-architecture command tell OS type, and replace amd64 with the output. So far, arm64 and s390x are also supported
  • signed-by=/path/to/key-file, specify the key file.

If you installed multiple Clang versions via the script, then you’ll have more lines in this file start with “deb”. Just add the “signed-by” section in each line and finally press Ctrl+S to save file, and Ctrl+X to exit.

3. Finally, run sudo apt update to apply change by refreshing package cache.

And, you may manually install/update the Clang packages by running command (replace number 20 according to which version you want to install):

sudo apt install clang-20 lldb-20 lld-20 clangd-20

Or, if you want to install everything, use the command below instead:

sudo apt install clang-tidy-20 clang-format-20 clang-tools-20 llvm-20-dev lld-20 lldb-20 llvm-20-tools libomp-20-dev libc++-20-dev libc++abi-20-dev libclang-common-20-dev libclang-20-dev libclang-cpp20-dev liblldb-20-dev libunwind-20-dev

Step 4: Verify

If everything’s done successfully, just run clang-xx --version and/or locate clang-xx to verify.

Uninstall

To remove the repository added by the script, just open terminal (Ctrl+Alt+T) and run command to remove the corresponding source file:

sudo rm /etc/apt/sources.list.d/archive_uri-http_apt_llvm_org_*.list

And, remove the repository key file via command:

sudo rm /etc/apt/trusted.gpg.d/apt.llvm.org.asc

Or, launch “Software & Updates” and remove source line and key from “Other Software” and “Authentication” tabs.

To remove Clang packages (replace 20 accordingly), just run command:

sudo apt remove --autoremove clang-20 lldb-20 lld-20 clangd-20