Archives For jimingkui

Paper GTK3 and Icon themes

This quick tutorial shows how to enable hot corners in Ubuntu 18.04 and higher Gnome shell.

While Gnome Tweaks provides only option to enable top-left hot corner (Activities overview), users can enable more hot corners in Gnome desktop via an extension called ‘Custom Hot Corners’.

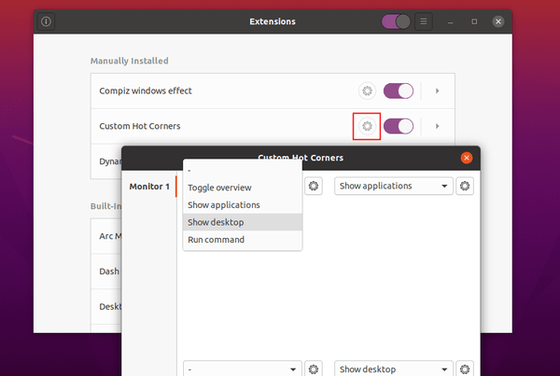
The extension enables multi-monitor hot corners with actions including Toggle overview, Show desktop, Show applications, and custom command.

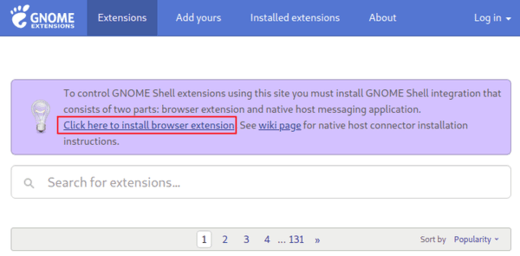
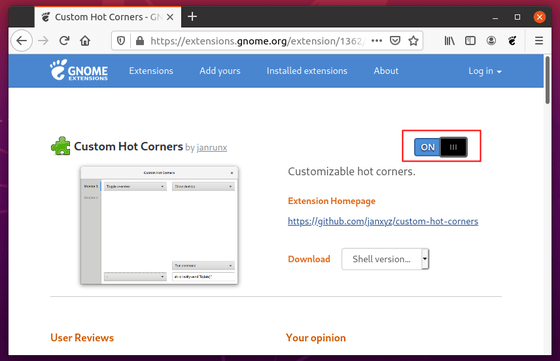
To install the extension, simply open Ubuntu Software, search for and install ‘custom hot corners’

Then you can bring up the configuration page via Gnome Tweaks (install it via Ubuntu Software) -> Extensions page.

In addition, wmctrl is required for ‘Show desktop’ action. Simply open terminal via Ctrl+Alt+T and run command to install the library:

sudo apt install wmctrl

That’s it. Enjoy!

Deadbeef audio player 1.8.1 was released a few days ago with various bug-fixes and performance improvements for the 1.8 series.

Deadbeef 1.8.1 release highlights:

  • Fixed audio freeze while sorting
  • Fixed error messages when loading PLS playlist with relative paths
  • Removed the unmaintained sndio plugin
  • Added experimental subgrouping support in playlist
  • Added new title formatting functions $stripprefix and $swapprefix
  • Updated Repeat and Shuffle hotkey names to match the menus
  • Fixed rounding bug of total playtime in statusbar
  • Added FLAC plugin option to ignore corrupted stream errors
  • Fixed reloading replaygain info
  • Fixed writing replaygain info to APEv2 tags
  • And many other bug-fixes, see the release note for details.

How to Install DeaDBeeF 1.8.1 in Ubuntu:

The new release package is available to install in Ubuntu 16.04, Ubuntu 18.04, Ubuntu 19.04 via PPA repository.

1. Open terminal either from app launcher or by pressing Ctrl+Alt+T on keyboard. When it opens, run command to add the PPA:

sudo add-apt-repository ppa:starws-box/deadbeef-player

Type user password (no asterisk feedback) when it prompts and hit Enter to continue.

2. Then refresh system package cache and install deadbeef via following 2 commands:

sudo apt update

sudo apt install deadbeef

Once installed, open the player from your system application menu and enjoy!

Uninstall:

To remove the music player, open terminal and run command:

sudo apt remove --auto-remove deadbeef

And remove the PPA via Software & Updates -> Other Software.

For Ubuntu 18.04 and higher users with multiple monitors, Hydrapaper is a GTK utility allows to set different background wallpaper for each monitor in Gnome 3, MATE, or Budgie desktop.

The utility uses Pillow to create a single image merging all of your chosen wallpapers and setting it as your wallpaper with the “Spanned” option.

Hydrapaper can be installed in Ubuntu 18.04 and higher via Flatpak (Containerized software package). Open terminal either from application menu or by pressing Ctrl+Alt+T. When it opens, do:

1. Run command to install Flatpak deamon first:

sudo apt-get install flatpak

Type user password (no asterisk feedback) when it prompts and hit Enter.

2. Then add Flathub repository via command:

flatpak remote-add --if-not-exists flathub https://flathub.org/repo/flathub.flatpakrepo

3. Finally install the utility via command:

flatpak install flathub org.gabmus.hydrapaper

Like normal software package, open Hydrapaper from application menu once successfully installed on your system.

To uninstall the utility, run command in terminal:

flatpak uninstall org.gabmus.hydrapaper

Toontown Rewritten, a fan-made recreation of Disney’s closed MMORPG Toontown Online, now is available to install via Snap package in Ubuntu 16.04, Ubuntu 18.04, and higher.

Toontown Rewritten (TTR) is free to play and open to anybody. The TTR snap package contains a slightly modified version of the official Toontown Rewritten launcher, including python 3 support. Due to the fact that this launcher is modified, the TTR team will not provide support if anything goes wrong with the launcher.

For Ubuntu 18.04 and higher, simply search for and install the game from Ubuntu Software utility:

For Ubuntu 16.04, you need to open terminal (Ctrl+Alt+T) and make sure snapd daemon is installed first:

sudo apt-get install snapd

Then install the Toontown Rewritten via command:

sudo snap install toontown

Once installed, launch it from your system application menu and enjoy!

Uninstall:

To remove the game, either use Ubuntu Software or run command in terminal:

sudo snap remove toontown

Kodi media center released version 18.3 a day with DTS-HD audio support and many bug-fixes. Here’s how to install it in Ubuntu 16.04, Ubuntu 18.04, Ubuntu 18.10, Ubuntu 19.04, and derivatives.

Kodi 18.3, codename “Leia”, release highlights:

  • Fixed favourites widget not scrolling properly on 16:10 displays
  • Fixed API button was not reachable with a mouse on Settings window
  • Fixed Skin Settings window scrollbar focus
  • Fixed order of TV Show title and Episode title in Video Info dialog
  • Added Search button to the side menu in the Video and Music windows
  • Fixed Wall and Infowall views scroll to bottom on certain aspect-ratios
  • Fixed broken side menu navigation in the Addon Browser window
  • Fixed a Group Manager crash when adding a new group
  • Fixed EPG UI corruption and/or EPG data not showing with newly added channels
  • Fixed PVR guide window channel data being overwritten
  • Added support for DTS-HD audio tracks
  • Fixed wrong album or artist thumb art being picked from scraper results

How to Install Kodi 18.3 in Ubuntu:

The Kodi stable PPA has made the new release packages for Ubuntu 16.04, Ubuntu 18.04, Ubuntu 18.10, and their derivatives.

1. Open terminal either via Ctrl+Alt+T keyboard shortcut or from application menu. When it opens, paste below command and hit run:

sudo add-apt-repository ppa:team-xbmc/ppa

Type user password (no asterisks feedback) when it prompts and hit Enter to continue.

2. Then refresh system package cache and install Kodi 18.3 via command:

sudo apt update

sudo apt install kodi
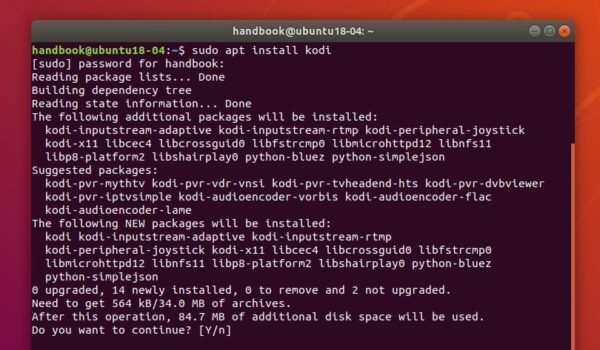
For Ubuntu 18.04 and higher, you can skip the apt update command.

Uninstall:

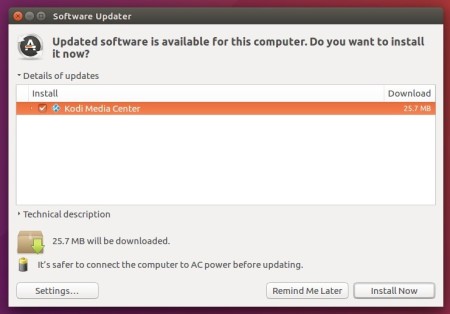
To remove the Kodi PPA repository, simply open Software & Updates -> Other Software.
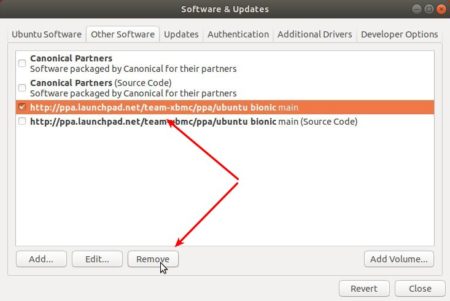
To remove Kodi, run command:

sudo apt remove --autoremove kodi kodi-data kodi-bin

HP Linux Imaging and Printing

HPLIP, HP developed printer and scanner drivers for Linux, released version 3.19.6 with a lot of new devices support.

New devices supported in HPLIP 3.19.6:

  • HP Smart Tank 500 series, 510, 530 series, 610
  • HP Smart Tank Plus 550, 570 series, 650
  • HP Neverstop Laser MFP 1200a, 1200w
  • HP Laser NS MFP 1005, 1005w
  • HP Neverstop Laser 1000a, 1000w
  • HP Laser NS 1020, 1020w
  • HP DesignJet T2600dr Postscript MFP
  • HP DesignJet XL 3600 PS MFP
  • HP Color LaserJet Pro M453cdn, M454dn, M454cdn, M453cdw, M454nw, M454dw, M454cdw
  • HP Color LaserJet Pro MFP M479dw, M478fcdn, M479fdn, M479fcdn, M478fcdw, M479fdw, M479fnw, M479fcdw
  • HP LaserJet Pro MFP M428dw, M429dw, M428fdn, M428c1, M428c3, M428m, M429fdn, M428fdw, M428c2, M428c4, M429fdw.
  • HP LaserJet Pro M305d, M304a, M305dn, M305dw, M404d, M405d, M404n, M405n, M404dn, M404c1, M404c3, M404m, M405dn, M404dw, M404c2, M404c4, M405dw.

1. To install the software, download the package “hplip-3.19.6.run” from the link below:

HPLIP Download Page

2. Then make the downloaded file executable from its Properties dialog, Permissions tab:

3. Finally open terminal either via Ctrl+Alt+T or search for “terminal” from app launcher. When it opens, run command to start installing it:

./Downloads/hplip-3.19.6.run

Type user password (no asterisk feedback) when it prompts and hit Enter.

4. Then follow the terminal prompts, answer some questions to build and install HPLIP on your system. When everything is done, plug/re-plug your printers and enjoy!

opera web browser

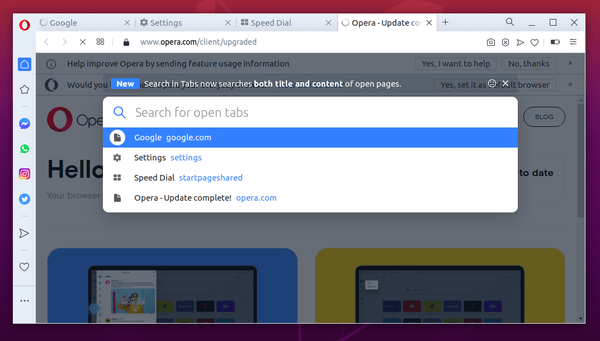
Opera web browser 62 was released today with improved dark mode, design updates. Here’s how to install it in Ubuntu.

Opera 62 release highlights:

  • Improved Dark Mode and support for Windows dark theme
  • Add bigger tiles option in EasySetup panel
  • Task Completer, connect browser’s history to Speed Dial
  • Bring back start-page preload service
  • And numerous other changes. See the release note.

How to Install Opera 62 in Ubuntu:

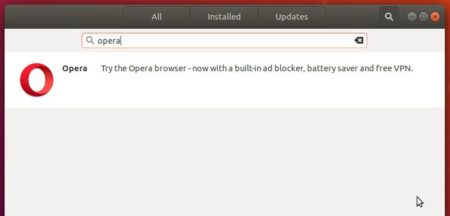
The Opera team offers snap package (containerised software package), which is always up-to-date (auto-updates itself). You can simply install it in Ubuntu Software:

Also traditional Opera binary package for Ubuntu is available for download at the link below:

Download Opera for Linux

To receive future updates through Software Updater, add the official Opera apt repository via following steps:

1. Open terminal (Ctrl+Alt+T) and run command to add the opera repository:

sudo sh -c 'echo "deb http://deb.opera.com/opera-stable/ stable non-free" >> /etc/apt/sources.list.d/opera.list'

2. Get the key:

wget -O - http://deb.opera.com/archive.key | sudo apt-key add -

Finally either install Opera via following command or upgrade the browser via Software Updater:

sudo apt update

sudo apt install opera-stable

Uninstall:

For the Opera snap package, simply remove it from Ubuntu Software.

For the Opera apt repository, launch Software & Updates and navigate to Other Software tab.

To remove traditional opera package, either use your system package manager or run command in terminal:

sudo apt remove --autoremove opera-stable

Free scorewriter MuseScore 3.2 was released a day ago with dozens of bug-fixes as well as some improvements to user interface.

MuseScore 3.2 release highlights:

  • Default to dark theme on macOS Dark Mode
  • Sticking (the process of assigning certain notes to either our left or right hand) as a new command
  • A few improvements to user interface.
  • Fixed exporting parts from a score didn’t produce correct MIDI, MP3, WAV, OGG, and FLAC files
  • Fixed that tuplets and articulations were laid out incorrectly
  • And many other fixes, see the relese note for details.

Download / Install MuseScore in Ubuntu:

MuseScore has a stable PPA for Ubuntu 18.04 and higher, though it’s falling behind with version 3.0.5.

There’s non-install single executable Appimage available to download at the link below:

MuseScore Appimage (64-bit)

Right-click the Appimage, go to Properties -> Permissions -> tick the box says ‘Allow executing file as program’, finally run it to launch MuseScore 3.2:

Boxy SVG, a Scalable Vector Graphics (SVG) editor, now can be easily installed in Ubuntu 16.04, Ubuntu 18.04, and higher via Snap package.

SVG is the standard format for storing vector graphics such as icons, banners, charts and illustrations.

Boxy SVG project goal is to create the best SVG editor for non-technical users as well as for professional designers and developers.

Boxy SVG features:

  • Native SVG support.
  • Import PNG, JPEG, GIF, WebP, PDF and AI files and export to PNG, JPEG, GIF, WebP and HTML.
  • Chromium-based rendering engine.
  • Google Fonts integration with hundreds of free fonts
  • Configurable keyboard shortcuts for over 100 commands
  • SVG and CSS code inspector similar to Chrome Dev Tools
  • And many other features.

Boxy SVG offers official Snap package for Linux. For Ubuntu 18.04 and higher, simply search for and install it from Ubuntu Software:

For Ubuntu 16.04, open terminal (Ctrl+Alt+T) and run command to make sure snapd daemon is installed:

sudo apt-get install snapd

Then install the SVG editor via command:

sudo snap install boxy-svg

Once installed. Launch it from your system application menu and enjoy!

(Optional) To remove Boxy SVG editor either use Ubuntu Software or run command in terminal:

sudo snap remove boxy-svg

This quick tutorial shows how to install PulseEffects, audio effects software (e.g., limiter, compressor, equalizer.), in Ubuntu 18.04, Ubuntu 18.10, Ubuntu 19.04, and Ubuntu 19.10.

Ubuntu uses both ALSA and Pulseaudio for controlling sound input and output. ALSA is the kernel level sound mixer that manages your sound card directly. And Pulseaudio is a software mixer provides further tools on top of ALSA base.

PulseEffects is an open-source audio effects software for PulseAudio applications that support:

  • Applications output: Limiter, Auto gain, Expander, Compressor, Multiband compressor, Equalizer, Bass enhancer, Exciter, Crystalizer, Reverberation, Crossfeed, Filter (low-pass, high-pass, band-pass and band-reject modes), Stereo tools, Loudness, Maximizer, Pitch, Gate, Multiband gate, De-esser, Convolver
  • Applications input: Gate, Multiband gate, WebRTC, Limiter, Compressor, Multiband compressor, Equalizer, Reverberation, Pitch, Filter (low-pass, high-pass, band-pass and band-reject modes), De-esse

How to Install PulseEffects in Ubuntu / Linux Mint:

Following steps will show you how to install PulseEffects via Ubuntu PPA, though it’s also available as flatpak (containerized softare package).

1. Open terminal either via Ctrl+Alt+T keyboard shortcut or by searching for ‘terminal’ from application menu. When it opens, run command to add the PPA:

sudo add-apt-repository ppa:mikhailnov/pulseeffects

Type user password (no asterisk feedback) when it prompts and hit Enter to continue.

2. For Linux Mint 19.x and other derivatives, refresh package cache may be required:

sudo apt update

3. Finally install the software via command:

sudo apt install pulseaudio pulseeffects --install-recommends

Once installation success. Restart Ubuntu, and finally launch it from application menu:

Uninstall:

To remove the software, simply open terminal and run command:

sudo apt remove pulseeffects

And open Software & Updates and navigate to Other Softwar tab to remove PPAs.