Archives For November 30, 1999

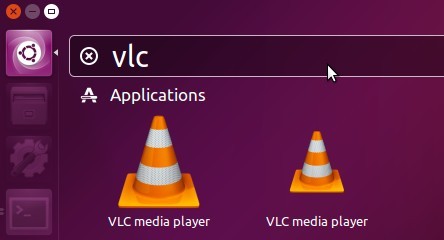
vlc_logo_icon

The latest stable VLC media player has reached the 2.2.4 release. While Ubuntu 16.04 provide the old 2.2.2 release in its universe repository, you may install / upgrade VLC via a PPA.

VLC 2.2.4 release highlights:

  • Fix crash in G.711 wav files
  • Fix mp3 crash in libmad
  • Fix out-of-bound write in adpcm QT IMA codec (VideoLAN-SA-1601, CVE-2016-5108)
  • Fix overlay creation on Windows XP for DirectDraw video output
  • Improve compilation support for GNU/HURD
  • Minor UI improvements for the Qt interface on Windows, Linux, BSD, …

VLC 2.2.3 release highlights:

  • Notable number of improvements, like green lines in the Windows video output and resuming where you left off.
  • It also improves our codec support by adding new formats and providing faster decompression.
  • More than 30 fixes for issues reported for 2.2.2.
  • You can finally open more than 15 elements from the Windows’ Explorer.

VLC 2.2.4 in Ubuntu 16.04

How to Install VLC 2.2.4 in Ubuntu 16.04:

1. Open terminal (Ctrl+Alt+T) and run the command below to add PPA:

sudo add-apt-repository ppa:nicola-onorata/desktop

Type in password (no visual feedback) when it asks and hit Enter.

VLC 2.2.4 PPA

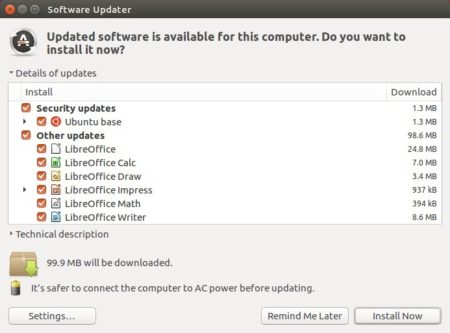
2. Upgrade VLC via Software Updater, or run the commands below one by one:

sudo apt update

sudo apt install vlc

3. The PPA also contains a group of other apps, so you may remove the PPA after installing VLC by launching Software & Updates -> Other Software.

remove-vlc224-ppa

Change Folder Color

Want to make a difference on your file folders? There’s a simple Nautilus, Caja, Nemo extension called “Folder-Color” that allows to change the color or emblem of a folder, or set the global folder color from context menu.

Linux Mint has integrated this feature into its Cinnamon and MATE Desktops. All you have to do is to right-click on a folder and choose a color or emblem from “Folder’s color” menu:

Folder Color

Only for changing Folder Color:

For Ubuntu 16.04, the tool has been made into the universe repository, but it only allows to change the color of folder icons.

Open terminal (Ctrl+Alt+T) and run the command below to install it for Unity or Gnome:

sudo apt install folder-color

Install folder color

For MATE Desktop, use the command below instead:

sudo apt install folder-color-caja

Apply changes by running command nautilus -q or caja -q.

For Full Feature version:

For full feature version that changes the color or emblem and global folder color, use the developer’s PPA.

Open terminal and run commands to remove previous version and install the extension from PPA:

sudo apt remove folder-color folder-color-caja folder-color-common

sudo add-apt-repository ppa:costales/folder-color

sudo apt update

sudo apt install folder-color folder-color-caja

Also restart your file browser via command nautilus -q or caja -q.

For Ubuntu MATE, if this does not work for you, try the commands below and finally restart Caja browser:

sudo ln -s /usr/lib/i386-linux-gnu/girepository-1.0/Caja-2.0.typelib /usr/lib/girepository-1.0/Caja-2.0.typelib

sudo ln -s /usr/lib/x86_64-linux-gnu/girepository-1.0/Caja-2.0.typelib /usr/lib/girepository-1.0/Caja-2.0.typelib

Support for Ubuntu 15.10 Ends on July 28

Last updated: July 7, 2016

Ubuntu 15.10 End of Life

Ubuntu 15.10 Wily Werewolf will reach the end of its life on July 28, 2016.

The Ubuntu 15.10 desktop users will receive no more security notices, critical fixes, or updated packages from the main Ubuntu archives as of this July 28th. Ubuntu announced in fridge.ubuntu.com:

    Ubuntu announced its 15.10 (Wily Werewolf) release almost 9 months ago, on October 22, 2015. As a non-LTS release, 15.10 has a 9-month month support cycle and, as such, the support period is now nearing its end and Ubuntu 15.10 will reach end of life on Thursday, July 28th. At that time, Ubuntu Security Notices will no longer include information or updated packages for Ubuntu 15.10.

Ubuntu 15.10 End of Life

Users of Ubuntu 15.10 can choose upgrade to Ubuntu 16.04 or install Ubuntu 14.04, both Long-Term Support release with 5-year support cycle.

digiKam

After two years of development, digiKam 5.0 stable was finally released one day ago with fully Qt5 port.

In addition to code porting, digiKam 5.0 now uses many Qt dependencies instead of KDE dependencies. To provide a pure Qt5 version of digiKam in the future, around 80% of KDE dependencies have been removed, 10% become optional for Linux Desktop. This simplifies the porting job and code maintenance on Windows, OS X, and other operating systems.

Other changes in digiKam 5.0:

  • remove KIO-slaves, instead a multi-threaded implementation is used to query the database
  • use virtual trash folder, accessible from album tree, instead of KDE desktop trash
  • improve metadata workflow in digiKam with a new Lazy Synchronization Tool
  • port kipi-plugins to Qt5
  • The whole database code has been reviewed, polished, cleaned, and documented.
  • database configuration panel rewritten
  • possible to setup MySQL datebase at first run

For more details, read the official release note.

digikam 5 splash

How to Install digiKam 5.0 in (K)Ubuntu:

Philip Johnsson is maintaining a PPA with digiKam binary for Ubuntu. Now digiKam 5.0 is available in the PPA for Ubuntu 16.04, Ubuntu 15.10, and derivatives.

1. Add PPA.

Open terminal emulator and paste the command below and run:

sudo add-apt-repository ppa:philip5/extra

Type in your password when it asks. There’s no visual feedback on password typing, so just type in mind and hit Enter.

digiKam 5 PPA

2. Now search for and install digikam5 using your package manager after refresh package caches.

Or just run the commands below one by one in terminal:

sudo apt update

sudo apt install digikam5

The digiKam5 packages is independent of previous digiKam 4.x. You may have both version installed at the same time.

Remote Access Ubuntu 16.04

This tutorial is going to show beginners how to easily setup a VNC server in Ubuntu 16.04 so to connect from remote machines.

1.) Ubuntu desktop provides vino VNC server out-of-the-box with a simple UI called Desktop Sharing.

Desktop Sharing

2.) After launching the utility, you can easily enable VNC server in Ubuntu by checking the boxes that says:

  • Allow other users to view your desktop
  • Allow other users to control your desktop (Optional)

Enable Vino VNC server

For security options:

  • If you want to be able to choose whether to allow someone to access your desktop, enable the first box.
  • To require other people to type a password when connecting to your desktop, enable the second one and set a password.
  • If your router supports UPnP and it’s enabled, you can allow people not in local network to connect by selecting “Automatically configure UPnP router to open and forward ports”

After setting up the VNC server, just close the utility.

3.) Disable encryption.

Due to this bug, the common used TigerVNC, TightVNC viewer does not support vino’s security type. You’ll get the error below when you try to connect:

security-notsupported

A workaround is to disable encryption requirement. To do so, install dconf Editor from Ubuntu Software (or via sudo apt install dconf-editor command in terminal), and launch it.

When it opens, navigate to org -> gnome -> desktop -> remote-access, and uncheck the value of “require-encryption” in right.

vino disable encryption

Finally connect to this desktop on remote machine by typing the IP and password using a VNC client!

PyCharm IDE

This is a quick tutorial for beginners how to install the latest PyCharm Python IDE with Ubuntu integration via PPA.

The official PyCharm Linux binary packages lack shortcut launchers for Ubuntu desktop. To install the IDE with Ubuntu patch and receive future updates along with other system updates via Software Updater, you may use a third-party PPA maintained by Mystic-Mirage.

The PPA contains both the Professional and free Community version for Ubuntu 16.04, Ubuntu 15.10, Ubuntu 14.04, Ubuntu 12.04, and their derivatives.

PyCharm IDE

Mystic-Mirage has stopped updating the PPA, for those sticking to the latest Pycharm Community, use the GetDeb repository instead, see here.

1. Add the PPA.

Open terminal and paste (Shift+Ctrl+V) the command below and hit run:

sudo add-apt-repository ppa:mystic-mirage/pycharm

PyCharm PPA

Type in your password (no visual feedback) when it asks and hit Enter.

2. Update and install PyCharm.

If you have Synaptic Package Manager installed, launch it and then search for and install pycharm (or pycharm-community) after clicking the Refresh button.

Install PyCharm via Synaptic

Or run the commands below one by one in terminal to install the Professional version:

sudo apt update

sudo apt install pycharm

For the community version, replace the last command with:

sudo apt install pycharm-community

Once a new version is released and made into PPA, you can simply launch Software Updater to upgrade it.

3. (Optional) To remove the PPA, go to Software & Updates -> Other Software tab. And PyCharm IDE can be removed with apt command with remove flag:

sudo apt remove pycharm pycharm-community

That’s it. Enjoy!

FileZilla FTP Client

The GetDeb repository now is maintaining the latest FileZilla client to make it easy to install and upgrade FileZilla in Ubuntu 16.04.

FileZilla FTP Client is available in Ubuntu universe repositories, but Canonical does not provide updates for the application. You have to manually install / upgrade the client as a new version is released.

While the official Linux binary is not well integrated with Ubuntu, the GetDeb repository now builds FileZilla for Ubuntu 16.04, so far it’s version 3.19.0.

FileZilla FTP Client 3.19.0

How to install the latest FileZilla in Ubuntu 16.04:

1. Add GetDeb repository.

For Ubuntu 16.04 and derivatives, open terminal and paste (Ctrl+Shift+V) the command below and hit run:

sudo sh -c 'echo "deb http://archive.getdeb.net/ubuntu xenial-getdeb apps" >> /etc/apt/sources.list.d/getdeb.list'

Type in your password when it asks (no visual feedback) and hit enter.

To make Ubuntu trust the packages from that repository, install the key:

wget -q -O - http://archive.getdeb.net/getdeb-archive.key | sudo apt-key add -

GetDeb repository for Ubuntu 16.04

2. Install / Upgrade FileZilla Client.

If you have a previous release installed, you can now upgrade it by launching Software Updater:

Upgrade FileZilla

Or you may run the commands below one by one in terminal to install / upgrade the FTP client:

sudo apt update

sudo apt install filezilla

Curlew Multimedia Converter

Curlew is a free multimedia converter for Ubuntu Linux that features small package size, few library dependencies, 100+ output formats, easy to use UI, and more.

Curlew is written in Python and GTK+ 3, and uses FFMPEG (or Libav-tools) to transcode media files. The main features are:

  • Easy to use user interface (New GTK3 Header bar).
  • Hide the advanced options with the ability to show them.
  • More than 100 output formats.
  • Allow to edit formats.
  • Shutdown or suspend PC afer a conversion process.
  • Show file informations, file details using mediainfo.
  • Allow to skip or remove file during conversion process.
  • Preview file before conversion in its context menu.
  • Show video thumbnail.
  • Convert a specified portion of file.
  • Combine subtitle with video.
  • Allow to crop and pad video.
  • Show error details if exist.
  • And more …
Curlew 100+ output formats

Curlew 100+ output formats

Curlew Advanced Settings

Curlew Advanced Settings

Curlew show file info

Curlew show file info

How to Install Curlew transcoder in Ubuntu:

Pre-compiled Ubuntu .deb is available in the link below:

Download Curlew (.deb)

So far, the latest is “curlew_0.2.2-1_all.deb”, just download and install it via either Ubuntu Software or terminal command (Ctrl+Alt+T):

sudo dpkg -i ~/Downloads/curlew_*.deb; sudo apt -f install

Works for Ubuntu 16.04, Ubuntu 15.10, and their derivatives. Once installed, launch Curlew from Unity Dash, or your desktop app launcher.

Faenza Icons

Faenza is one of the most popular Gnome icon theme that provides light, dark, Faenza-Ambiance, and Faenza-Radiance themes to fit with light or dark panels / toolbars.

Since Ubuntu 15.04 Vivid, the icon theme was finally made into official Ubuntu repositories to make it easier to install.

Faenza Icons in Unity

For Ubuntu 16.04, while Ubuntu Software (Gnome Software) does not show applications without appdata (information about software description and screenshot etc.), use Synaptic or apt command:

Open terminal (Ctrl+Alt+T) and run command to install Faenza Icons in Ubuntu 16.04:

sudo apt install faenza-icon-theme

install-faenza-icon

Type in password and once it’s properly installed, launch Unity Tweak Tool (available in Ubuntu Software) or other tweak tool for your desktop and apply new icons in Appearance -> Icons.

apply faenza icons
A repacked version is also available that includes wireless mouse icon and the tiny calendar icon in time & date menu.

Faenza Theme with wireless mouse, calendar icon

Sigil

Sigil, an open-source and multi-platform ePub ebook editor, has reached the 0.9.6 release with some new features and various bug fixes.

New features added in Sigil 0.9.6:

  • create sgc-nav.css stylesheet for nav and allow templates in Prefs Dir for user to control it
  • add General Setting to allow user to set own temporary directory location
  • add Qt Stylesheet support – Recognize and load “qt_styles.qss” file if stored in Sigil Preferences folder
  • extend the plugin interface to add support for epub3 bindings elements
  • add option + forward delete shortcut to active Metadata Editor remove

It also brings a lot of bug-fixes in the release, see sigil website for details.

sigil epub editor

How to install Sigil 0.9.6 in Ubuntu:

There’s no official binary releases for Linux. While Ubuntu Software provides an old version, you may either build the latest release from source or use a third-party PPA.

And here are my personal builds of Sigil 0.9.6, available for Ubuntu 16.04 and Ubuntu 15.10:

Download sigil-data and sigil (.deb)

Download and install the .deb package for sigil-data and then sigil package (i386 for 32bit, amd64 for 64bit).

For those who prefer adding PPA, open terminal (Ctrl+Alt+T) and run the commands below one by one:

sudo add-apt-repository ppa:ubuntuhandbook1/sigil

sudo apt update

sudo apt install sigil sigil-data

To manage PPAs, go to System Settings -> Software & Updates -> Other Software.