![]()
The ‘Tab’ key bash auto-completion does not work for you? Here’s how to re-enable this feature in Ubuntu.
When typing in terminal/command console, user can press ‘Tab’ key to auto-complete command, options, file path & name. This feature is quite useful and available out-of-the-box for every user with home directory.
If you broke something done and the feature does no longer work, then this tutorial could help.
Step 1: Install bash-completion package
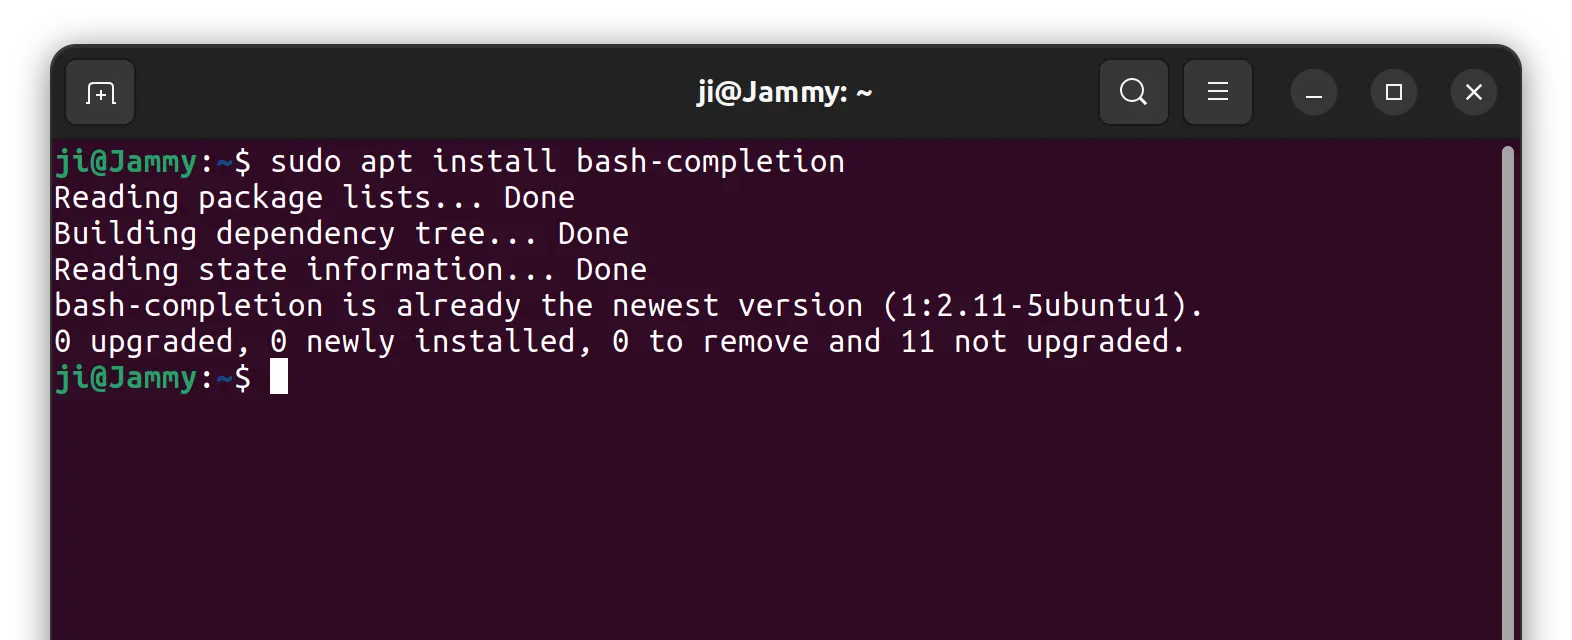
For Debian, Ubuntu, and most other Linux, this feature is implemented by bash-completion package files. So the first step is to make sure that package is installed on your system.
To do so, open terminal/command console and run command:
sudo apt install bash-completion
Step 2: Enable Bash Completion
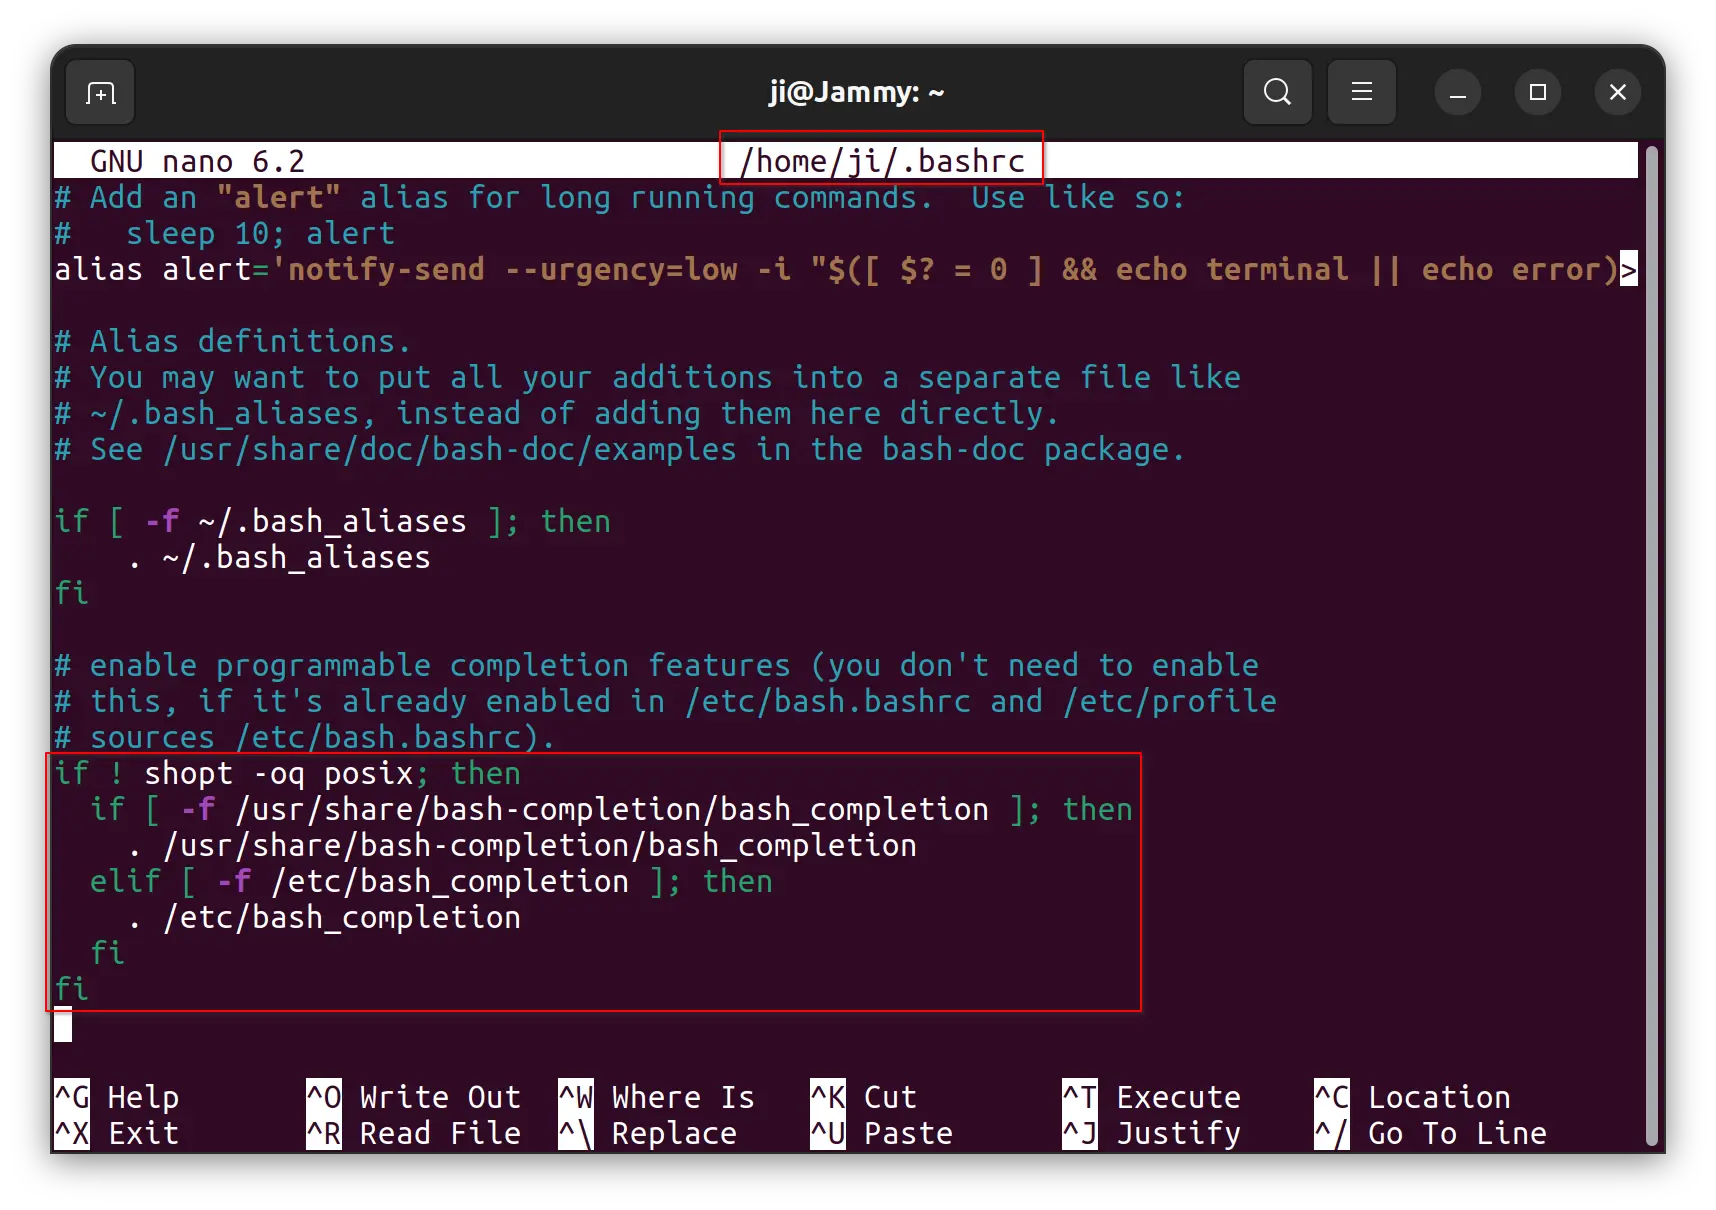
For each user, there’s a .bashrc file in user home directory. The file runs automatically on every login, and it contains the rule to enable bash completion.
1. First, run command to edit the file:
nano ~/.bashrc
2. When the file opens, add the following lines or make sure the lines below exist:
if ! shopt -oq posix; then
  if [ -f /usr/share/bash-completion/bash_completion ]; then
    . /usr/share/bash-completion/bash_completion
  elif [ -f /etc/bash_completion ]; then
    . /etc/bash_completion
  fi
fi
To save file, press Ctrl+X, type y and hit Enter.
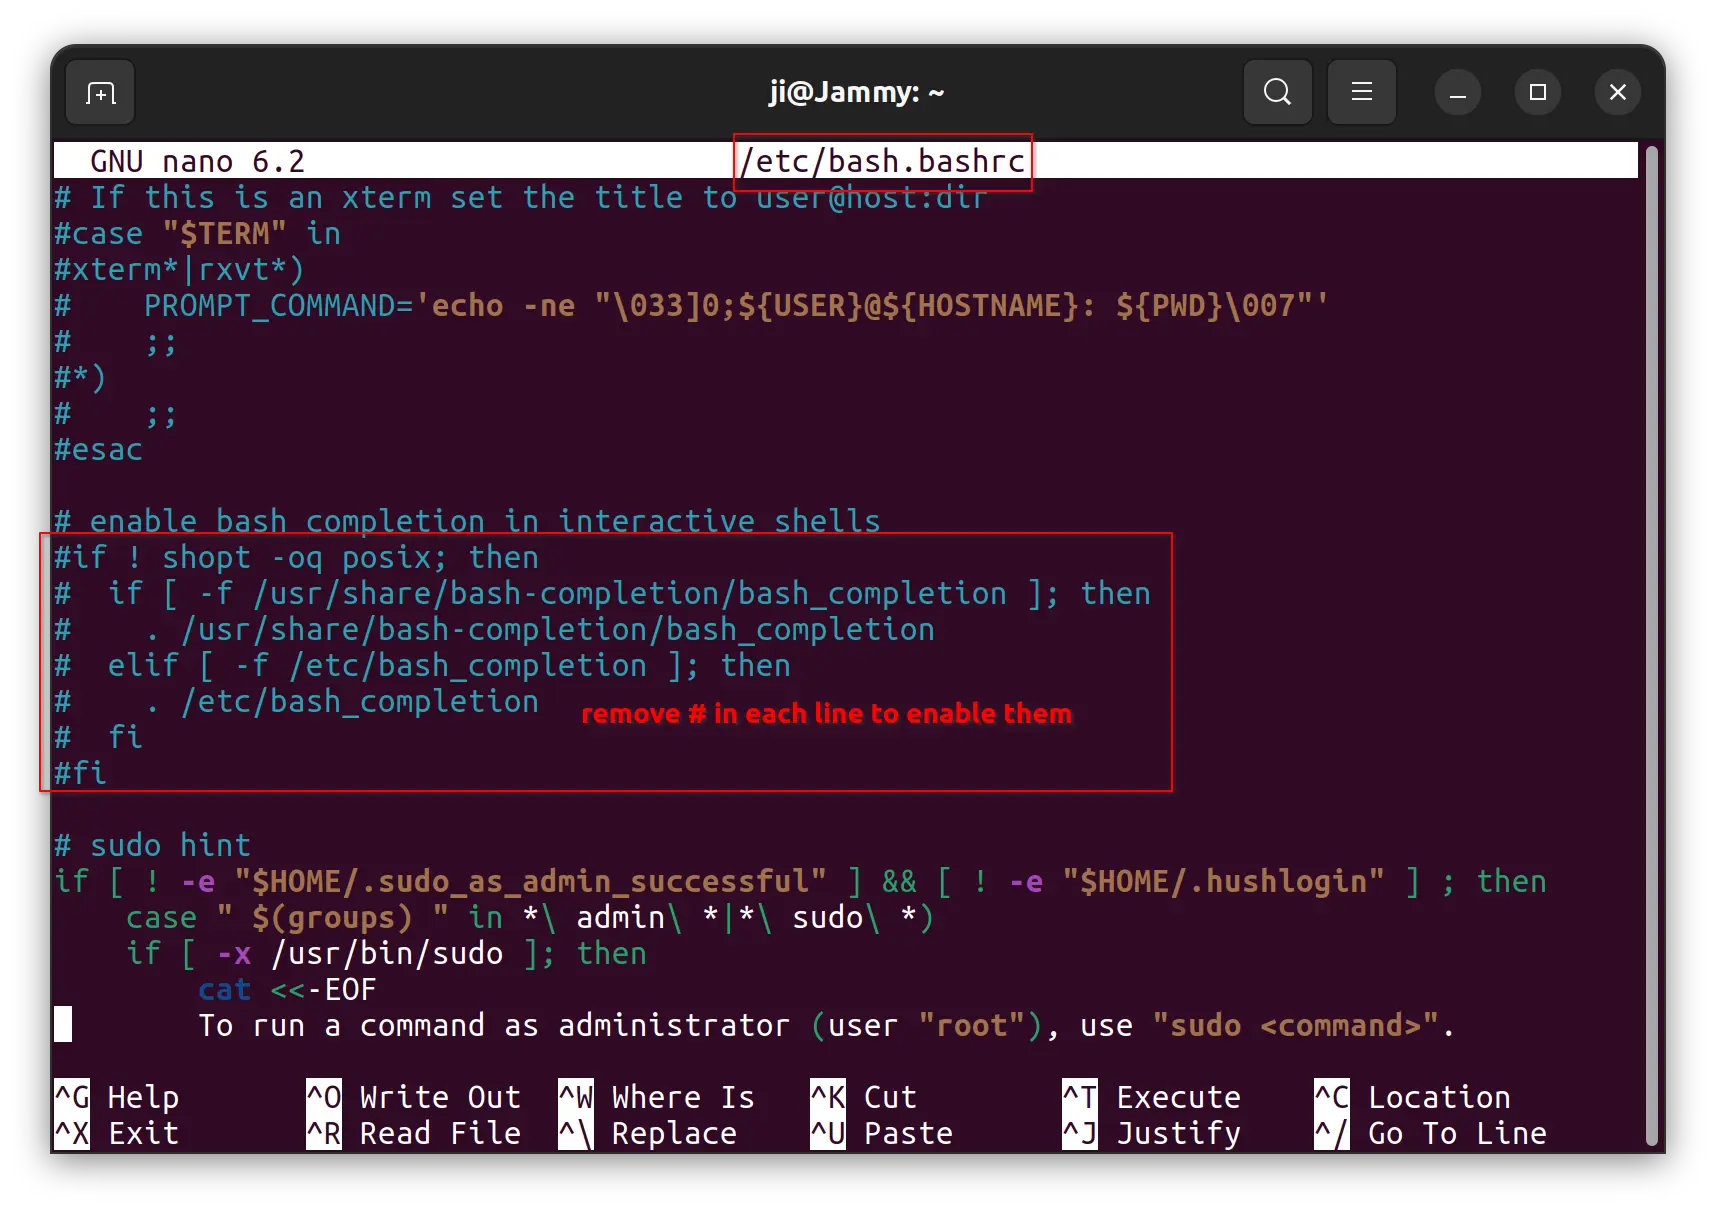
You can alternatively edit the system wide config file:
sudo nano /etc/bash.bashrc
Then enable the corresponding lines (remove # at the beginning for each line), so it applies to all users at login.
After saving the change, it should work immediately in new terminal window or command console.
In addition
The default configuration files for bash completion is located in “/usr/share/bash-completion”. However, some Linux Distro or may be 3rd party program may add rules by creating files under “/etc/bash_completion.d/”.
So, if the feature does not work for a specific command, go check the config file under “/etc/bash_completion.d/”.