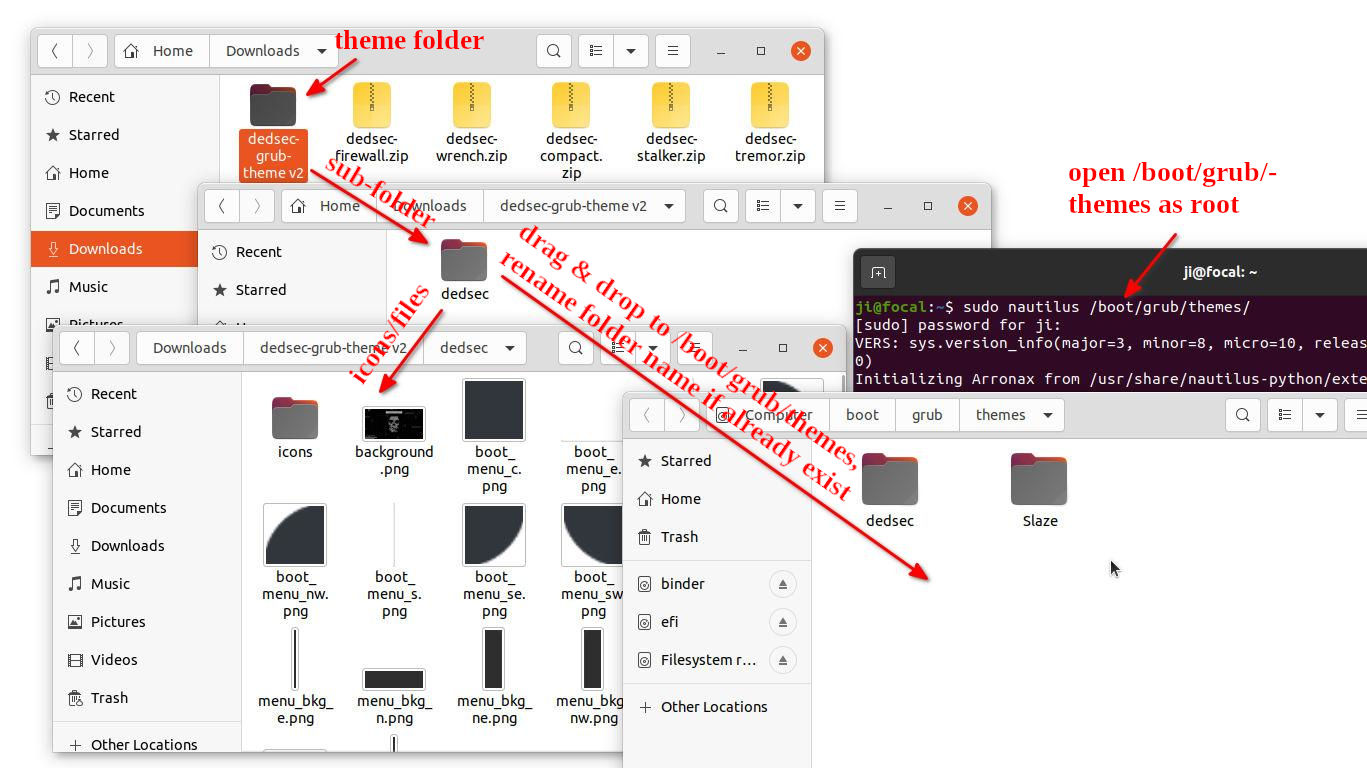
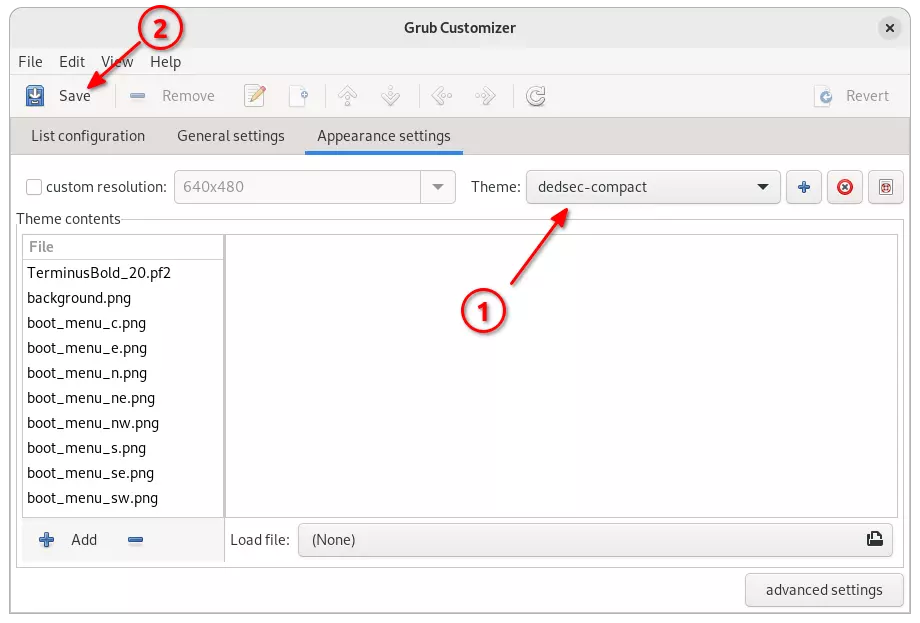
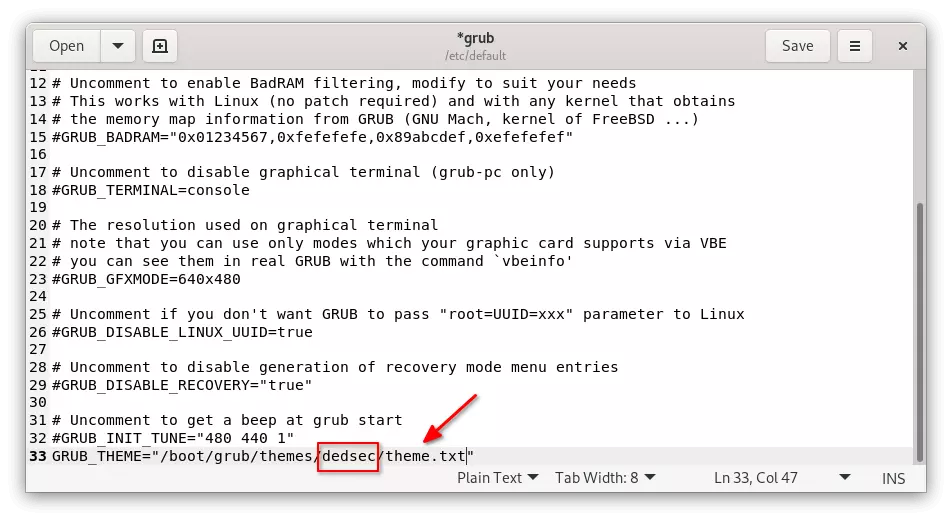
![]()
Looking for task manager or todo list app for Linux? ‘Getting Things GNOME’ is worth a try!
There are quite a few task managing apps for Linux desktop. ‘Getting Things GNOME’ (GTG in short) is one of the best for the GNOME desktop.
I’m using Gnome ToDo to write down what to do in next days. It’s easy to use, and has a good-looking UI that turns dark automatically according to sunrise / sunset. It’s so good until I found GTG.

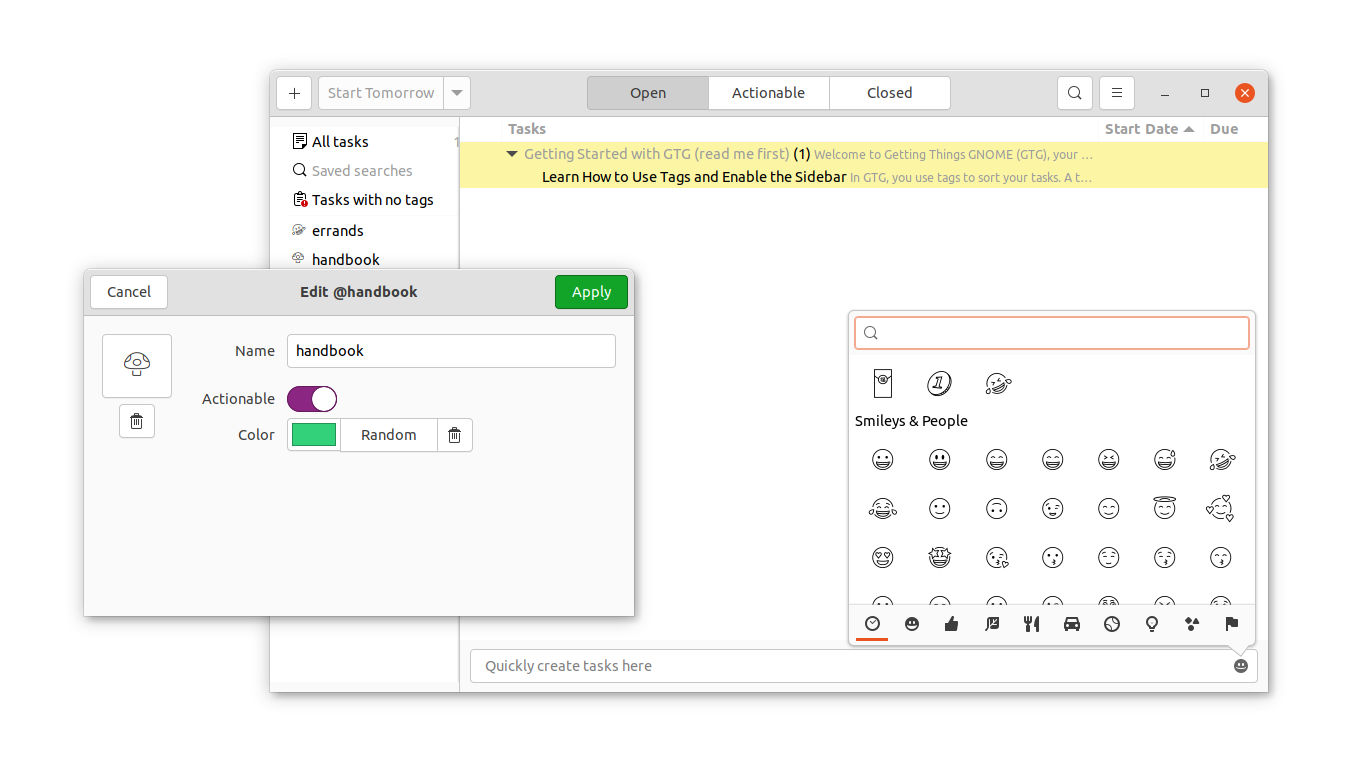
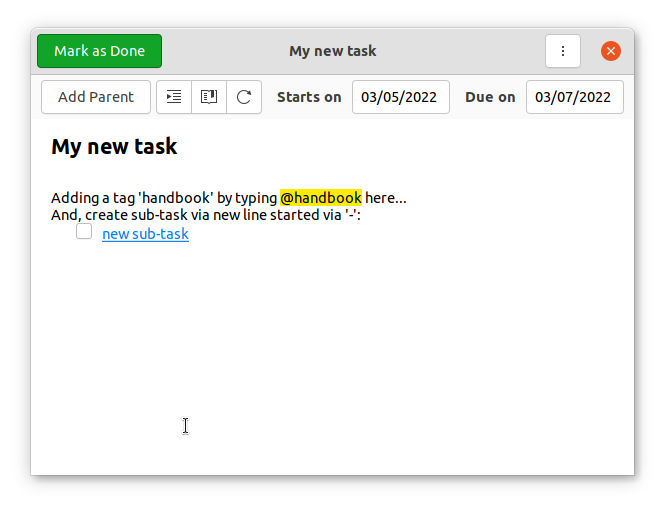
GTG is attractive by the flexible tagging and searching system. User may create tags either by inserting ‘@‘ with the keyword in tasks, or using the tasks’ context menu. Each tag may have its own icon and color.
The app also supports sub-task that can be easily created either from a task’s context menu. Or, just type new line started with ‘–‘ will generate a sub-task, and that line turns blue with underline and checkbox at the beginning automatically.
GTG also features a ‘Actionable’ view tab, that shows all ‘start-able’ tasks, i.e. the start date is already over, or doesn’t have open subtasks.
Other features of ‘Gnome Things GNOME’ include:
- Emoji support
- Searching system (with save support)
- Easily set start date / due date.
- Drag & drop rearrange tasks.
- ‘Closed’ tab for done, dismiss tasks.
- Dark mode support.
- Plugin support.
How to Install Getting Things GNOME:
The app is available to install as Flatpak package, which could be the only downside for those having low disk space.
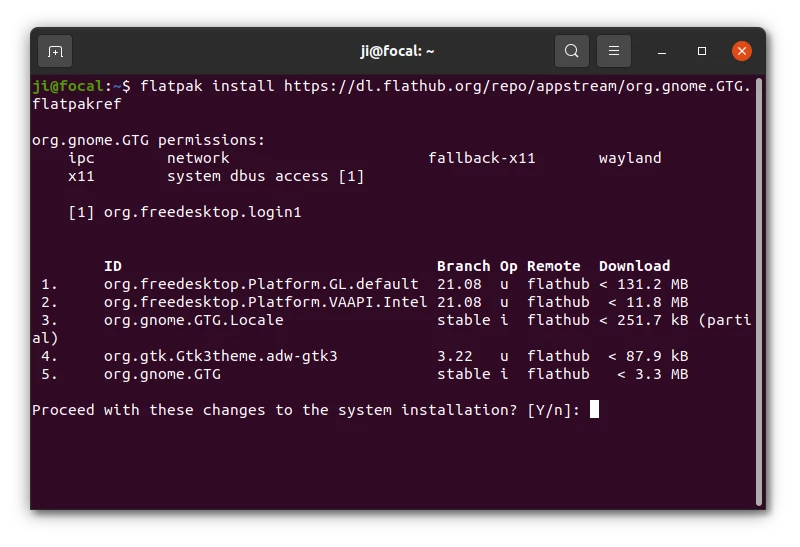
Firstly, open terminal (Ubuntu may simply press Ctrl+Alt+T on keyboard) and run command to install flatpak daemon:
sudo apt install flatpak
Ubuntu 16.04 and Ubuntu 18.04 needs to add this PPA first before installing Flatpak.
Next, install the ToDo app via command:
flatpak install https://dl.flathub.org/repo/appstream/org.gnome.GTG.flatpakref
Remove Getting Things GNOME:
To remove the Flatpak package, run command after making backup of your data:
flatpak uninstall --delete-data org.gnome.GTG
And clear useless run-times via flatpak uninstall --unused.